This topic describes how to use a serverless task to synchronize an entire MySQL database to Hologres in real time.
Prerequisites
MaxCompute and Hologres data sources have been created. For more information, see Data Source Configuration.
If you are using Alibaba Cloud RDS and Alibaba Cloud Hologres instances, the connectivity test passes automatically if no whitelist is configured. If a whitelist is configured, you must add the required IP addresses to the whitelist. For a list of required IP addresses, see Network connectivity and whitelist configuration.
Create a serverless sync task
A serverless sync task is a fully managed, pay-as-you-go data synchronization service. This service lets you focus on your business logic instead of managing underlying resource groups or network configurations.
1. Create a serverless sync task
Go to the Data Integration page.
Log on to the DataWorks console. In the top navigation bar, select the desired region. In the left-side navigation pane, choose . On the page that appears, select the desired workspace from the drop-down list and click Go to Data Integration.
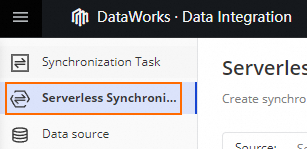
In the navigation pane on the left, click Serverless Sync Task.
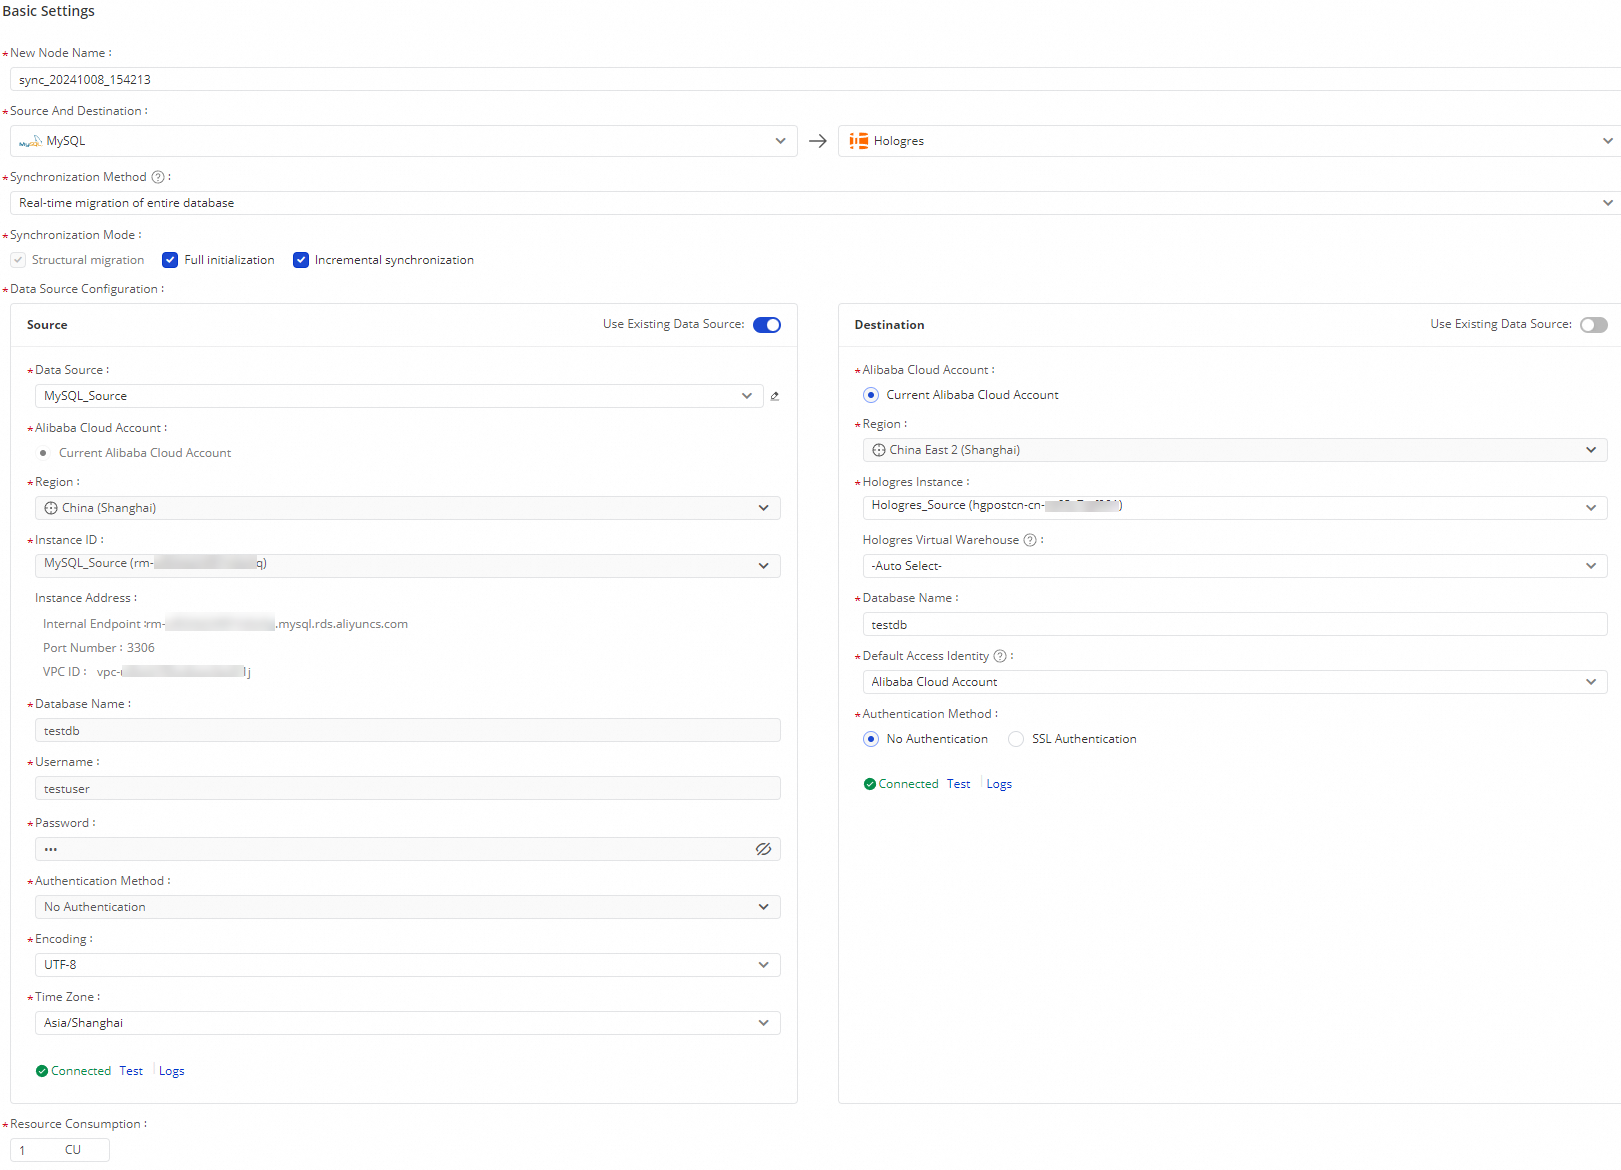
In the Serverless Sync Task section, set Source to MySQL and Destination to Hologres. Then, click Create Serverless Sync Task.
2. Configure basic information
To use an existing data source, click Use Existing Data Source and select the data source from the list. The data source information is automatically populated.
You do not need to add the Source or Destination data sources in Data Integration or the Management Center in advance. Instead, you can configure the details for the Source or Destination directly on this page.
After you configure the source and destination information, click Test to test the connectivity. For Alibaba Cloud RDS and Alibaba Cloud Hologres instances, the connectivity test passes automatically if no whitelist is configured. If a whitelist is configured, you must add the required IP addresses. For a list of required IP addresses, see Network connectivity and whitelist configuration.
3. Configure the task
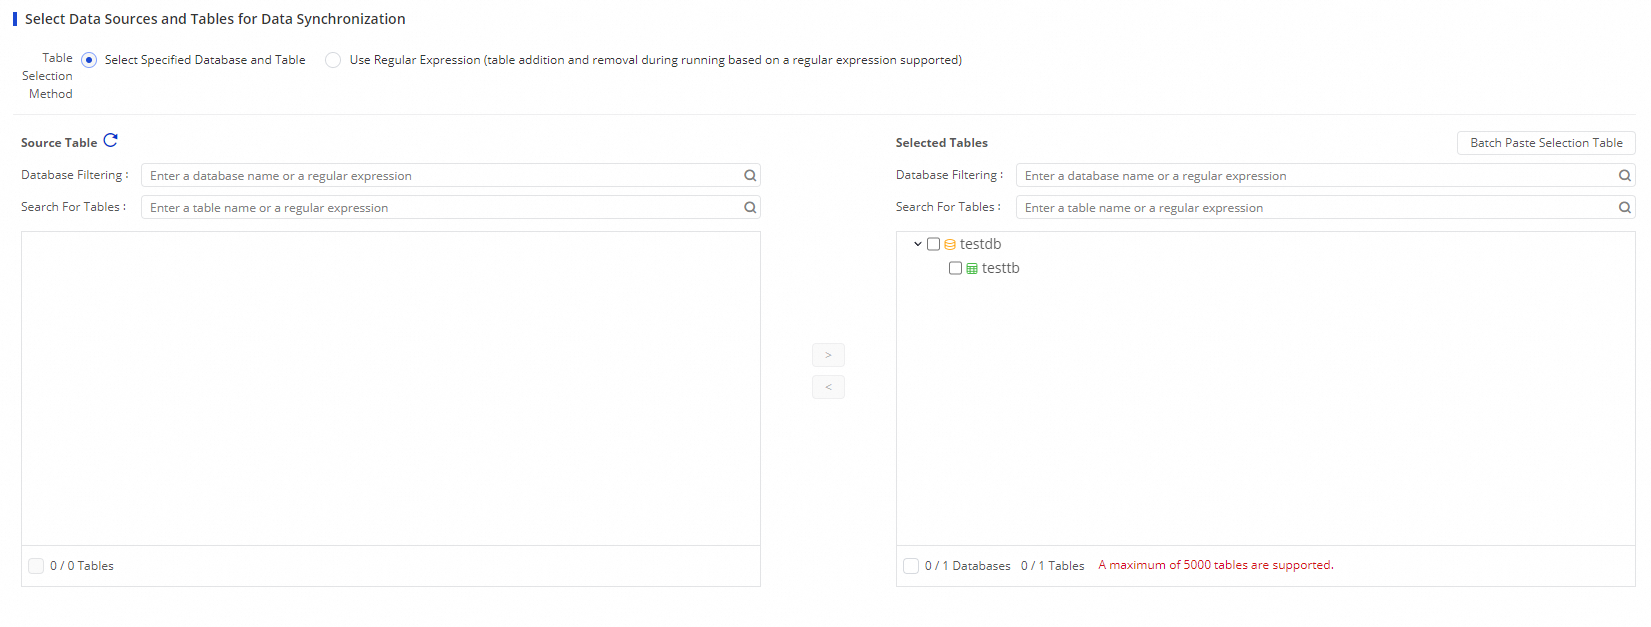
1. Select the databases and tables to sync
After the connectivity test passes, the sync task automatically pulls the databases and tables from the source data source. For MySQL-to-Hologres tasks, you can select Specify Databases and Tables or Use Regular Expressions to Select Tables.
In the Source Tables list, select the tables that you want to synchronize and click the ![]() icon to add them to the Selected Tables list.
icon to add them to the Selected Tables list.
2. Configure destination table mappings
In the Actions column, click Refresh Mapping. Then, follow the on-screen instructions to configure the table name mapping, field type mapping, and schema name mapping.

3. Configure alerts, advanced parameters, and more
In the upper-right corner, click Alert Settings, Advanced Parameter Settings, or DDL Capability Settings, and complete the configuration as prompted.
4. Complete the configuration
After you complete the configuration, click Complete Configuration.
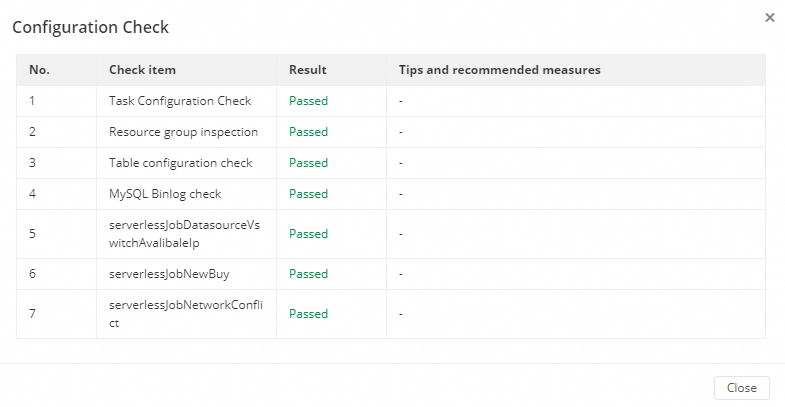
When you click Complete Configuration for the first time, a Configuration Check is automatically performed. Note that this Configuration Check is a precheck and does not block the Complete Configuration operation.
Start the sync task
Starting the task triggers another configuration check. This configuration check is mandatory. The task will not start if the check fails.
The check items vary based on the sync task.
The first time you start the task, the system checks whether you have the required permissions. These permissions are the same as those required to purchase a pay-as-you-go serverless resource group. You must have the AliyunBSSOrderAccess and AliyunDataWorksFullAccess permissions to start the task.
On the Serverless Sync Task page, find the task that you created and click Start in the Actions column.

After the task starts, it enters the Environment Preparation stage. During this stage, the system prepares dedicated computing resources for the task. This process typically takes a few minutes.

When the startup is complete, the status changes to Running.

Sync task O&M
View task details
Click the task name in the Name/ID column or the content in the Execution Overview column to go to the task details page.
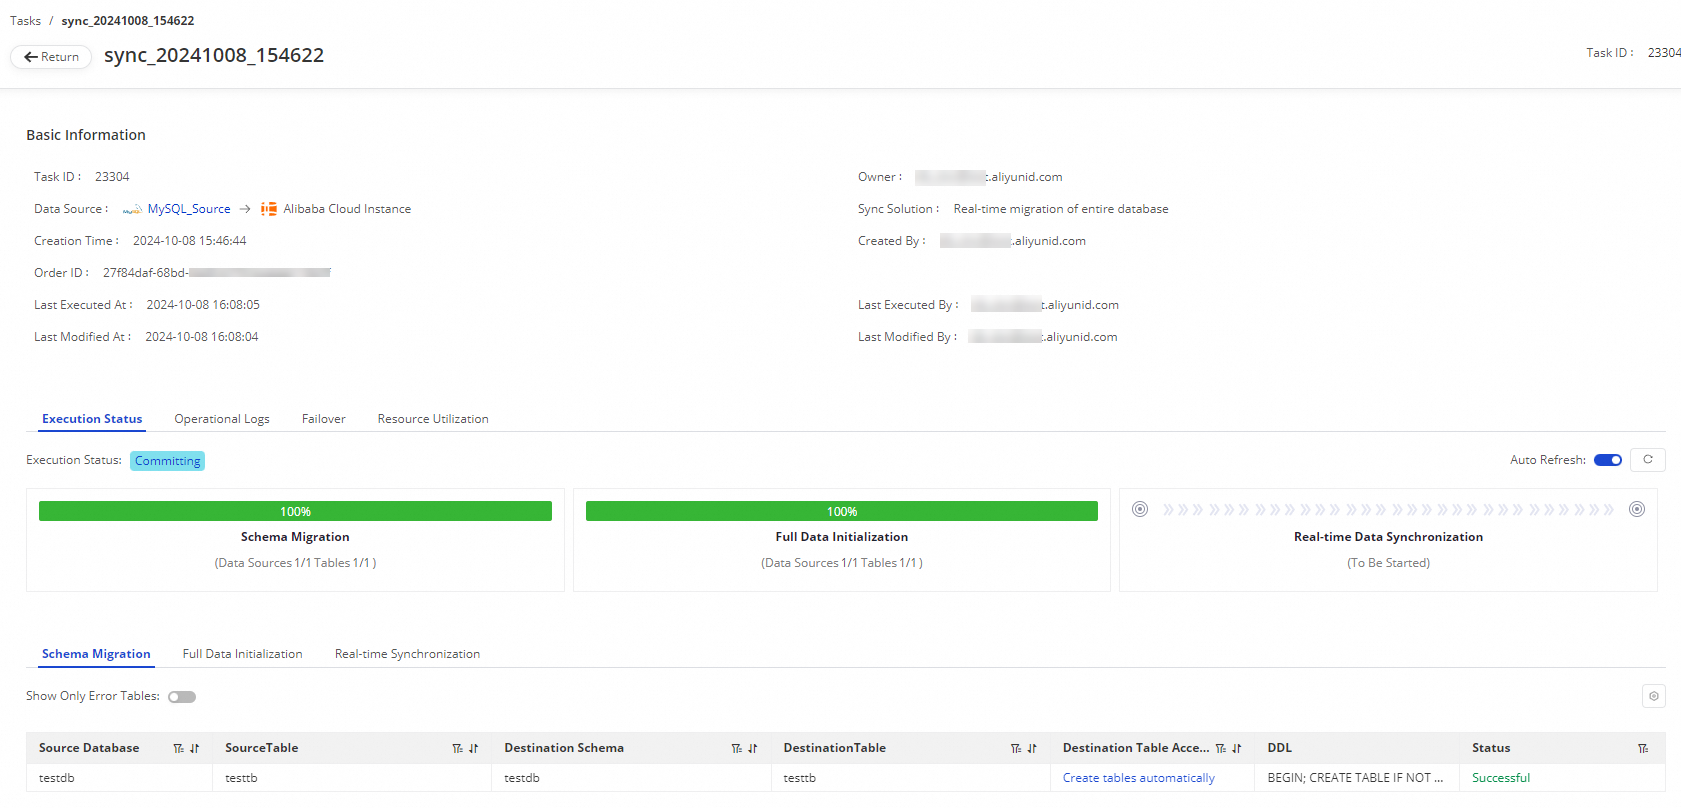
Basic Information: Includes data source information, the billing order ID, and the synchronization solution.
Execution Status: View the execution status of each step in the sync task. You can also view operational logs, failover records, and resource utilization.
Details: View details about schema migration, full data initialization, and real-time synchronization.
Sync task configuration
In the Actions column of the serverless sync task, click Edit to go to the task configuration page.

You can add, delete, or modify the tables to be synchronized. Then, click Complete Configuration.
In the Actions column, click Apply Updates.

When you click Apply Updates, a precheck is automatically performed. If the precheck fails, the update is blocked.
The check for an update has fewer items than the check for the initial startup. Because the resources are already initialized, the update process does not include the resource preparation stage.
Related references
For more information about task order details and advanced parameter configuration, see Appendix.
If you encounter any problems with a serverless real-time sync task, see Real-time synchronization FAQ.