description-of-features-on-the-management-page
DataV provides the Design Resources feature in the Resource Management module of the product console. You can view, rename, and group design resources in the management panel. This allows you to manage all design resources in a more efficient manner. This topic describes the features on the Design Resources page.
On the Design Resources page, you can perform the following operations: 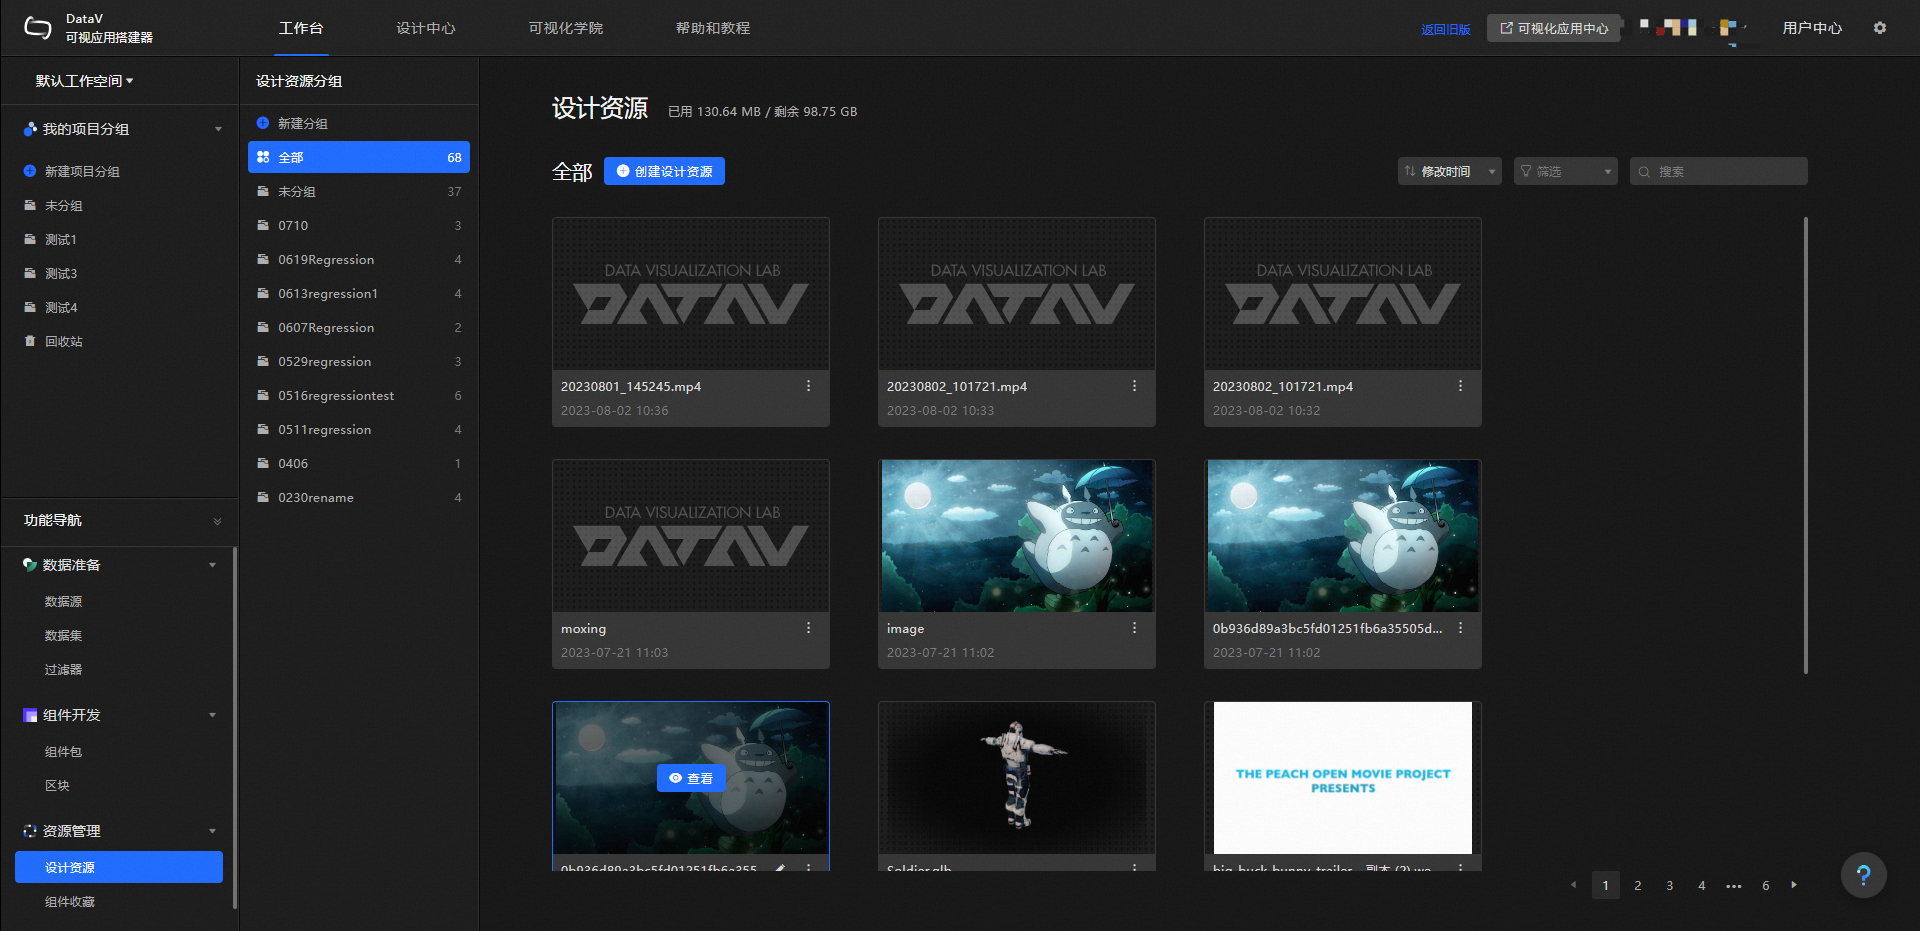
Manage a group
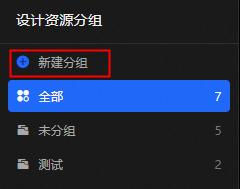
On the left side of the Design Resources page, you can manage all resources by group. In the Manage Groups section, you can perform the following operations:
Operation | Procedure |
Add a grouping field | In the Manage Groups section, all design resources are displayed by default. You can click Create Group, enter the name of the new group, and then click the Enter key to add a new group. |
Deletes an API group. | Move the pointer over a group in the lower part of the Group List and click the Note After a group is deleted, the design resources in the group are moved to all design resources that are not grouped. |
Rename a group | Move the pointer over a group in the lower part of the Group list and click the |
 icon next to the group. In the Delete dialog box that appears, confirm the deletion of the group.
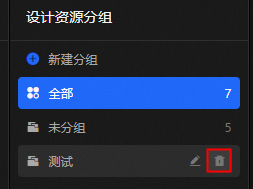
 icon on the right of the group. In the Name field on the left, you can change the name of the group. Press the Enter key to rename the group.
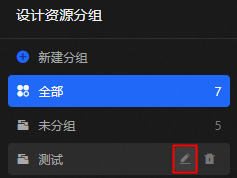
View resource capacity
On the Design Resources page, resources are measured based on the size of the resources. Different versions of DataV have different capacity limits. Design resources are isolated based on different workspaces. The design resources of each workspace share a capacity pool.
The capacity of the Enterprise Edition resource is 5GB.
The capacity of Professional Edition resources is 10GB.
In the upper part of the Design Resources page, you can view the used and remaining resources of Design Resources in the current workspace. 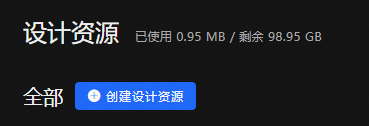
Resources are isolated by workspace, but the resource capacity is calculated by account. In the Design Resources section, no design resources are available, but the remaining capacity is partially occupied. This may be because the design resources of other workspaces occupy the resource capacity.
Create design resources locally
On the Design Resources page, you can customize the content of local design resource files that are required for upload. You can upload the following types of design resource files: Image, Video, and Model. 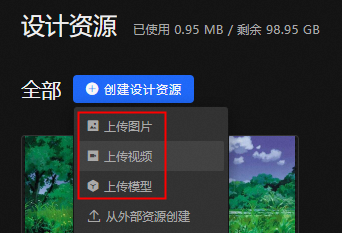
Click Create Design Resource and select Upload Image, Upload Video, or Upload Model from the drop-down list.
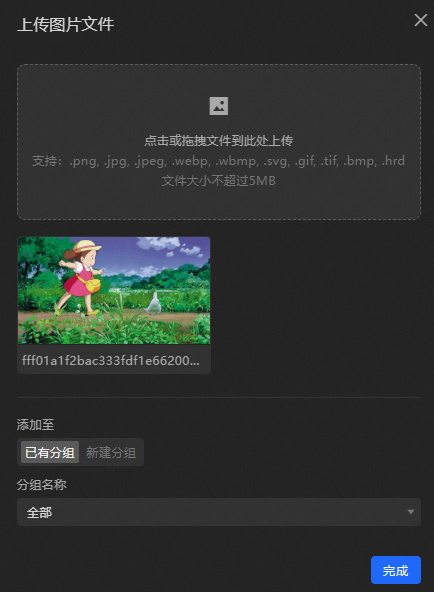
In the dialog box, you can drag a local image, video, or model file to the dashed box. You can also click the icon in the dashed box and select the image, video, or model file to upload.
NoteThe format and size of a design resource file that is uploaded locally are limited as follows:
Image files can be. png, .jpg, .jpeg, .webp, .wbmp, .svg, .gif, .tif, .bmp, and. hrd. The file size cannot exceed 5MB. You can upload multiple image files at a time.
Video files:.mov, .mp4, and. webm. The file size cannot exceed 50MB.
Valid values:.gltf and. glb. The file size cannot exceed 50MB.
The uploaded images, videos, and model files are displayed in the area below the dashed box.

In the Add To section in the lower-left corner of the dialog box, select Existing Group or Create Group.
Existing Group: If you select an existing group, you can select a specific group from the Group Name drop-down list. By default, all groups are added.
Create Group: If you select this option, you can enter a new group name in the Group Name field.
After you add the group, click Complete in the lower-right corner of the File Upload dialog box.
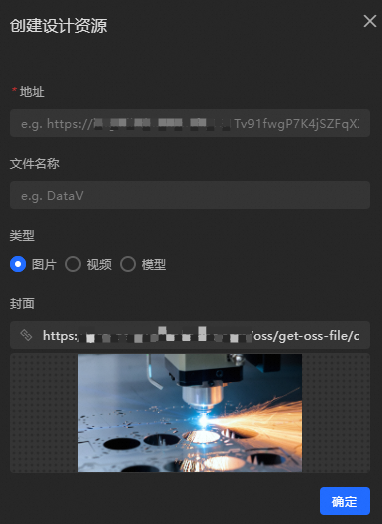
Create design resources from external resources
On the Design Resources page, you can create design resources from external resource files. The following table lists the types of external design resource files that can be created: Image, Video, and Model. 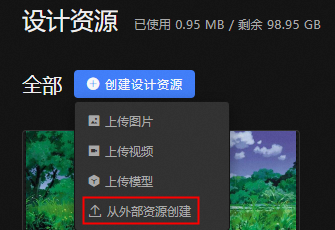
A design resource file created by using an external resource URL link has no size limit, and the created resource does not occupy the design resource capacity. Model design resources are available only in the Professional Edition and above.
Click Create Design Resource and select Create from External Resource from the drop-down list.
In the Create Design Resource dialog box, you can configure the required configuration items for the external resource file as follows.
Parameter
description
The address.
(Required) You can enter the URL of an external resource file accessible over the Internet in the input box.
Name
Customize the name of the input design resource file.
Type
The file type of the external resource file. Valid values: Image, Video, and Model.
Cover
You can enter the URL of the thumbnail image. You can also drag or click the icon below the thumbnail to select an image in the local folder as the thumbnail of the external resource file.
NoteThe size of the cover image cannot exceed 2M.
After you configure the external resource parameters, click OK in the lower-right corner of the File Upload dialog box.
Importantyou can upload a model by designing resources. currently, you can only upload a complete embedded gltf model file or glb model file. the separated gltf format (.gltf +.bin) is not supported.
If the loaded model has broken surfaces, it may be that the number of triangular surfaces in a single mesh exceeds 4294967296/3 ≈ 1431655765. Therefore, for the problem of broken surfaces in complex models, it is recommended to simplify the patches in the modeling software before uploading them.
Sorting resources
On the Design Resources page, click the Sort drop-down list and select a sorting style to sort the design resources in the panel. You can sort by Creation Time, Modification Time, or Name. By default, it is sorted by modification time in reverse order. 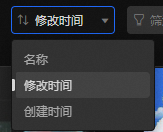
Filter resource types
In the upper-right corner of the Design Resources page, click the All drop-down list. In the drop-down list, you can filter design resources by type. You can select Image, Video, or Model. 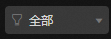
By default, All data types are displayed.
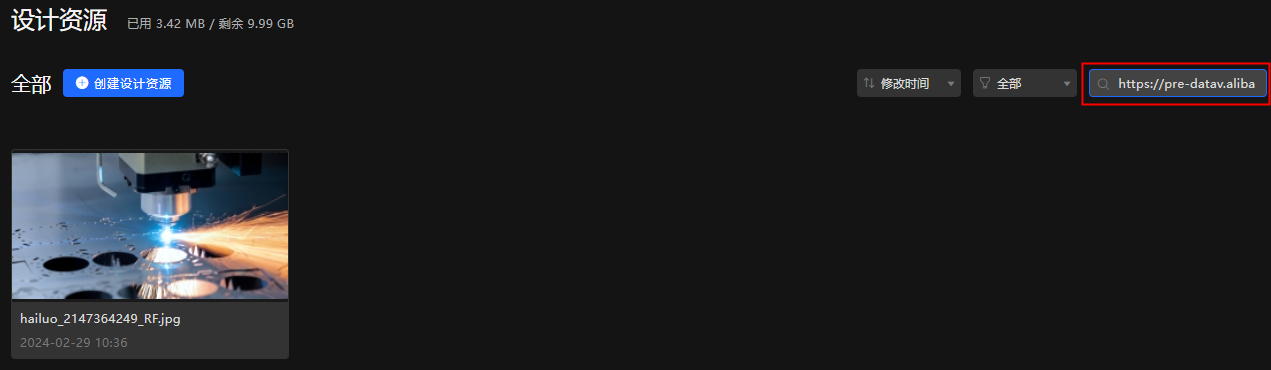
Search for resources
Click the search box in the upper-right corner of the Design Resources page. Enter the name or URL of a design resource in the search box to search for the corresponding design resource in the panel. 
Rename a resource
On the Design Resources page, move the pointer over a design resource and click the ![]() icon or the resource name in the lower-left corner.
icon or the resource name in the lower-left corner. 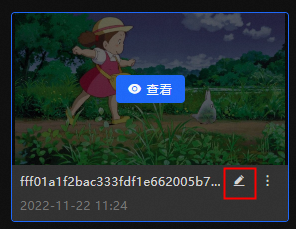
Manage resource operations
Each design resource on the Design Resources page supports multiple operations.
Operation | Procedure |
Change a resource group | On the Design Resources page, move the pointer over a design resource, click the |
Copy Resource Links | On the Design Resources page, move the pointer over a design resource and click the |
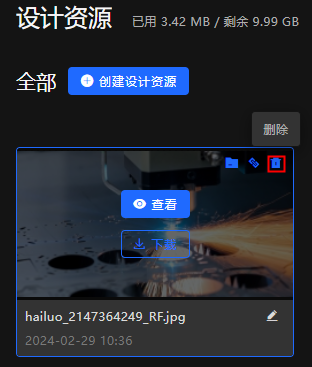
Delete a resource | On the Design Resources page, move the pointer over a design resource and click the Important Design resources cannot be restored after they are deleted. If the resources are used in the data kanban, the content will be missing. Exercise caution when you perform this operation. |
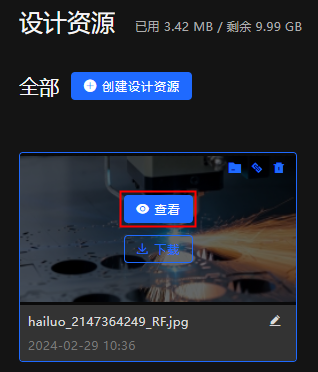
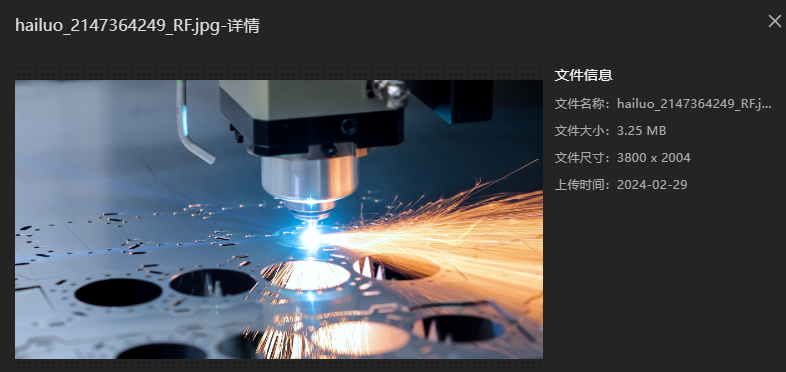
View the details of a synchronization entity | On the Design Resources page, move the pointer over a design resource and click View. In the Details dialog box, the details of the design resource file are displayed, including the file name, file size, file size, and upload time. In the resource file details dialog box of the video and model classes, you can preview and view the video or model files. In the details dialog box, you can generate thumbnail snapshots. You can use the following two methods to generate thumbnail snapshots:
|
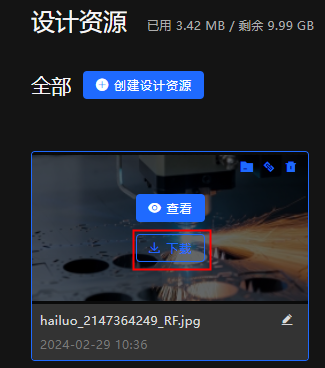
Downloads a resource. | On the Design Resources page, move the pointer over a design resource and click Download to download the resource to your computer. Note Resources created by external resources do not support downloading. |
 icon, select Existing Group or Create Group, and then click OK.
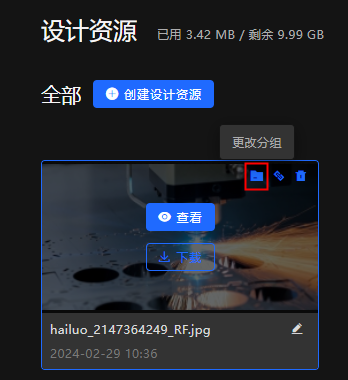
 icon to copy the path of the resource. You can paste the copied resource link in the search box on the management page to quickly retrieve the required resources.
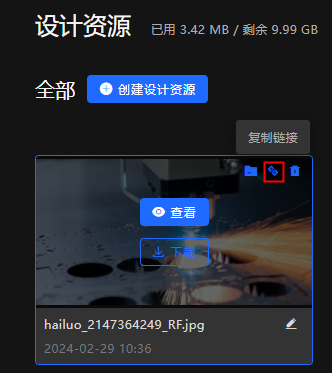
 icon. In the Delete dialog box, click OK.