To connect a transit router (TR) to a network instance (such as a VPC, VBR, CCN, or ECR instance, or an IPsec-VPN connection) in another Alibaba Cloud account, the network instance must first grant authorization to the TR. This topic describes the authorization process and related operations.
Billing
Attaching an Enterprise Edition transit router to a VPC, VBR, or ECR instance, or an IPsec-VPN connection, incurs a network attachment fee and a data processing fee. When you grant the authorization, you can specify whether the account that owns the network instance or the account that owns the Enterprise Edition transit router is the payer. For more information about the billing of Enterprise Edition transit routers, see Billing.
Limits
A transit router can connect only to network instances that belong to accounts of the same site type. For example, a transit router in a China site account cannot connect to a network instance in an international site account.
To change the payer for an active network attachment, you must perform steps in both the network instance account and the transit router account; it cannot be changed in a single action. For more information, see Change the payer for a network instance.
Prerequisites
Before you authorize a network instance, make sure that the following requirements are met:
The account that owns the network instance and the account that owns the transit router are of the same site type (both China site or both international site).
A transit router can connect only to network instances that belong to accounts of the same site type. For example, a transit router in a China site account cannot connect to a network instance in an international site account.
You have the ID of the Alibaba Cloud account that owns the transit router instance.
You have the ID of the CEN instance to which the transit router belongs.
Before you authorize a VBR instance, you must apply for the required permissions. For more information, see Apply to attach a cross-account VBR to a CEN instance or VPC.
Before you authorize an IPsec-VPN connection, make sure that it is not attached to any resource:
An IPsec-VPN connection attached to a VPN Gateway instance cannot be attached to a transit router.
If the IPsec-VPN connection is already attached to a transit router, you must first detach it. For more information, see Delete a network attachment.
Scenario
In this scenario, a transit router in Account B needs to connect to several network instances in Account A: a VPC instance, VBR instance, CCN instance, ECR instance, and an IPsec-VPN connection. The following sections describe how Account A can grant authorization to the transit router in Account B.

Authorize network instances
VPC authorization
Log on to the VPC console with Account A.
In the top navigation bar, select the region where the target VPC instance is deployed.
On the VPC page, find the target VPC instance and click its ID.
Click the Cross-account Authorization tab. On the Cloud Enterprise Network tab, click Cross-account Authorization.
In the Attach to CEN dialog box, configure the parameters and click OK.
Parameter
Description
Peer Account UID
The ID of the Alibaba Cloud account that owns the transit router instance.
Peer CEN Instance ID
The ID of the CEN instance to which the transit router belongs.
Payer
Select the account that pays the fees.
CEN Instance Owner (default): The account that owns the transit router pays the network attachment fee and data processing fee for the VPC.
VPC Users: The account that owns the VPC pays the network attachment fee and data processing fee for the VPC.
ImportantChoose the payer carefully. Changing the payer may affect your services. For more information, see Change the payer for a network instance.
After you confirm the settings, the authorization is created and listed on the Cross-account Authorization tab.
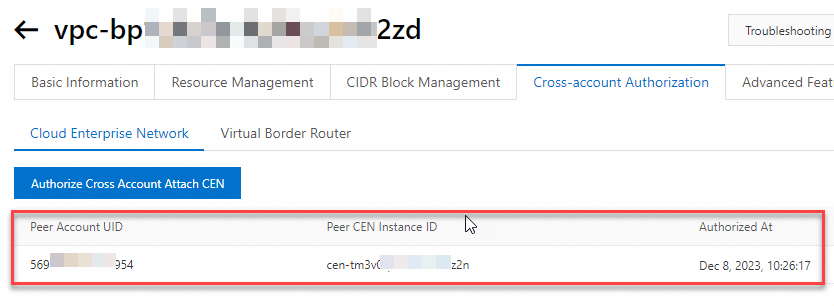
Make a note of the VPC ID and the ID of Account A. You will need this information to create the VPC attachment. For details, see Create a VPC attachment.
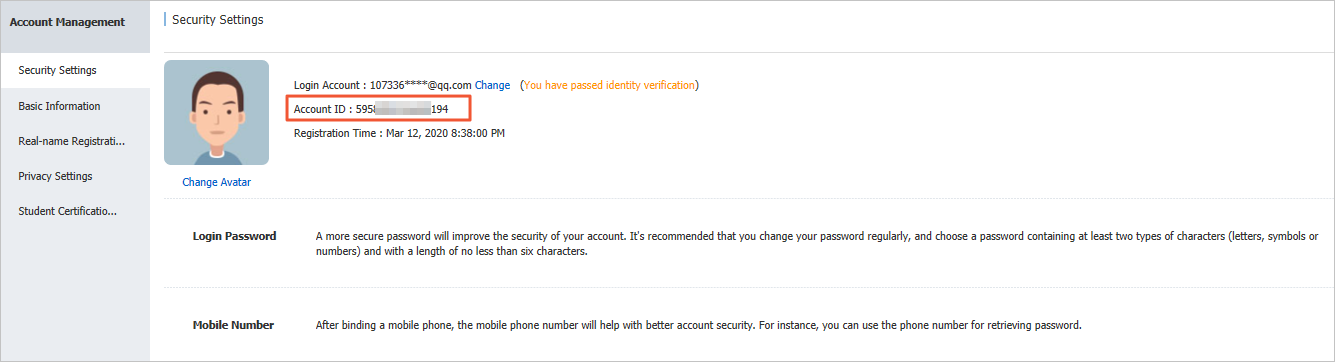
You can view your account ID on the Account Management page.
VBR authorization
Log on to the Express Connect console with Account A.
In the top navigation bar, select the region where the target VBR instance is deployed.
In the left-side navigation pane, click Virtual Border Routers (VBRs).
On the Virtual Border Routers (VBRs) page, click the ID of the target VBR instance.
On the CEN Authorization tab, click Authorize CEN of Another Account to Load Instance.
In the Authorize CEN of Another Account to Load Instance pane, configure the parameters and click OK.
Parameter
Description
Peer CEN Instance ID
The ID of the CEN instance to which the transit router belongs.
Peer Account UID
The ID of the Alibaba Cloud account that owns the transit router instance.
Payer
Select the account that pays the fees.
CEN Owner (default): The account that owns the transit router pays the network attachment fee and data processing fee for the VBR.
VBR Owner: The account that owns the VBR pays the network attachment fee and data processing fee for the VBR.
ImportantChoose the payer carefully. Changing the payer may affect your services. For more information, see Change the payer for a network instance.
After you confirm the settings, the authorization is created and listed on the CEN Authorization tab.
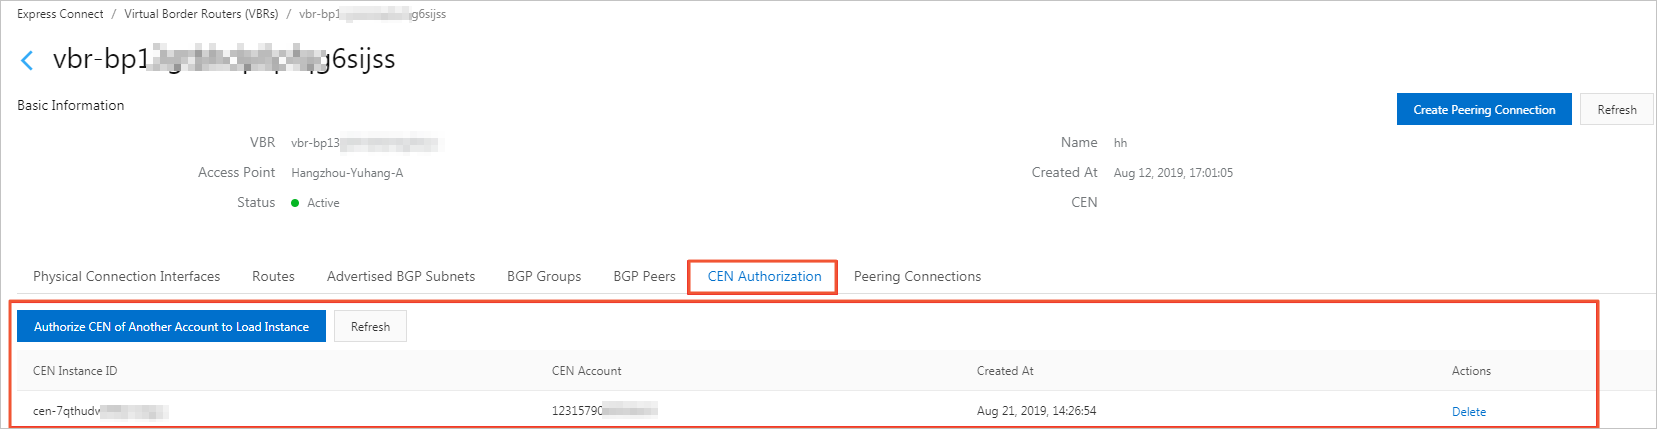
Make a note of the VBR ID and the ID of Account A. You will need this information to create the VBR attachment. For details, see Create a VBR attachment.
You can view your account ID on the Account Management page.
CCN authorization
Log on to the Smart Access Gateway console with Account A.
In the top navigation bar, select the region where the target CCN instance is located.
In the left-side navigation pane, click CCN.
On the CCN page, click the ID of the target CCN instance.
On the instance details page, click the CEN Cross Account Authorization Information tab, and then click CEN Cross Account Authorization.
In the Attach to CEN dialog box, enter the ID of Account B and the ID of the CEN instance that belongs to Account B, and then click OK.
After the authorization is granted, you can view the authorization information on the CEN Cross Account Authorization Information tab.

Make a note of the CCN ID and the ID of Account A. You will need this information to create the CCN attachment. For details, see Create a CCN attachment.
You can view your account ID on the Account Management page.
IPsec-VPN authorization
Log on to the VPN Gateway console.
In the left navigation pane, choose .
- In the top navigation bar, select the region of the IPsec-VPN connection.
On the IPsec Connections page, find the target IPsec-VPN connection and click its ID.
On the details page of the IPsec-VPN connection, click the Cross-account Authorization tab, and then click Cross-account Authorization.
In the Attach to CEN dialog box, configure the parameters and click OK.
Parameter
Description
Peer Account UID
The ID of the Alibaba Cloud account that owns the transit router instance.
Peer CEN Instance ID
The ID of the CEN instance to which the transit router belongs.
Payer
Select the account that pays the fees.
CEN Owner (default): The account that owns the transit router pays the network attachment fee and data processing fee after the transit router is attached to the IPsec-VPN connection.
VPN Owner: The account that owns the IPsec-VPN connection pays the network attachment fee and data processing fee after the transit router is attached to the IPsec-VPN connection.
ImportantChoose the payer carefully. Changing the payer may affect your services. For more information, see Change the payer for a network instance.
The owner of the IPsec-VPN connection remains responsible for its instance and data transfer fees.
After the authorization is granted, you can view the authorization information on the Cross-account Authorization tab.
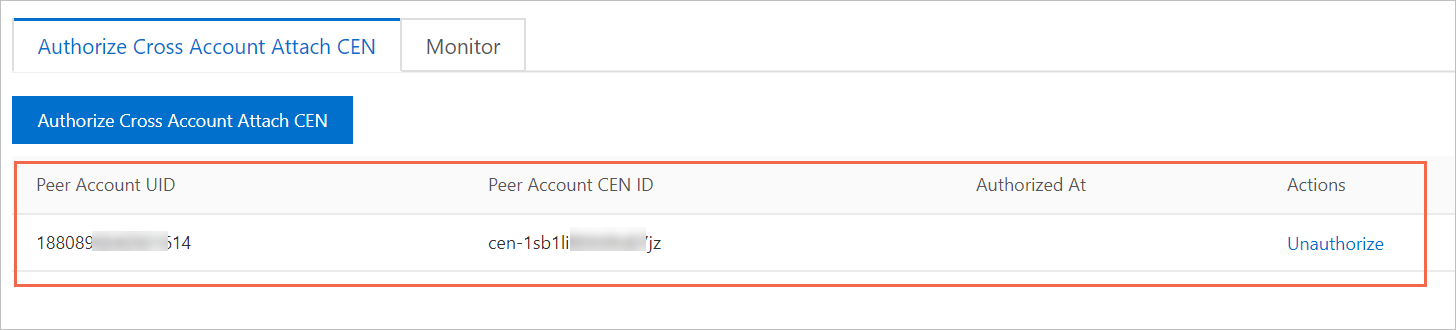
Make a note of the IPsec-VPN connection ID and the ID of the Alibaba Cloud account that owns it. You will need this information to create the VPN attachment. For details, see Create a VPN attachment.
You can view your account ID on the Account Management page.
ECR authorization
Log on to the Express Connect console with Account A.
In the left-side navigation pane, click ECR.
On the ECR page, click the ID of the target ECR instance.
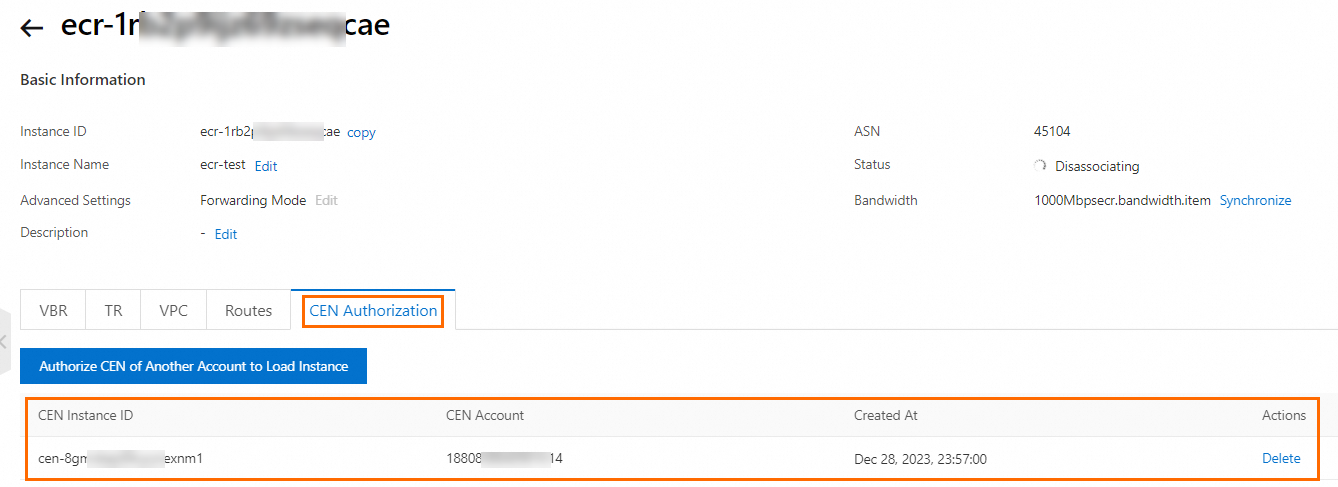
On the CEN Authorization tab, click Authorize CEN of Another Account to Load Instance.
In the Join CEN dialog box, configure the parameters and click OK.
Parameter
Description
Peer CEN Instance ID
The ID of the CEN instance to which the transit router belongs.
Peer Account UID
The ID of the Alibaba Cloud account that owns the transit router instance.
Payer
Select the account that pays the fees.
CEN Owner (default): The account that owns the transit router pays the network attachment fee and data processing fee for the ECR.
ECR Owner: The account that owns the ECR pays the network attachment fee and data processing fee for the ECR.
ImportantChoose the payer carefully. Changing the payer may affect your services. For more information, see Change the payer for a network instance.
After the authorization is granted, you can view the authorization information on the CEN Authorization tab.
Make a note of the ECR ID and the ID of Account A. You will need this information to create the ECR attachment. For details, see Create an ECR attachment.
You can view your account ID on the Account Management page.
Change network instance payer
If the Enterprise Edition transit router is not yet attached to the cross-account network instance, revoke the authorization in the resource account (the account that owns the network instance) and then grant a new authorization.
If the Enterprise Edition transit router is already attached to the cross-account network instance, you must first change the payer in the resource account, then change the payer on the TR side. The change takes effect at the top of the next hour.
You can change the payer only for VPC, VBR, and VPN attachments. This feature is not supported for ECR attachments.
Console
This example shows how to change the payer for a cross-account VPC attachment. Assume the following:
Account A owns the CEN instance and Account B owns the VPC instance.
The current payer is Account A (CEN Instance Owner).
To change the payer to Account B (VPC Owner), follow these steps:
In Account B, change the payer on the VPC instance details page.
On the details page of the target VPC instance, go to the Cross-account Authorization tab. In the Payer column of the target authorization, click Edit and select VPC Users.
In Account A, change the payer for the VPC attachment.
Go to the target transit router, find the target VPC attachment, click Edit in the Payer Account column, and select Resource Owner Account.
Wait for the change to take effect.
The change takes effect at the top of the next hour.
API
From the resource account, call the ModifyGrantInstanceToTransitRouter operation and set the
OrderTypeparameter to the desired payer.From the TR account, change the payer:
For a VPC attachment, call the UpdateTransitRouterVpcAttachmentAttribute operation and set the
OrderTypeparameter to the desired payer.For a VBR attachment, call the UpdateTransitRouterVbrAttachmentAttribute operation and set the
OrderTypeparameter to the desired payer.For a VPN attachment, call the UpdateTransitRouterVpnAttachmentAttribute operation and set the
OrderTypeparameter to the desired payer.
The change takes effect at the top of the next hour. You can then call the DescribeGrantRulesToCen operation from the TR account to confirm that the
EffectiveOrderTypeparameter is updated to the new payer.
Revoke network instance authorization
You must delete the network attachment before you can revoke the authorization for the network instance. For more information, see Delete a network attachment.
Revoke VPC authorization
Log on to the VPC console with Account A.
In the top navigation bar, select the region where the target VPC instance is deployed.
On the VPC page, find the target VPC instance and click its ID.
Click the Cross-account Authorization tab. On the Cloud Enterprise Network tab, find the target authorization and click Revoke Permissions in the Actions column.
In the Revoke Permissions dialog box, confirm the information and click OK.
Revoke VBR authorization
Log on to the Express Connect console with Account A.
In the top navigation bar, select the region where the target VBR instance is deployed.
In the left-side navigation pane, click Virtual Border Routers (VBRs).
On the Virtual Border Routers (VBRs) page, click the ID of the target VBR instance.
Click the CEN Authorization tab. On this tab, find the target authorization and click Delete in the Actions column.
In the Revoke Authorization dialog box, confirm the information and click OK.
Revoke CCN authorization
Log on to the Smart Access Gateway console with Account A.
In the top navigation bar, select the region where the target CCN instance is located.
In the left-side navigation pane, click CCN.
On the CCN page, click the ID of the target CCN instance.
Click the CEN Cross Account Authorization Information tab. On this tab, find the target authorization and click Revoke Authorization in the Actions column.
In the Note dialog box, confirm the information and click OK.
Revoke IPsec-VPN authorization
Log on to the VPN Gateway console with Account A.
In the top navigation bar, select the region where the target IPsec-VPN connection is located.
In the left-side navigation pane, .
On the IPsec Connections page, find the target IPsec-VPN connection and click its ID.
On the details page of the IPsec-VPN connection, find the target authorization on the Cross-account Authorization tab and click Revoke Permissions in the Actions column.
In the Revoke Permissions dialog box, confirm the information and click OK.
Revoke ECR authorization
Log on to the Express Connect console with Account A.
In the left-side navigation pane, click ECR.
On the ECR page, click the ID of the target ECR instance.
Click the CEN Authorization tab. On this tab, find the target authorization and click Delete in the Actions column.
In the Revoke Authorization dialog box, confirm the information and click OK.