This tutorial describes how to use a lifecycle hook of Auto Scaling to suspend an ECS instance and use a template from CloudOps Orchestration Service (OOS) to automatically apply an automatic snapshot policy to the instance.
Prerequisites
-
You have created a scaling group that is in the Enabled state. For more information, see Manage scaling groups.
-
You have created an automatic snapshot policy. For more information, see Create an automatic snapshot policy.
A Resource Access Management (RAM) role is created for OOS. The trusted entity of the RAM role must be Alibaba Cloud Service, the trusted service must be CloudOps Orchestration Service, and the RAM role must have the permissions to perform operations on the OOS template. For more information, see Create a RAM role for OOS and grant permissions.
NoteIn this topic, the OOSServiceRole RAM role is used as an example. You can also use other roles.
Background
An automatic snapshot policy periodically creates snapshots for your ECS instances, which improves data security and operational fault tolerance. Although you cannot associate an automatic snapshot policy when you create a scaling configuration, you can use a lifecycle hook and an OOS template to automate this process. This method is more efficient than manually applying a policy to each new ECS instance.
An automatic snapshot policy periodically creates snapshots at scheduled times to protect the data on your system disks and data disks. For more information, see Automatic snapshot policies.
Procedure
This tutorial uses the OOS public template ACS-ESS-LifeCycleApplyAutoSnapshotPolicy as an example to describe how to automatically apply an automatic snapshot policy to ECS instances during a scale-out. The procedure is as follows:
Step 1: Grant permissions to the OOS RAM role
You must have the required permissions to execute OOS templates. Executing the O&M operations defined in ACS-ESS-LifeCycleApplyAutoSnapshotPolicy involves resources from Elastic Compute Service (ECS) and Auto Scaling.
Log on to the RAM console.
-
Create a permission policy.
In the left-side navigation pane, choose .
On the Policies page, click Create Policy.
-
On the Create Policy page, click the JSON tab, enter the following policy content, and then click OK.
{ "Version": "1", "Statement": [ { "Action": [ "ecs:DescribeDisks", "ecs:ApplyAutoSnapshotPolicy", "ecs:DescribeInstances" ], "Resource": "*", "Effect": "Allow" }, { "Action": [ "ess:CompleteLifecycleAction" ], "Resource": "*", "Effect": "Allow" } ] } -
In the Create Policy dialog box, enter a name for the policy.
The policy name is
ESSHookPolicyForApplyAutoSnapshotPolicy.NoteIf you need to modify the policy content, click Cancel to continue editing the permission policy.
-
Click OK.
-
Attach the permission policy to the OOSServiceRole RAM role.
In the left-side navigation pane, choose .
Find the OOSServiceRole RAM role and click Grant Permission in the Actions column.
Add the required permissions for the OOSServiceRole RAM role that is assumed by OOS to complete the authorization.
-
On the Grant Permission page, configure the settings and click OK.
The following table describes the parameters used in this tutorial. Use the default values for any parameters not mentioned.Basic Information
Parameter
Description
Grant Scope
Select Alibaba Cloud Account.
Policies
Add the custom policy
ESSHookPolicyForApplyAutoSnapshotPolicy.
Step 2: Create a lifecycle hook and trigger a scale-out
Log on to the Auto Scaling console.
In the navigation pane on the left, click Scaling Groups.
In the top navigation bar, select a region.
Find the scaling group that you want to manage and open its details page in one of the following ways:
In the Scaling Group Name/ID column, click the ID of the scaling group.
In the Actions column, click Details.
-
Create a lifecycle hook for the scale-out event.
At the top of the page, click the Event and adhesive hook tab.
-
Click Create Lifecycle Hook.
-
Configure the lifecycle hook and click OK.
The following table describes the parameters used in this tutorial. Use the default values for any parameters not mentioned.
Parameter
Description
Name
Enter
ESSHookForApplyAutoSnapshotPolicy.Scaling Activity Type
Select Scale-Out.
Timeout Period
Enter an appropriate timeout period, for example, 300 seconds.
NoteThe timeout period is the maximum time allowed for the custom action to complete. If the action does not finish within this period, it fails. Set a timeout that is long enough for your action to run successfully.
Default Execution Policy
Select Continue.
Send Notification When Lifecycle Hook Takes Effect
Configure the template as follows:
-
Notification Method: Select OOS Template.
-
OOS Template Type: Select Public Templates.
-
Public Template: Select
ACS-ESS-LifeCycleApplyAutoSnapshotPolicy.
The execution parameters for
ACS-ESS-LifeCycleApplyAutoSnapshotPolicyare as follows:-
autoSnapshotPolicyId: Enter the ID of your automatic snapshot policy.
-
OOSAssumeRole: Select
OOSServiceRole. In Step 1, you granted this RAM role the required permissions to manage ECS and Auto Scaling resources. OOS assumes this role to acquire these permissions.
-
-
Trigger a scale-out event.
In this tutorial, we manually execute a scaling rule to trigger the scale-out event. You can also use other methods, such as scheduled or event-triggered tasks.
NoteLifecycle hooks are triggered when you execute a scaling rule, but they are not triggered when you manually add or remove existing ECS instances from a scaling group.
-
At the top of the page, click the Scaling Rules and Event-triggered Tasks tab.
-
On the Scaling Rules tab, click Create Scaling Rule.
-
Configure the scaling rule and click OK.
The following table describes the parameters used in this tutorial. Use the default values for any parameters not mentioned.
Parameter
Description
Rule Name
Enter
Add1.Rule Type
Select Simple Scaling Rule.
Operation
Set to add 1 instance.
-
In the list of scaling rules, find the
Add1rule and click Actions in the Recurrently column. -
Click OK.
After the scaling rule is executed, one ECS instance is automatically created. The lifecycle hook
ESSHookForApplyAutoSnapshotPolicyin the scaling group then suspends the ECS instance and simultaneously notifies the OOS service to execute the O&M operations defined inACS-ESS-LifeCycleApplyAutoSnapshotPolicy. -
-
Verify that the automatic snapshot policy is applied to the new ECS instance.
At the top of the page, click the Instance Management tab.
-
Find the newly created ECS instance and click its ID in the ECS Instance ID/Name column.
-
On the Instance Details page, click the Block Storage tab.
Find the cloud disk, and in the Actions column, click Set Snapshot Policy.
-
The figure below shows that an automatic snapshot policy is enabled for the cloud disk. This policy corresponds to the Automatic Snapshot Policy ID set when the lifecycle hook was created, which is the expected behavior when you use the public template
ACS-ESS-LifeCycleApplyAutoSnapshotPolicy.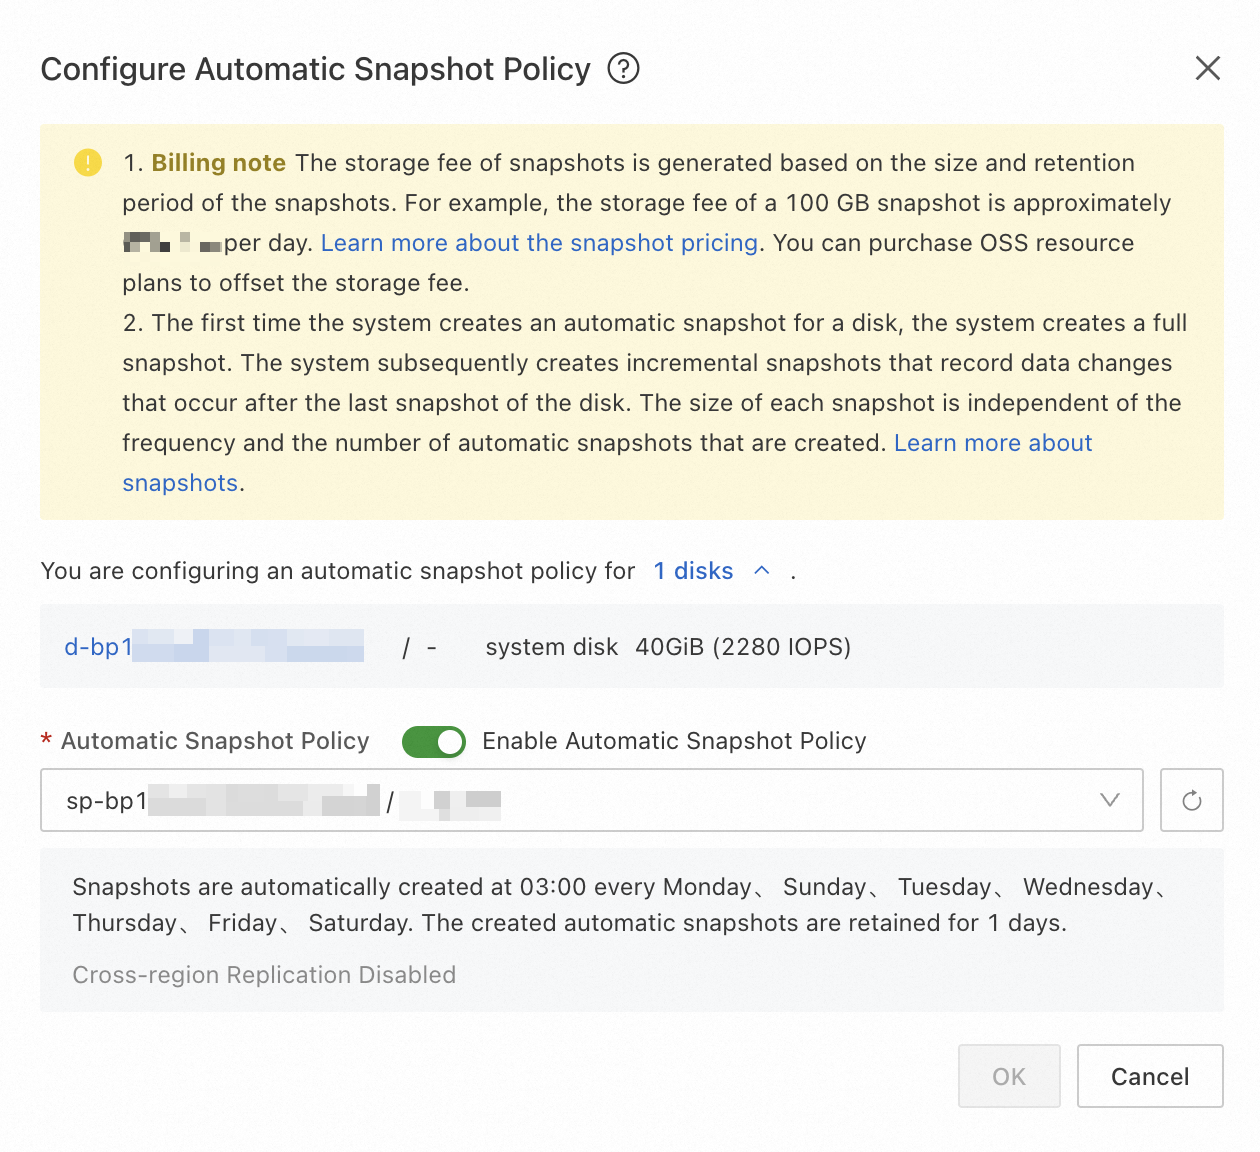
-
If the ECS instance was created but the automatic snapshot policy was not applied, go to the OOS console to check the task execution status.
-
(Optional) Step 3: View the OOS execution status
Log on to the OOS console.
In the left-side navigation pane, choose .
Find the execution task by time and click Details in the Actions column.
-
On the execution details page, view the execution information.
For example, you can view the execution ID and status in the Basic Information section. You can also click a task node in the Task Execution section to view details for that step. For more information, see View the details of an execution.
NoteIf an execution fails, the execution details page displays an error message.
FAQ
If you fail to execute an O&M task, troubleshoot the issue based on the error message in the execution result. For more information, see FAQ.
The following table describes the common error message.
Error message | Cause | Solution |
Forbidden.Unauthorized message: A required authorization for the specified action is not supplied. | You have not authorized Auto Scaling to perform the current action. | Check whether the OOSServiceRole RAM role has the required permissions. |
Forbidden.RAM message: User not authorized to operate on the specified resource, or this API doesn't support RAM. | The RAM user or RAM role does not have the permissions to operate the corresponding resources. | Check whether the OOSServiceRole RAM role has the required permissions. For example, you can grant the OOS permissions to the RAM role. Before OOS can manage the resources that are declared in the OOS template, you must grant the required permissions to the RAM role. |
LifecycleHookIdAndLifecycleActionToken.Invalid message: The specified lifecycleActionToken and lifecycleActionId you provided does not match any in process lifecycle action. | The ongoing lifecycle hook action has ended or been stopped. | Assess the timeout period of the lifecycle hook to make sure that the O&M tasks specified in the OOS template can be complete within the allotted time limit. |
Related topics
You can also use an Auto Scaling lifecycle hook and a CloudOps Orchestration Service (OOS) template to automatically run scripts on an ECS instance during a scale-in or scale-out event. For more information, see Automatically execute scripts on ECS instances.