Combining Anti-DDoS Origin with Anti-DDoS Proxy (Chinese Mainland) gives you always-on protection that automatically escalates to high-capacity scrubbing during large volumetric attacks. Anti-DDoS Origin is cost-effective, protects all your cloud assets transparently with no added latency during normal operations. Anti-DDoS Proxy (Chinese Mainland) mitigates volumetric DDoS attacks. When an attack exceeds its mitigation capacity and blackhole filtering is triggered, Sec-Traffic Manager automatically redirects traffic to Anti-DDoS Proxy (Chinese Mainland). After the attack stops, traffic switches back automatically.
How it works
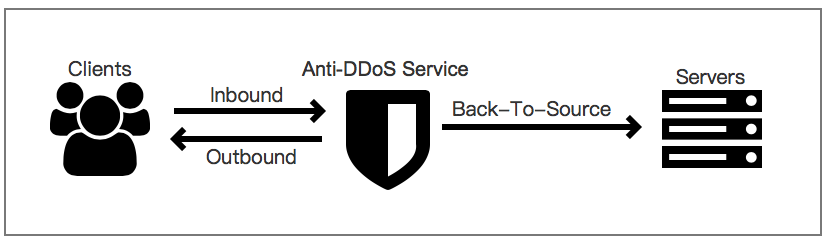
During normal operations, all service traffic flows directly to your cloud service through Anti-DDoS Origin with no added latency. When an attack exceeds the mitigation capacity of your Anti-DDoS Origin instance and blackhole filtering is triggered, Sec-Traffic Manager switches traffic to your Anti-DDoS Proxy (Chinese Mainland) instance using DNS records.
The switchover time depends on where your local DNS servers are located:
DNS servers in the Chinese mainland: 5 to 10 minutes
DNS servers outside the Chinese mainland: 1 to 3 minutes
After the attack stops, Sec-Traffic Manager waits for the configured switchback waiting time before redirecting traffic back to your cloud service. Traffic is not immediately switched back to prevent service disruption from repeated attacks.
If blackhole filtering is deactivated on the cloud resource before the switchback waiting time elapses, traffic switches back immediately regardless of the configured waiting time.
For mitigation capabilities by region, see Mitigation capabilities.Mitigation Plan
Prerequisites
Before you begin, ensure that you have:
An Alibaba Cloud account with sufficient permissions to purchase Anti-DDoS Origin and Anti-DDoS Proxy (Chinese Mainland) instances
Access to your DNS provider to update DNS records
Solution overview
Deploy the two-product combination in four steps:
Purchase and configure an Anti-DDoS Origin instance, and add your cloud service for protection.
Purchase and configure an Anti-DDoS Proxy (Chinese Mainland) instance, and add your domain names.
Configure a tiered protection rule in Sec-Traffic Manager to handle automatic traffic switchover.
Update your DNS record to point to the Sec-Traffic Manager CNAME.
Step 1: Purchase and configure an Anti-DDoS Origin instance
Purchase an Anti-DDoS Origin instance
This example uses an Anti-DDoS Origin 2.0 (Subscription) instance. For full purchase details, see Purchase an Anti-DDoS Origin instance.
Log on to the Traffic Security console.
On the Instance Management page, click Purchase Anti-DDoS Origin Instance. Set the Edition parameter to Enterprise, configure the parameters, and complete the payment.
Parameter Description Clean bandwidth The average network bandwidth of the service to protect. For guidance on estimating your business scale, see Anti-DDoS Origin 1.0 (subscription). IP addresses The total number of public IP addresses to protect. Mitigation logs Specifies whether to enable mitigation logs, which provide full log analysis and reports for protected traffic. Resource group The resource group for the instance. Select an existing resource group or create one. For details, see Create a resource group. 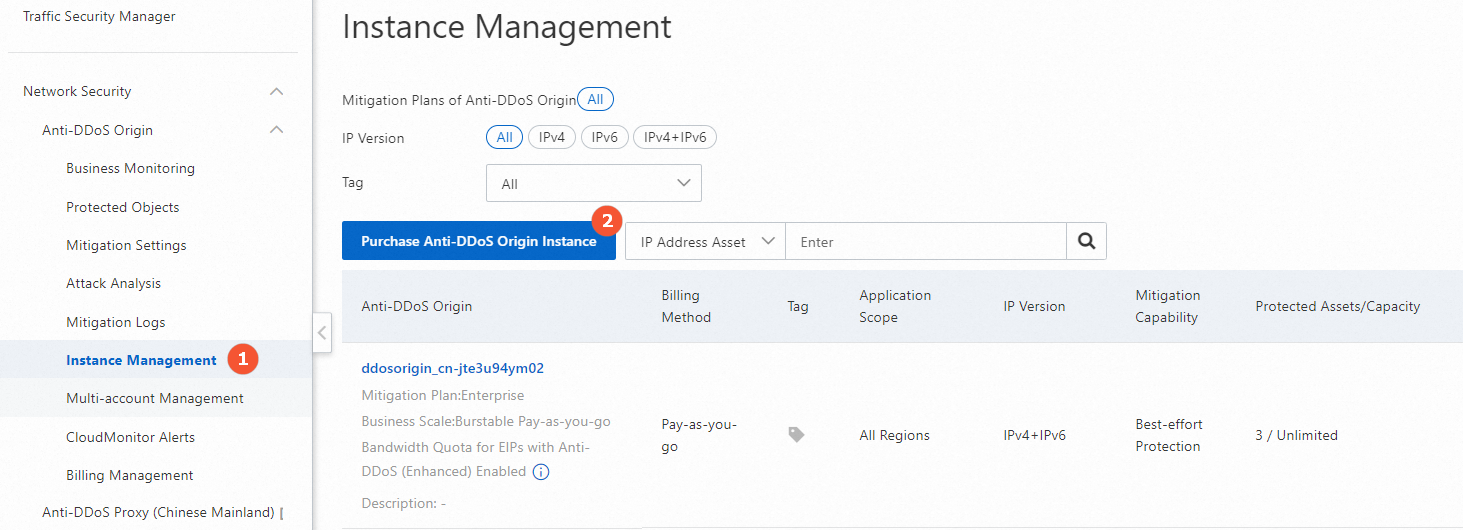
Add your origin server IP address for protection
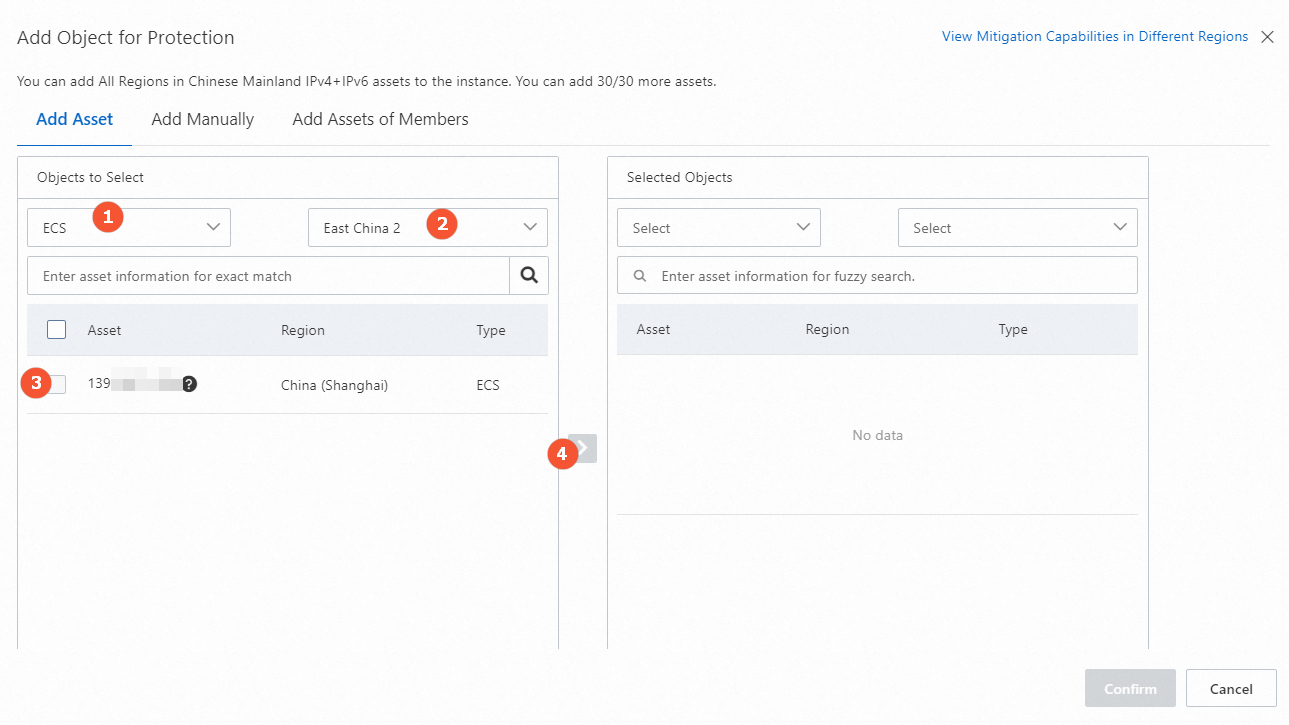
For full details, see Add an object for protection.
On the Protected Objects page, select All Regions in the top navigation bar, select the instance you purchased, and then click Add Object for Protection.
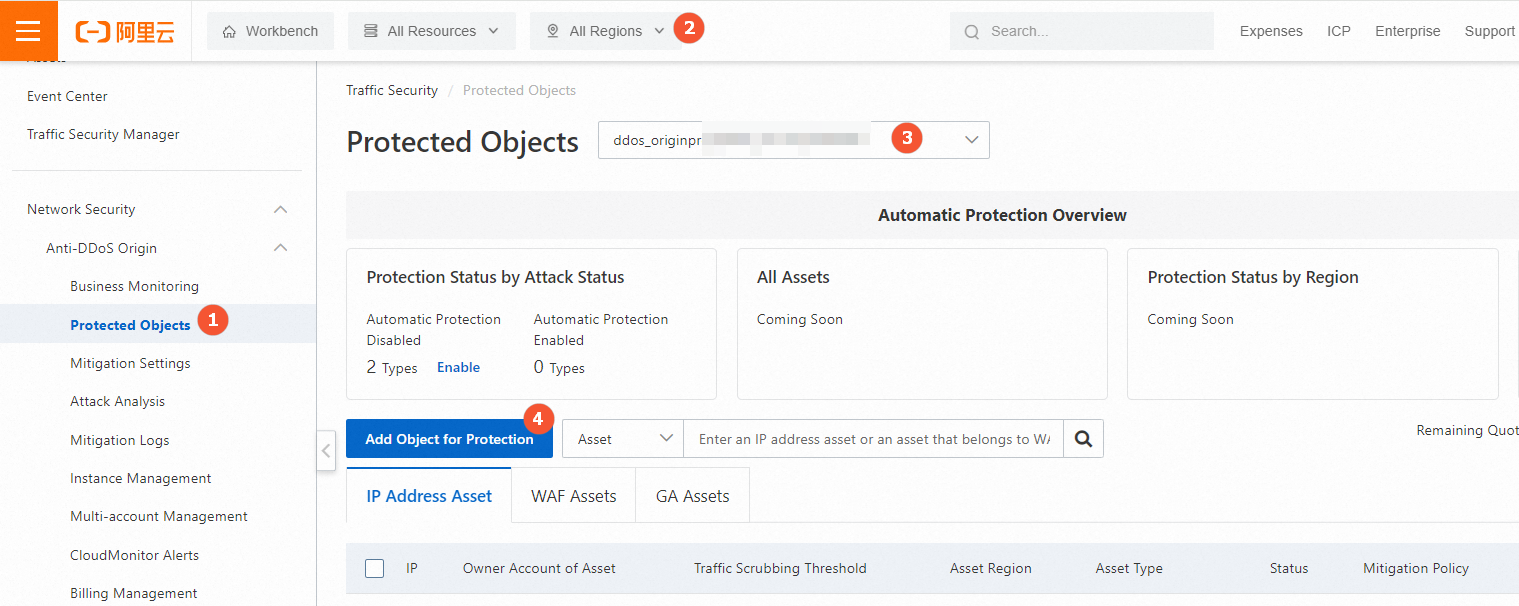
Click the Add Asset or Add Manually tab to add objects for protection.
Step 2: Purchase and configure an Anti-DDoS Proxy (Chinese Mainland) instance
After traffic switches to your Anti-DDoS Proxy (Chinese Mainland) instance, the blackhole filtering threshold is determined by the maximum mitigation capacity of that instance. Configure both basic bandwidth and burstable bandwidth to optimize costs.
Purchase an Anti-DDoS Proxy (Chinese Mainland) instance
For full purchase details, see Purchase an Anti-DDoS Proxy instance.
Log on to the Anti-DDoS Proxy console.
In the top navigation bar, select Chinese Mainland. On the Instances page, click Purchase Instance.
Parameter Description IP version The IP version supported by the instance. Valid values: IPv4 and IPv6. > ImportantFor differences between IPv4 and IPv6 instances, see Functions and features. If you forward access requests from IPv6 clients: domain-based services are forwarded only to IPv4 origin servers; port-based services can be forwarded to IPv4 or IPv6 origin servers.
Mitigation plan The mitigation plan for the instance. This example uses the Profession mitigation plan. Basic bandwidth The basic protection bandwidth — the threshold of attack traffic the instance can mitigate. Burstable bandwidth The maximum mitigation capacity provided by the instance. For billing details, see Billing of the burstable protection bandwidth feature. Clean bandwidth The bandwidth for normal (non-attack) traffic. Set this to a value greater than the peak inbound or outbound traffic of your workloads, whichever is higher. > WarningIf clean bandwidth is insufficient, packet loss may occur. To estimate your needs, check inbound and outbound traffic statistics in the Elastic Compute Service (ECS) console or through monitoring tools on your origin server. For example, if you protect three websites each with a peak outbound traffic of 50 Mbit/s, set clean bandwidth to more than 150 Mbit/s. If bandwidth is insufficient, see Upgrade an instance.
95th percentile burstable clean bandwidth Specifies whether to enable burstable clean bandwidth. Valid values: Disable, Daily 95th Percentile, Monthly 95th Percentile. For billing details, see Billing of the burstable clean bandwidth feature. Function plan The feature set for the instance. Valid values: Standard Function and Enhanced Function. For a comparison, see Differences between the Standard and Enhanced function plans. Domains The number of domains the instance can protect. Must be a multiple of 10. The number of unique second-level domains cannot exceed Domains/10. For the Profession mitigation plan, the default is 50, which allows up to 5 second-level domains and their subdomains or wildcard domains (up to 50 total). Request rate The concurrent queries per second (QPS) the instance can handle during normal operations. HTTP and HTTPS requests are supported. > WarningIf clean QPS is insufficient, packet loss may occur. Enable the burstable QPS feature or increase the clean QPS. For QPS-to-connection mappings, see Purchase an Anti-DDoS Proxy instance.
95th percentile burstable QPS Specifies whether to enable burstable QPS. Valid values: Disable, Daily 95th Percentile, Monthly 95th Percentile. For billing details, see Billing of the burstable QPS feature. Ports The number of TCP and UDP ports for which forwarding rules can be configured. Resource group The resource group for the instance in Resource Management. Default: Default Resource Group. For details, see Create a resource group. 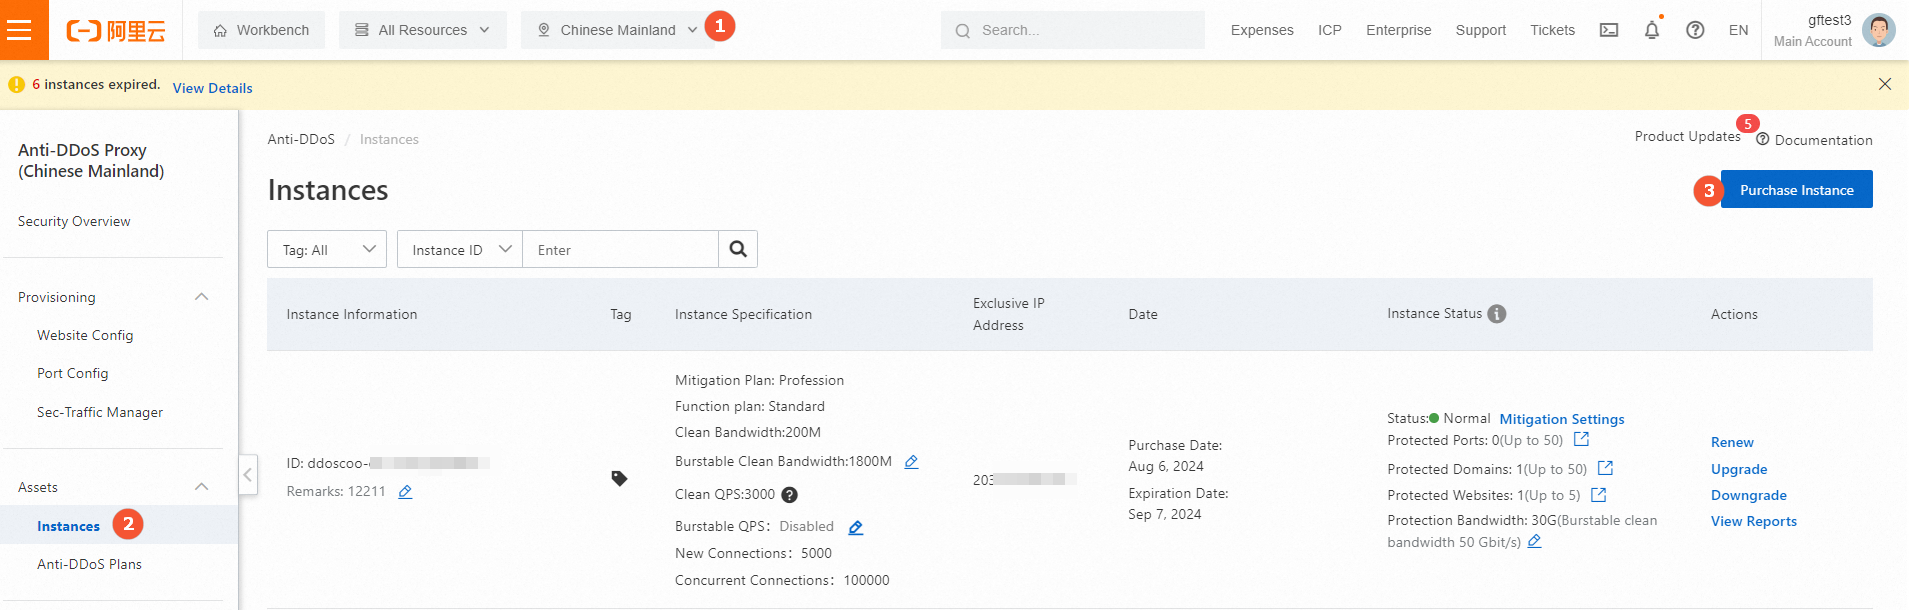
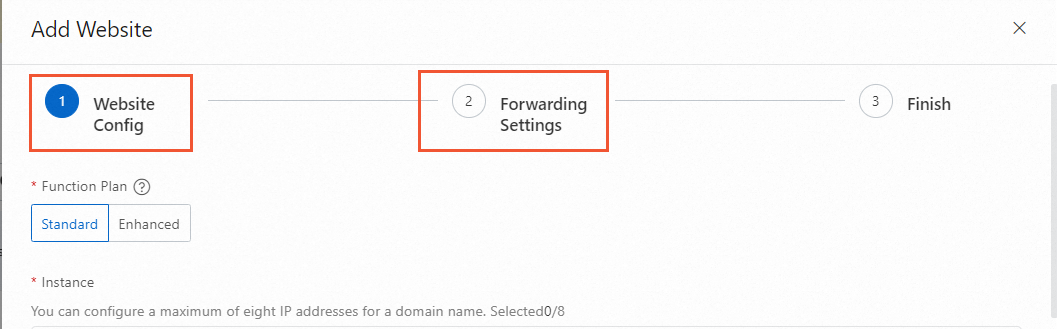
Add domain names to your Anti-DDoS Proxy (Chinese Mainland) instance
On the Website Config page, click Add Website.
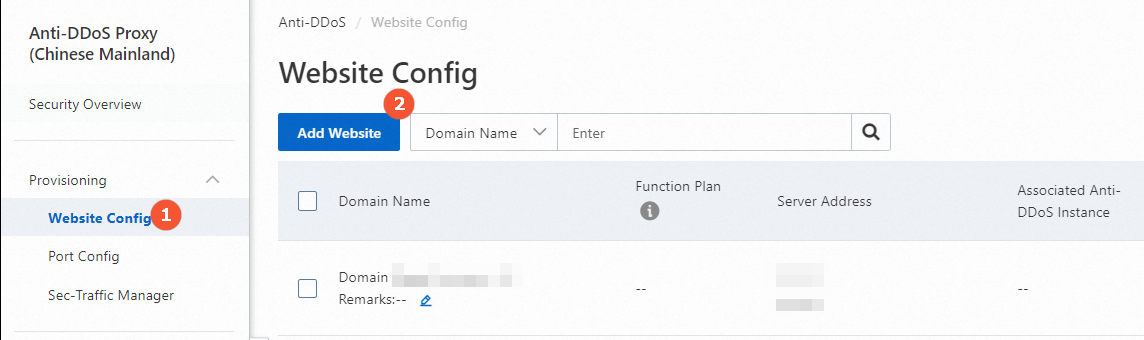
Complete the Website Config and Forwarding Settings steps. For details, see Add one or more websites.
NoteIn the Finish step, do not modify the DNS record. DNS updates are handled in Step 4 of this guide, where you point traffic to the Sec-Traffic Manager CNAME instead.
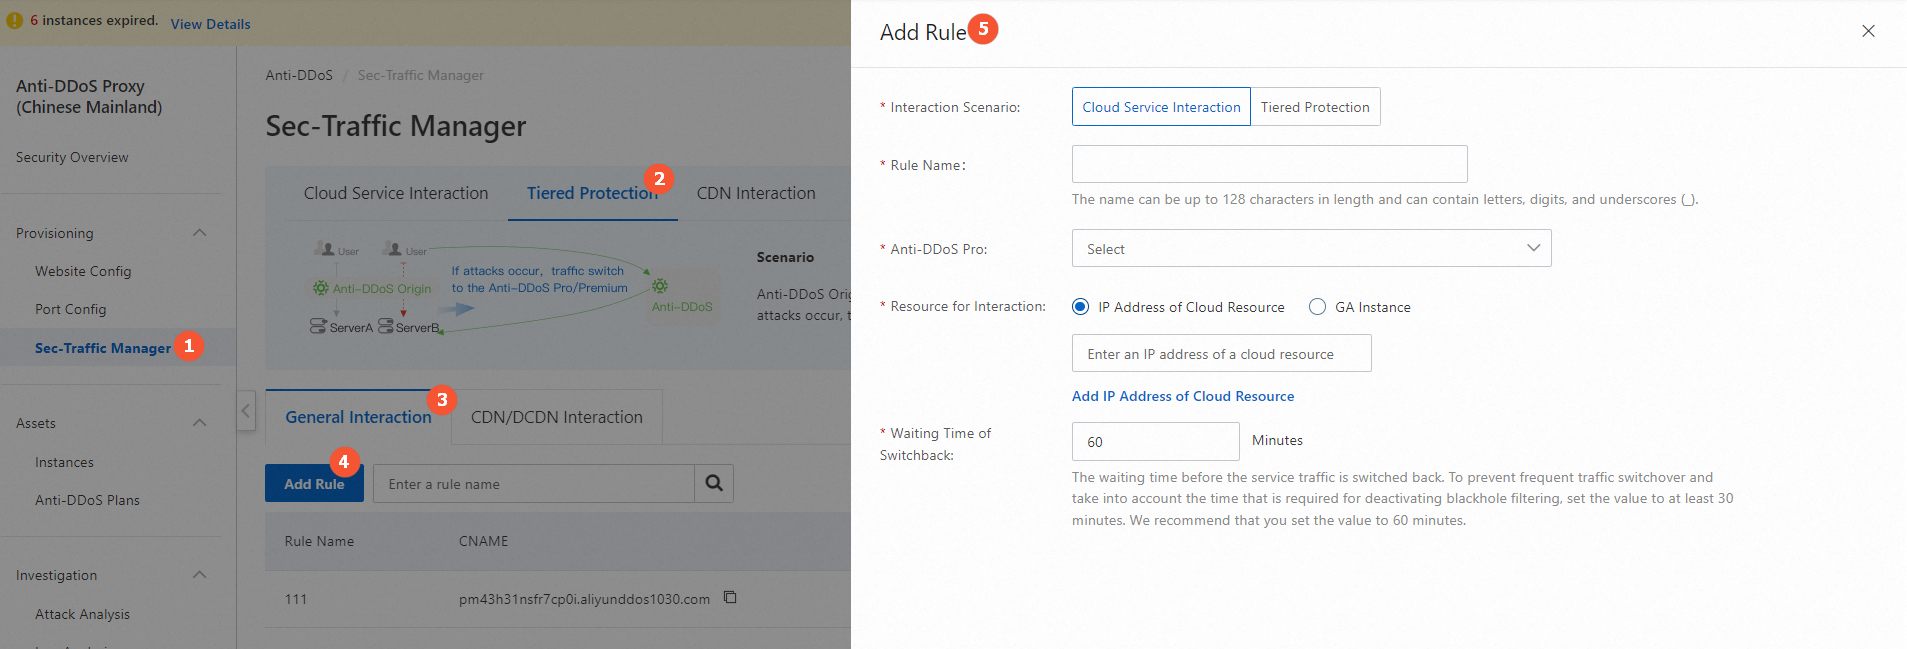
Step 3: Configure Sec-Traffic Manager
Create a tiered protection rule so that traffic is routed through the Sec-Traffic Manager CNAME. For details, see Create a tiered protection rule.
Log on to the Anti-DDoS Proxy (Chinese Mainland) console, go to Sec-Traffic Manager > Tiered Protection > General Interaction, and click Add Rule.
Parameter Description Interaction scenario Select Tiered Protection. Rule name A name for the rule. Up to 128 characters. Allowed characters: letters, digits, and underscores (_). Anti-DDoS Pro Select the Anti-DDoS Proxy (Chinese Mainland) instance. Resource for interaction Click Add IP Address of Cloud Resource to add the IP addresses of your cloud resources. Up to 20 IP addresses are supported. > NoteIf multiple IP addresses are added, traffic is forwarded to other IP addresses when one is under attack. Traffic switches to the Anti-DDoS Proxy (Chinese Mainland) instance only when all added IP addresses are under attack. To configure traffic forwarding to Anti-DDoS Proxy when a single IP is attacked, see Share one Anti-DDoS Proxy instance among multiple cloud resources.
Waiting time of switchback The time to wait after an attack stops before switching traffic back to the cloud resource IP address. Valid range: 30 to 120 minutes. We recommend that you set the value to 60 minutes. > NoteIf blackhole filtering is triggered for your Anti-DDoS Proxy (Chinese Mainland) instance, the service traffic of a cloud resource cannot be switched to the instance until blackhole filtering is deactivated and the waiting time elapses. If blackhole filtering is triggered for a cloud resource, traffic switches to the Anti-DDoS Proxy (Chinese Mainland) instance automatically. Once blackhole filtering is deactivated on the cloud resource, traffic can switch back immediately regardless of the waiting time.
After the rule is created, copy the CNAME of Sec-Traffic Manager shown in the rule list.
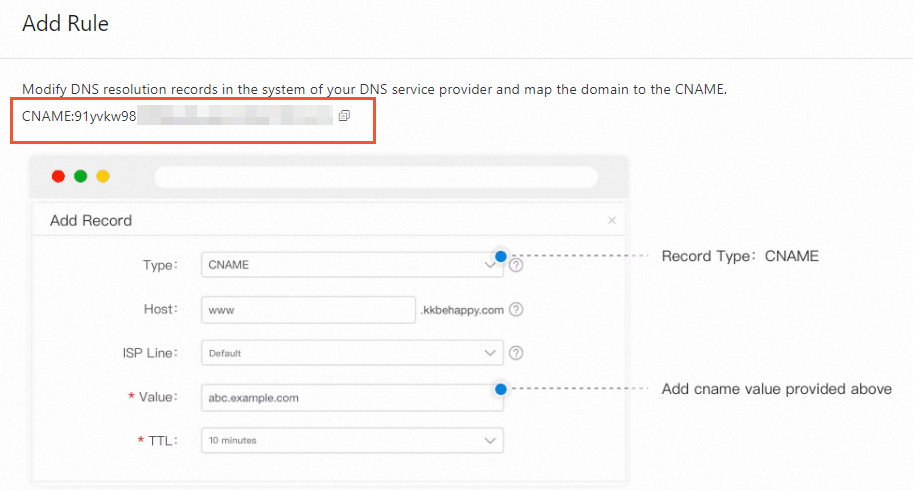
Step 4: Update the DNS record
Update your DNS record to point traffic to the Sec-Traffic Manager CNAME. For details, see Change the CNAME record to redirect traffic to Sec-Traffic Manager.
This example uses Alibaba Cloud DNS.
Log on to the Alibaba Cloud DNS console.Alibaba Cloud DNS console
On the Configurations > Public Zone page, click Add Zone.
Update the DNS record:
Set Record type to CNAME.
Set Record value to the Sec-Traffic Manager CNAME you obtained in Step 3.