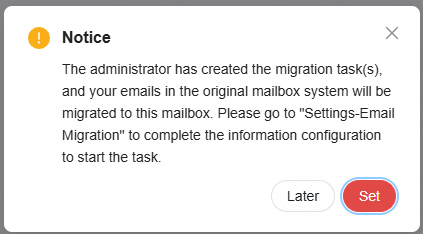
This topic describes what you must check in your former Lark mailbox before you start the migration.
The third-party mailbox screenshots in this topic are for reference only. The actual interface may differ as mailbox features are updated. Always defer to the actual state of your third-party mailbox.
Considerations
Review the following constraints before you create Alibaba Mail accounts or start a migration:
Source mailbox — In this topic, the source mailbox is your former Lark mailbox, and the source mailbox system is Lark Mail.
Migration between Alibaba Mail tenants — If you migrate from one Alibaba Mail tenant to another, log on to the destination tenant's Mail admin console to start the migration. Do not start the migration from the source tenant.
Account names — Account name requirements differ by migration plan, and they determine how you create your Alibaba Mail accounts. Choose a plan before you create the accounts. The plan comparison table in Select a migration plan lists the account name requirement of each plan.
Source mailbox password — The source mailbox password must remain valid and unchanged until the migration is complete. If the password changes, Alibaba Mail cannot authenticate to the source mailbox, and the migration of that account fails.
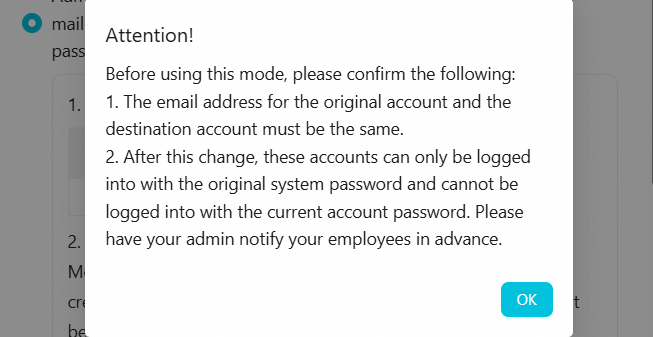
Employee logon after batch migration without passwords — After you enable batch migration without passwords, employees can log on only with their source mailbox credentials, and any initial password that you set becomes invalid.
Prepare the source mailbox
Complete the following preparations before you create a migration task in Alibaba Mail:
Alibaba Mail accounts — Create and assign an Alibaba Mail account for every user to be migrated on the Contacts > Member Management page. For instructions, seeCreate employee accounts.
Source mailbox service — Confirm that the source mailbox system is running and that its IMAP or POP service is enabled. For Lark Mail, enable the Third-party email client service and generate a migration password as described in the following two procedures.
Retrieval and logon restrictions — For every source mailbox to be migrated, disable email retrieval limits (for example, change Fetch last 30 days to Fetch all), IP-based logon restrictions, and two-factor authentication such as SMS, WeChat, or authenticator apps.
Application-specific passwords — If an application-specific password is enabled on a source mailbox, migrating with the original mailbox password fails with an account or password error. Either disable the application-specific password feature, or use the generated security password in the migration configuration. For Lark Mail, use the migration password that you generate in the Lark desktop client. For instructions, seeEnable and set up a third-party client security password.
Data changes — Complete any data deletion or moving operations in the source mailbox system beforehand. Avoid modifying data during the migration.
Folder names — (Recommended) Folder names in the source mailbox system do not contain special characters such as
+,*,\, or/.
Depending on the features of your source mailbox system, you can disable these settings in bulk or by using the API of the source mailbox system.
Enable the Third-party email client service in Lark
The Third-party email client service must be enabled in the Lark admin console. Otherwise, the migration cannot be performed.
Log on to the Lark admin console.
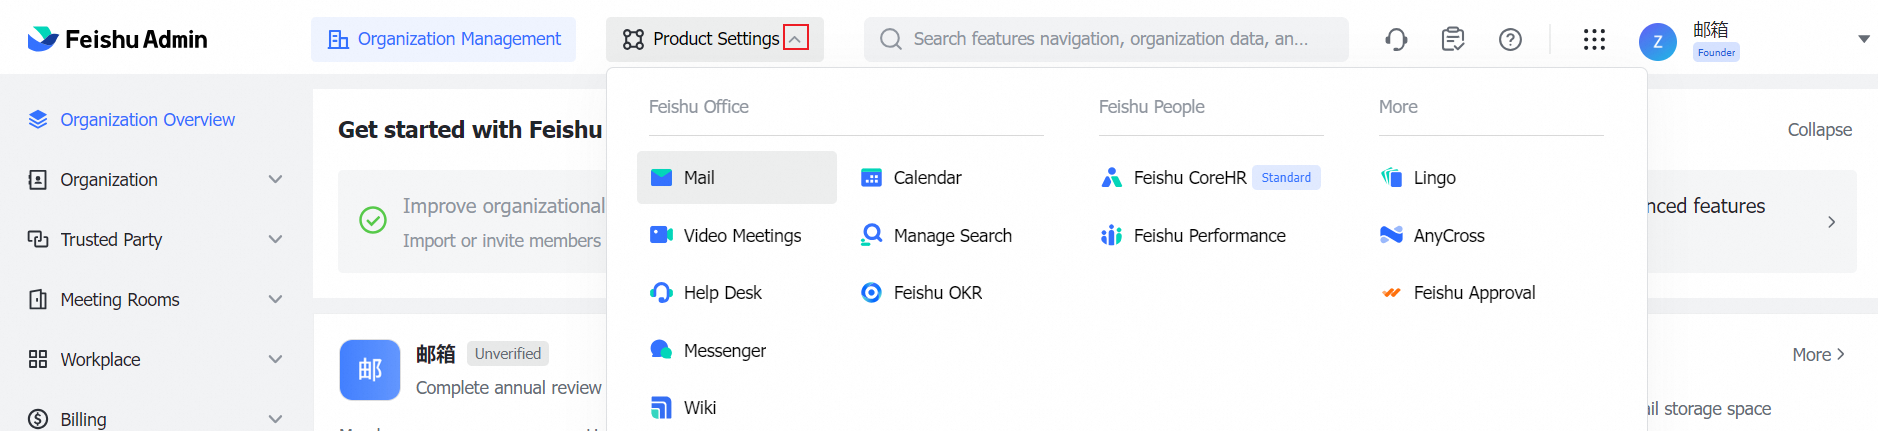
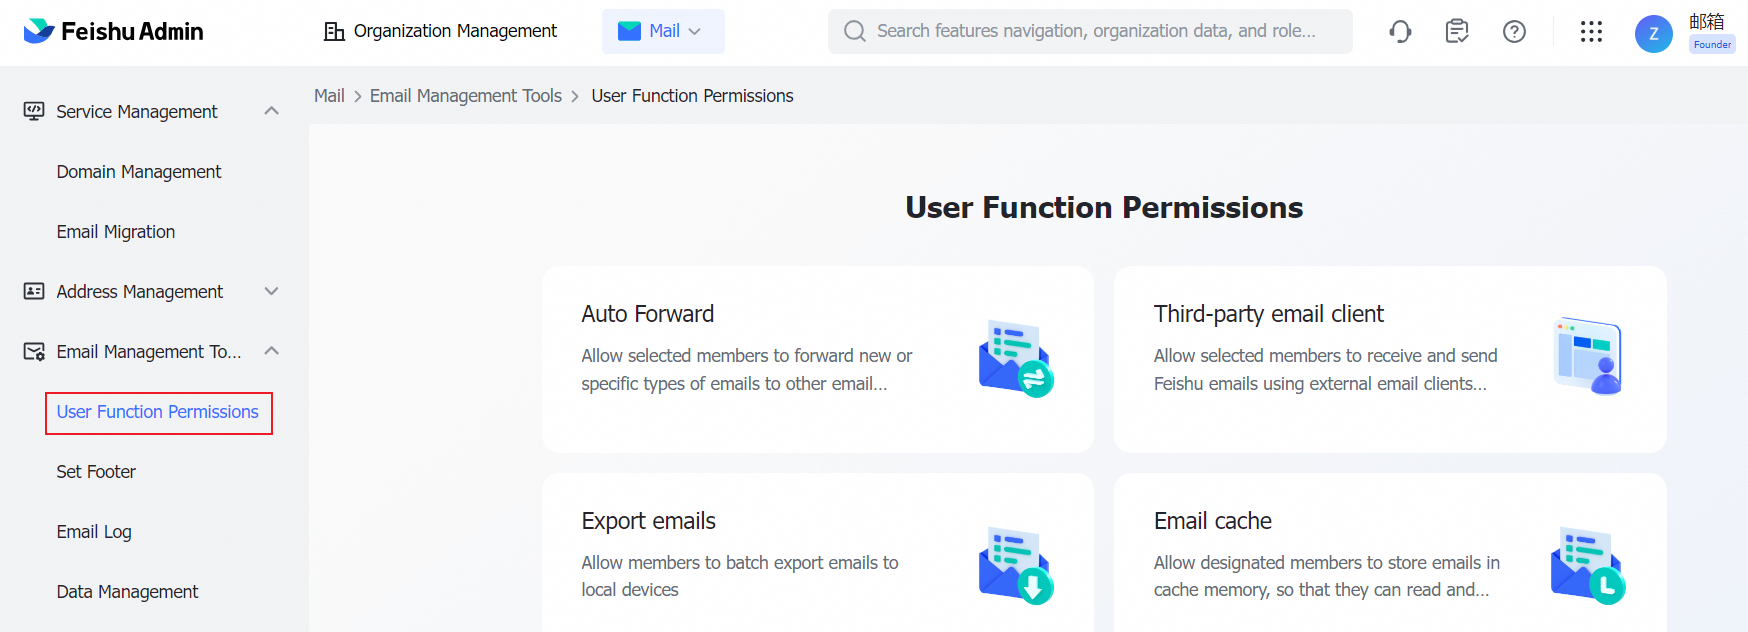
Choose Product Settings > Mail > Mail Management Tools > User Feature Permissions > Third-party email client.
The configuration page of the Third-party email client service opens. The following figures show this service in the Lark admin console.
Generate a migration password in Lark
Download and log on to the Lark desktop client.
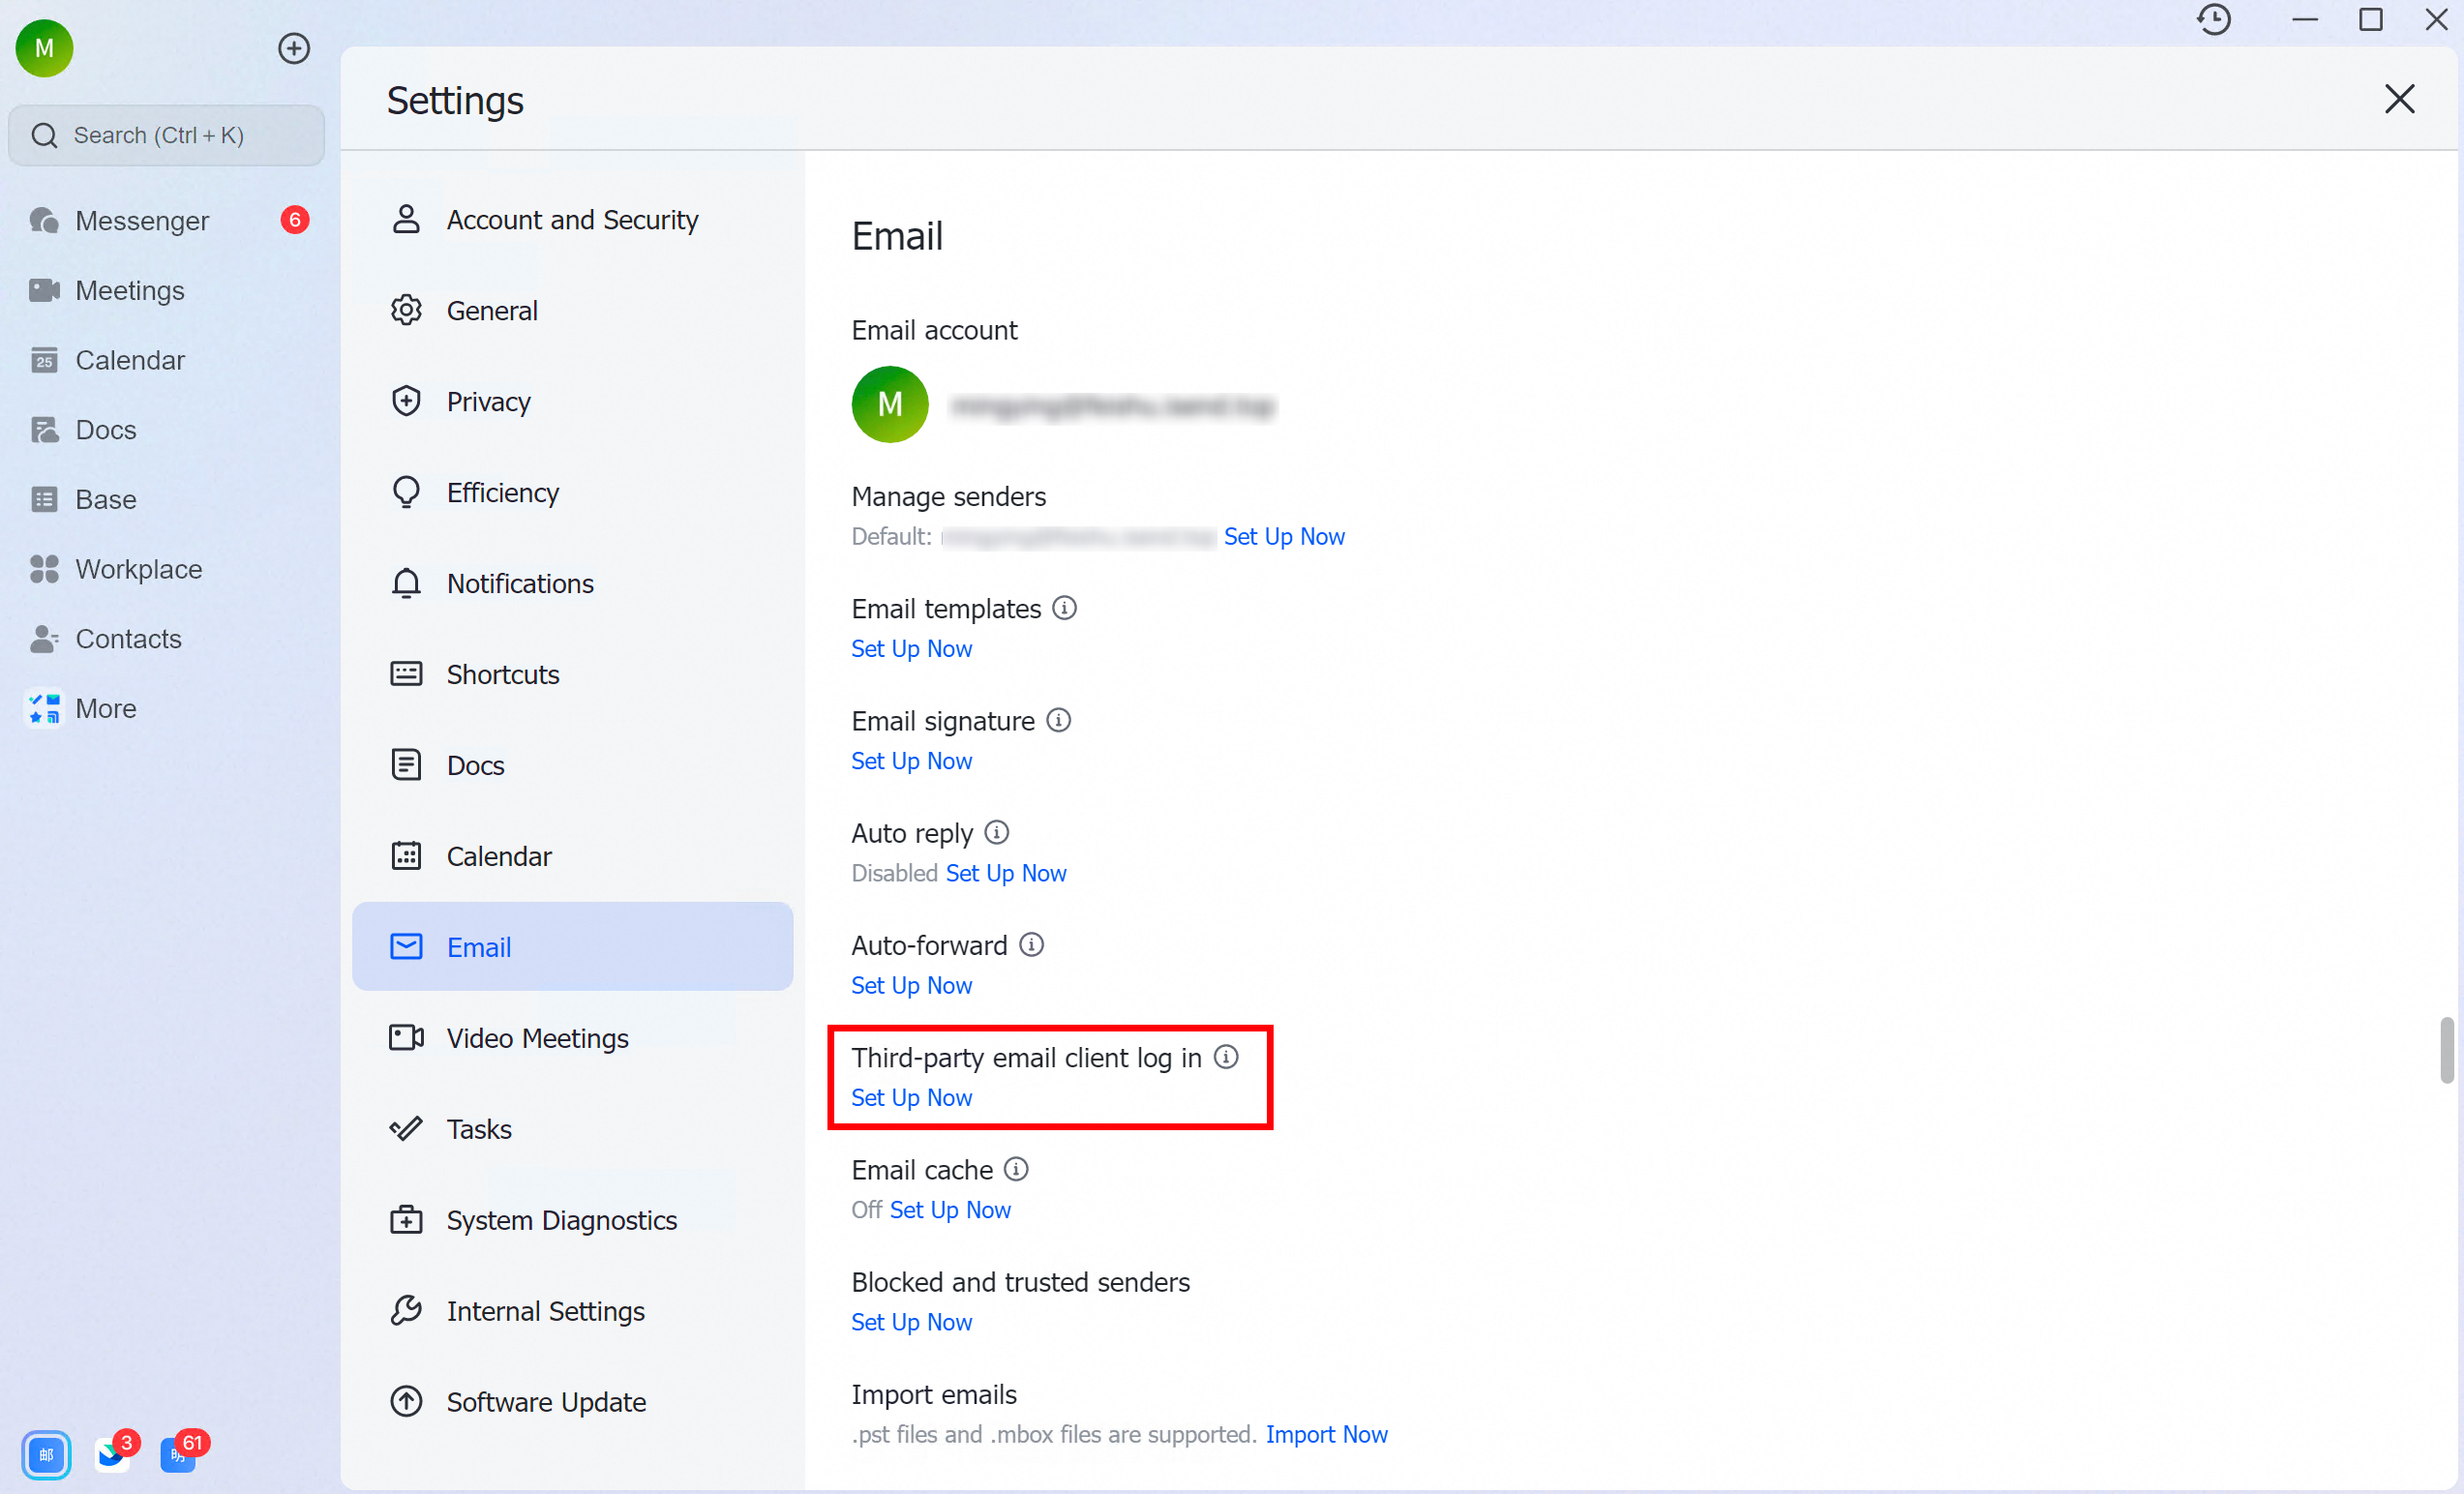
Choose your profile picture > Settings > Mail.
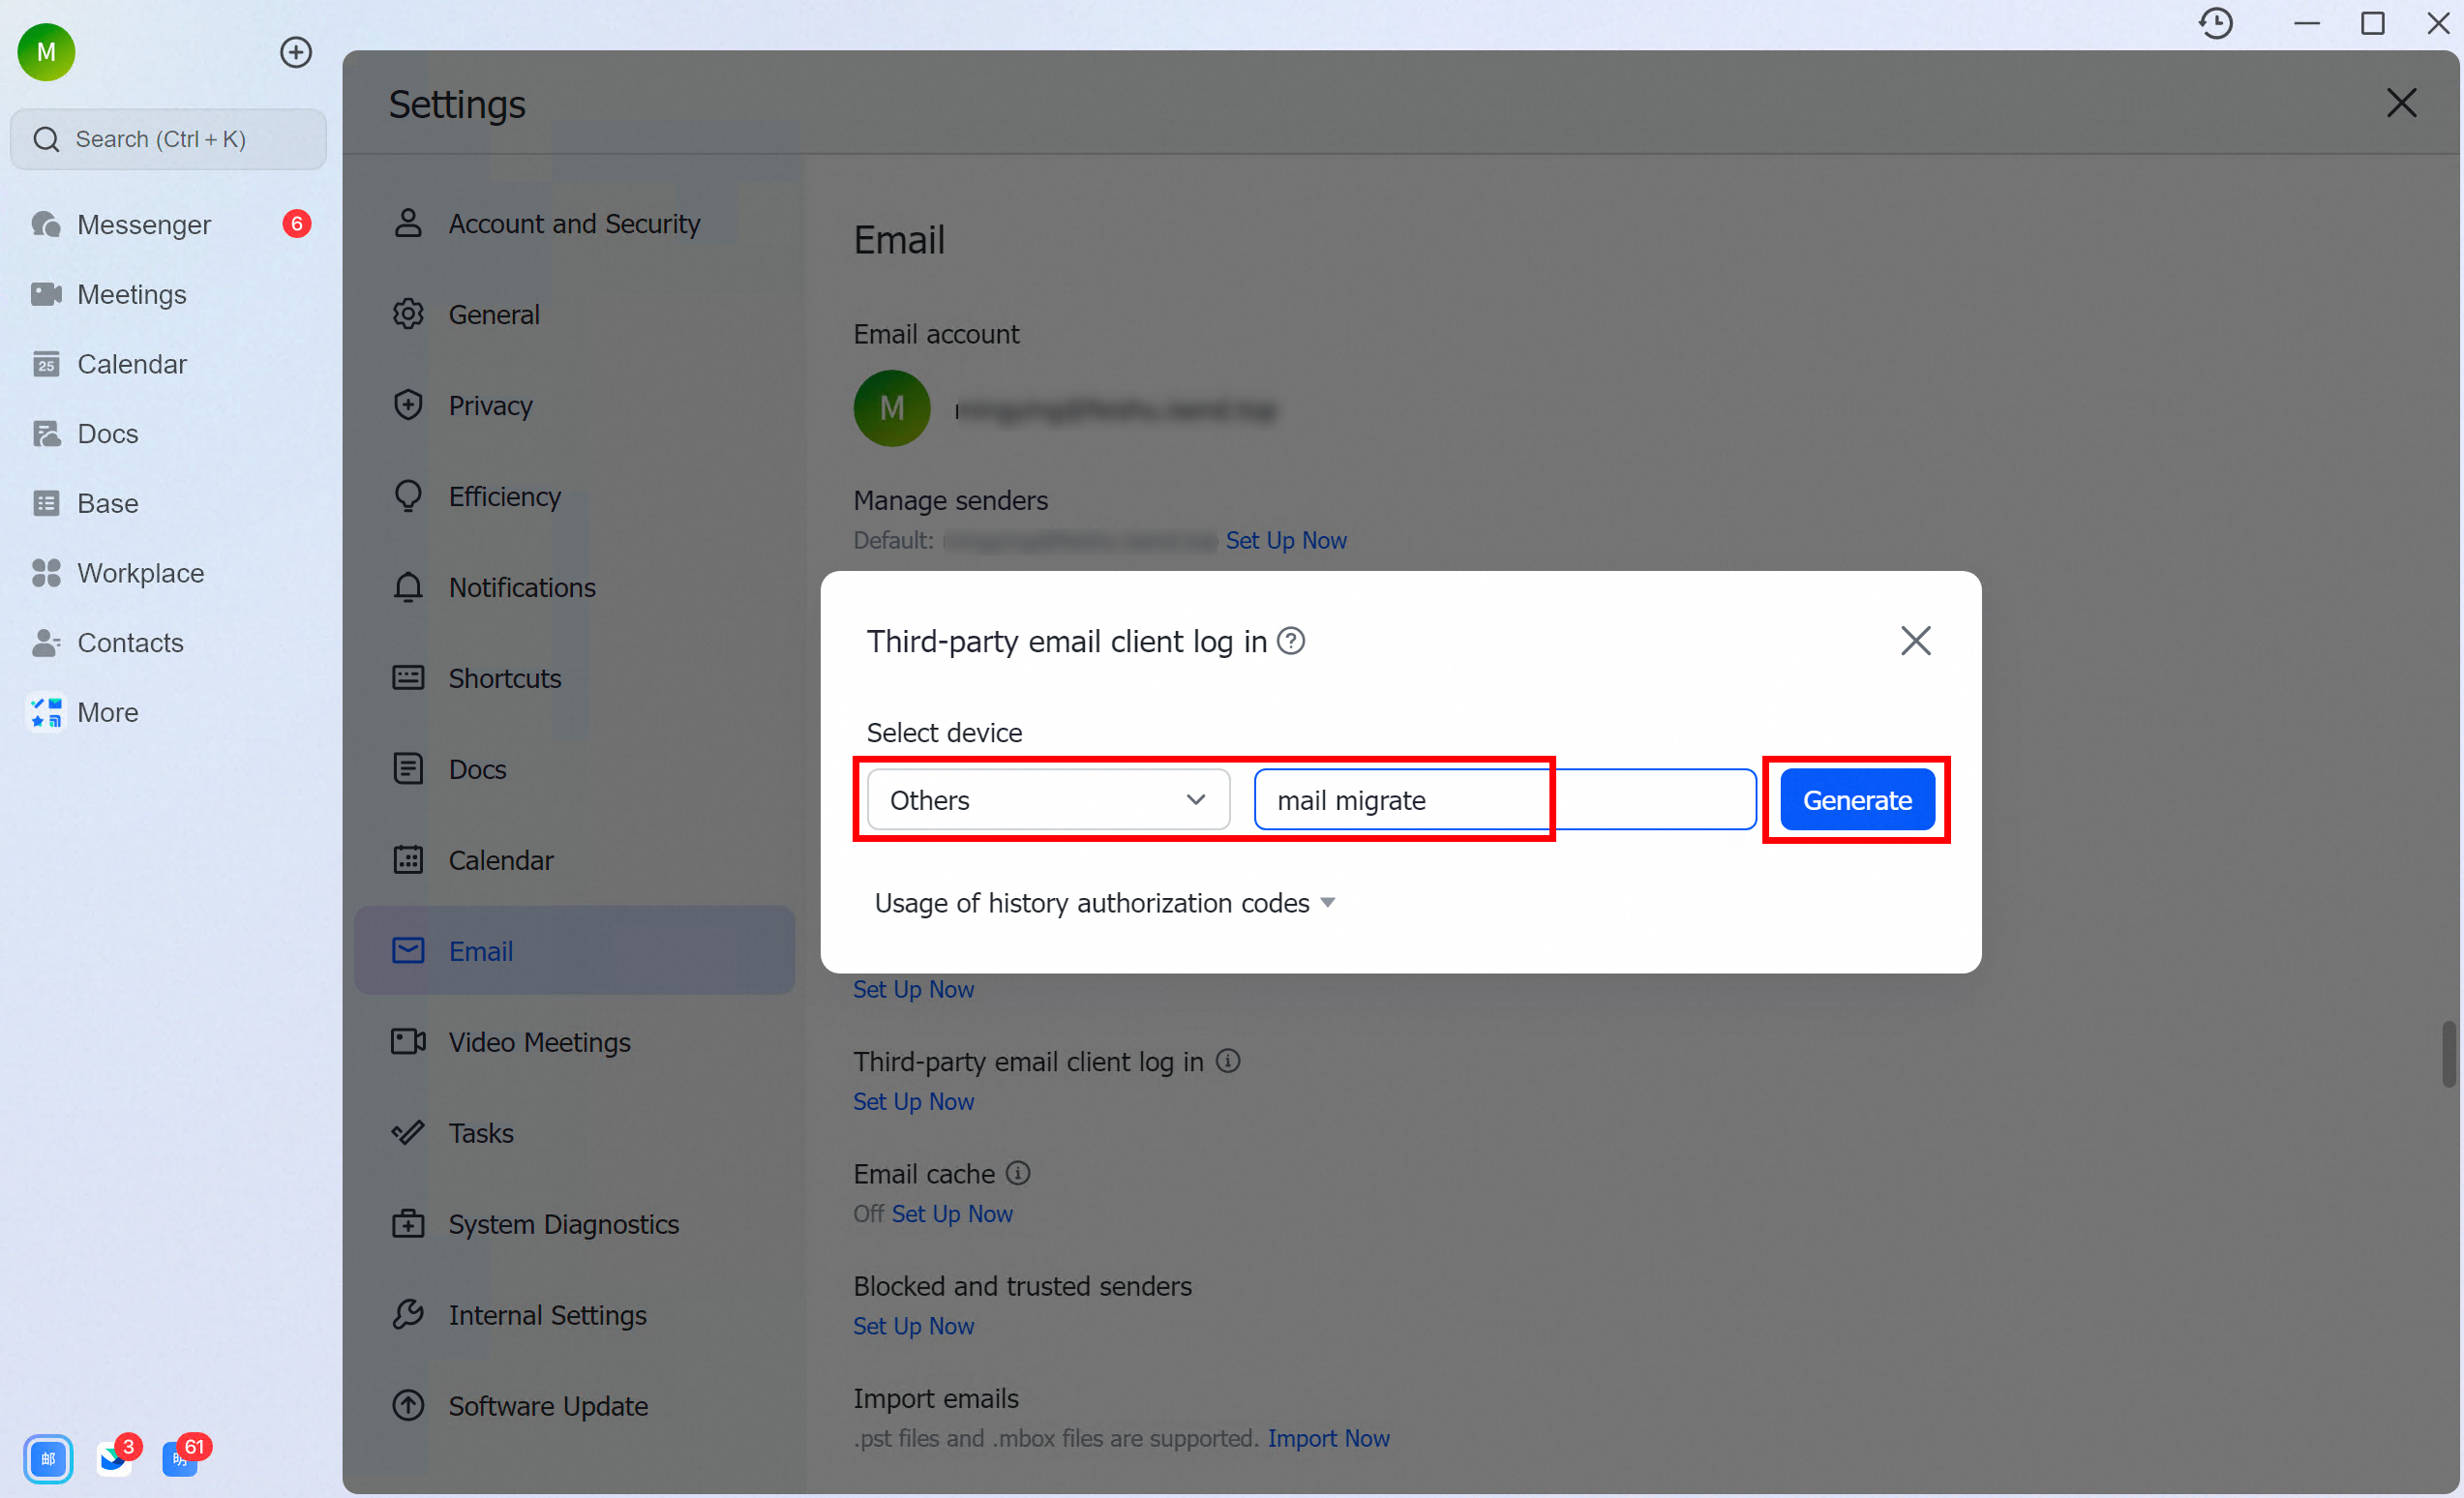
Click Third-party email client logon, and then click Set Now.
This setting is not available in the web client. Log on to the desktop client to perform this operation.
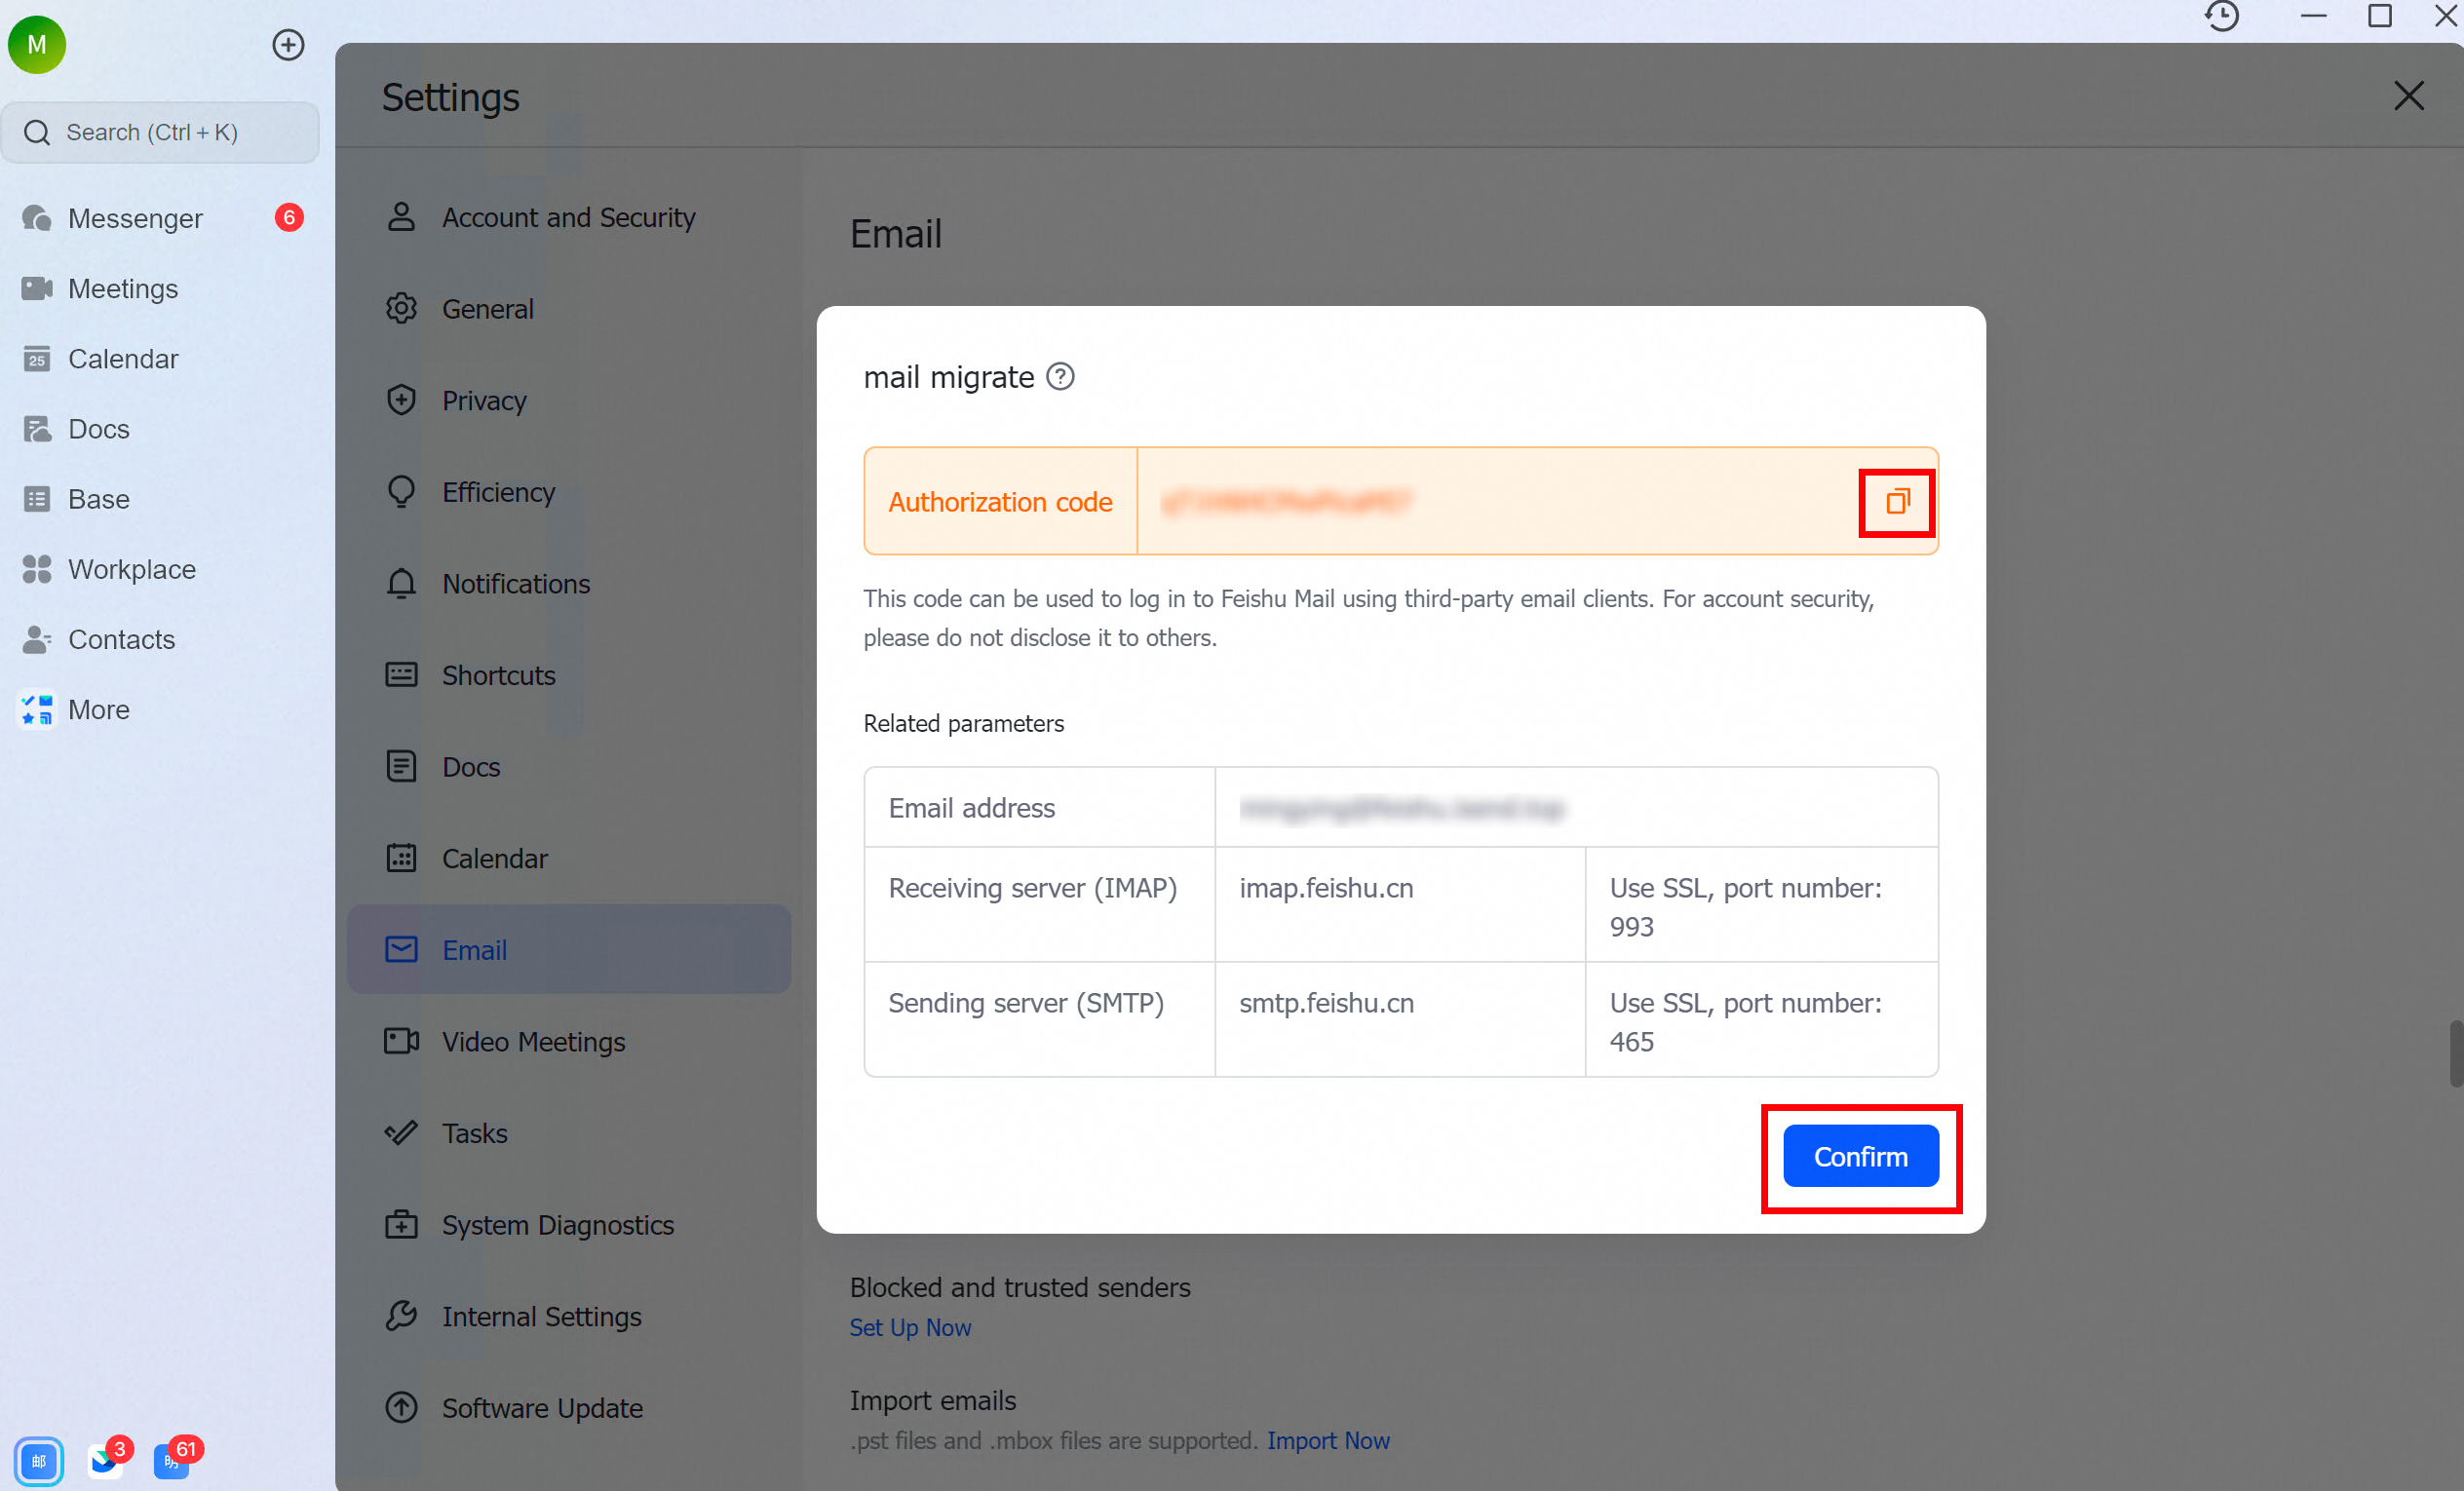
Save the generated password. Enter it as the Source System Email Password when you configure the source system parameters of the migration task.
The following figures show the Third-party email client logon setting in the Lark desktop client.
Start the migration in Alibaba Mail
After you complete the preceding preparations, start the migration in the Mail admin console: create a migration task, select a migration plan, and add the accounts to be migrated. Depending on the plan that you choose, employees enter their own source mailbox credentials to trigger their migration.
Create a migration task
Log on to the Mail admin console. In the left-side navigation pane, choose Mailbox Tools > Mailbox Migration, and then click Create Migration Task.
The following figure shows the mailbox migration page in the Mail admin console.
Configure source system parameters
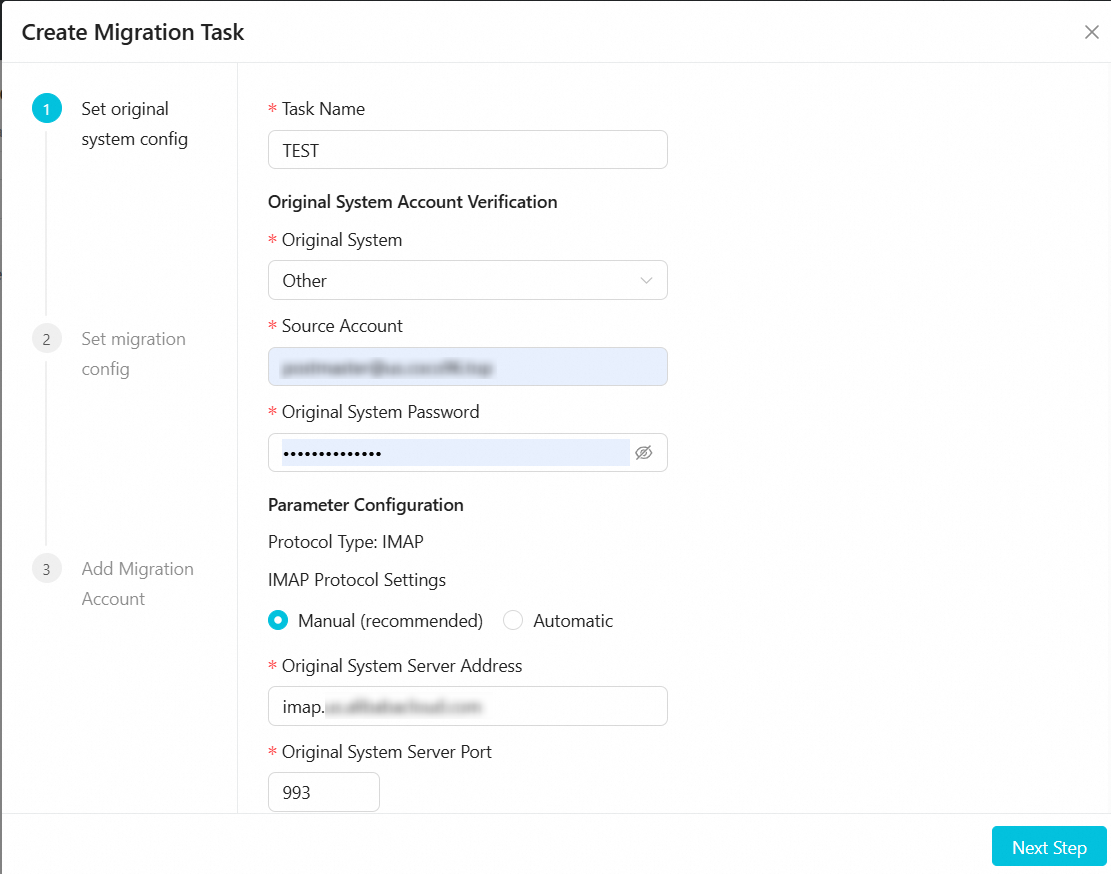
Enter a Task Name.
Select the Source System.
Enter the Source System Email Account, Source System Email Password, and Source System Server Address. For Lark Mail, enter the migration password that you generated in the Lark desktop client as the Source System Email Password.
(Recommended) Use the default settings for the other options.
Click Next.
The following figure shows the source system parameters of a migration task.
Configure migration settings
The following figure shows the migration settings of a migration task.

Under Folders to Migrate, select one of the following options:
All Folders: You can exclude specific folders from the migration.
Specific Folders: Select only the folders that you want to migrate.
Under Emails to Migrate, select All Emails or Emails in a specified date range.
Under Folder Location, select one of the following options:
Store Separately (unified storage mode, named by email address): A dedicated folder is created in the destination mailbox, named after the source email address.
Merge into System Folders (folder mapping mode): Source folders are automatically mapped to system folders (for example, Sent Items to Sent), and the structure of custom folders is preserved.
Under Migration Time Settings, select one of the following options:
Start Immediately: Data transfer begins within 2 hours.
Start at a scheduled time: Set a custom start time for the migration.
Click Next.
The following figures show the two Folder Location options.


Add migration accounts
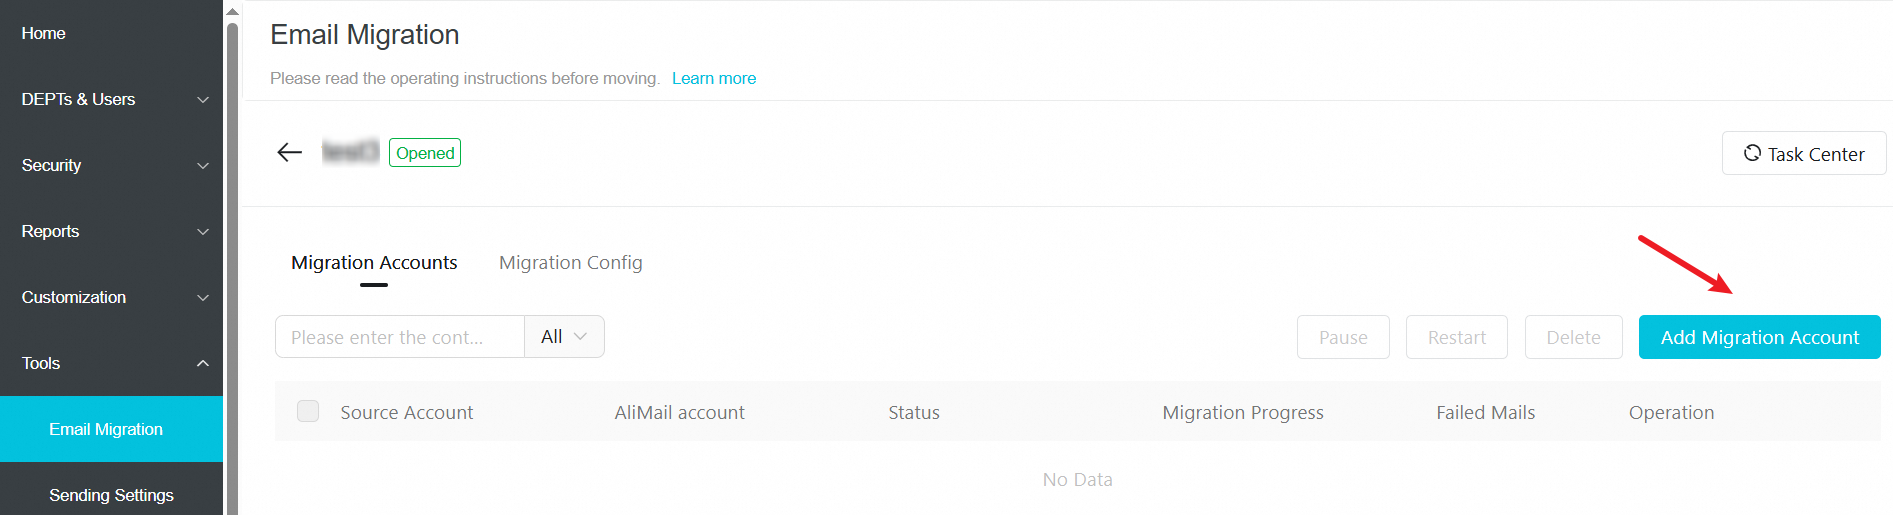
Click Add Migration Accounts, and then select one of the three migration plans that are described in Select a migration plan.
The following figures show the Add Migration Accounts entry point.
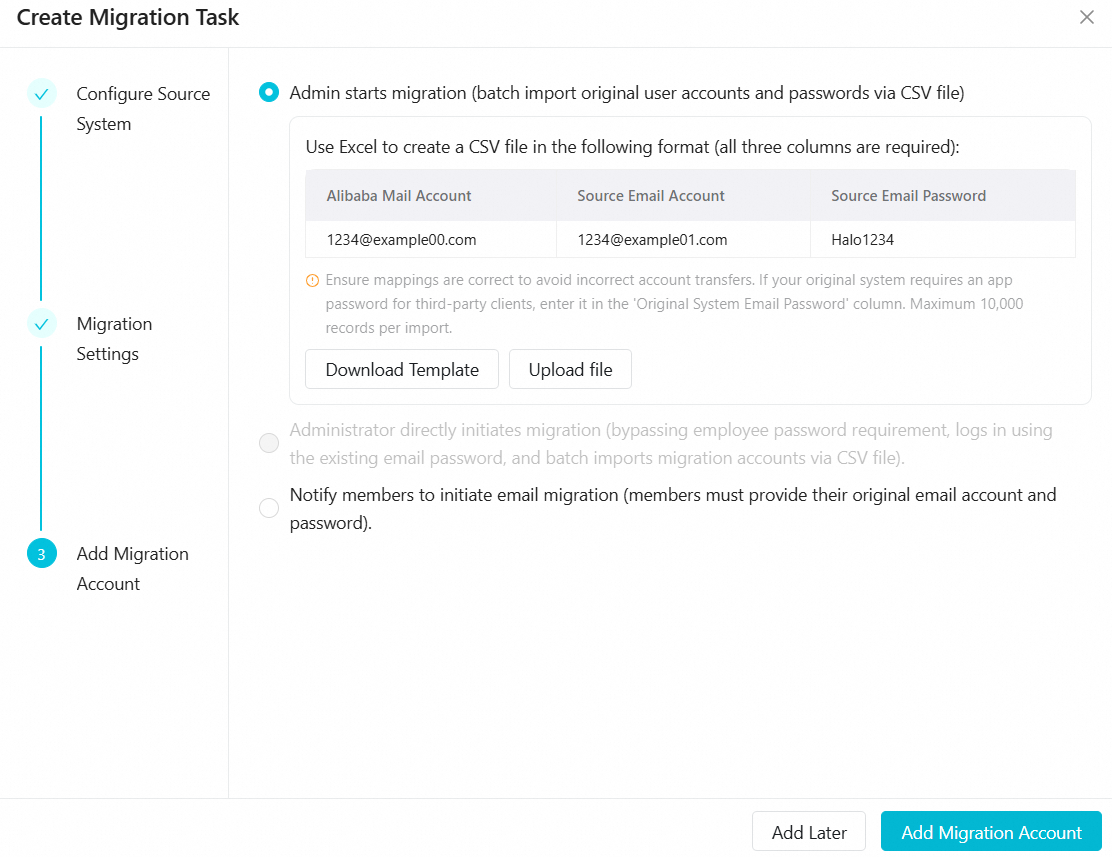
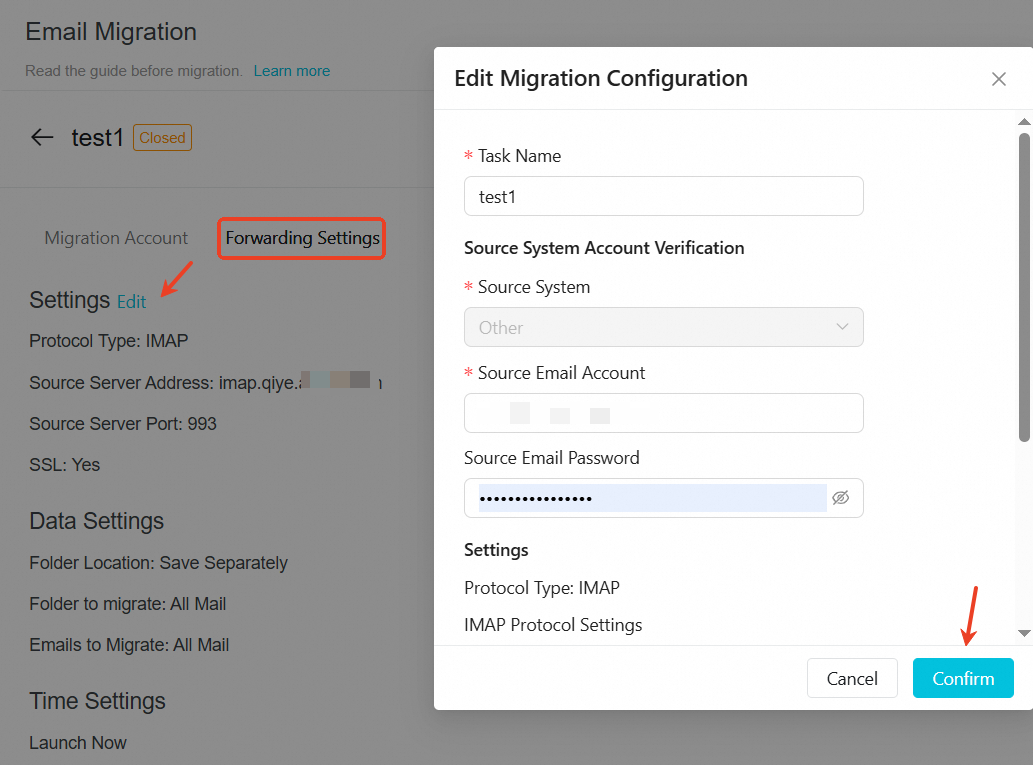
To change the migration parameters later, choose Migration Settings > Edit > Edit Migration Configuration, make your changes, and then click OK.
Select a migration plan
Alibaba Mail provides three migration plans. Choose a plan based on whether you have the source mailbox passwords and on how much of the migration you want employees to perform. The following table compares the three plans.
| Plan | When to choose | Account name requirement | Who enters the source credentials |
| Plan 1: Batch migration (with passwords) | You have the source mailbox passwords of all accounts to be migrated. | The source and destination account names can be different. Provide an accurate account mapping. | The administrator uploads the source accounts and passwords in a CSV file. |
| Plan 2: Batch migration (without passwords) | You have only a list of the accounts to be migrated. | The Alibaba Mail account name must be identical to the source account name. | Each employee logs on to Alibaba Mail with the source credentials, which triggers the migration. |
| Plan 3: Employee self-service migration | Employees keep their own passwords and schedule their own migration. | Each employee provides their own source mailbox account. | Each employee enters the source credentials on the mailbox migration page. |
The following figure shows the plan selection page.
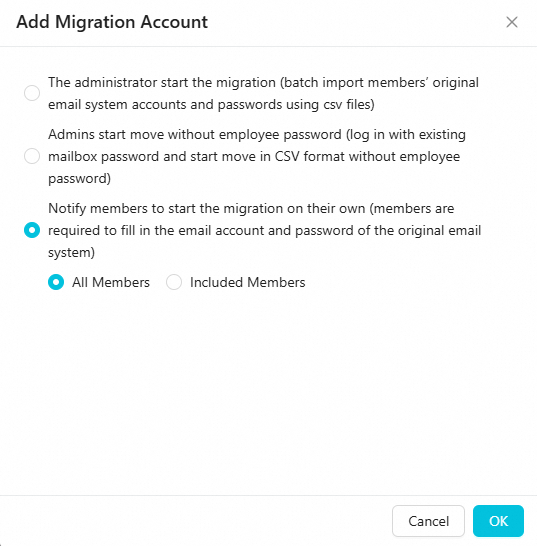
Sub-account matching rule: In plans where the administrator provides the account mapping, the destination mailbox account does not need to be identical to the source mailbox account. Based on the source account information that you provide, Alibaba Mail migrates data to the matching account that you have already created. To avoid changing the mailbox address after the migration, which could affect daily use, keep the same account prefix for the source and destination accounts. Plan 2 is the exception: it requires the Alibaba Mail account name to be identical to the source account name.
Plan 1: Batch migration (with passwords)
In password autofill mode, the administrator starts the migration directly by importing a CSV file that contains the source mailbox accounts and passwords.
Summary: The administrator provides the passwords, Alibaba Mail migrates the data in the background, and employees take no action.

Prepare a CSV file with the following three required columns:
| Alibaba Mail account | Source account | Source password |
| 1234@example00.com | 1234@example01.com | Halo1234 |
Use cases:
You have all employees' source mailbox passwords, application-specific passwords, or delegated access.
You want a migration that requires no action from employees.
The migration involves complex authentication, such as a Microsoft Exchange delegated account or third-party application passwords.
How it works: The administrator provides the source account and password in a CSV file. Alibaba Mail uses these credentials to fetch data directly from the source mailbox system in the background.
Roles and actions:
| Role | Actions | Key considerations |
| Administrator | 1. Create accounts: Batch-create employee accounts in the Mail admin console. 2. Prepare CSV file: Include three columns (Alibaba Mail account, source account, and source password). 3. Handle special cases: Enter application-specific passwords if required. For Microsoft Exchange, use the delegated format. 4. Upload and import: Upload the file in the Mail admin console to start the migration. | A single upload supports up to 10,000 entries; verify account mappings carefully to prevent data mismatch; ensure compliance with privacy and data protection policies. |
| Employee | No action required. | No logon or configuration is needed; no passwords need to be provided to anyone other than the administrator; wait for the migration to complete. |
Risk assessment: This mode involves the administrator handling employee passwords. Ensure that the procedure complies with your company's information security policies and legal requirements.
For migration from Microsoft Exchange with a delegated account (seeSet up a delegated account for Microsoft Exchange), use the following format in the migration file:
user2@example.com,superman@example.com/user1,passwordField descriptions:
user2@example.com: The Alibaba Mail account.superman@example.com/user1: The source mailbox in delegated account format, whereuser1is the source mailbox prefix and access is delegated tosuperman@example.com.password: The password ofsuperman@example.com.
Plan 2: Batch migration (without passwords)
In source password logon mode, the administrator imports a list of accounts, and each employee triggers their own migration by logging on to Alibaba Mail with their source mailbox password.
Summary: The administrator provides an account list. Employees log on with their source mailbox account and password, which automatically starts the migration.
Prepare a CSV file with only one column of data:
| Migration account |
| 1234@example00.com |
Use cases:
You do not have access to employee passwords and want to protect user privacy.
You want to start the migration in batches and minimize manual configuration for employees.
Employees can use their source credentials to log on to Alibaba Mail and agree not to change their source password during the migration.
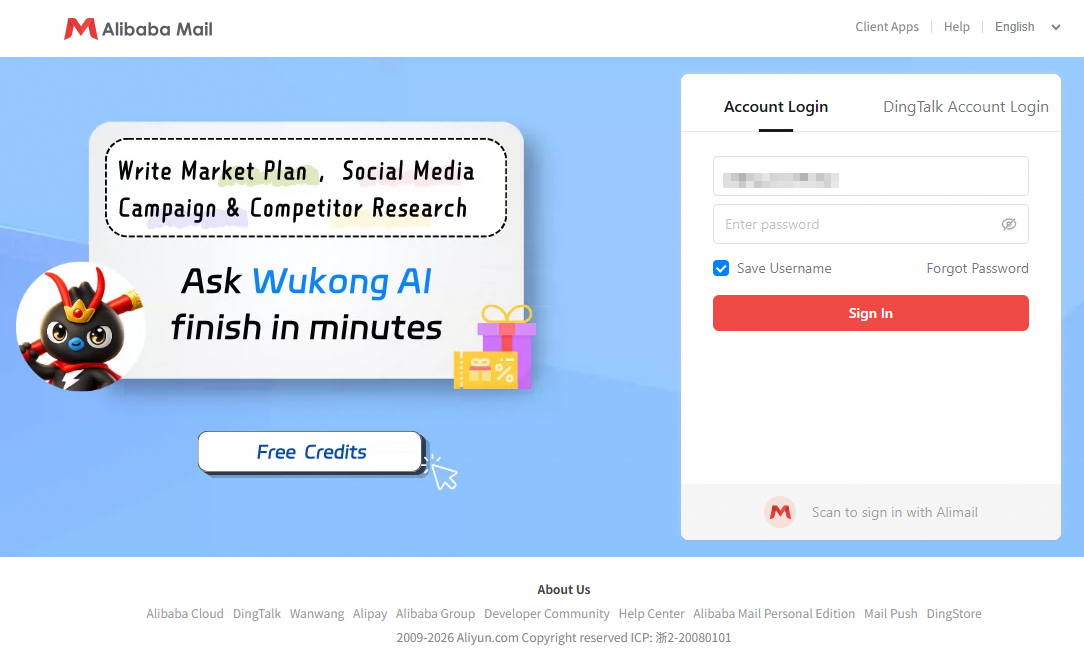
How it works: The administrator imports a list of the accounts to be migrated. When an employee logs on to Alibaba Mail for the first time, the employee must use the source mailbox account and password for authentication. A successful logon automatically triggers the migration.
Roles and actions:
| Role | Actions | Key considerations |
| Administrator | 1. Create accounts: When you create accounts in Alibaba Mail, the email address must be identical to the source email address. 2. Prepare CSV file: Include only one column (migration account, which is the newly created account). 3. Upload and import: Upload the file in the Mail admin console to enable domain-wide migration. 4. Notify employees: Inform employees that they must use their source credentials to log on. | A single upload supports up to 1,000 entries. |
| Employee | 1. Log on to the new mailbox: Use the source mailbox account and password to log on to the Alibaba Mail web client. 2. Trigger migration: The migration starts automatically after a successful logon. 3. (Optional) Change password: You can change the password of the new mailbox without affecting the migration. | Do not change the password in the source mailbox system during the migration. |
The following figure shows how an employee logs on to the Alibaba Mail web client with source mailbox credentials.
Risk assessment:
Allowed actions — After logging on to Alibaba Mail, employees can change the logon password of the new mailbox in the web client. This action does not affect the background migration.
Forbidden actions (high risk) — Do not change the password in the source mailbox system until the migration is complete. If a password change causes the migration to fail, the employee must choose Settings > View More Settings > Mailbox Settings > Mailbox Migration in Alibaba Mail and manually update the source password to resume the migration.
Plan 3: Employee self-service migration
In self-service mode, employees start their own migration by entering their source mailbox account and password on the mailbox migration page of Alibaba Mail.
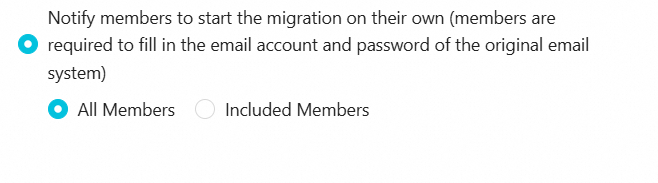
Summary: The administrator creates a migration task for all or selected members. Employees enter their own credentials to start the migration, which gives them control over the process.
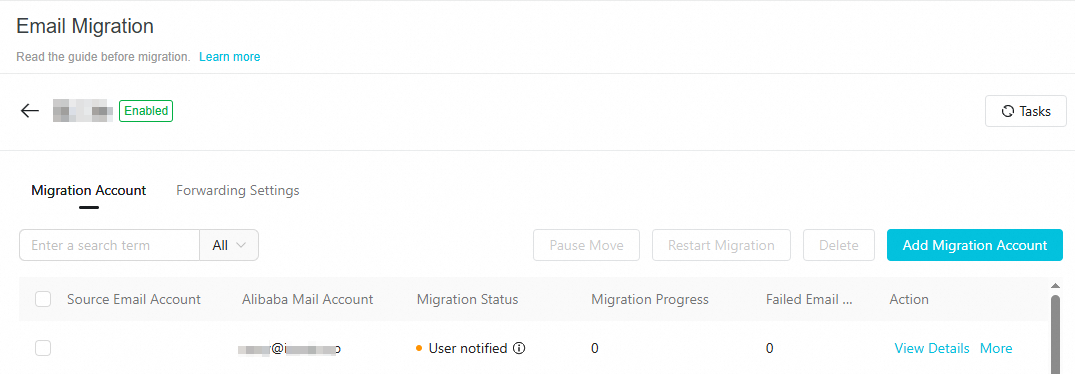
The following figures show the self-service migration configuration.

Use cases:
Employees manage their own passwords and prefer not to share them with the administrator.
Employees want to schedule their own migration time.
You prefer a decentralized approach that reduces the administrator's workload.
How it works: The administrator first creates the Alibaba Mail accounts and a migration task. After logging on, employees go to the settings page and enter their source account credentials to authorize the migration.
Roles and actions:
| Role | Actions | Key considerations |
| Administrator | 1. Create accounts: Batch-create employee accounts in the Mail admin console and distribute initial passwords. 2. Enable feature: Enable Domain Migration or Allow Members to Self-Service Migrate in the Mail admin console. 3. Notify and guide: Inform employees how to access the settings page to configure their migration. | No CSV file preparation is required; no account information needs to be collected. |
| Employee | 1. Log on to the new mailbox: Log on to the Alibaba Mail web client with the initial credentials provided by the administrator. 2. Go to settings: Click Go to Settings in the pop-up window, or choose Settings > View More Settings > Mailbox Settings > Mailbox Migration. 3. Enter information: Enter the source mailbox account and password to start the migration. | Ensure that the source password is entered correctly. |
Employees can monitor the migration progress on the Mailbox Migration page.