GPU sharing lets multiple pods share the computing resources of a single GPU, improving GPU utilization and reducing costs. Containers on the same GPU run in isolation from each other, so one container cannot exceed its allocated resources and affect other containers.
This topic describes how to enable GPU sharing in an ACK Edge cluster.
Feature support by node type
Cloud nodes and edge node pools support different GPU sharing capabilities. Choose your configuration path based on your node type and isolation requirements.
| Feature | Cloud nodes | Edge node pools |
|---|---|---|
| GPU sharing | Supported | Supported |
| GPU memory isolation | Supported | Not supported |
| Computing power isolation | Supported | Not supported |
Edge node pools support GPU sharing only. Memory and computing power isolation are not available for edge nodes. If your workloads require memory or computing power isolation, use cloud nodes.
Prerequisites
Before you begin, ensure that you have:
-
An ACK Edge cluster running Kubernetes 1.18 or later. For more information, see Create an ACK Edge cluster
-
The cloud-native AI suite activated. For more information, see Cloud-native AI suite overview and Billing of the cloud-native AI suite
-
The kubeconfig file of the ACK Edge cluster obtained and kubectl connected to the cluster. For more information, see Obtain the kubeconfig file and connect to the cluster
Usage notes
For GPU nodes managed in ACK clusters, follow these rules when requesting and using GPU resources.
Do not use any of the following methods to request GPU resources:
-
Running GPU-heavy applications directly on nodes
-
Using Docker, Podman, or nerdctl to create containers with GPU requests — for example,
docker run --gpus allordocker run -e NVIDIA_VISIBLE_DEVICES=all -
Adding
NVIDIA_VISIBLE_DEVICES=allorNVIDIA_VISIBLE_DEVICES=<GPU ID>to theenvsection of a pod YAML file -
Setting
NVIDIA_VISIBLE_DEVICES=allduring container image builds whenNVIDIA_VISIBLE_DEVICESis not specified in the pod YAML -
Adding
privileged: trueto thesecurityContextsection of a pod YAML file
These methods bypass the scheduler's device resource ledger. As a result, actual GPU resource allocation diverges from what the scheduler tracks, causing it to schedule additional pods to the same node. Applications then compete for the same GPU, and some may fail to start due to insufficient GPU resources. These methods may also trigger other unknown issues, such as those reported by the NVIDIA community.
Step 1: Install the GPU sharing component
The GPU sharing component (ack-ai-installer) is part of the cloud-native AI suite. Follow the steps for your current deployment state.
If the cloud-native AI suite is not deployed
-
Log on to the ACK console. In the left-side navigation pane, click Clusters.
-
On the Clusters page, find the cluster and click its name. In the left-side navigation pane, choose Applications > Cloud-native AI Suite.
-
On the Cloud-native AI Suite page, click Deploy.
-
On the Deploy Cloud-native AI Suite page, select Scheduling Policy Extension (Batch Task Scheduling, GPU Sharing, Topology-aware GPU Scheduling).
-
(Optional) Click Advanced next to the component. In the Parameters panel, modify the
policyparameter of cGPU and click OK. If you have no requirements for computing power sharing, use the defaultpolicy: 5. For details on supported policies, see Install and use cGPU on a Docker container.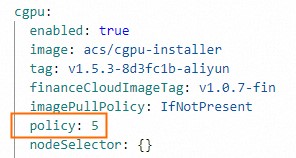
-
At the bottom of the page, click Deploy Cloud-native AI Suite.
After deployment completes, ack-ai-installer appears in the Deployed state on the Cloud-native AI Suite page.
If the cloud-native AI suite is already deployed
-
Log on to the ACK console. In the left-side navigation pane, click Clusters.
-
On the Clusters page, find the cluster and click its name. In the left-side navigation pane, choose Applications > Cloud-native AI Suite.
-
Find ack-ai-installer and click Deploy in the Actions column.
-
(Optional) In the Parameters panel, modify the
policyparameter of cGPU. If you have no requirements for computing power sharing, use the defaultpolicy: 5. For details on supported policies, see Install and use cGPU on a Docker container. -
Click OK.
After ack-ai-installer is installed, its state changes to Deployed.
Step 2: Create a GPU node pool
Cloud node pools
-
On the Clusters page, find the cluster and click its name. In the left-side navigation pane, choose Nodes > Node Pools.
-
In the upper-right corner of the Node Pools page, click Create Node Pool.
-
In the Create Node Pool dialog box, configure the parameters and click Confirm Order. The following table describes the key parameters. For other parameters, see Create and manage a node pool.
ImportantAfter adding the GPU sharing label to a node, do not use
kubectl label nodesor the label management feature in the ACK console to change the label value. Doing so can cause scheduling issues. Configure GPU sharing at the node pool level. For details, see Configure GPU scheduling policies for node pools and Issues that may occur if you change label values.Parameter Description Expected nodes The initial number of nodes. Set to 0to create an empty node pool.Node label Click the  icon, set Key to
 ack.node.gpu.schedule, and set Value tocgpu. This label enables GPU sharing with GPU memory isolation and computing power sharing — pods on the node request GPU memory only, and multiple pods can share the same GPU. For more information, see Labels for enabling GPU scheduling policies.
Edge node pools
-
On the Clusters page, find the cluster and click its name. In the left-side navigation pane, choose Nodes > Node Pools.
-
On the Node Pools page, click Create Node Pool.
-
In the Create Node Pool dialog box, configure the parameters and click Confirm Order. In the Node Labels section, click the
icon, set Key to ack.node.gpu.schedule, and set Value toshare. This label enables GPU sharing. For other parameters, see Edge node pool management. For more information about node labels, see Labels for enabling GPU scheduling policies.
Step 3: Add GPU-accelerated nodes
Cloud nodes
Skip this step if you already added GPU-accelerated nodes when creating the node pool.
Add ECS instances with the GPU-accelerated architecture to the cloud node pool. For more information, see Add existing ECS instances or Create and manage a node pool.
Edge nodes
For more information, see Add a GPU-accelerated node.
Step 4: Install the GPU inspection tool (cloud nodes only)
Use kubectl-inspect-cgpu to inspect GPU memory allocation across the cluster. This step applies to cloud nodes only.
-
Download kubectl-inspect-cgpu to a directory in your PATH. This example uses
/usr/local/bin/.-
Linux: ``
bash wget http://aliacs-k8s-cn-beijing.oss-cn-beijing.aliyuncs.com/gpushare/kubectl-inspect-cgpu-linux -O /usr/local/bin/kubectl-inspect-cgpu`` -
macOS: ``
bash wget http://aliacs-k8s-cn-beijing.oss-cn-beijing.aliyuncs.com/gpushare/kubectl-inspect-cgpu-darwin -O /usr/local/bin/kubectl-inspect-cgpu``
-
-
Grant execute permissions:
chmod +x /usr/local/bin/kubectl-inspect-cgpu -
Query GPU usage across the cluster:
kubectl inspect cgpuExpected output:
NAME                       IPADDRESS      GPU0(Allocated/Total)  GPU Memory(GiB)
cn-shanghai.192.168.6.104  192.168.6.104  0/15                   0/15
----------------------------------------------------------------------
Allocated/Total GPU Memory In Cluster:
0/15 (0%)
To view per-pod GPU allocation details, run
kubectl inspect cgpu -d.
Step 5: Deploy a sample workload
Cloud node pools
-
Check the current GPU memory allocation:
kubectl inspect cgpuExpected output:
NAME IPADDRESS GPU0(Allocated/Total) GPU1(Allocated/Total) GPU Memory(GiB) cn-shanghai.192.168.0.4 192.168.0.4 0/7 0/7 0/14 --------------------------------------------------------------------- Allocated/Total GPU Memory In Cluster: 0/14 (0%) -
Deploy a sample Job that requests 3 GiB of GPU memory. Replace
npxxxxxxxxxxxxxxwith your node pool ID.apiVersion: batch/v1 kind: Job metadata: name: gpu-share-sample spec: parallelism: 1 template: metadata: labels: app: gpu-share-sample spec: nodeSelector: alibabacloud.com/nodepool-id: npxxxxxxxxxxxxxx # Replace with your node pool ID containers: - name: gpu-share-sample image: registry.cn-hangzhou.aliyuncs.com/ai-samples/gpushare-sample:tensorflow-1.5 command: - python - tensorflow-sample-code/tfjob/docker/mnist/main.py - --max_steps=100000 - --data_dir=tensorflow-sample-code/data resources: limits: aliyun.com/gpu-mem: 3 # GPU memory to request, in GiB workingDir: /root restartPolicy: NeverThe
aliyun.com/gpu-memfield specifies the amount of GPU memory in GiB. For example,3requests 3 GiB of GPU memory from the shared GPU.
Edge node pools
Deploy a sample Job that requests 4 GiB of GPU memory. Replace npxxxxxxxxxxxxxx with your edge node pool ID.
apiVersion: batch/v1
kind: Job
metadata:
  name: tensorflow-mnist-share
spec:
  parallelism: 1
  template:
    metadata:
      labels:
        app: tensorflow-mnist-share
    spec:
      nodeSelector:
        alibabacloud.com/nodepool-id: npxxxxxxxxxxxxxx # Replace with your edge node pool ID
      containers:
      - name: tensorflow-mnist-share
        image: registry.cn-beijing.aliyuncs.com/ai-samples/gpushare-sample:tensorflow-1.5
        command:
        - python
        - tensorflow-sample-code/tfjob/docker/mnist/main.py
        - --max_steps=100000
        - --data_dir=tensorflow-sample-code/data
        resources:
          limits:
            aliyun.com/gpu-mem: 4 # GPU memory to request, in GiB
        workingDir: /root
      restartPolicy: Never
Step 6: Verify the results
Cloud node pools
-
Log on to the control plane.
-
Print the last log line of the pod to confirm GPU memory isolation is active:
kubectl logs gpu-share-sample --tail=1Expected output:
2023-08-07 09:08:13.931003: I tensorflow/core/common_runtime/gpu/gpu_device.cc:1326] Created TensorFlow device (/job:localhost/replica:0/task:0/device:GPU:0 with 2832 MB memory) -> physical GPU (device: 0, name: Tesla T4, pci bus id: 0000:00:07.0, compute capability: 7.5)The output indicates that 2,832 MiB of GPU memory is requested by the container.
-
Run nvidia-smi inside the container to view the memory visible to the container:
-
`3043MiB / 3231MiB` — the container sees only 3,231 MiB (approximately 3 GiB), not the full GPU memory. This confirms GPU memory isolation is working.
kubectl exec -it gpu-share-sample nvidia-smiExpected output:
Mon Aug 7 08:52:18 2023
+-----------------------------------------------------------------------------+
| NVIDIA-SMI 418.87.01    Driver Version: 418.87.01    CUDA Version: 10.1     |
|-------------------------------+----------------------+----------------------+
| GPU  Name        Persistence-M| Bus-Id        Disp.A | Volatile Uncorr. ECC |
| Fan  Temp  Perf  Pwr:Usage/Cap|         Memory-Usage | GPU-Util  Compute M. |
|===============================+======================+======================|
|   0  Tesla T4            On   | 00000000:00:07.0 Off |                    0 |
| N/A   41C    P0    26W /  70W |   3043MiB /  3231MiB |      0%      Default |
+-------------------------------+----------------------+----------------------+

+-----------------------------------------------------------------------------+
| Processes:                                                       GPU Memory |
|  GPU       PID   Type   Process name                             Usage      |
|=============================================================================|
+-----------------------------------------------------------------------------+
Key considerations:
-
-
Run nvidia-smi on the node to view total GPU memory:
-
`15079MiB` — total GPU memory on the node (the full Tesla T4)
-
`3053MiB / 15079MiB` — the container occupies 3,053 MiB out of 15,079 MiB total, leaving the remaining memory available for other pods to share the same GPU
nvidia-smiExpected output:
Mon Aug  7 09:18:26 2023
+-----------------------------------------------------------------------------+
| NVIDIA-SMI 418.87.01    Driver Version: 418.87.01    CUDA Version: 10.1     |
|-------------------------------+----------------------+----------------------+
| GPU  Name        Persistence-M| Bus-Id        Disp.A | Volatile Uncorr. ECC |
| Fan  Temp  Perf  Pwr:Usage/Cap|         Memory-Usage | GPU-Util  Compute M. |
|===============================+======================+======================|
|   0  Tesla T4            On   | 00000000:00:07.0 Off |                    0 |
| N/A   40C    P0    26W /  70W |   3053MiB / 15079MiB |      0%      Default |
+-------------------------------+----------------------+----------------------+

+-----------------------------------------------------------------------------+
| Processes:                                                       GPU Memory |
|  GPU       PID   Type   Process name                             Usage      |
|=============================================================================|
|    0      8796      C   python3                                     3043MiB |
+-----------------------------------------------------------------------------+
Key considerations:
-
Edge node pools
-
On the Clusters page, find the cluster and click its name. In the left-side navigation pane, choose Workloads > Pods.
-
In the Actions column for your pod (for example, `tensorflow-mnist-multigpu-*`), click Terminal** and run:
-
`16384MiB` — the pod sees the full GPU memory (V100 SXM2, 16 GiB). Edge node pools support GPU sharing but not GPU memory isolation, so the pod's view is not restricted to the 4 GiB it requested.
-
The pod's actual GPU memory usage is governed by environment variables set automatically by the GPU sharing component: ``
ALIYUN_COM_GPU_MEM_CONTAINER=4 # GPU memory the pod is allocated (GiB) ALIYUN_COM_GPU_MEM_DEV=16 # Total memory of the physical GPU (GiB)`` -
The ratio of allocated to total GPU memory is:
4 / 16 = 0.25(25%)
nvidia-smiExpected output:
Wed Jun 14 06:45:56 2023
+-----------------------------------------------------------------------------+
| NVIDIA-SMI 515.105.01   Driver Version: 515.105.01   CUDA Version: 11.7     |
|-------------------------------+----------------------+----------------------+
| GPU  Name        Persistence-M| Bus-Id        Disp.A | Volatile Uncorr. ECC |
| Fan  Temp  Perf  Pwr:Usage/Cap|         Memory-Usage | GPU-Util  Compute M. |
|                               |                      |               MIG M. |
|===============================+======================+======================|
|   0  Tesla V100-SXM2...  On   | 00000000:00:09.0 Off |                    0 |
| N/A   35C    P0    59W / 300W |    334MiB / 16384MiB |      0%      Default |
|                               |                      |                  N/A |
+-------------------------------+----------------------+----------------------+

+-----------------------------------------------------------------------------+
| Processes:                                                                  |
|  GPU   GI   CI        PID   Type   Process name                  GPU Memory |
|        ID   ID                                                   Usage      |
|=============================================================================|
+-----------------------------------------------------------------------------+
Key considerations:
-
What's next
-
GPU sharing overview — learn about the underlying cGPU mechanism
-
Install the GPU sharing component — update ack-ai-installer
-
Disable the memory isolation feature of cGPU — run a workload without GPU memory isolation on cloud nodes
-
Advanced capabilities — topology-aware scheduling and other advanced GPU sharing features