AI-assisted processing integrates large language model (LLM) inference directly into the DataWorks Data Integration pipeline. Instead of moving data as-is, the pipeline calls AI models in real time to analyze, enrich, or transform each record as it travels from the source to the destination—unlocking value from unstructured text without writing any AI invocation code.
This feature is designed for enterprise users who need to perform advanced analysis and processing on data during data synchronization. It is especially useful for companies that want to use AI to improve data quality and extract value from data.
Supported NLP tasks
Task | What it does |
Sentiment analysis | Classifies the sentiment of text |
Summary generation | Condenses long documents into key points |
Keyword extraction | Pulls out the most relevant terms and phrases |
Text translation | Converts text from one language to another |
Use cases
Industry | How AI processing helps |
Customer service / E-commerce | Analyze sentiment in user comments and support tickets; extract core issues and key feedback points |
Compliance / Legal / Scientific research | Generate summaries and extract key information from policy documents, legal contracts, and research papers during sync |
Manufacturing / Supply chain / Healthcare | Analyze device logs, supply chain feedback, and doctor-patient records to surface threat alerts and service quality signals |
Cross-language collaboration | Translate social media comments, news articles, or business documents into a single language for centralized analysis |
Prerequisites
Before you begin, ensure that you have:
A workspace using Data Studio (new version)
A large model service configured from one of the supported providers:
Alibaba Cloud DataWorks model service — Deploy a model and start the model service in Model Service Management
Alibaba Cloud Model Studio — Activate Alibaba Cloud Model Studio and obtain an API key
PAI Model Gallery — Activate Platform for AI (PAI) and obtain a token for the model service
Data source information configured manually or as existing data sources for the offline sync task
A resource group attached to the workspace with connectivity to the data source
Billing
In addition to DataWorks subscription fees and resource group fees, AI-assisted processing incurs model inference fees.
Example: translate customer feedback during a Hologres-to-Hologres sync
This example walks through configuring AI-assisted processing in an offline sync task that copies data from one Hologres table to another. The task translates each value in the feedback_info column into English and writes the result to the destination table.
What the AI processing does in this example:
Source field | Processing description | Output field |
|
|
|
Step 2: Create an offline sync task
Go to the Workspaces page in the DataWorks console. In the top navigation bar, select a region. Find the target workspace and choose Shortcuts > Data Studio in the Actions column.
In the left navigation pane, click
 to open Data Studio. To the right of Workspace Directories, click
  and choose Create Node > Data Integration > Batch Synchronization. The New Node dialog box opens.
Set the Path, Data Source and Destination, and Name for the node, then click OK.
Step 3: Configure the sync task
After the node is created, the task configuration page opens. Configure each section in order.
Data source
Type — Set during node creation and cannot be changed. To use a different data source type, create a new node.
Data Source — Select an existing data source from the drop-down list, or click Add Data Source to create one.
Runtime resource
Select a Resource Group for the sync task. For a serverless resource group, specify the number of CUs in the Resource Usage(CU) field.
After selecting a resource group, Data Integration checks connectivity to the source and destination automatically. Click Connectivity Check to run the check manually.

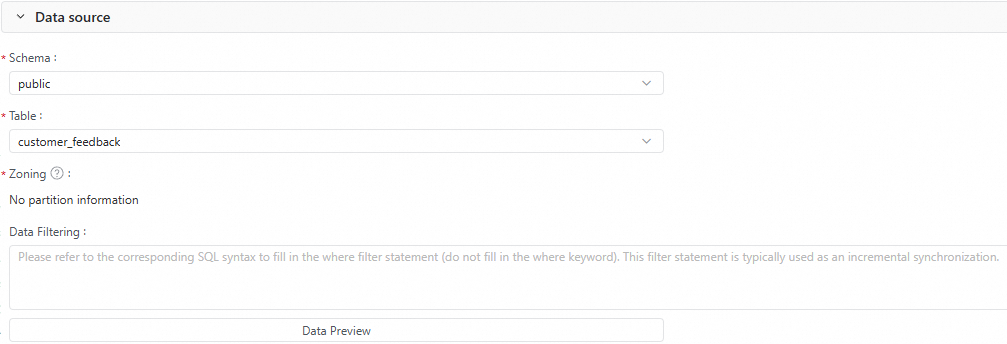
Source
Configure the source table settings: Schema, Table, Partition, and Data Filtering conditions. Click Data Preview to preview the records that will be synced.
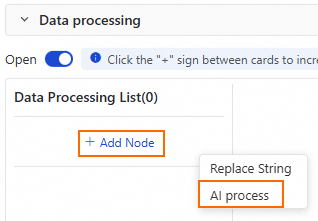
Data processing
In the data processing section, toggle Enable to turn on data processing. This requires additional computing resources.
Click Add Node and select AI Process.
Configure the AI Process node. The key parameters are:
Parameter
Description
Model Provider
Select the provider: DataWorks Model Service, Aliyun Bailian, or PAI Model Gallery
Model Endpoint
Applies when Model Provider is PAI Model Gallery. Enter the model invocation endpoint. To get the endpoint, see Test service invocation
Model Name
The model used for intelligent data processing. Select one from the list
API Key
The credential to access the model. For Alibaba Cloud Model Studio, see Obtain a Model Studio API key. For PAI Model Gallery, go to the deployed EAS task, start online debugging, and use the access token as the API key
Processing Description
A natural language instruction describing how to process the source field. Reference field names using the
#{column_name}format. For this example, enterTranslate '#{feedback_info}' into EnglishOutput Field
The field where the processed result is stored. If the field does not exist, it is created automatically. For this example, enter
feedback_processedClick Data Output Preview in the upper-right corner of the data processing section to preview the processed output.
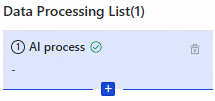
(Optional) Add more processing nodes. Multiple data processing nodes execute sequentially.
Destination
Configure the destination table: Schema, Table, and Partition.
Click Generate Target Table Schema to generate the schema automatically.
Select an existing table if one already exists.
Set the Write Mode and Write Conflict Strategy.
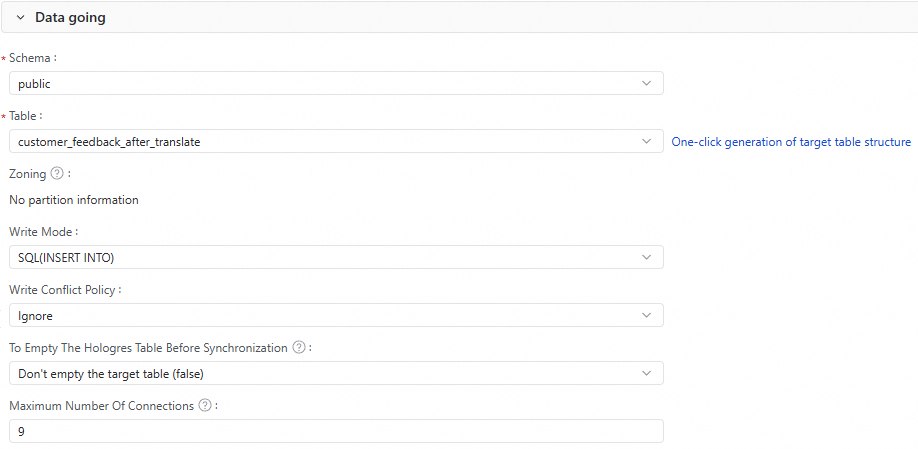
Configure whether to delete existing data in the Hologres table before the sync.
(Optional) Set Maximum Connections.
Maximum Connections applies only when Write Mode is
SQL(INSERT INTO). A single task can use up to nine connections. Make sure the Hologres instance has enough idle connections before starting the task.
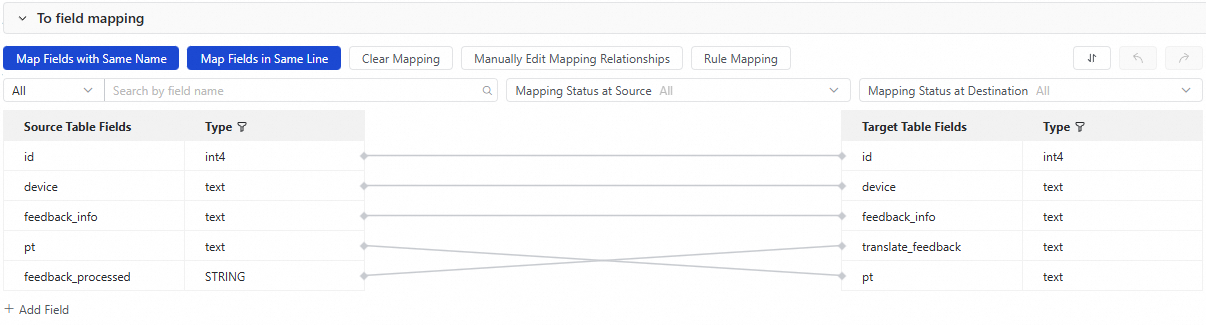
Destination field mapping
After configuring the source, data processing, and destination, the field mapping between the source and destination tables is shown. Fields are mapped by name and position by default.
For this example, in addition to the default mapping for id, device, feedback_info, and pt, manually map feedback_processed (the AI output field from the source) to translate_feedback in the destination table.
Step 4: Test the task
In the right panel, click Run Configuration. Set the Resource Group and any Script Parameters for this test run.
In the toolbar, click Save and then Run. After the task finishes, verify the result is successful and check the destination table to confirm the data is correct.
Step 5: Configure scheduling
To run the sync task on a schedule, set the Scheduling Policies in the Scheduling section on the right side of the page and configure the node scheduling properties.
Step 6: Publish the node
Click the Publish icon in the toolbar to start the publishing flow. This publishes the task to the production environment. Periodic scheduling takes effect only after the node is published.
What's next
After the node is published, you can backfill historical data or monitor and manage the task in Operation Center.
Backfill Data — Backfills data for the current node. For more advanced backfill workflows, use Operation Center. See Run a data backfill task and view the data backfill instance (New).
Perform O&M — After publishing, the task is automatically managed by Operation Center. View the running status or manually trigger execution. See Operation Center.