Data Transmission Service (DTS) provides an easy-to-use data synchronization feature. To configure a data synchronization task, you only need to perform simple operations in the DTS console.
If you use the data synchronization feature for the first time, read the topic Manage a data synchronization task to learn how to create, monitor, and manage a data synchronization task.
Precautions
This topic provides a general procedure for configuring a data synchronization task. The procedure varies with the data sources. For more information about how to configure data synchronization tasks for specific data sources, see Overview of data synchronization scenarios.
Before you begin
If the source database is a self-managed MySQL database or runs on a PolarDB for MySQL cluster, you must enable the binary logging feature for the database. For more information, see Enable binary logging and Create an account for a self-managed MySQL database and configure binary logging.
Procedure
Purchase a data synchronization instance based on the database type and region of the source and destination instances. For more information, see Purchase a DTS instance.
Log on to the DTS console.
NoteIf you are redirected to the Data Management (DMS) console, you can click the
 icon in the
  to go to the previous version of the DTS console.
In the left-side navigation pane, click Data Synchronization.
At the top of the Synchronization Tasks page, select the region where the data synchronization instance resides.
Find the data synchronization instance and click Configure Synchronization Channel in the Actions column.
Configure the source and destination instances.
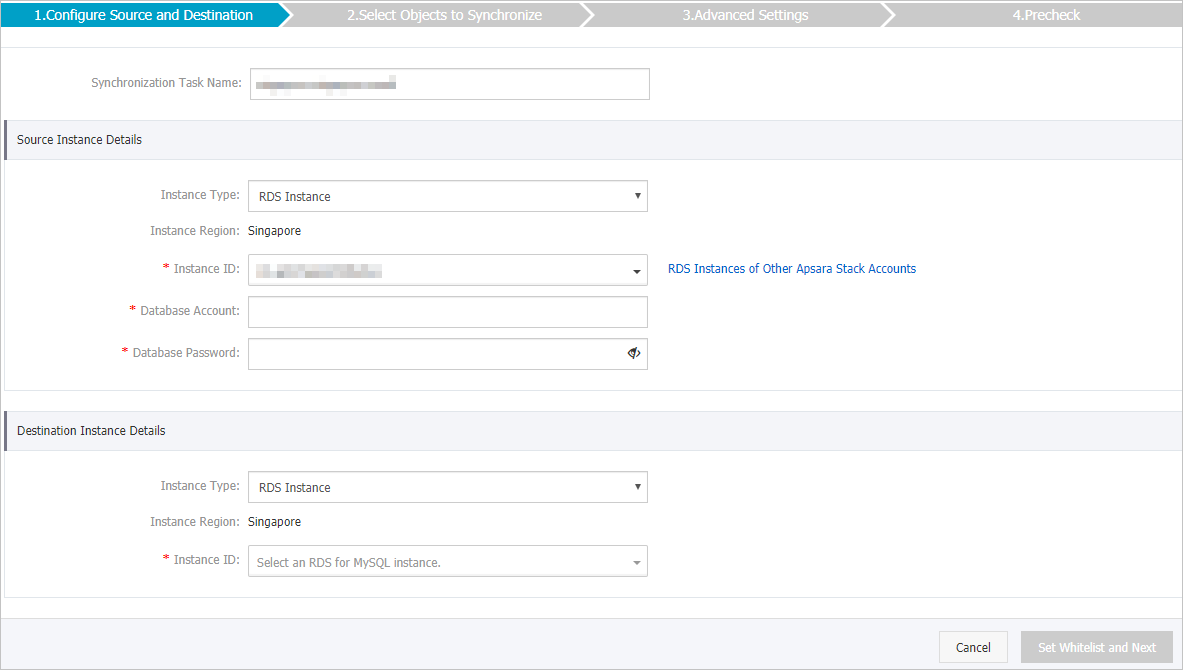
In the lower-right corner of the page, click Set Whitelist and Next.
NoteIf the source instance or destination instance is an Alibaba Cloud database instance, DTS automatically adds the CIDR blocks of DTS servers to the whitelist of the database instance. This ensures that DTS servers can connect to the database instance.
Select the synchronization policy and the objects to be synchronized. Click Next.
Parameter/Setting
Description
Select the objects to be synchronized
Select one or more objects from the Available section and click the
 icon to add the objects to the Selected section.
 You can select tables or databases as the objects to be synchronized.
NoteIf you select a database as the object to be synchronized, all schema changes in the database are synchronized to the destination database.
By default, after an object is synchronized to the destination database, the name of the object remains unchanged. You can use the object name mapping feature to rename the objects that are synchronized to the destination instance. For more information, see Rename an object to be synchronized.
Rename Databases and Tables
You can use the object name mapping feature to rename the objects that are synchronized to the destination instance. For more information, see Object name mapping.
Replicate Temporary Tables When DMS Performs DDL Operations
If you use DMS to perform online DDL operations on the source database, you can specify whether to synchronize temporary tables generated by online DDL operations.
Yes: DTS synchronizes the data of temporary tables generated by online DDL operations.
NoteIf online DDL operations generate a large amount of data, the data synchronization task may be delayed.
No: DTS does not synchronize the data of temporary tables generated by online DDL operations. Only the original DDL data of the source database is synchronized.
NoteIf you select No, the tables in the destination database may be locked.
Retry Time for Failed Connections
By default, if DTS fails to connect to the source or destination database, DTS retries within the next 720 minutes (12 hours). You can specify the retry time based on your needs. If DTS reconnects to the source and destination databases within the specified time, DTS resumes the data synchronization task. Otherwise, the data synchronization task fails.
NoteWhen DTS retries a connection, you are charged for the DTS instance. We recommend that you specify the retry time based on your business needs. You can also release the DTS instance at your earliest opportunity after the source and destination instances are released.
Select the initial synchronization types.

In the lower-right corner of the page, click Precheck.
NoteBefore you can start the data synchronization task, DTS performs a precheck. You can start the data synchronization task only after the task passes the precheck.
If the task fails to pass the precheck, you can click the
 icon next to each failed item to view details.
 You can troubleshoot the issues based on the causes and run a precheck again.
If you do not need to troubleshoot the issues, you can ignore failed items and run a precheck again.
Close the Precheck dialog box after the following message is displayed: The precheck is passed. Then, the data synchronization task starts.
Wait until initial synchronization is completed and the data synchronization task is in the Synchronizing state.
You can view the status of the data synchronization task on the Synchronization Tasks page.
