By Juan Patrick, Solution Architect Intern
Make your web development faster and secure on Alibaba Cloud.
Continuous integration and delivery (CI/CD) have enabled developers to release software application on a more frequent basis without compromising quality. CI/CD is a part of DevOps practice that is used to enhance the processes of software development. CI/CD can help to boost production, identify bugs more quickly and efficiently. GitLab is one of the tools which is popular utilized in the CI/CD process.
During the CI/CD process, we also want our code to be secured against unauthorized access or code modification. Therefore, security plays a vital role in protecting application code. We can secure the access to Git server and DevOps, through Smart Access Gateway (SAG), the private network connection solution from Alibaba Cloud. SAG App delivers VPN-based services for accessing private network in a more secure, intelligent and reliable way.
This article demonstrates how to set up a CI/CD process which can only be accessed by authorized internal DevOps team through private network. The steps are separated into:
This article will focus on the procedure for securing and managing Git server, and web application is developed using Node.js which is ready to run and will be uploaded to the Git server for source code control.
All Alibaba Cloud services and products used in this document are based in Indonesia-Jakarta.
The following architecture diagram describes the design of this CI/CD system on Alibaba Cloud.
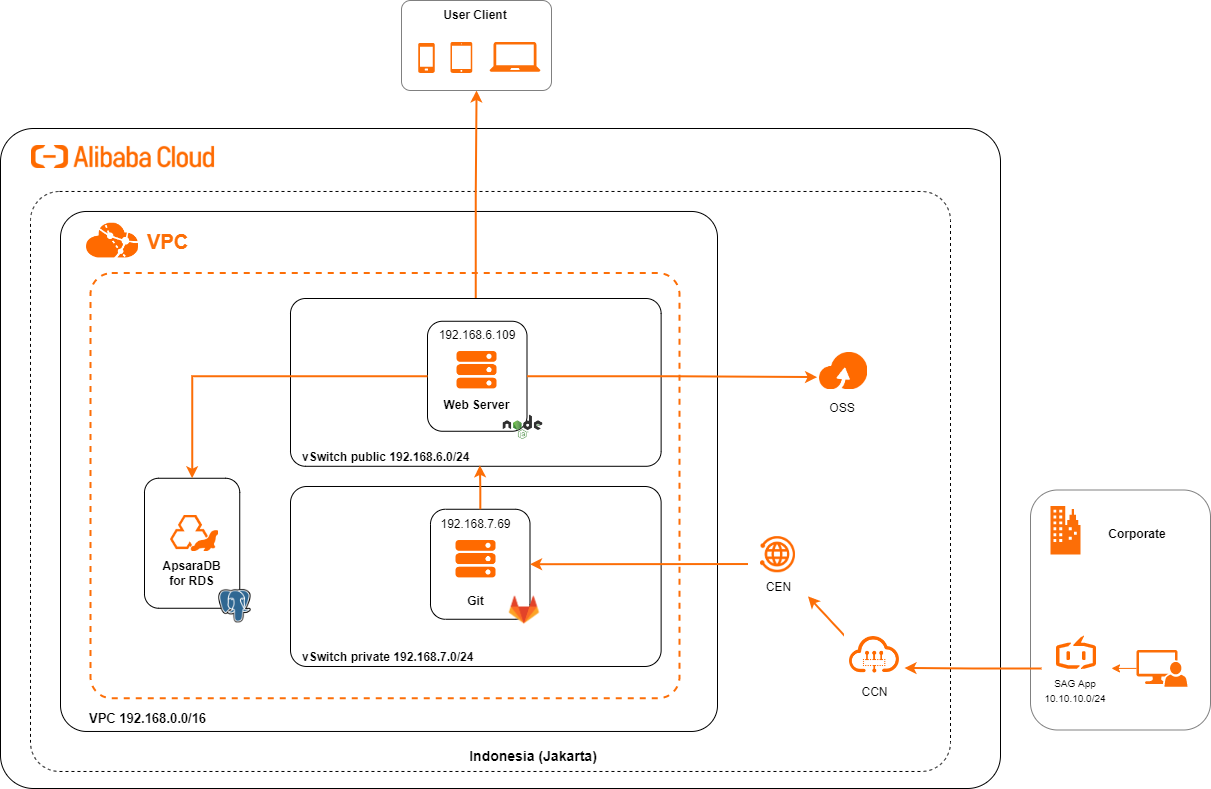
According to the architecture, all Alibaba Cloud services and products setup in the same VPC. These two ECS instances (Operating System Ubuntu) in their respective roles as a web server and Git server. The web server is responsible for providing web services to clients (public) and is connected to the ApsaraDB for RDS as a database and OSS for storing image files (unstructured data). Git is only accessible from private corporate network through the SAG App.
Based on the security principle of Minimizing Attack Surface Area, Security Group configured for CI/CD process allows only SSH and HTTP port open to web server internal network, and SAG VPN network, as listed in the following table:
| Source | Destination | Port No. | Description |
| 10.10.10.0/24 (SAG VPN Network) |
192.168.7.69 | 22 | Remote access for O&M from office intranet network |
| 10.10.10.0/24 (SAG VPN Network) |
192.168.7.69 | 80 | Source code control from office intranet network |
| 192.168.6.0/24 (Web server Network) |
192.168.7.69 | 80 | Source code download from web server network |
SAG (Smart Access Gateway) is an all-in-one solution for connecting private networks to Alibaba Cloud. There are many product types of SAG, you can check at https://www.alibabacloud.com/help/en/smart-access-gateway/latest/what-is-sag and we are going to use SAG App for this project.
1. Open the console SAG and go to the SAG -> Smart Access Gateway App -> SAG App Instances, then click Create SAG App.
For detail configuration, you can check at https://www.alibabacloud.com/help/en/smart-access-gateway/latest/purchase-sag-app
2. After creating SAG App Instance, click Quick Configuration on column Actions.
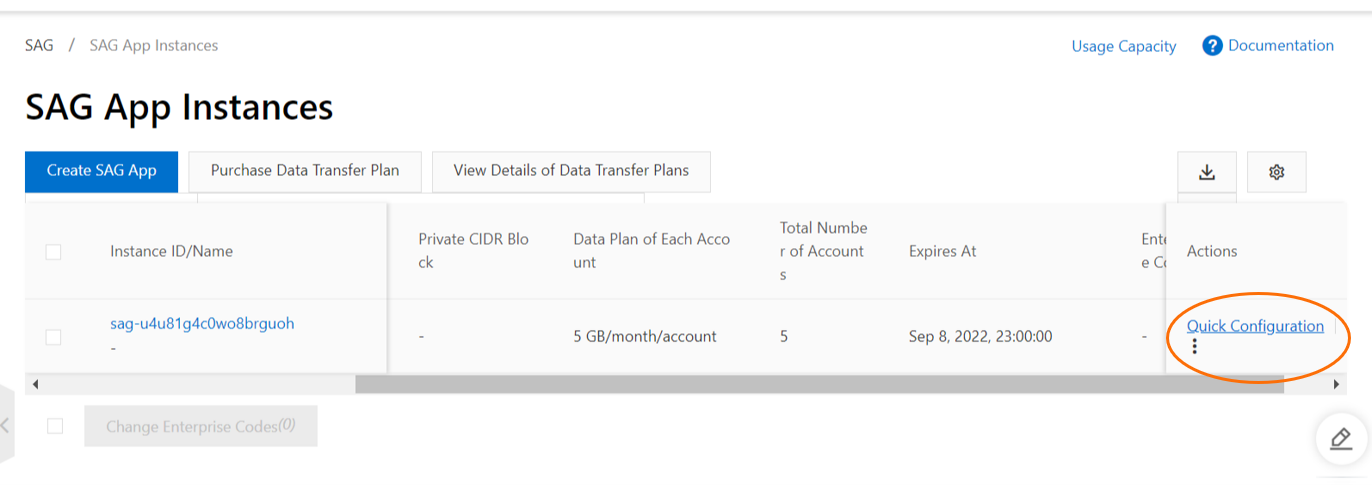
3. Follow the instructions step by step and make sure the second step is to create CEN so that transit router SAG will be created.
The SAG App settings information is available at https://www.alibabacloud.com/help/en/smart-access-gateway/latest/get-started-with-sag-app
1. Open console CEN and go to Cloud Enterprise Network -> Instances, and click on CEN instance that created before when configure SAG.
2. On Basic Settings of CEN Instance, click icon with ⊕ on VPC.
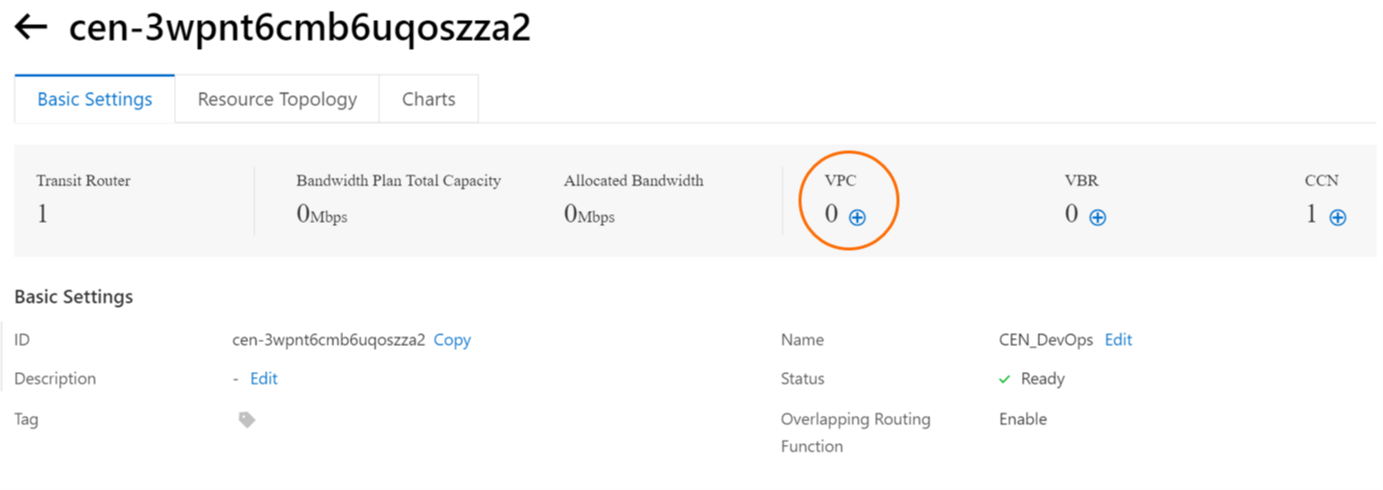
3. Set the Region in the same region from your VPC and choose your VPC is used on your ECS. Leave it to default, click OK. Now, we already have two transit routers for VPC and CCN.

The CEN settings information is available at https://www.alibabacloud.com/help/en/cloud-enterprise-network/latest/quick-start
1. Download at https://www.alibabacloud.com/help/en/smart-access-gateway/latest/install-the-sag-app and install the application on your device.
2. Open smartag-app and login using by instance ID SAG App, username/email, and password from SAG App Instance in console SAG. Check the Please read and agree privacy policy and click Login.
3. Click Connect to Intranet and you can see your Local IP and DNS Server on Connection tab.
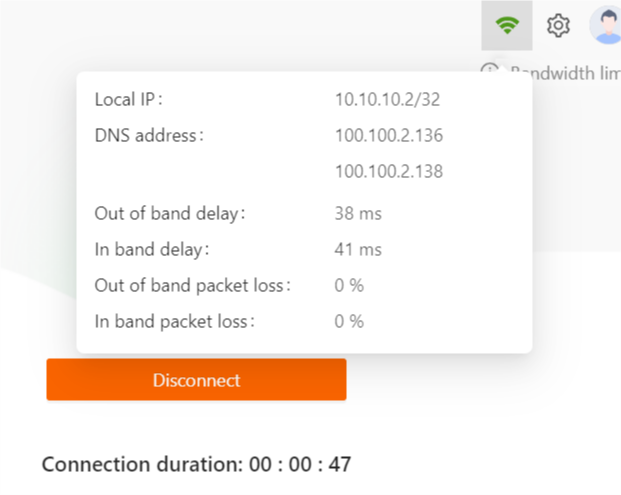
4. Ping your ECS Instance's private IP address from PC to test connection. If you see an ECS response that looks like this:
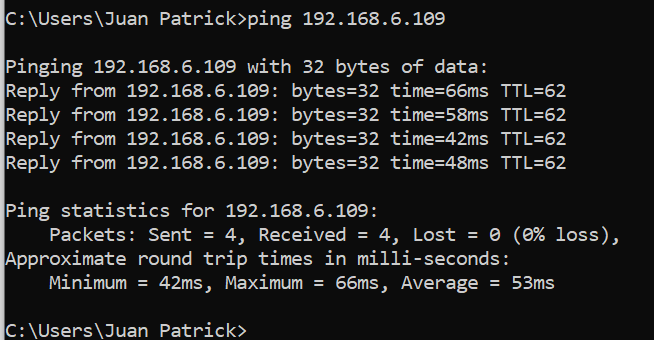
This mean you already success to connect privately on ECS using SAG App. Take a note when you want to connect ECS, you have to connect intranet using SAG App.
There is another option to secure ECS network access using SSL VPN, you can look at https://www.alibabacloud.com/blog/remote-access-with-centralized-hostname-management-alibaba-cloud-privatezone-sag-app-and-vpn-gateway_597889
Git is a version control system for software development. Git helps to control and document code in our project. All changes to our code will be saved in history. We can track history for find out who created or changed the code. In this part, we want to setup Git with application GitLab on ECS Instance.
1. Connect your ECS Instance using SSH
ssh root@<Private IP address of ECS Instance>There are many ways to connect ECS, you can see here: https://www.alibabacloud.com/help/en/elastic-compute-service/latest/connection-methods
2. Update and install dependencies on Ubuntu
sudo apt update && sudo apt upgrade3. Install dependency packages
sudo apt install curl debian-archive-keyring lsb-release ca-certificates apt-transport-https software-properties-common -y4. Import GitLab key
gpg_key_url="https://packages.gitlab.com/gitlab/gitlab-ce/gpgkey"
curl -fsSL $gpg_key_url| sudo gpg --dearmor -o /etc/apt/trusted.gpg.d/gitlab.gpg
5. In the file /etc/apt/sources.list.d/gitlab gitlab-ce.list, add the contents of the repository.
sudo tee /etc/apt/sources.list.d/gitlab_gitlab-ce.list<<EOF
deb https://packages.gitlab.com/gitlab/gitlab-ce/ubuntu/ focal main
deb-src https://packages.gitlab.com/gitlab/gitlab-ce/ubuntu/ focal main
EOF
6. Update the APT package to verify the configured repository
sudo apt update
7. Download script GitLab
curl -sS https://packages.gitlab.com/install/repositories/gitlab/gitlab-ce/script.deb.sh | sudo bash
8. Display output to check content of source list GitLab.
cat /etc/apt/sources.list.d/gitlab_gitlab-ce.list
9. Install Gitlab CE (Community Edition)
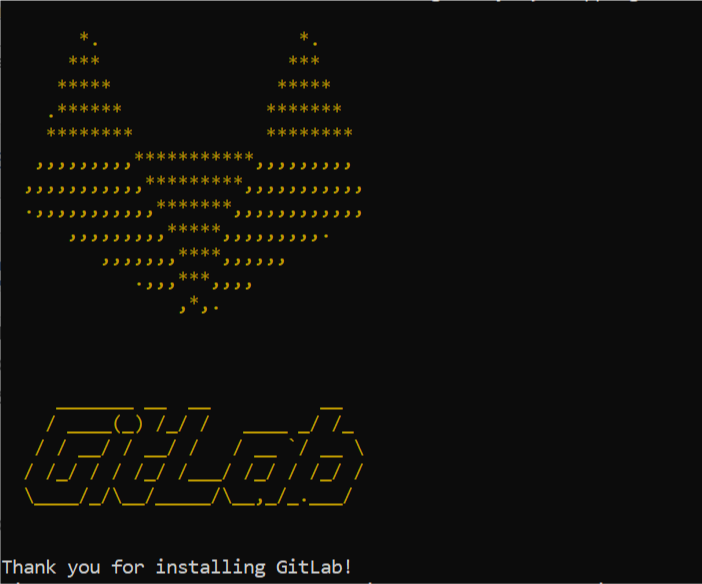
sudo apt install gitlab-ceAfter installation, you can see the part of logo GitLab
10. Edit GitLab configuration file:
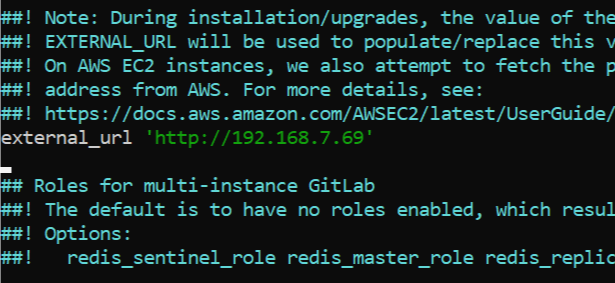
nano /etc/gitlab/gitlab.rb11. Change external_url with your Private IP Address of ECS. This is example:
12. Running configuration GitLab
sudo gitlab-ctl reconfigure13. Check status GitLab and see every part of GitLab was running
sudo gitlab-ctl status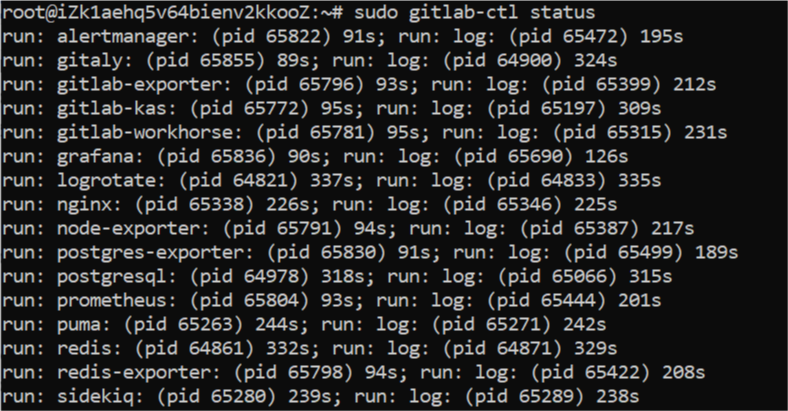
1. Display the password and copy the content of password then save it later for login GitLab.
cat /etc/gitlab/initial_root_password
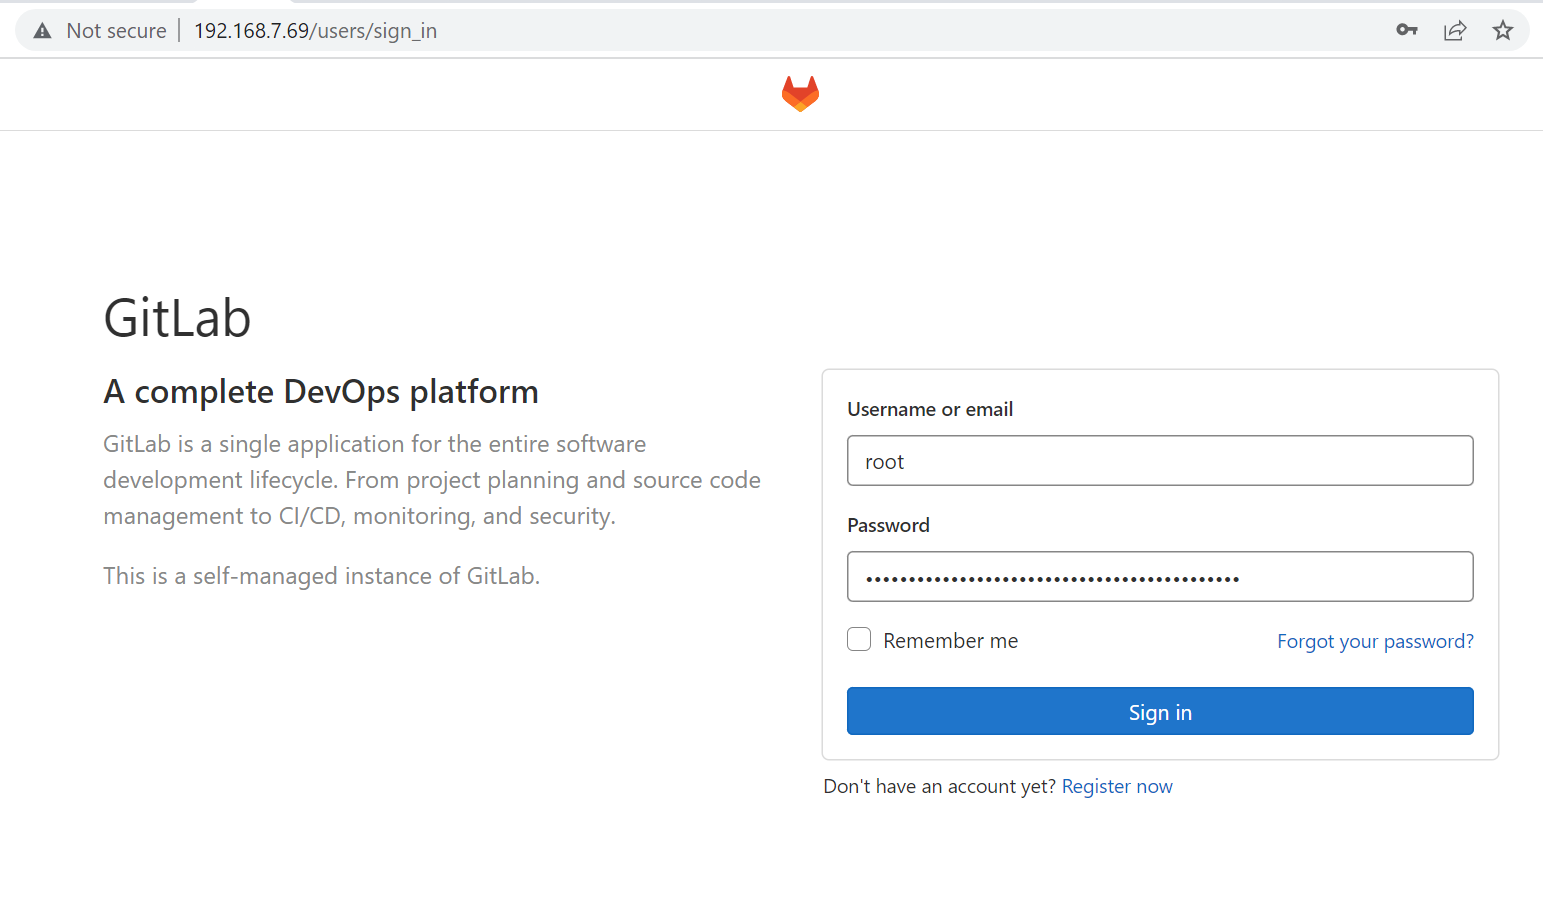
2. Open new tab and type http://<Private IP Address of ECS Instance>. Login as root and paste the password that you had copied before.
3. The following display would appear:
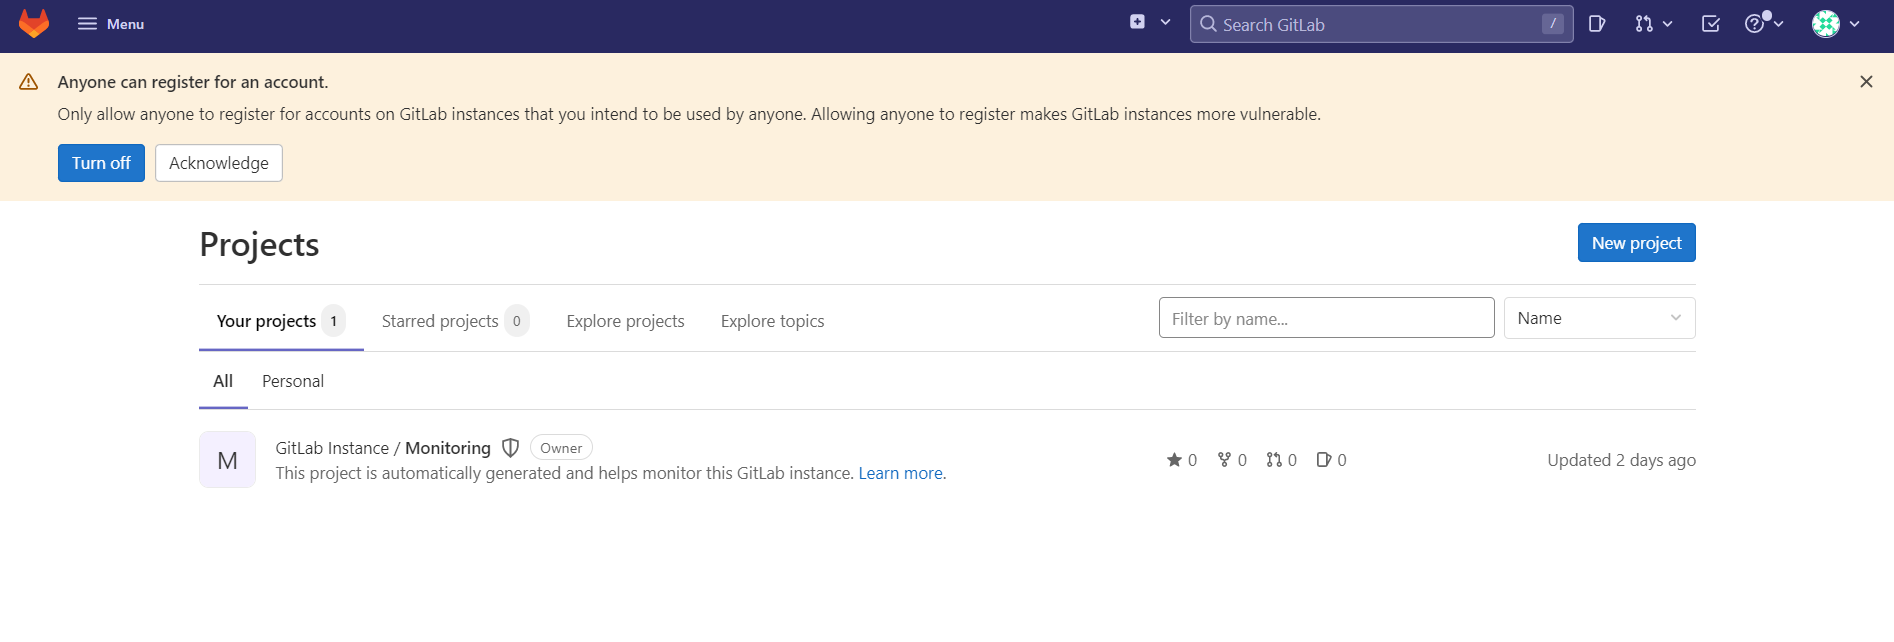
You can go to Profile User -> Preferences -> Password to set new password.
Additional information on the GitLab configuration procedures may be found at https://www.alibabacloud.com/help/en/elastic-compute-service/latest/install-and-use-gitlab
At this part, we will set up the web server. We already have a Node.js web application project, which will be committed to the Git server and cloned by the Web Server. Prior to that, we want to prepare git on the client and install Node.js on the server.
1. Update and install dependencies on Ubuntu
sudo apt update && sudo apt upgrade2. Make sure curl is installed before install Node.js.
sudo apt install curl3. Using the Node.js PPA from Nodesource, Node.js and NPM are already setup. (stable version)
cd ~ | curl -fsSL https://deb.nodesource.com/setup_lts.x | sudo -E bash –4. The command below can be used to verify the version of Node.js that will be installing.
sudo apt-cache policy nodejs
5. Use the following command to launch the Node.js installation.
sudo apt install nodejs6. Check version of Node.js and NPM.
node -v && npm -v
In this section, we'll use the git to upload the project to ECS. The web server will use git operations to download the specified Web application project.
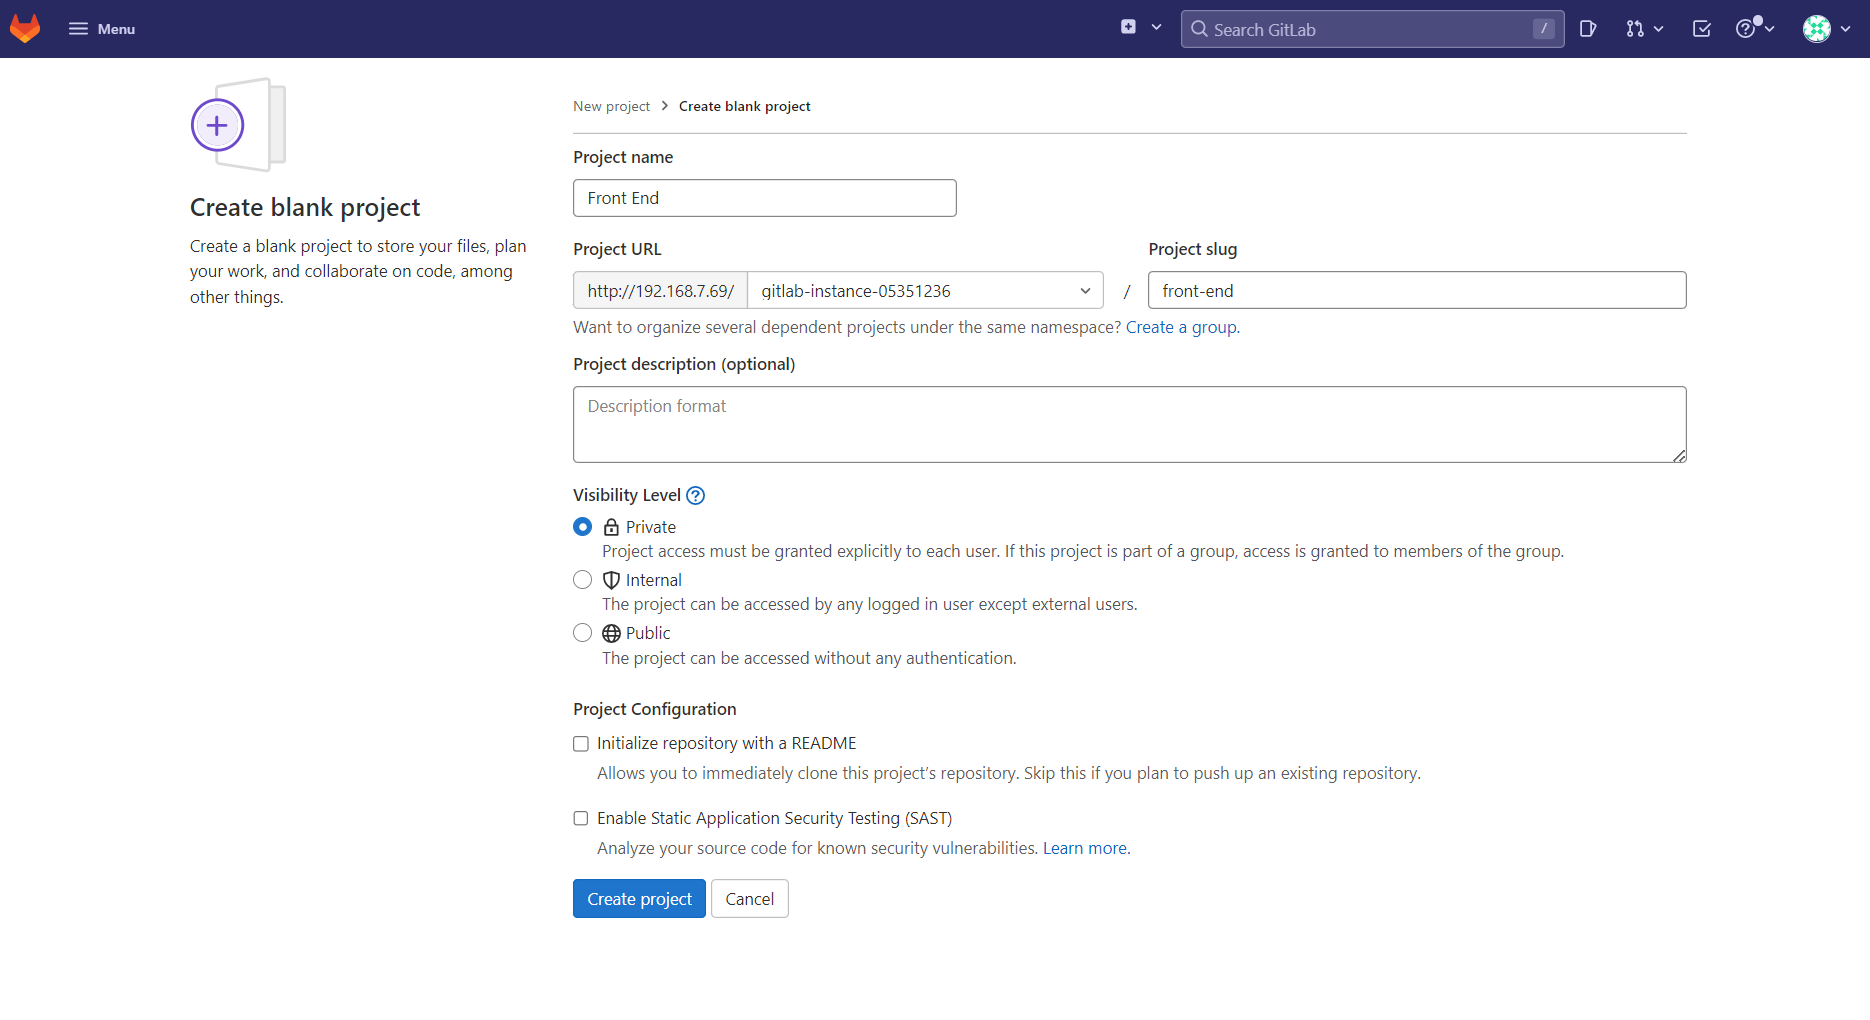
1. Create Repository with New Project and choose Create blank project.
2. Fill Project Name, set the visibility level (for this article, using Private) and uncheck the Initialize repository with a README. Click Create project.
3. Open application git bash and jump to your directory project web. Follow this command to upload your project: (using HTTP for commit project)
git init
git remote add origin <URL-Repository>
git add .
git commit -m "message"
git push -u origin master
Note: It will pop up the Git Credential Manager, just login as the same account before when the first login to GitLab.
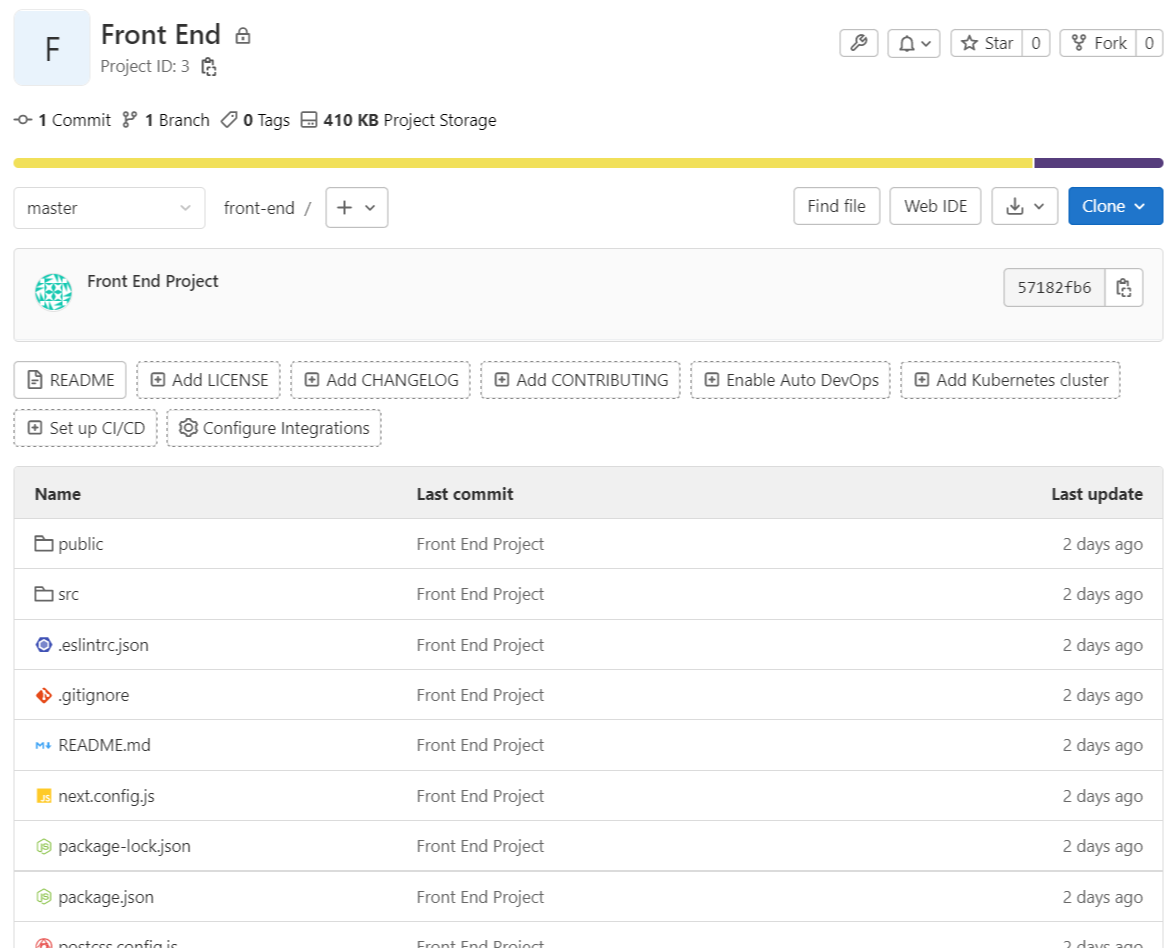
4. Result:
1. Access remote your ECS as a web server via SSH.
ssh root@<Public IP address of ECS Instance>2. Install the git dependency package:
sudo apt install git3. Copy URL Project by click on button Clone and copy text URL on section Clone with HTTP
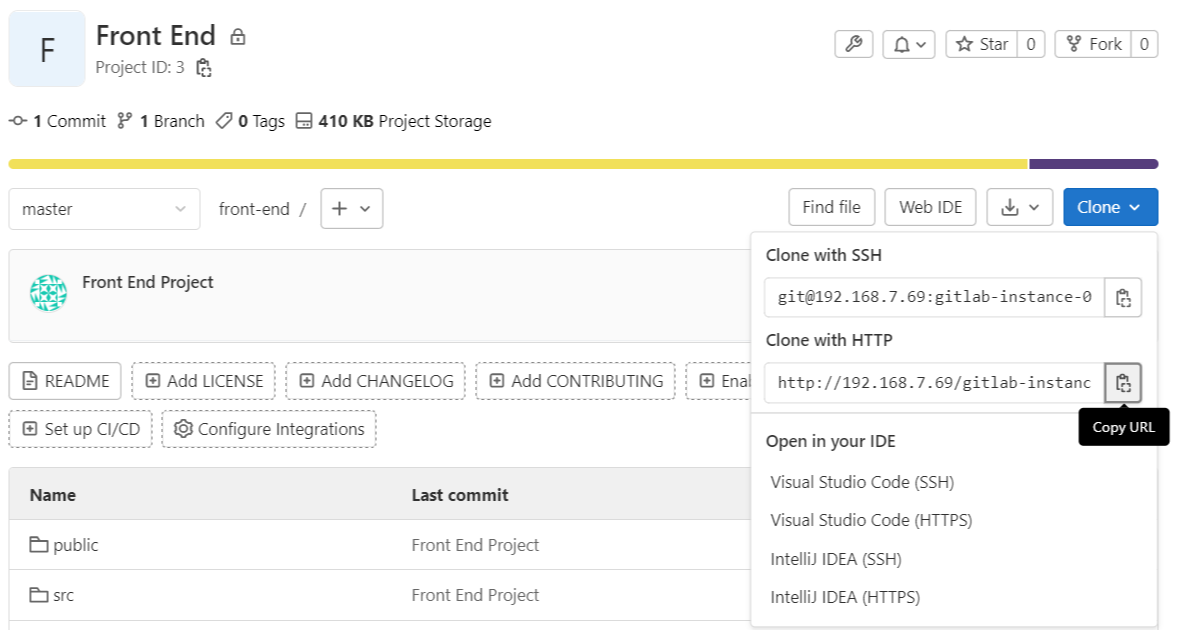
4. Clone project on GitLab by type git clone and then paste URL that you had copied before.
git clone http://<IP Address of ECS Instance>/<group>/<project-name>.git5. Install packages for project and running application Node.js as a background service by install pm2 or forever package.
If you want to see additional example for deploying Node.js project, you can check at https://www.alibabacloud.com/blog/deploying-node-js-apps-for-production-on-alibaba-cloud_594639
CI/CD can help to speed up development process, but the security can't be compromised. We have already set up CI/CD using GitLab and secured access with SAG. These procedures have the benefit of managing the project development and operation process on Alibaba Cloud in a secure manner. We should develop software code and share it on a server that only certain people can access.
Instalasi CI/CD Sederhana dan Aman di Alibaba Cloud dengan SAG dan GitLab
91 posts | 12 followers
FollowAlibaba Cloud Indonesia - August 22, 2022
Alibaba Cloud Community - August 26, 2022
Alibaba Clouder - October 3, 2018
Alibaba Cloud Community - August 3, 2022
Alibaba Cloud Community - July 18, 2022
Haemi Kim - October 20, 2021
91 posts | 12 followers
Follow Alibaba Cloud Flow
An enterprise-level continuous delivery tool.
Learn More DevOps Solution
Accelerate software development and delivery by integrating DevOps with the cloud
Learn More Data Integration
Data Integration is an all-in-one data synchronization platform. The platform supports online real-time and offline data exchange between all data sources, networks, and locations.
Learn More Hybrid Cloud Solution
Highly reliable and secure deployment solutions for enterprises to fully experience the unique benefits of the hybrid cloud
Learn MoreMore Posts by Alibaba Cloud Indonesia