By Sathiya Sarathi
Modern stand-alone web applications can be deployed in many ways. Alibaba Cloud provides services ranging from single-click deployments known as Light Space (also known as Simple Application Service) to fully elastic and customizable instances using the Elastic Compute Services.
Now, you can start building Virtual Private Servers (VPS) on Light Space for as low as 1.65 USD/month (19.90 USD for the first year.) This pricing is available only for a limited time.
When there's a need to run multiple applications to work alongside the native hosted applications, the applications hosted on Light Space can be migrated to Elastic Compute Service in the same region or different regions using the simple steps below.
The following guide explains how to migrate a WordPress site hosted as a virtual private server application hosted on Light Space:
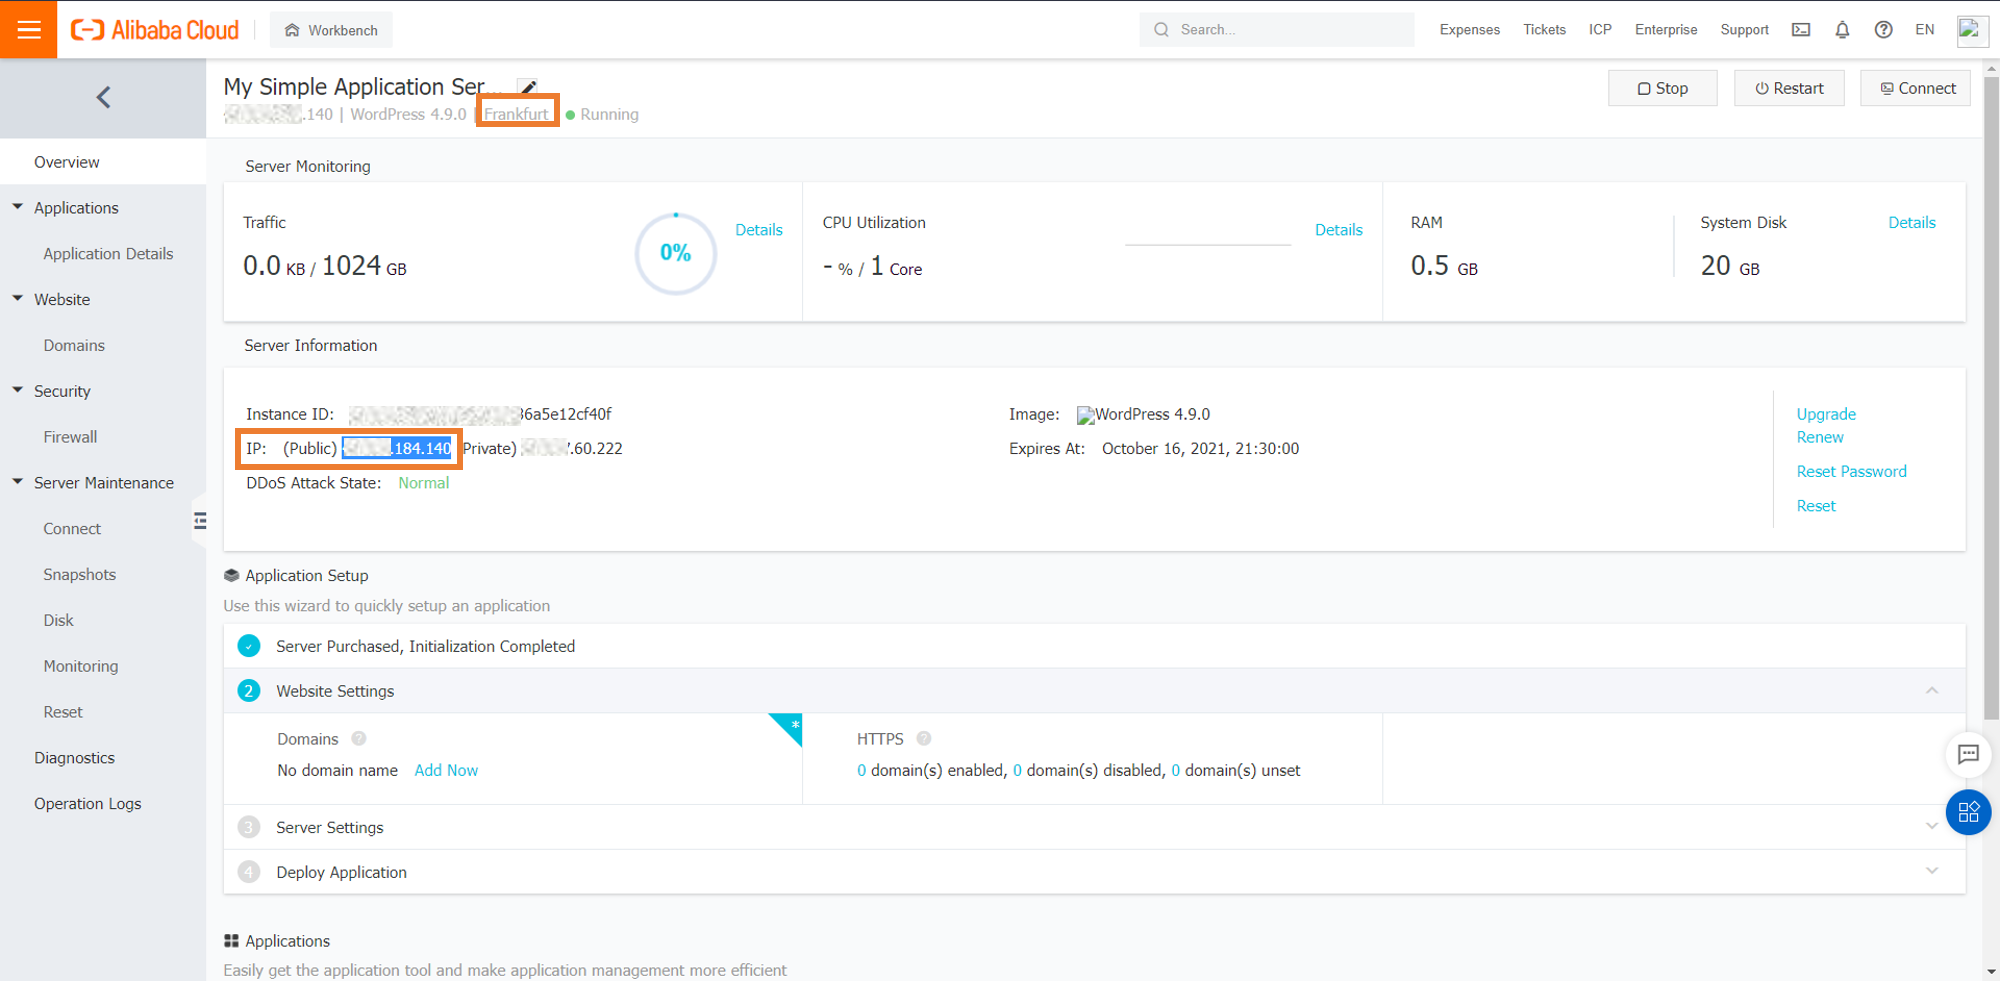
The public IP of the application results are on the following webpage. This walkthrough aims to replicate the same page by deploying the application's image on Elastic Compute Service.
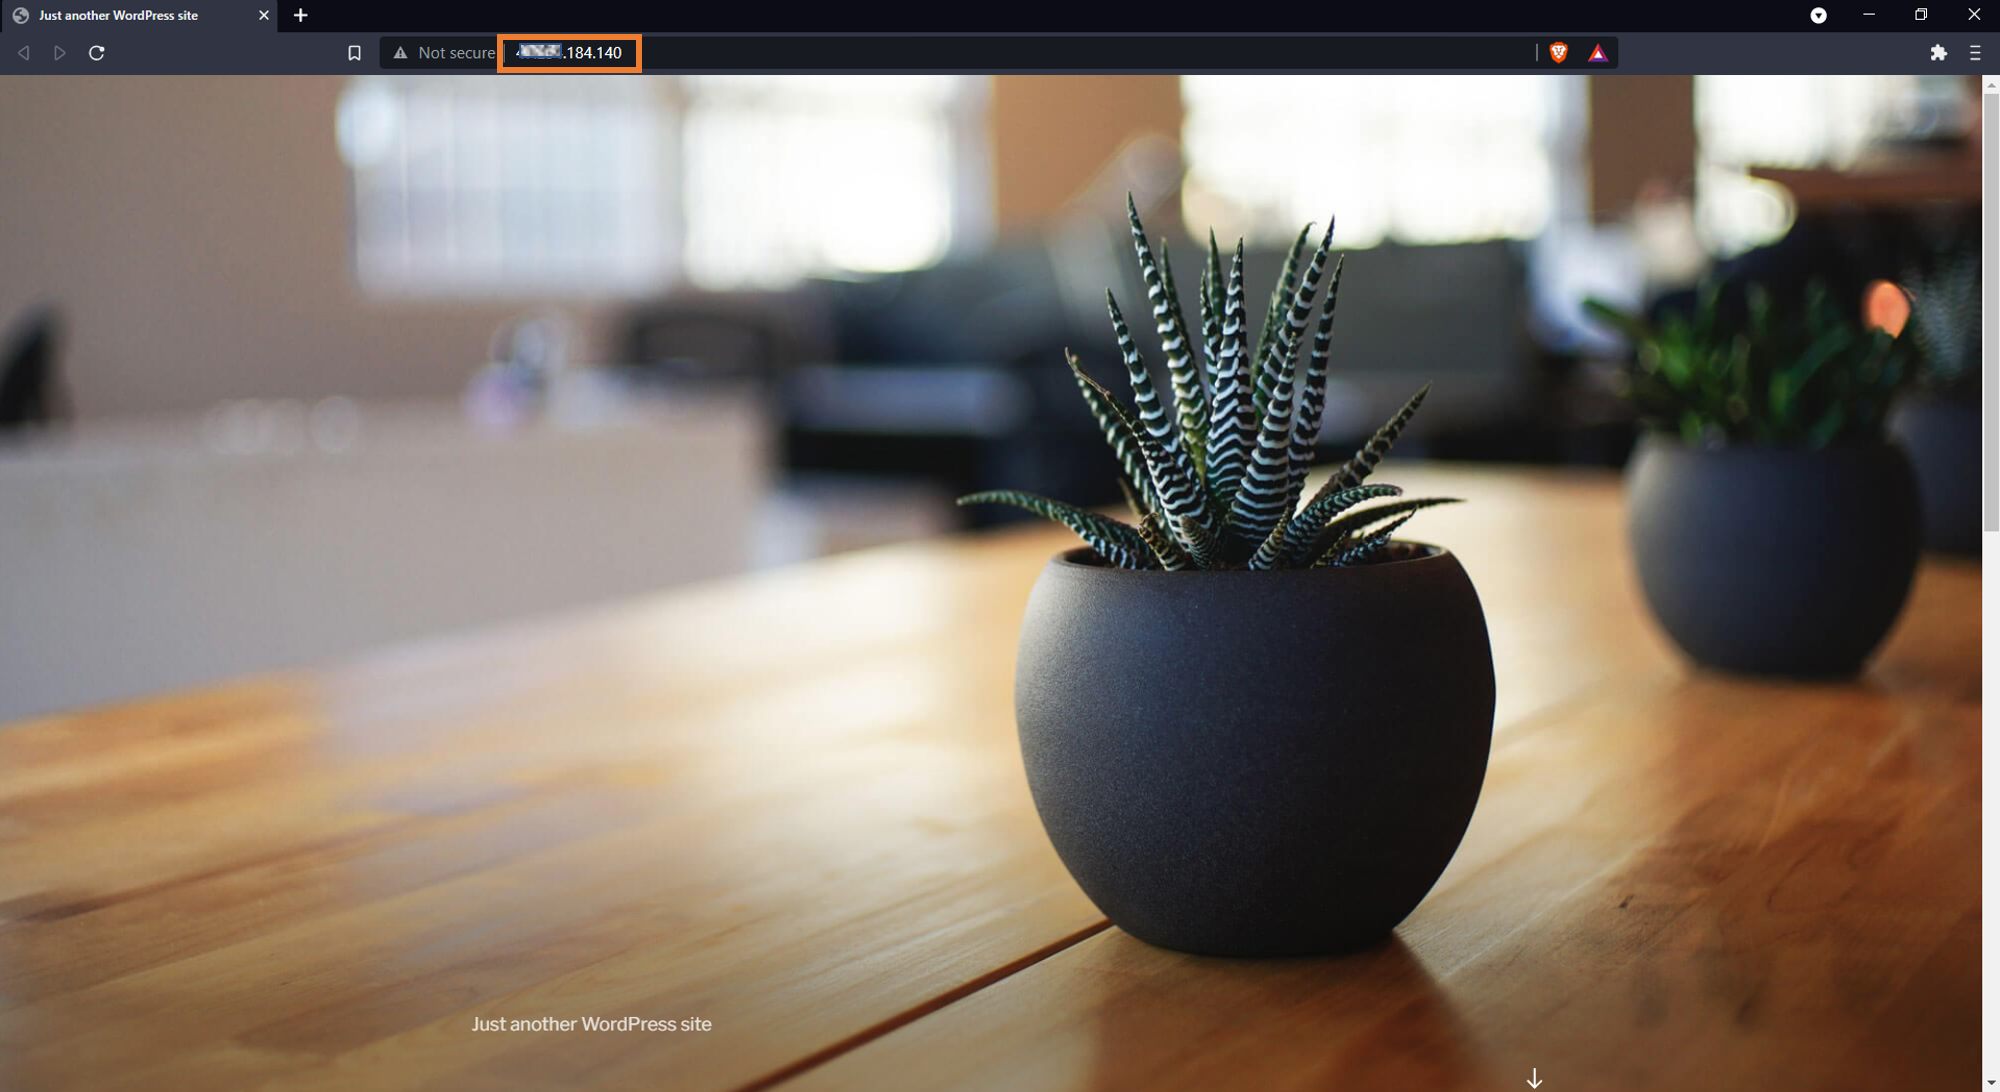
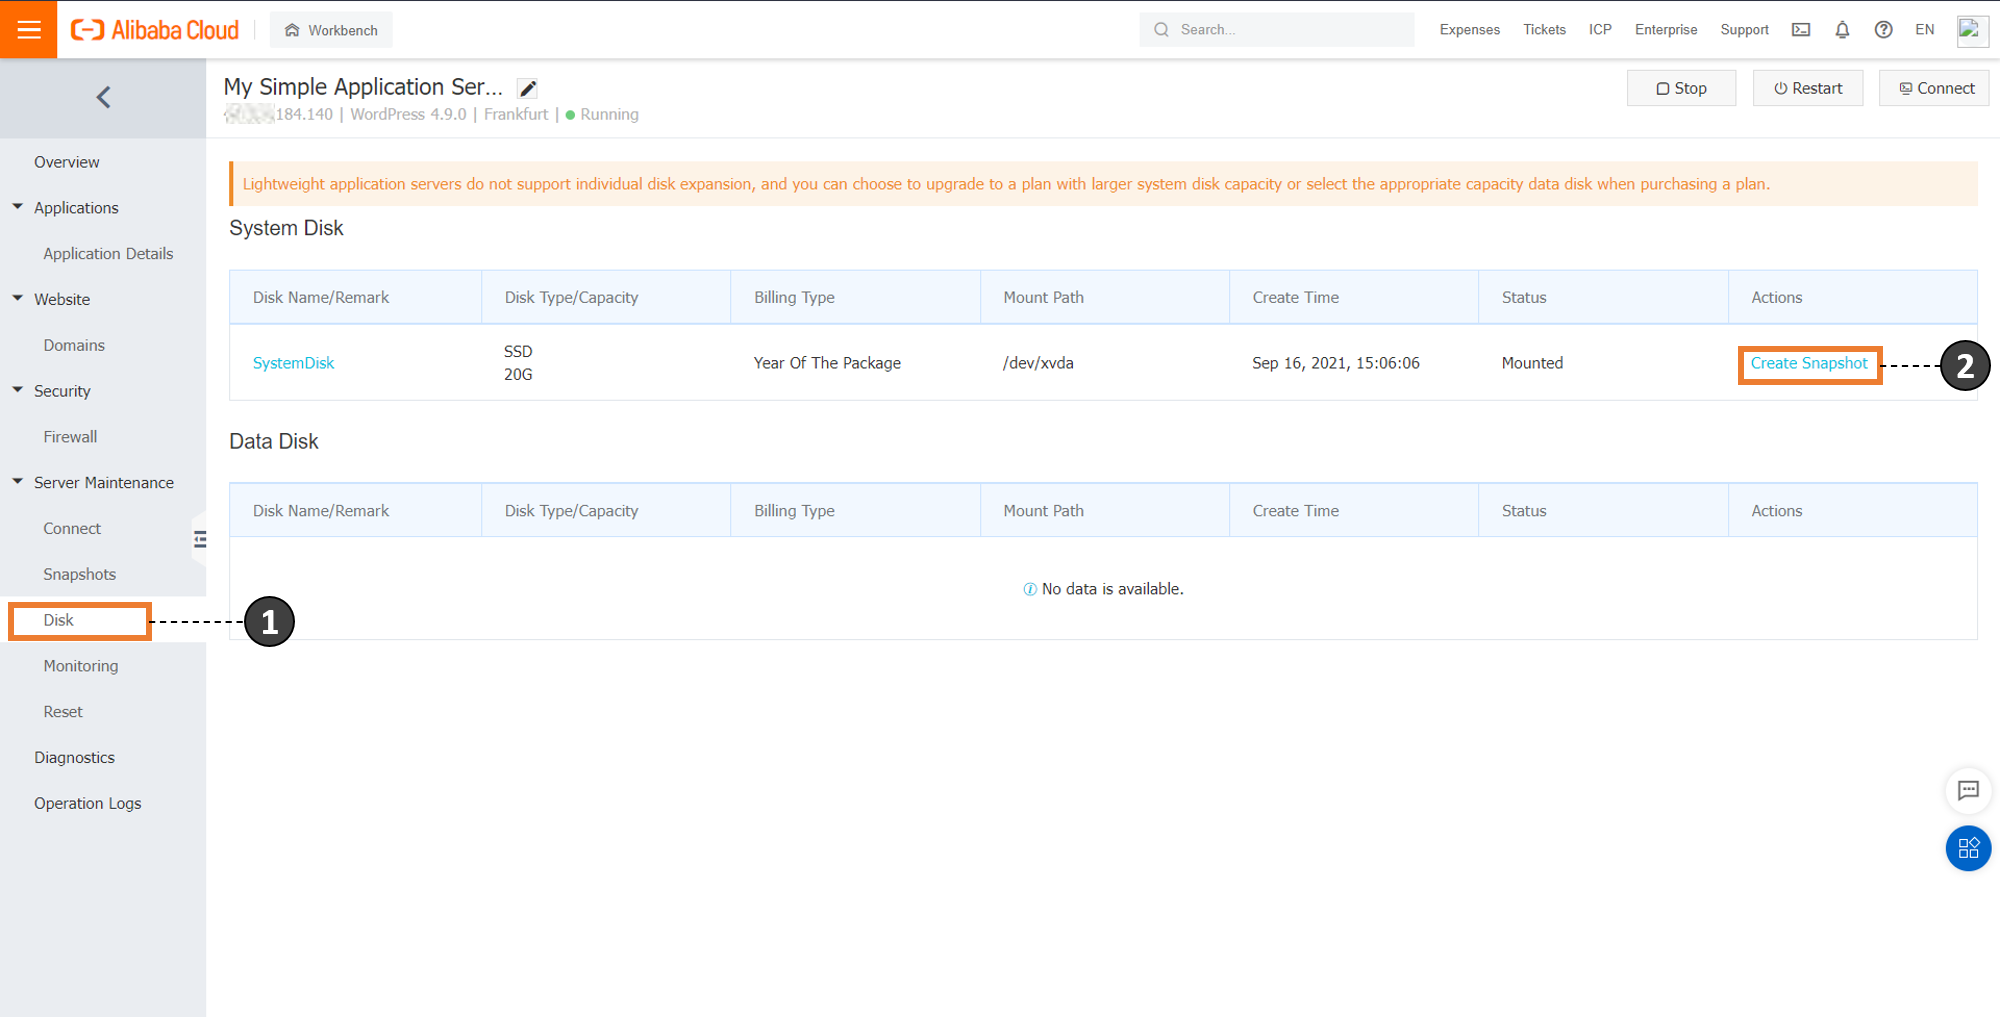
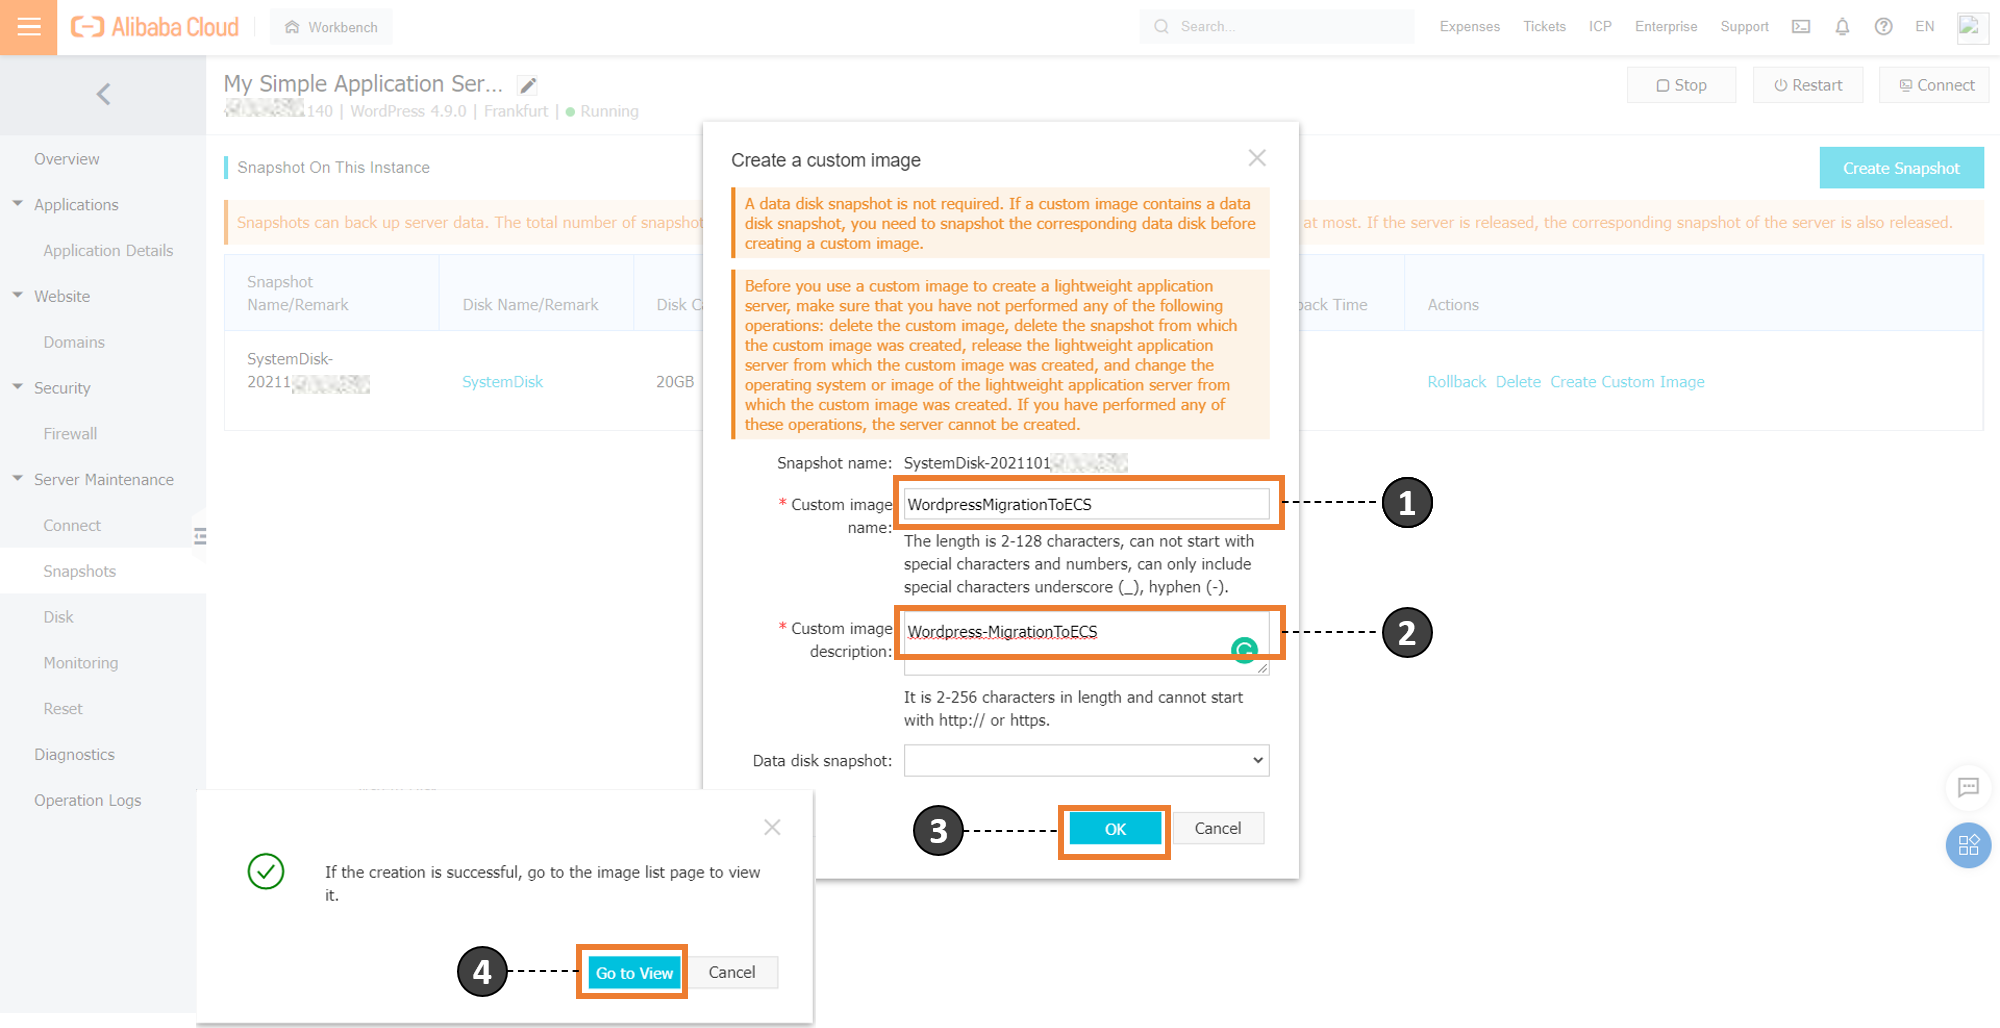
After completing the snapshot creation, a custom image can be created, which will be migrated to the Elastic Compute Service. Click the Snapshots button on the side pane, and the previously created snapshot will appear on the console. Now, click the Create Custom Image button to create an image out of the snapshot:
You can define a custom image name and description to create an image out of the snapshot:
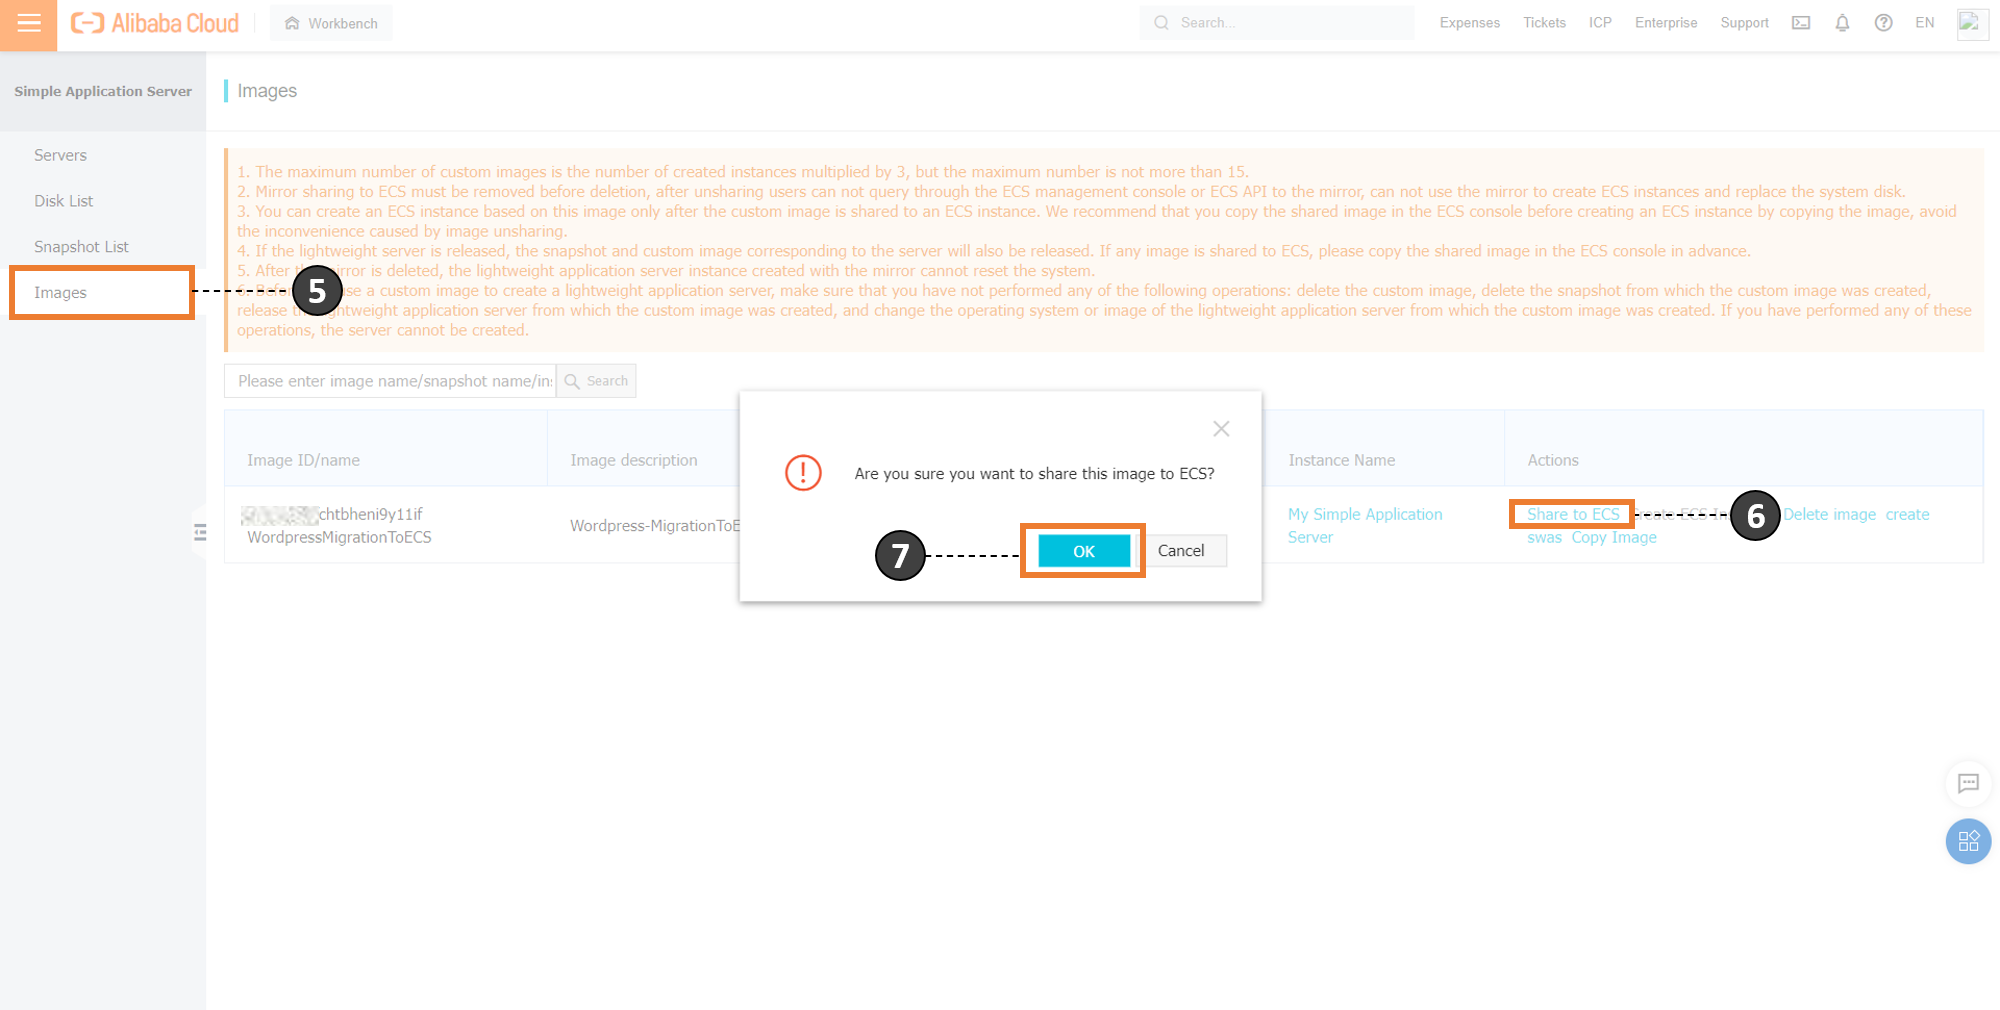
It lists the created image under the Images tab of the Light Space console. Finally, click the Share to ECS option to copy this image onto the Elastic Compute Service. Upon confirmation, this copies the created image to Elastic Compute Service.
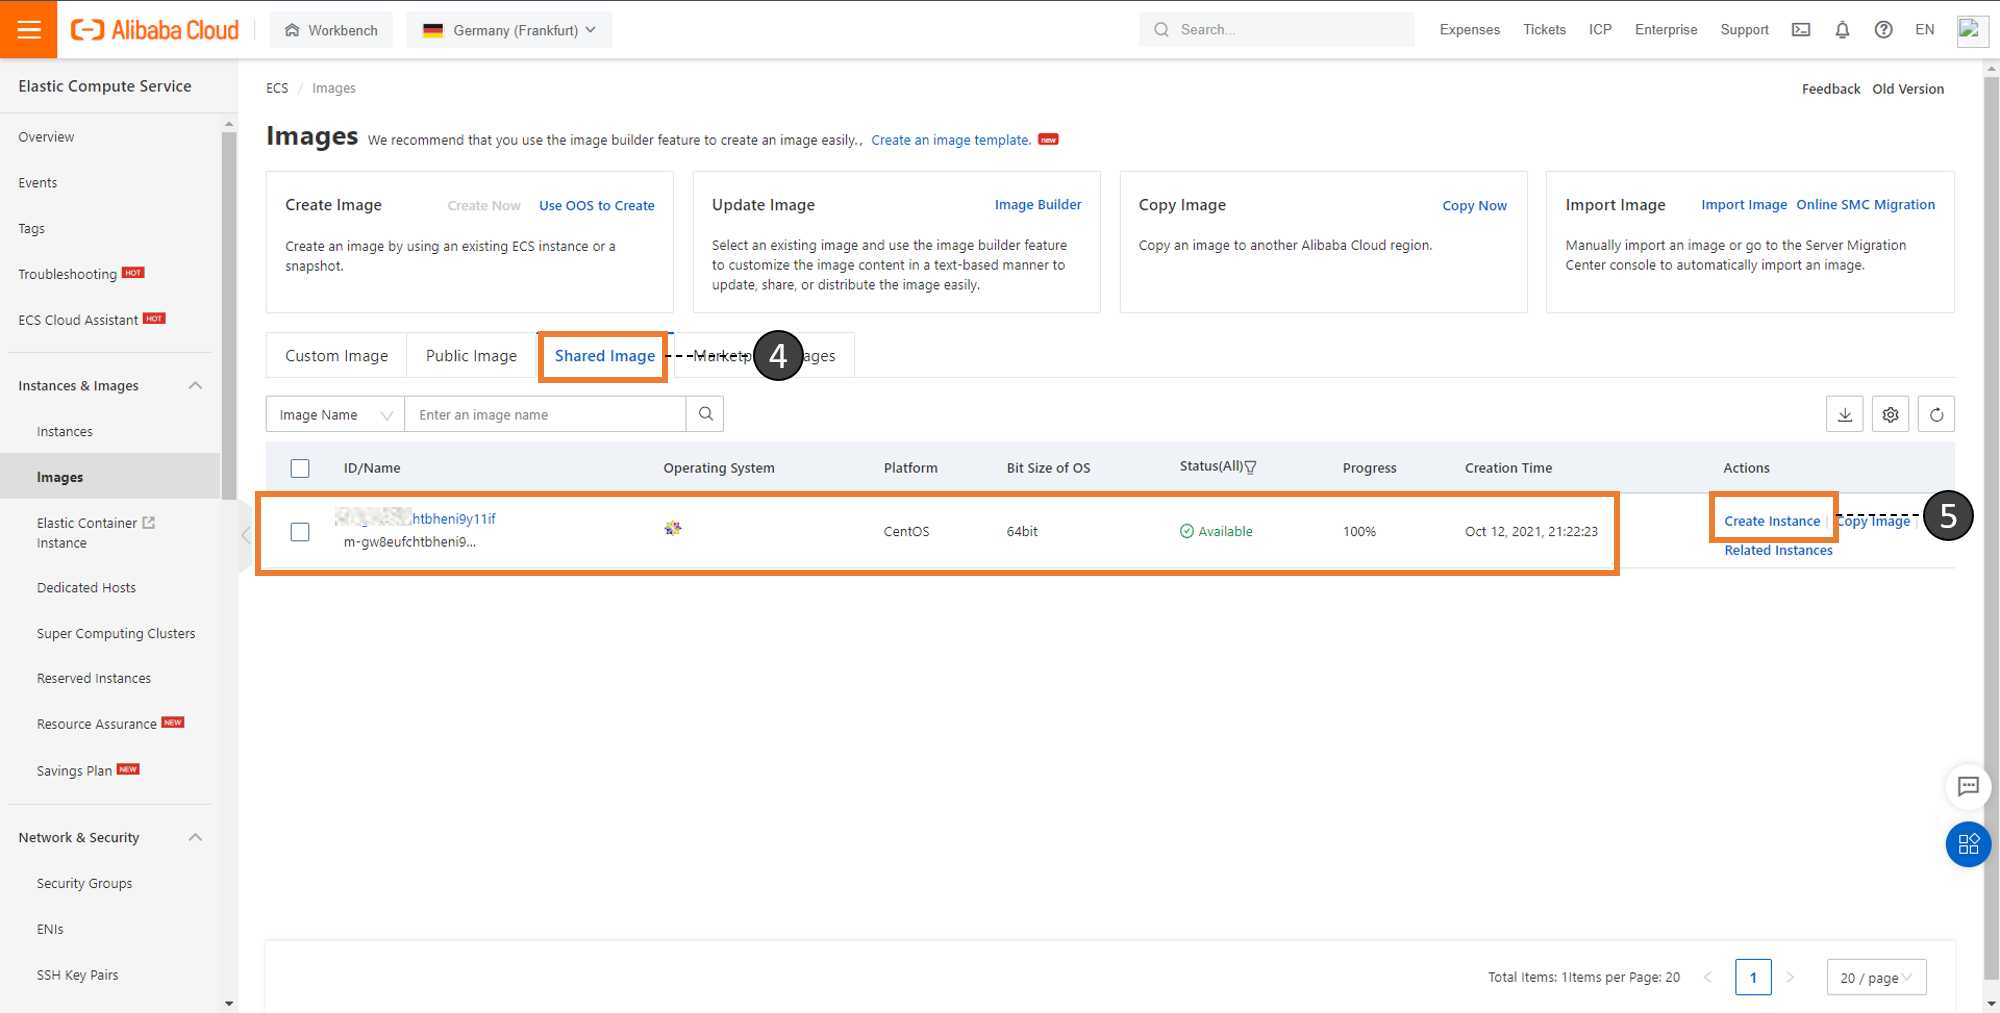
Click the Shared Image tab to reveal the image that was shared from Light Space. From here, the instance for the image can be created by pressing the Create Instance hyperlink shown in the image below:
Follow the wizard by choosing the required configuration to create the instance and create an order. This results in a confirmation message denoting the successful purchase of the instance with the custom image that we created earlier.
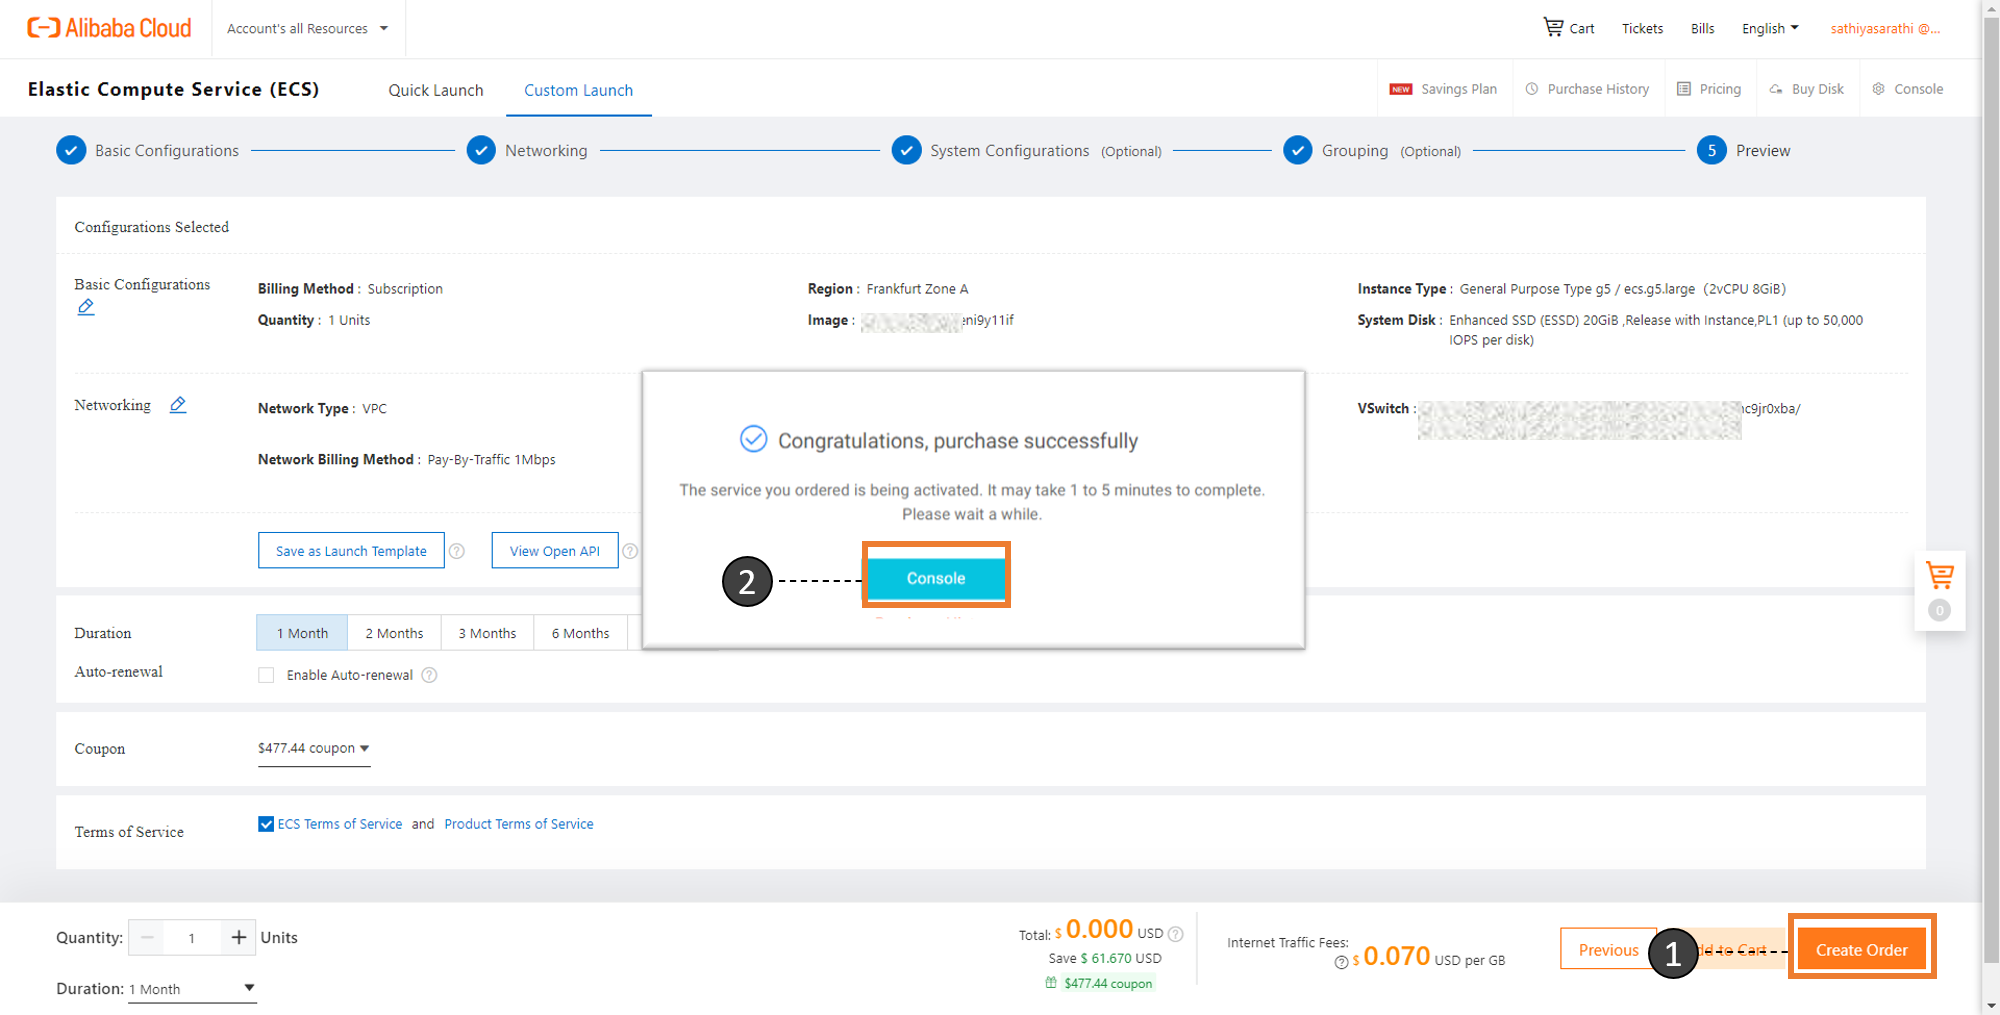
The newly spawned instance can be found in the console shown below:
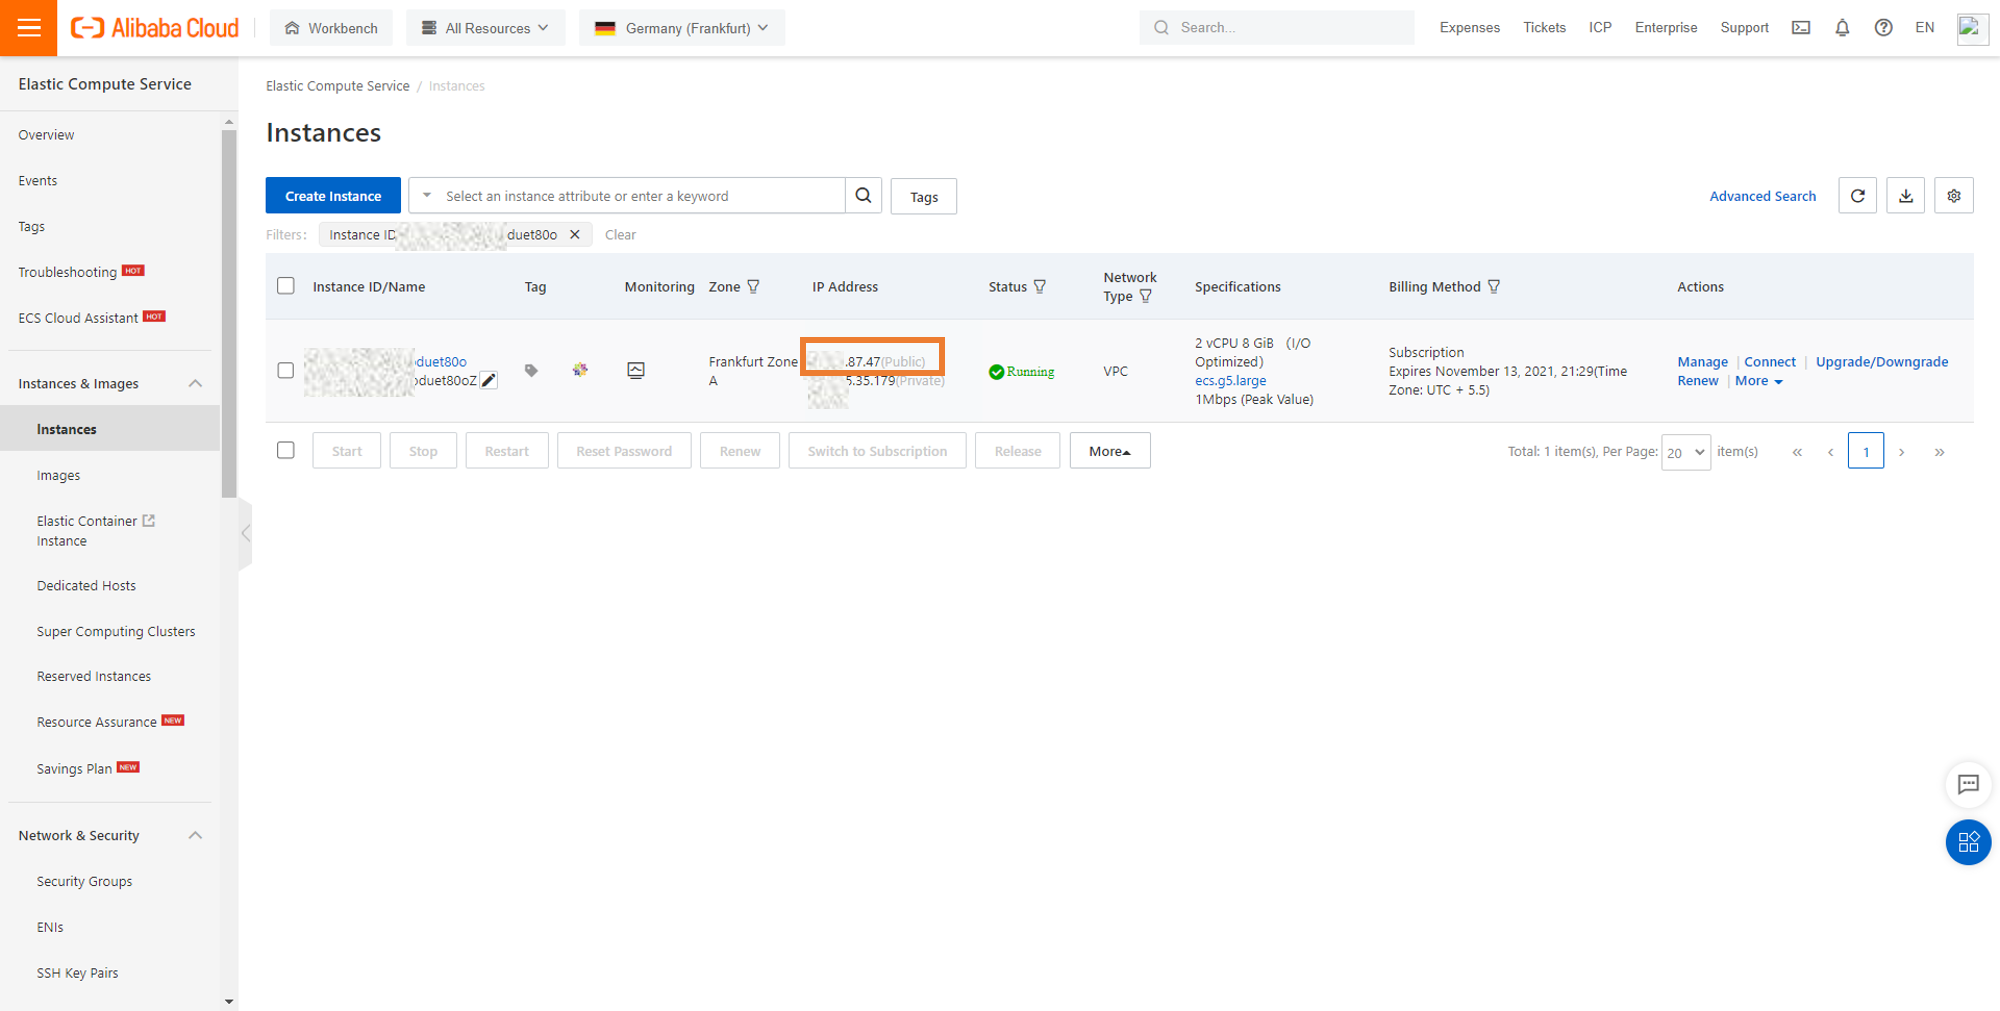
Let's pick the public IP address and check if the WordPress site is accessible. As shown below, locating the public IP address of the instance results in the page we saw earlier:
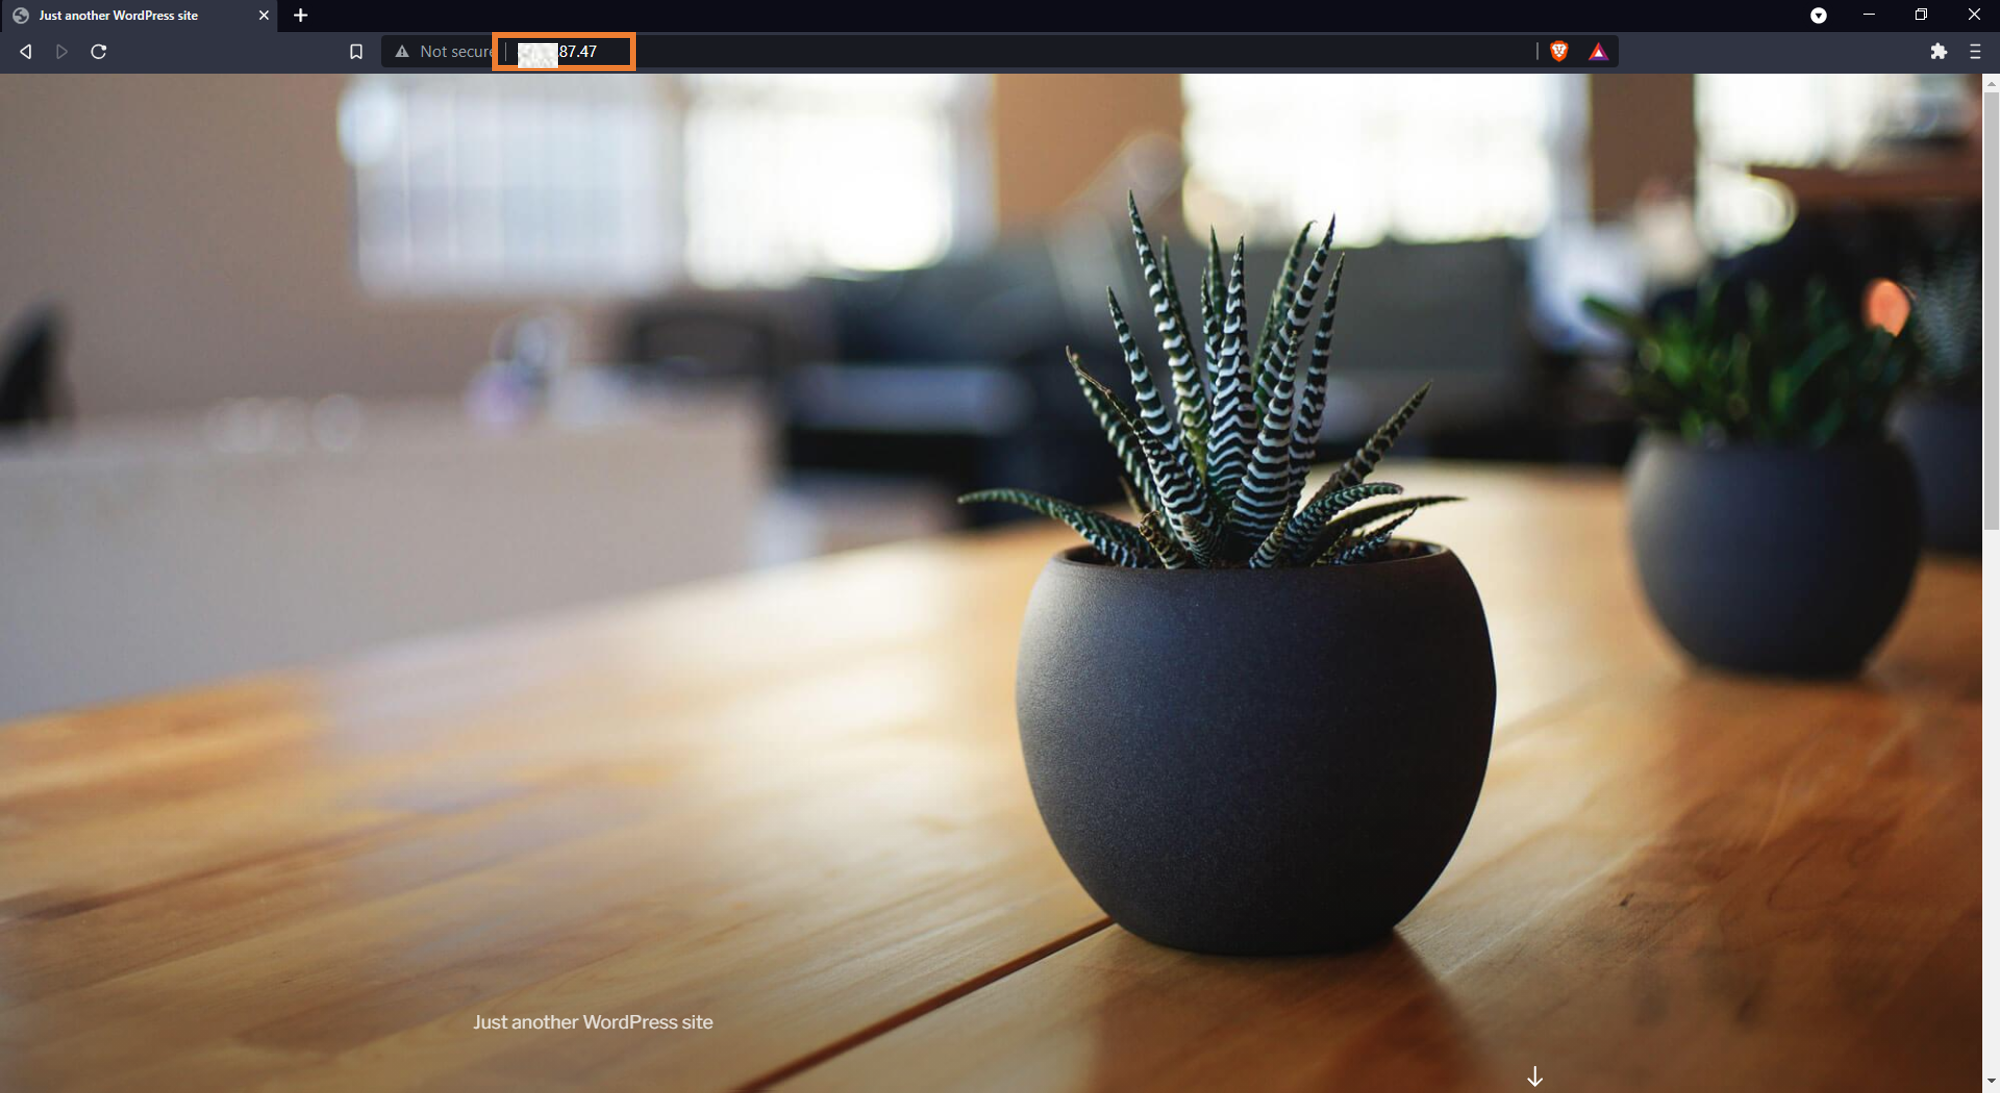
It shows that the application has been successfully migrated from Light Space to Elastic Compute Service.
The previous section dealt with the migration of a standalone Virtual Private Server Application on Light Space to an Elastic Compute Service instance in the same region. What if you need to migrate to a different region? All the steps above remain the same except for an extra process in Step 3.
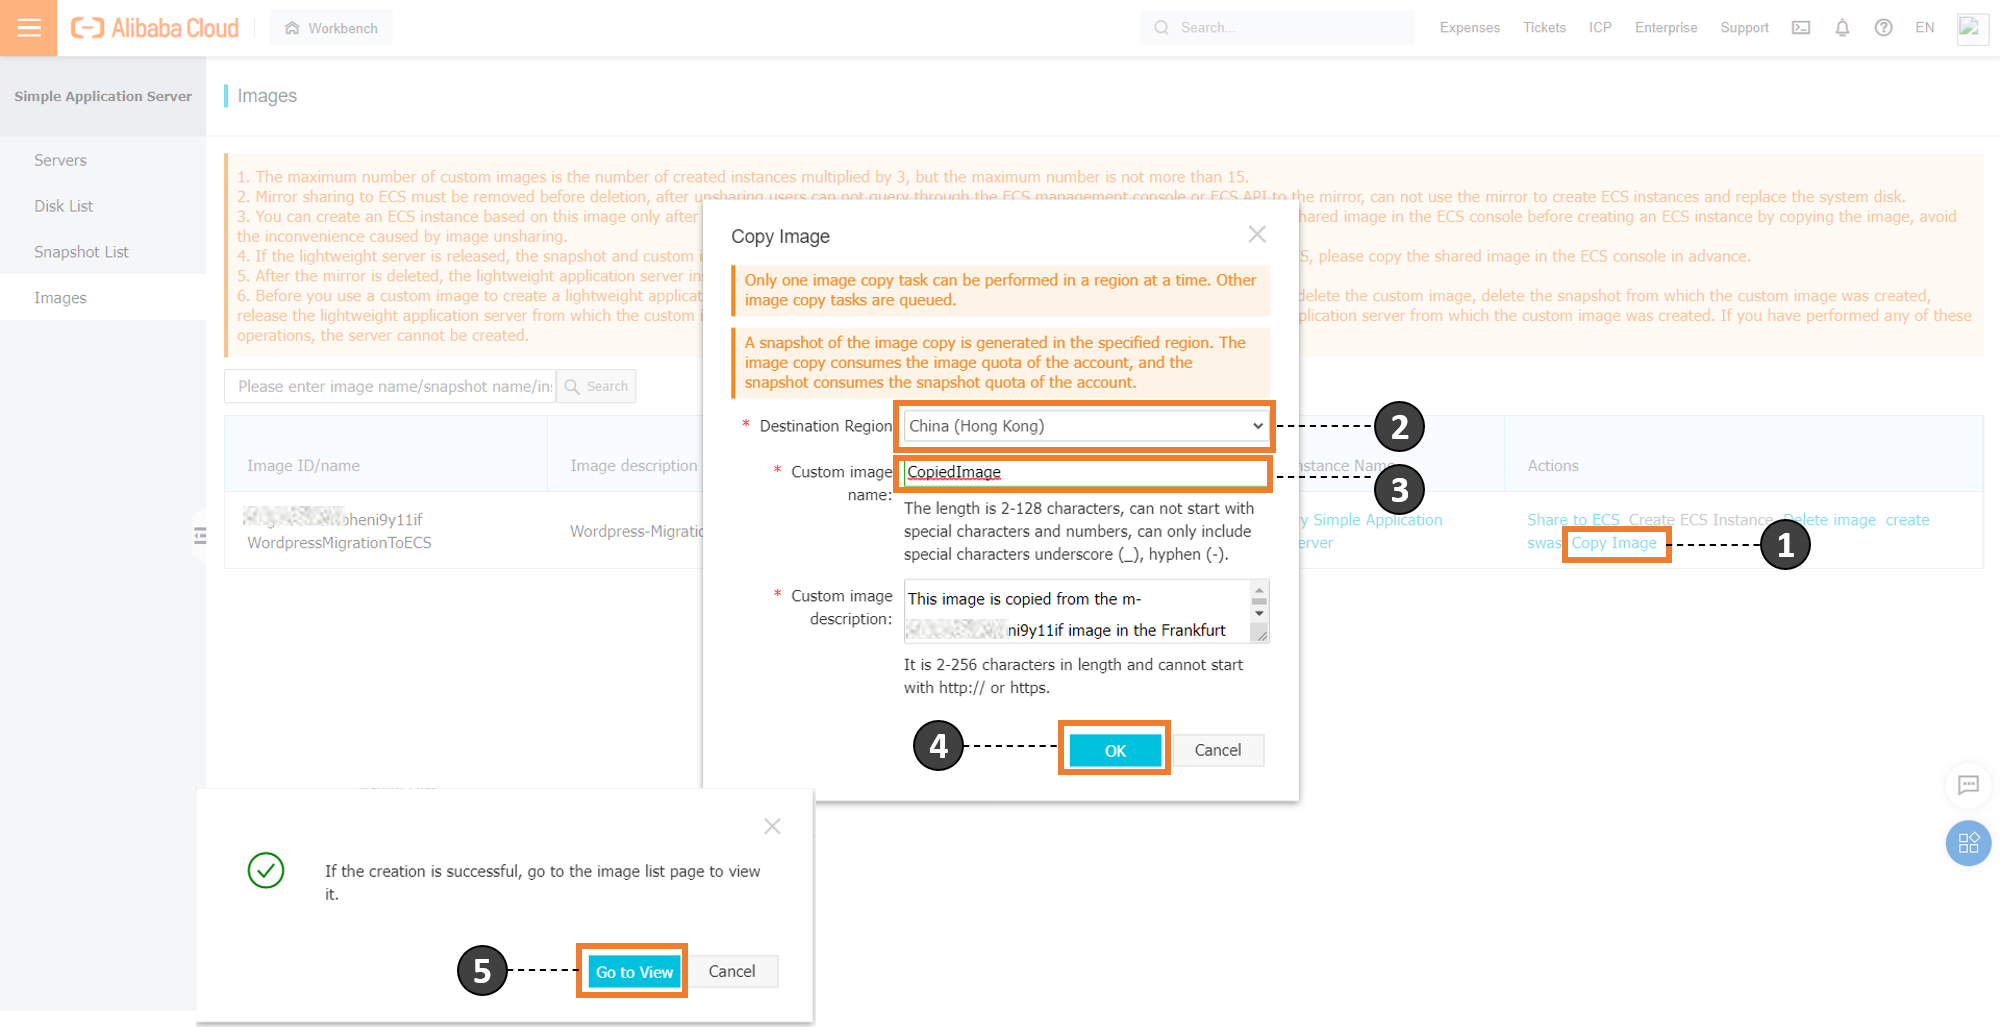
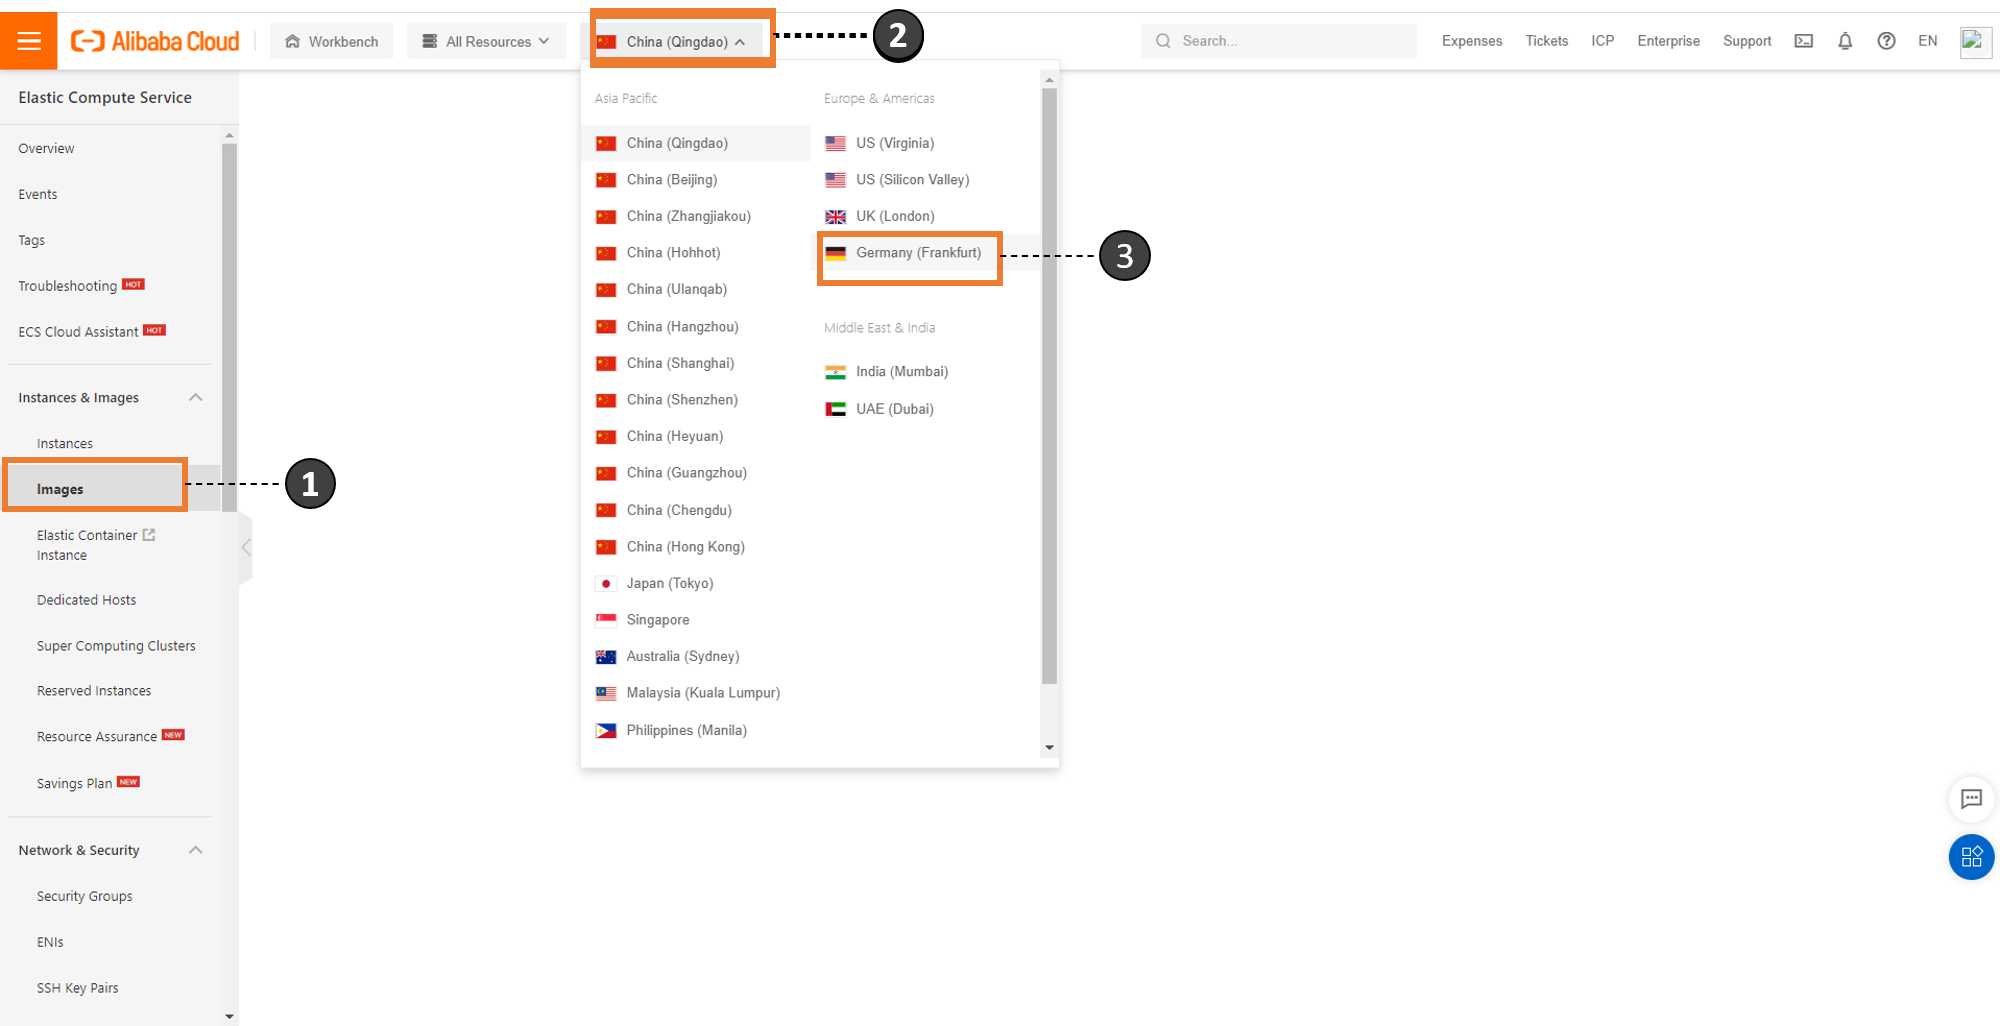
In this walkthrough, we are copying the image from Germany (Frankfurt) to China (Hong Kong). It will result in the image getting created on the Simple Application Service Images dashboard:
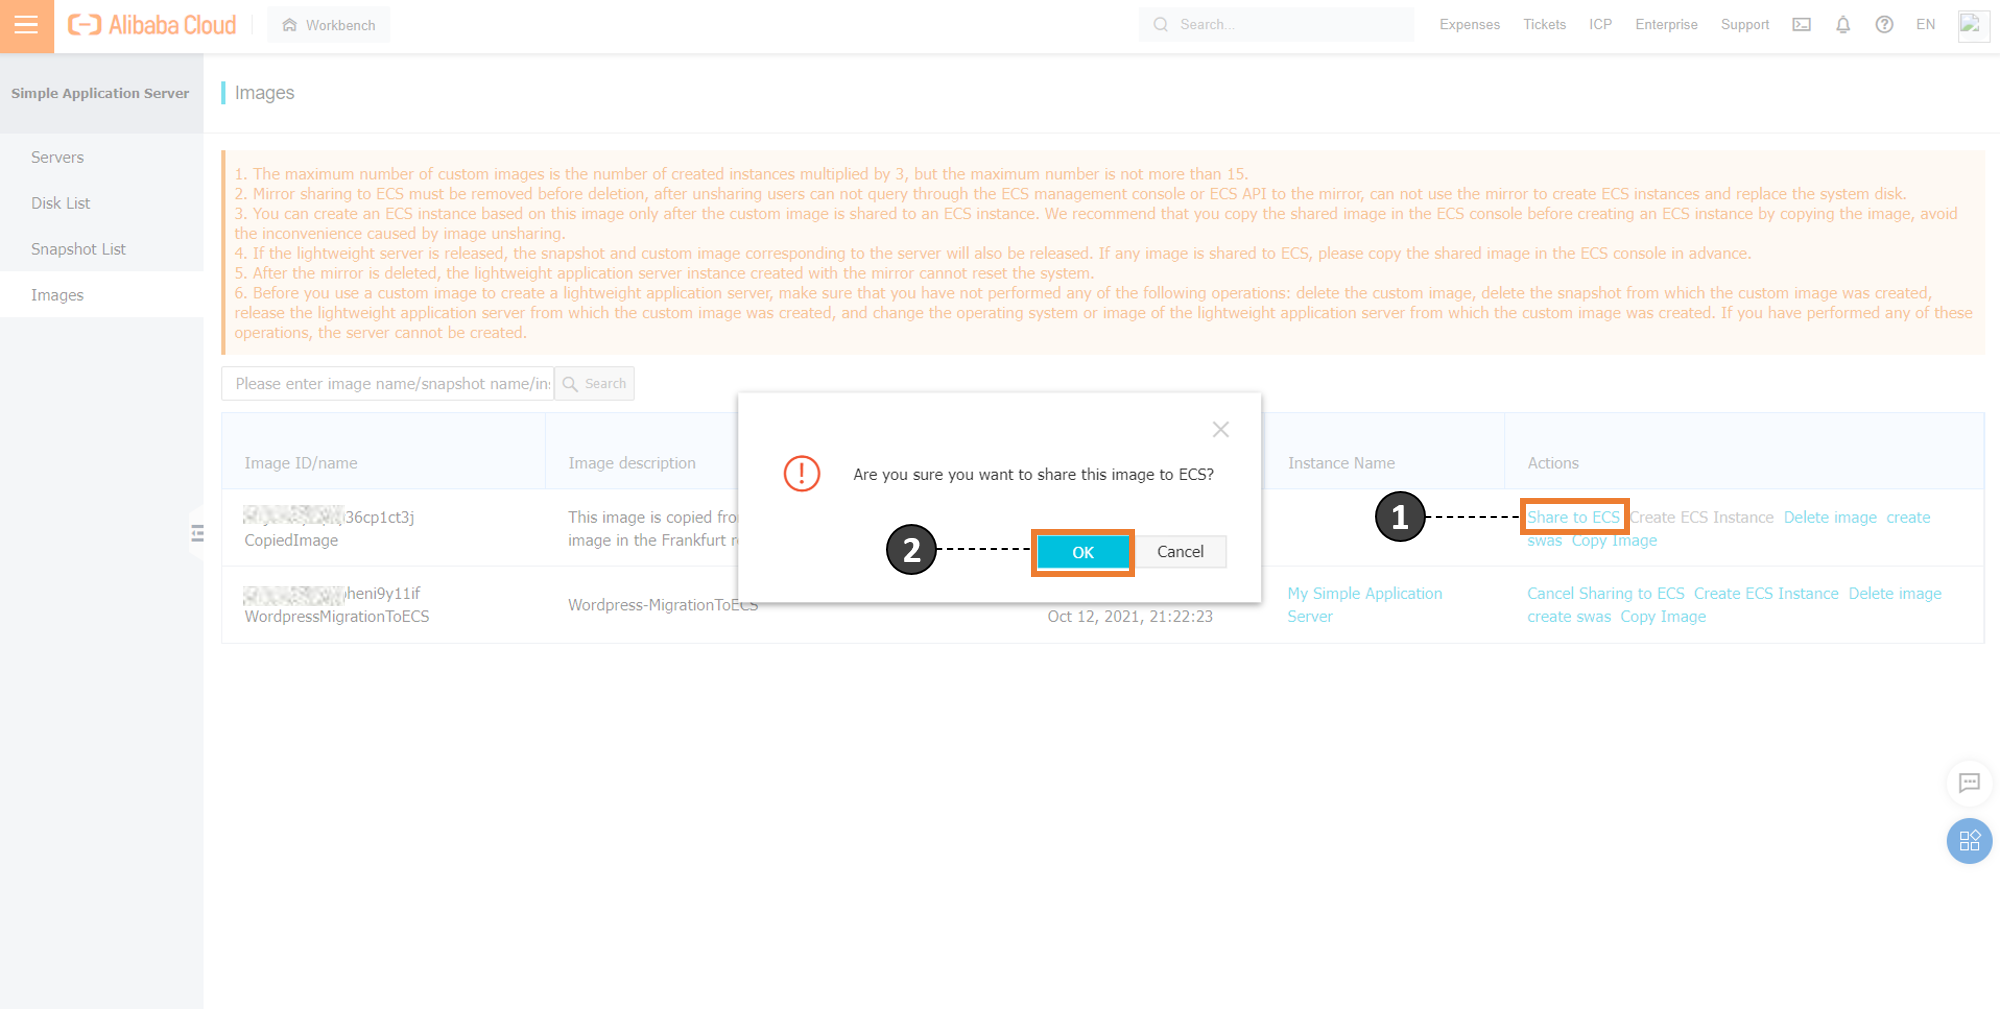
This created image can be shared to ECS directly, and the image can be located on the ECS console by selecting the corresponding region:
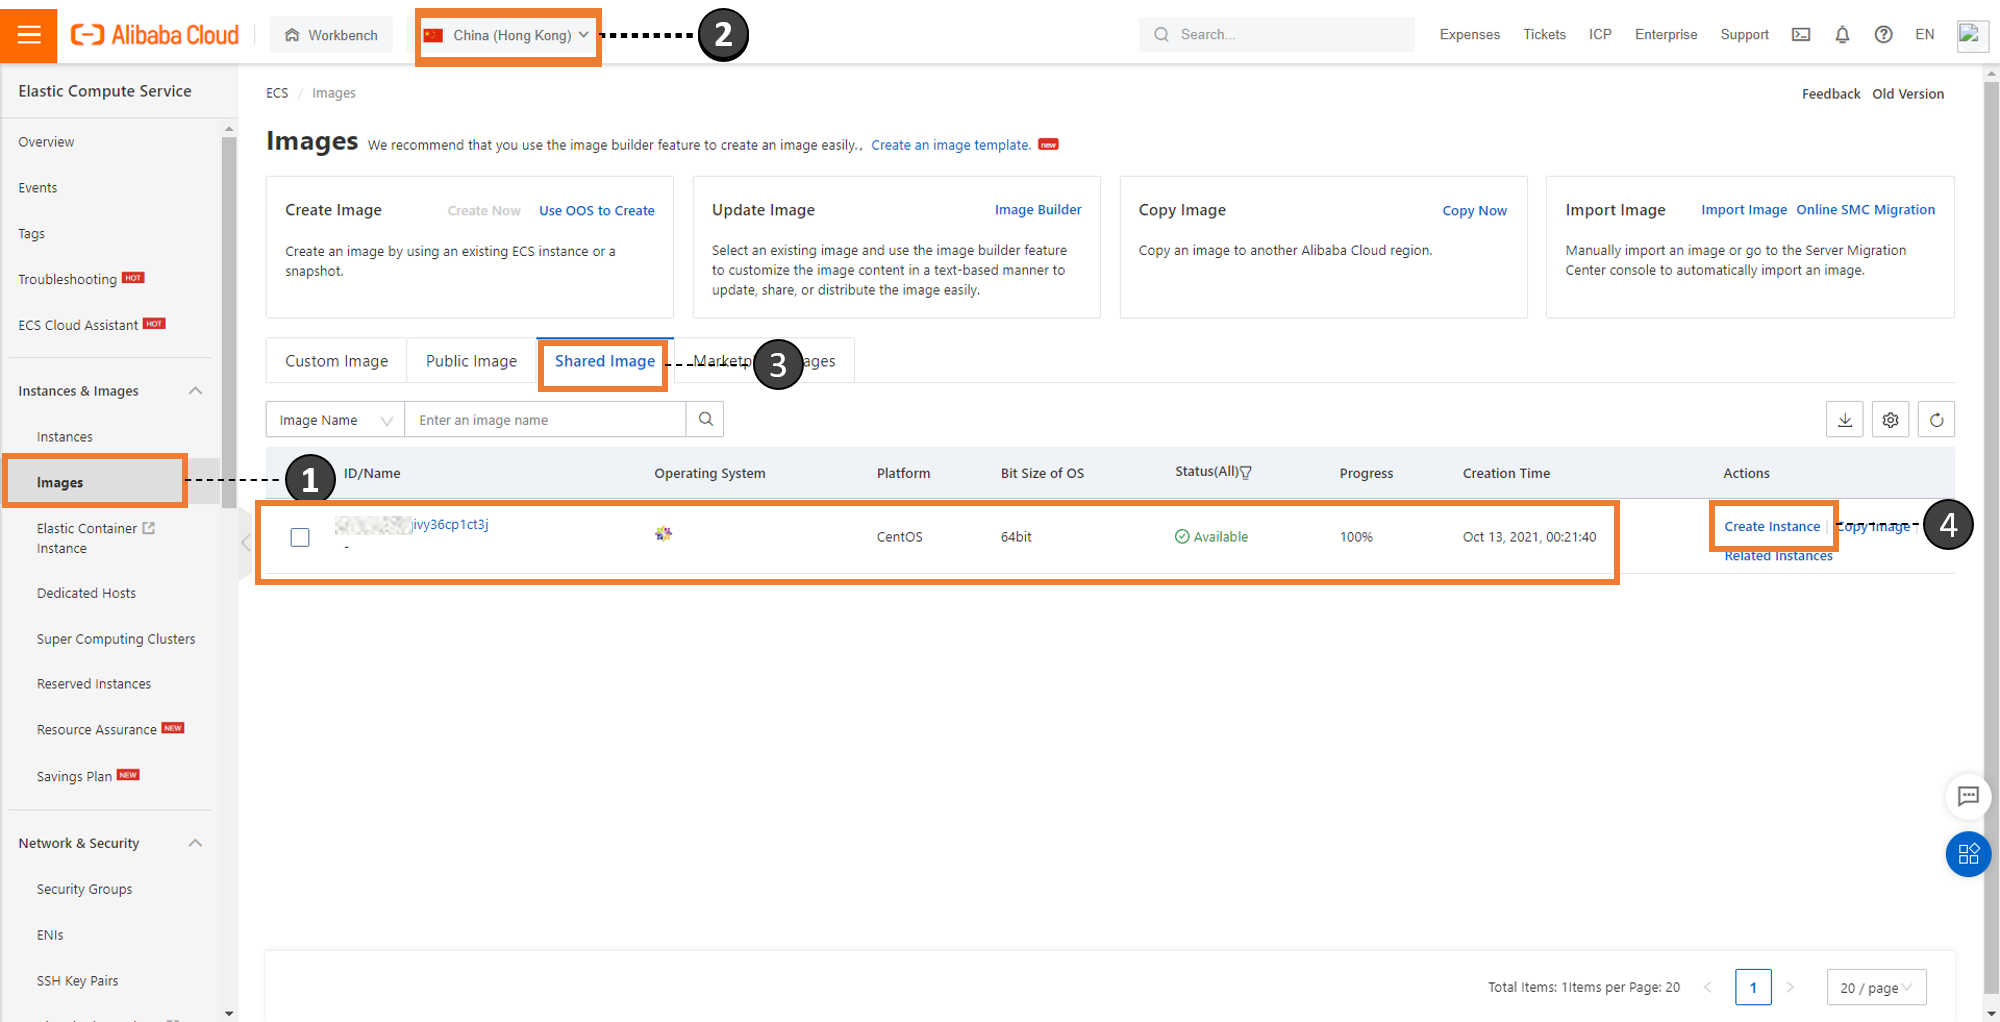
The application can be migrated to ECS easily by following the remaining steps from the previous section.
Alibaba Cloud to Digitalize the 2022 Asian Games with New DingTalk for Sports

1,304 posts | 461 followers
FollowAlibaba Clouder - November 2, 2020
Alibaba Cloud Community - March 11, 2022
Alibaba Cloud Community - March 25, 2022
Rupal_Click2Cloud - July 27, 2021
Alibaba Cloud Community - September 21, 2021
Alibaba Clouder - August 14, 2020

1,304 posts | 461 followers
Follow Cloud Migration Solution
Secure and easy solutions for moving you workloads to the cloud
Learn More ECS(Elastic Compute Service)
Elastic and secure virtual cloud servers to cater all your cloud hosting needs.
Learn More Database Migration Solution
Migrating to fully managed cloud databases brings a host of benefits including scalability, reliability, and cost efficiency.
Learn More Oracle Database Migration Solution
Migrate your legacy Oracle databases to Alibaba Cloud to save on long-term costs and take advantage of improved scalability, reliability, robust security, high performance, and cloud-native features.
Learn MoreMore Posts by Alibaba Cloud Community