By Arslan Ud Din Shafiq, Alibaba Cloud Tech Share Author. Tech Share is Alibaba Cloud's incentive program to encourage the sharing of technical knowledge and best practices within the cloud community.
Subsonic is an open source and free to use web-based streaming application that lets you share your favorite videos and music on your own media server. Subsonic media streamer provides you a centralized way to access your music from anywhere in the world.
In this tutorial, we will be installing and setting up Subsonic on an Alibaba Cloud Elastic Compute Service (ECS) with Ubuntu 16.04 installed.
Before proceeding with installation of any kind of package, use the following command to update your Ubuntu system. To execute this command, remember to login from non-root user with sudo privileges.
# sudo apt update && sudo apt upgradeSoftware-properties-common package is required to get the supported files for installation of Java. To install software-properties-common execute the command.
# sudo apt-get install software-properties-common -y You can install Oracle Java or OpenJDK. In this tutorial, you will need to install Oracle Java. To do so, you will need to follow the steps below.
Step 1:
Add the required PPA repository for installing Java. To do so, execute the following command,
# sudo add-apt-repository ppa:webupd8team/javaAfter executing above command, you will be asked to press Enter to continue or Ctrl+C to return control and cancel the process. Hit Enter to proceed with installation.
Step 2:
You will need to update the source list. To do so, you will need to execute the following command.
# sudo apt-get updateStep 3:
You can install Oracle Java. To install Oracle Java 8, execute the following command.
# sudo apt-get install oracle-java8-installerYou will be asked to type 'y' and hit Enter to continue. Hit Enter and you will see the license agreement prompt.
Hit Enter to continue, and you will see the Oracle Binary Code license terms prompt.
Select Yes and hit Enter in order to accept the license terms of Oracle Binary Code, the setup will be continued.
To install Subsonic, you will need to follow the steps below.
Step 1:
Get download link of latest release of Subsonic from its official website and execute the following command to download a copy of Subsonic.
# wget https://s3-eu-west-1.amazonaws.com/subsonic-public/download/subsonic-6.1.3.debStep 2:
Execute the following command to de-package the downloaded Debian file.
# sudo dpkg -i subsonic-6.1.3.debStep 3:
By default, subsonic has root user which is not secure. Hence, to avoid security issues, you will need to change user for subsonic. To do so, execute the following command which will open a file in nano editor. Find SUBSONIC_USER=root, change root to your own username, in my case, I will use aareez and save the file.
Step 4:
you will need to restart your Subsonic Media Server by executing the command below.
# sudo systemctl restart subsonicStep 5:
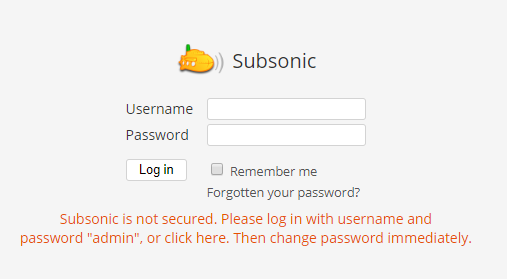
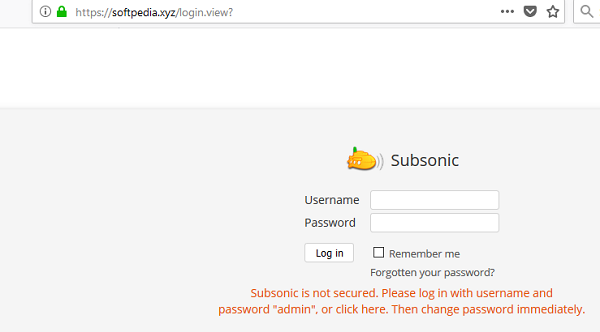
You can access your Subsonic Media Server via http://your_ecs_ip_address:4040 which means you will need to access port 4040. In case, you get any error while accessing, you will need to create security rule and update your firewall settings from Alibaba Cloud Security Group Rules. For updating firewall settings, go to the section specified for firewall settings. After accessing the Subsonic Media Server, you will see the following screen.
Step 6:
To store your media files, you will need to specify a directory for Subsonic Media Server. To do so, execute the commands below to create folder and assign rights to that folder.
# sudo mkdir /var/music
# sudo chown aareez:aareez /var/music
Step 7:
Log in to Subsonic Media Server by using default username and password.
Username: admin
Password: admin
After logging in successfully, you will see the following screen.
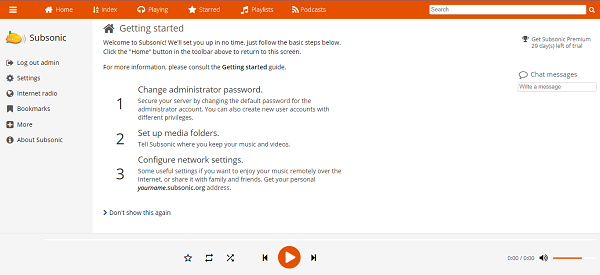
Change your administrator password to avoid any illegal access of your Subsonic Media Server.
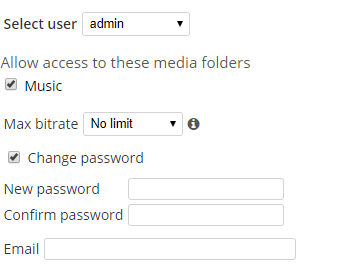
Select user as admin and type your new password and hit save button.
You will need to set up your media folder next. Type media folder address as you created in the above step and hit save button.

Finally, you need to configure network settings as shown below.
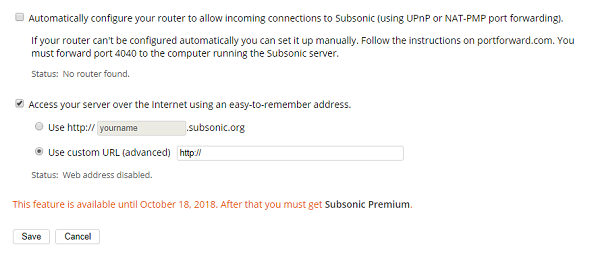
If you have any domain name, you can use it here but for enabling it, you will need to install Nginx and setup reverse proxy to forward the request to port 4040.
If you have activated firewalls, you will have to define a rule in Alibaba Cloud security group for your cloud server to add exception for port 80/tcp and 443/tcp. You can enable these ports while creating ECS instance, but in case if you have forgotten to unblock these ports, you can follow the procedure in this guide: https://www.alibabacloud.com/help/doc-detail/25471.htm
In this step, you will setup reverse proxy to access Subsonic Media Server so that you can access it via domain name without using any port in the end of address.
To install Nginx server, execute the command below.
# sudo apt-get install -y nginxStart and enable nginx server so that on system reboot, it can start automatically. To do so, execute the commands below.
# sudo systemctl start nginx
# sudo systemctl enable nginx
On successful installation, you will see the welcome screen.
To install Node.js, execute the command below.
# sudo apt-get install nodejsExecute the following command to create an Nginx configuration file using nano editor.
# sudo nano /etc/nginx/conf.d/subsonic.confAdd the following text in the opened file and save it.
server {
  listen 80;
  listen [::]:80;

  server_name softpedia.xyz;

  location / {
      proxy_pass http://localhost:4040/;
  }
}
Restart your Nginx server using the command below.
# sudo systemctl restart nginxTo install SSL certificate using Let's Encrypt SSL, follow the steps below.
Update your system by executing command below.
# sudo apt-get updateAdd the certbot repository.
# sudo add-apt-repository ppa:certbot/certbotUpdate the package to load the added certbot repository.
# sudo apt-get updateInstall python-certbot-nginx using the command below.
# sudo apt-get install python-certbot-nginxIssue SSL certificate to your domain by executing the command below.
# sudo certbot --nginx -d softpedia.xyzRestart nginx server using the command below.
# sudo systemctl restart nginxCongratulations! You have successfully installed and configured Subsonic media server on your ECS Ubuntu instance.

2,605 posts | 747 followers
FollowAlibaba Clouder - March 27, 2020
Alibaba Clouder - January 21, 2019
Alibaba Clouder - August 27, 2020
ClouderLouder - November 25, 2020
Alibaba Clouder - November 22, 2019
Alibaba Clouder - April 26, 2019

2,605 posts | 747 followers
Follow ECS(Elastic Compute Service)
Elastic and secure virtual cloud servers to cater all your cloud hosting needs.
Learn More OSS(Object Storage Service)
An encrypted and secure cloud storage service which stores, processes and accesses massive amounts of data from anywhere in the world
Learn MoreLearn More
More Posts by Alibaba Clouder