Web intrusion prevention blocks common web attacks and zero-day vulnerabilities, but strict detection rules can sometimes flag legitimate traffic as malicious. For example, an internal tool that sends requests containing special characters in authorization headers might be blocked even though it is authorized. Configure a whitelist to exempt specific requests from detection by the Protection Rules Engine.
Prerequisites
Before you begin, ensure that you have:
A WAF instance
A website added to WAF — see Tutorial
Create a whitelist rule
Step 1: Open the whitelist page
Log on to the WAF console.
In the top navigation bar, select the resource group and the region where your WAF instance is deployed. The available regions are Chinese Mainland and Outside Chinese Mainland.
In the left-side navigation pane, choose Protection Configurations > Website Protection.
At the top of the Website Protection page, select the domain name from the Switch Domain Name drop-down list.

Click the Web Security tab, locate the Web Intrusion Prevention section, and click Settings.
On the Web Intrusion Prevention - Whitelisting page, click Create Rule.
Step 2: Configure the rule
In the Create Rule dialog box, configure the following parameters.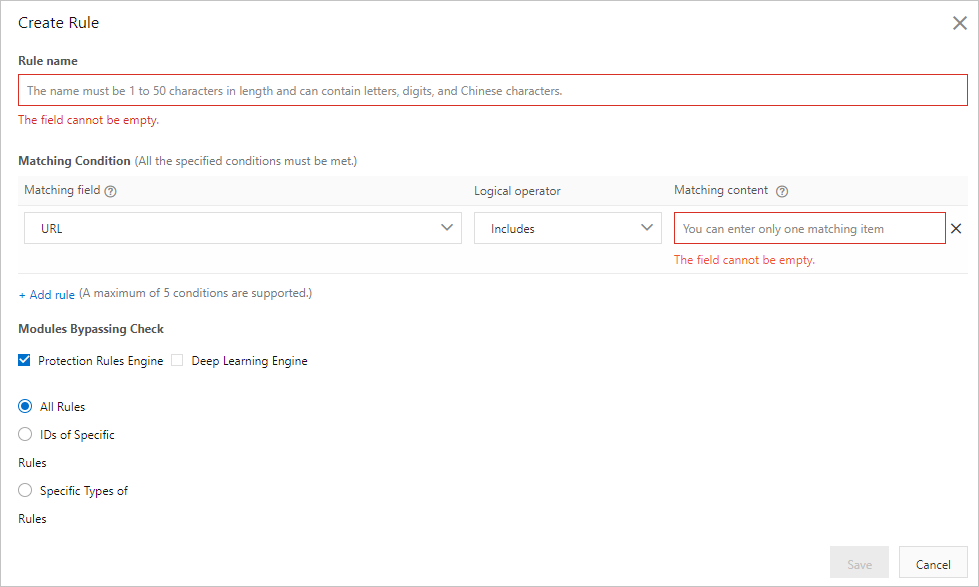
| Parameter | Description |
|---|---|
| Rule name | A name for the rule. Accepts 1–50 characters containing letters and digits. |
| Matching Condition | The conditions that identify which requests to exempt. Click Add rule to add conditions — up to 5 per rule. When multiple conditions are set, the rule triggers only if all conditions are met. For supported fields, see Fields in match conditions. |
| Bypassed Modules | The protection module to bypass for matching requests. The only valid value is Protection Rules Engine. |
Step 3: Select the scope of rules to bypass
When you select Protection Rules Engine, All Rules is automatically selected — every rule in the engine is bypassed for matching requests.
Configure the narrowest bypass scope possible to minimize your attack surface. Prefer skipping specific rule IDs over skipping all rules or entire rule types.
Option A: Skip specific rules by ID (recommended)
Select IDs of Specific Rules.
Enter each rule ID and press Enter after each one. You can enter up to 50 rule IDs.

To find rule IDs, go to the Protection Rule Group page and click Create Rule Group — the page lists all rules in WAF with their IDs. For more information, see Customize protection rule groups.
Tip: To handle a specific false positive faster, go to the Security Report page, open the Web Intrusion Prevention tab, find the blocked request, and click Ignore False Positives in the Actions column. WAF automatically generates a whitelist rule based on the characteristics of attack requests — you do not need to manually configure conditions or query rule IDs. For details, see View security reports on the Web Security tab.
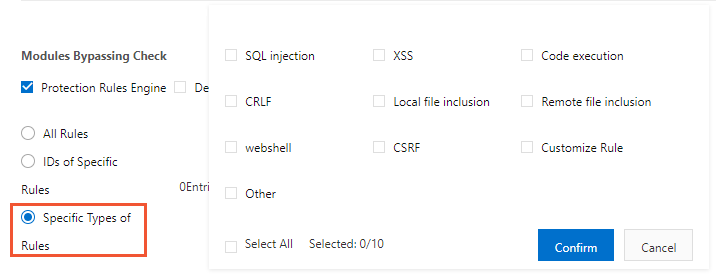
Option B: Skip specific rule types
Select Specific Types of Rules.
Select the rule types to bypass.
Click Confirm.
Step 4: Save the rule
Click Save.
The whitelist rule is automatically enabled. View, disable, edit, or delete rules at any time from the rule list.
Whitelist rules do not expire. If a rule is no longer needed, disable or delete it to avoid leaving unintended gaps in protection.