You can create an IPsec-VPN connection to establish an encrypted communication channel between a data center and a transit router. This topic describes how to create and manage IPsec-VPN connections in dual-tunnel mode.
Prerequisites
Before you create an IPsec-VPN connection, make sure you are familiar with the network architecture of IPsec-VPN connections in dual-tunnel mode.
Complete all the prerequisite steps described in the procedure.
Create an IPsec-VPN connection
- Log on to the VPN gateway console.
In the left navigation pane, choose .
On the IPsec Connections page, click Bind CEN.
On the Create IPsec-VPN Connection page, configure the IPsec-VPN connection as described below, and then click OK.
IPsec Settings
NoteWhen you create a VPN gateway or an IPsec-VPN connection that is associated with a transit router for the first time, the system automatically creates the AliyunServiceRoleForVpn service-linked role. This role allows the VPN gateway to access other cloud resources, such as elastic network interfaces (ENIs) and security groups, which is required to create the VPN gateway or IPsec-VPN connection. The system does not create the role again if it already exists. For more information about AliyunServiceRoleForVpn, see AliyunServiceRoleForVpn.
Configuration
Description
Name
Specify a name for the IPsec-VPN connection.
Region
Select the region of the transit router to attach.
The IPsec-VPN connection is created in the same region as the transit router.
Resource Group
Select a resource group for the CEN instance.
If you leave this parameter empty, the system displays the CEN instances in all resource groups.
Gateway Type
Select the network type for the IPsec-VPN connection.
Public (default): The IPsec-VPN connection is established over the Internet.
Private: The IPsec-VPN connection is established over a private network to encrypt private traffic.
Bind CEN
Select the account that owns the transit router.
Same Account: If you select this option, specify a Cloud Enterprise Network (CEN) instance that belongs to your account. When the IPsec-VPN connection is created, the system automatically attaches it to the transit router in the current region of the CEN instance.
Cross Account: If you select this option, the IPsec-VPN connection is not attached to a transit router by default after it is created. On the IPsec-VPN connection product page, grant cross-account authorization. Then, attach the IPsec-VPN connection to a transit router in another account.
If cross-account authorization is not granted, the IPsec-VPN connection can be attached only to a transit router that belongs to your account.
NoteTo change the attached transit router, first detach the VPN connection from the current transit router. Then, create a VPN connection on the new transit router.
CEN Instance ID
Select the CEN instance to which the transit router belongs.
The system displays the instance ID and CIDR block of the transit router that is created by the CEN instance in the current region. The IPsec-VPN connection will be attached to the transit router.
NoteThis parameter is required only when Bind CEN is set to Same Account.
Routing Mode
Select a routing mode for the IPsec-VPN connection.
Destination Routing Mode (default): Routes and forwards traffic based on destination IP addresses.
Protected Data Flows: Routes and forwards traffic based on source and destination IP addresses.
If you select Protected Data Flows, configure Local Network and Remote Network. After the IPsec-VPN connection is configured, the system automatically adds destination-based routes to the route table of the IPsec-VPN connection. By default, the routes are advertised to the route table of the transit router that is associated with the IPsec-VPN connection.
Local Network
If Routing Mode is set to Protected Data Flows, you must enter the CIDR block on the Alibaba Cloud side to be connected to the data center. Phase 2 negotiation is based on the protected data flows on both sides. We recommend that you keep the value of Local Network on the Alibaba Cloud side the same as the remote network on the data center side.
Click the
 icon on the right side of the text box to add multiple CIDR blocks on the Alibaba Cloud side.Note
If you configure multiple CIDR blocks, you must set IKE Version to ikev2.
Remote Network
If Routing Mode is set to Protected Data Flows, enter the CIDR block of the local data center. Phase 2 negotiation is based on the protected data flows on both sides. Ensure that the Remote Network on the Alibaba Cloud side matches the local network of the data center.
Click the
icon on the right side of the text box to add multiple CIDR blocks on the data center side.NoteIf you configure multiple CIDR blocks, set IKE Version to ikev2.
Effective Immediately
Specify whether the IPsec-VPN connection configuration takes effect immediately.
Yes (default): The system starts the IPsec negotiation immediately after the configuration is complete.
No: The system starts the IPsec negotiation only when traffic is detected.
Tunnel Settings
ImportantWhen you create an IPsec-VPN connection in dual-tunnel mode, configure two tunnels and make sure that both are active. If you configure or use only one tunnel, you cannot benefit from the link redundancy and zonal disaster recovery capabilities of the IPsec-VPN connection.
Parameter
Description
Enable BGP
If the IPsec-VPN connection uses Border Gateway Protocol (BGP), enable BGP. BGP is disabled by default.
Before using BGP dynamic routing, make sure your on-premises gateway device supports BGP. Also, understand how BGP dynamic routing works and its limits.
Local ASN
After enabling the Border Gateway Protocol (BGP) feature, enter the autonomous system number (ASN) for the Alibaba Cloud side of the tunnel. Both tunnels use the same ASN. Default value: 45104. Valid values: 1 To 4294967295.
NoteUse a private ASN to establish a BGP connection with Alibaba Cloud. For more information about the range of private ASNs, see the relevant documentation.
Customer Gateway
Select the customer gateway to associate with the tunnel.
Pre-shared Key
The authentication key for the tunnel. It authenticates the tunnel and its peer.
The key must be 1 to 100 characters in length and can contain digits, uppercase letters, lowercase letters, and the following special characters:
~`!@#$%^&*()_-+={}[]\|;:',.<>/?. The key cannot contain space characters.If you do not specify a pre-shared key, the system generates a random 16-character string as the pre-shared key. After you create the IPsec-VPN connection, you can view the pre-shared key generated by the system by clicking the Edit button of the tunnel. For more information, see Modify tunnel configurations.
ImportantMake sure that the tunnels and peers use the same pre-shared key. Otherwise, tunnel communication cannot be established.
Encryption Configuration
Configuration
Description
IKE Configurations
Version
Select the IKE version.
ikev1
ikev2 (default)
Compared with IKEv1, IKEv2 simplifies SA negotiations and provides better support for scenarios that use multiple CIDR blocks.
Negotiation Mode
The negotiation mode. Valid values:
main (default): The main mode provides higher security during negotiations.
aggressive: The aggressive mode is faster and has a higher success rate during negotiations.
The modes support the same security level for data transmission.
Encryption Algorithm
The encryption algorithm used in Phase 1 negotiation.
Supported algorithms: aes128 (default), aes192, aes256, des, and 3des.
NoteUse the aes128, aes192, or aes256 algorithms. Do not use the des or 3des algorithms.
Advanced Encryption Standard (AES) is a symmetric-key cryptography algorithm that provides strong encryption and decryption. AES ensures secure data transmission and has little impact on network latency, throughput, and forwarding performance.
3des is the Triple Data Encryption Algorithm. It requires a long encryption time, has high algorithmic complexity, and uses significant computing resources. Compared with AES, 3des reduces forwarding performance.
Authentication Algorithm
The authentication algorithm that is used in Phase 1 negotiations.
Valid values: sha1 (default), md5, sha256, sha384, and sha512.
On some on-premises gateway devices, you may need to specify the PRF algorithm. The PRF algorithm must be the same as the IKE authentication algorithm.
DH Group
The Diffie-Hellman (DH) key exchange algorithm for Phase 1 negotiation.
group1: DH group 1.
group2 (default): DH group 2.
group5: DH group 5.
group14: DH group 14.
SA Life Cycle (seconds)
Set the lifetime for the SA from Phase 1. The unit is seconds. The default value is 86400. The valid range is 0 to 86400.
LocalId
Enter an identifier for the tunnel for Phase 1 negotiation. The default value is the gateway IP address of the tunnel.
This parameter is used only to identify Alibaba Cloud in IPsec-VPN connection negotiation. The identity can be an IP address or a Fully Qualified Domain Name (FQDN). The value cannot contain spaces. Use a private IP address as the local identity.
If LocalId is an FQDN, such as example.aliyun.com, the peer ID of the IPsec-VPN connection on the on-premises gateway device must match the value of LocalId. The recommended negotiation mode is aggressive (aggressive mode).
RemoteId
Enter an identifier for the peer for Phase 1 negotiations. The default value is the IP address of the associated customer gateway.
This parameter serves only as an identifier for the on-premises gateway device during IPsec-VPN negotiations. The identity can be an IP address or an FQDN, and cannot contain spaces. Use a private IP address as the peer identity.
If RemoteId is an FQDN, such as example.aliyun.com, the local identity on the on-premises gateway device must match the value of RemoteId. Set the negotiation mode to aggressive (aggressive mode).
IPsec Configurations
Encryption Algorithm
The encryption algorithm for Phase 2 negotiation.
Valid values: aes128 (default), aes192, aes256, des, and 3des.
NoteUse the aes128, aes192, or aes256 algorithms. Do not use the des or 3des algorithms.
Advanced Encryption Standard (AES) is a symmetric-key cryptography algorithm that provides strong encryption and decryption. AES ensures secure data transmission and has little impact on network latency, throughput, and forwarding performance.
3des is the Triple Data Encryption Algorithm. It requires a long encryption time, has high algorithmic complexity, and uses significant computing resources. Compared with AES, 3des reduces forwarding performance.
Authentication Algorithm
The authentication algorithm that is used in Phase 2 negotiations.
Valid values: sha1 (default), md5, sha256, sha384, and sha512.
DH Group
The Diffie-Hellman (DH) key exchange algorithm for Phase 2 negotiation.
disabled: Does not use the DH key exchange algorithm.
If the on-premises gateway device does not support Perfect Forward Secrecy (PFS), select disabled.
If you select any group other than disabled, the PFS feature is enabled by default. This feature ensures that a key is updated during each renegotiation. You must also enable PFS on the on-premises gateway device.
group1: DH group 1.
group2 (default): DH group 2.
group5: DH group 5.
group14: DH group 14.
SA Life Cycle (seconds)
Set the lifetime of the SA negotiated in Phase 2. Unit: seconds. Default value: 86400. Value range: 0 To 86400.
DPD
Select whether to enable the Dead Peer Detection (DPD) feature. This feature is enabled by default.
When the DPD feature is enabled, the IPsec-VPN connection sends DPD packets to check if the peer is active. If no response is received from the peer within a specific time, the connection fails. The IPsec-VPN connection then deletes the Internet Security Association and Key Management Protocol (ISAKMP) SA, the IPsec SA, and the IPsec tunnel. If a DPD timeout occurs, the IPsec-VPN connection automatically starts a new tunnel negotiation. The DPD packet timeout is 30 seconds.
NAT Traversal
Select whether to enable the network address translation (NAT) traversal feature. By default, the NAT traversal feature is enabled.
After enabling NAT traversal, the initiator does not check UDP ports during Internet Key Exchange (IKE) negotiations and can automatically discover NAT gateway devices along the IPsec tunnel.
BGP Configuration
If you enable BGP for the IPsec-VPN connection, you can configure the CIDR block and IP address for the Alibaba Cloud side of the BGP tunnel. If you do not enable BGP when you create the IPsec-VPN connection, you can enable BGP for the tunnels and add the required configurations after the IPsec-VPN connection is created.
Parameter
Description
Tunnel CIDR Block
Enter the tunnel CIDR block.
The tunnel CIDR block must be a /30 CIDR block within the 169.254.0.0/16 range. The CIDR block cannot be 169.254.0.0/30, 169.254.1.0/30, 169.254.2.0/30, 169.254.3.0/30, 169.254.4.0/30, 169.254.5.0/30, 169.254.6.0/30, or 169.254.169.252/30.
NoteThe two tunnels of an IPsec-VPN connection must use different tunnel CIDR blocks.
Local BGP IP address
Enter the BGP IP address of the local end of the tunnel.
This IP address must be within the tunnel CIDR block.
Advanced configuration
When you create an IPsec-VPN connection and attach it directly to a transit router in your account, the system selects the following three advanced features by default to help you configure routing. You can also deselect these features and customize network connectivity using the various routing features of the transit router.
Configuration item
Description
Automatic Advertising
After you enable this feature, the system automatically advertises routes from the route table of the transit router associated with the IPsec-VPN connection to the BGP route table of the IPsec-VPN connection.
NoteThis feature takes effect only if BGP dynamic routing is used between the IPsec-VPN connection and your data center.
You can also disable this feature using the Advertise Routes setting. For more information, see Disable route synchronization.
Automatically Associate with Default Route Table of Transit Router
Enabling this feature associates the IPsec-VPN connection with the default route table of the transit router. The transit router queries the default route table to forward traffic from the IPsec-VPN connection.
Automatically Advertise System Routes to Default Route Table of Transit Router
After this feature is enabled, the system advertises the routes in the destination-based route table and the BGP route table of the IPsec-VPN connection to the default route table of the transit router.
After the IPsec-VPN connection is created, find the target IPsec-VPN connection on the IPsec Connections page, and then click Download Configuration in the Actions column.
In the IPsec-VPN Connection Configuration dialog box, copy the configuration and save it locally. Use this configuration to configure your on-premises gateway device.
What to do next
Using the downloaded configuration for the IPsec-VPN connection, configure the on-premises gateway device.
View tunnel information of an IPsec-VPN connection
After you create an IPsec-VPN connection, you can view the status and information of the two tunnels on the details page of the IPsec-VPN connection.
Log on to the VPN Gateway console.
In the left navigation pane, choose .
- In the top navigation bar, select the region of the IPsec-VPN connection.
On the IPsec Connections page, find the IPsec-VPN connection and click its ID.
On the details page of the IPsec-VPN connection, view the status and information of the two tunnels.
Field
Description
Tunnel/Tunnel ID
The tunnel ID.
Gateway IP Address
The gateway IP address assigned by the system to the tunnel, used to establish an encrypted tunnel.
Pre-shared Key
The pre-shared key used by the tunnel.
The pre-shared key is encrypted by default. You can view the pre-shared key by moving the pointer over View.
Tunnel CIDR Block
If BGP dynamic routing is enabled for the tunnel, this field displays the BGP tunnel CIDR block.
Local BGP IP Address
If BGP dynamic routing is enabled for the tunnel, this field displays the BGP IP address on the Alibaba Cloud side.
Connection Status
The status of the IPsec-VPN negotiations of the tunnel.
If the IPsec-VPN negotiations succeed, the console displays Phase 2 Negotiations Succeeded.
If the IPsec-VPN negotiations fail, the console displays a failure message. Troubleshoot the issue based on the message. For more information, see Troubleshoot IPsec-VPN.
Customer Gateway
The customer gateway instance associated with the tunnel.
The customer gateway is configured with an IP address and BGP ASN on the data center side.
Status
The status of the tunnel. Valid values:
Active
Updating
Deleting
Manage IPsec-VPN connections
Modify the configuration of a tunnel
Modify an IPsec-VPN connection
Enable the BGP feature for a tunnel separately
Grant permissions on an IPsec-VPN connection to a transit router instance in another account
If you select Cross Account for the Bind CEN option when you create an IPsec-VPN connection, you must perform the following steps after the connection is created to grant the cross-account transit router permissions on the IPsec-VPN connection.
Before you grant the permissions, make sure that the IPsec-VPN connection is not attached to a transit router. If the IPsec-VPN connection is already attached to a transit router instance, you must first detach it. For more information, see Delete a network instance connection.
Log on to the VPN Gateway console.
In the left navigation pane, choose .
- In the top navigation bar, select the region of the IPsec-VPN connection.
On the IPsec Connections page, find the target IPsec-VPN connection and click its ID.
On the Cross-account Authorization tab of the IPsec-VPN connection details page, click Cross-account Authorization.
In the Attach to CEN dialog box, configure the following parameters and click OK.
Configuration item
Note
Peer Account UID
The ID of the Alibaba Cloud account to which the transit router belongs.
Peer CEN Instance ID
The ID of the Cloud Enterprise Network (CEN) instance to which the transit router belongs.
Payer
Select the account that pays the fees.
CEN Instance Owner (default): The account that owns the transit router pays the transit router's connection fee and traffic processing fee after the transit router is attached to the IPsec-VPN connection.
VPN Owner: The account that owns the IPsec-VPN connection pays the transit router's connection fee and traffic processing fee after the transit router is attached to the IPsec-VPN connection.
ImportantSelect the payment account with caution. Changing the payment account may interrupt your services. For more information, see Change the payment account for a network instance.
After an IPsec-VPN connection is attached to a transit router, the owner of the IPsec-VPN connection still pays the instance fee and traffic fee for the IPsec-VPN connection.
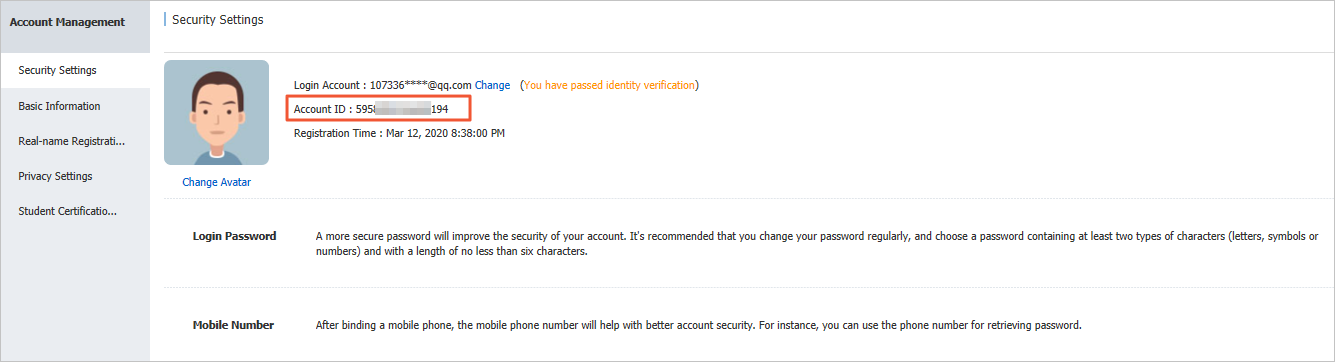
We recommend that you record the ID of the IPsec-VPN connection and the ID of its Alibaba Cloud account. These IDs are required when you associate the IPsec-VPN connection with a transit router that belongs to another account. For more information, see Attach an IPsec-VPN connection to a transit router.
You can view your account ID on the Account Management page.
Revoke authorization for an IPsec-VPN connection from a transit router instance in another account
If you no longer need to associate an IPsec-VPN connection with a transit router of another Alibaba Cloud account, you can revoke the permissions on the IPsec-VPN connection from the transit router. Before you revoke the permissions, you must disassociate the IPsec-VPN connection from the transit router. For more information, see Delete a network instance connection.
Delete an IPsec-VPN connection
Create and manage an IPsec-VPN connection by calling API operations
You can create and manage an IPsec-VPN connection by calling API operations. You can use tools such as Alibaba Cloud SDK (recommended), Alibaba Cloud CLI, Terraform, or Resource Orchestration Service. The following API operations are available: