PrestoDB is an open source distributed SQL query engine for big data based on the massively parallel processing (MPP) architecture. PrestoDB can be connected to various data sources, such as MySQL, Elasticsearch, and Tablestore. After you connect PrestoDB to Tablestore, you can execute SQL statements in PrestoDB to query and analyze data in Tablestore, write data to Tablestore, and import data to Tablestore.
Background information
PrestoDB is an open source distributed SQL query engine for big data based on the massively parallel processing (MPP) architecture. PrestoDB can be connected to various data sources, such as MySQL, Elasticsearch, and Tablestore. PrestoDB can be used as a query tool, an extract, transform, and load (ETL) tool, a stress testing tool, or a unified query engine to meet the requirements for data processing in different scenarios.
As a query tool for daily development and troubleshooting, PrestoDB allows you to execute SQL statements to query and analyze data in tables.
As an ETL tool, PrestoDB allows you to replicate data across tables or instances and copy data from disparate data sources.
As a stress testing tool, PrestoDB allows you to scan or write multiple data records at the same time.
As a unified query engine in the data mid-end, PrestoDB can be connected to various disparate data sources.
Before you access Tablestore by using PrestoDB, you must connect PrestoDB to Tablestore. After PrestoDB is connected to Tablestore, you can execute SQL statements in PrestoDB to query and analyze data in Tablestore, write data to Tablestore, and import data to Tablestore.
Prerequisites
A server that runs the Linux or macOS operating system is available. In this example, a server that runs the Linux operating system is used.
NoteIf no server that runs the Linux operating system is available, we recommend that you use an Elastic Compute Service (ECS) instance that runs the Linux operating system. For more information, see Create and manage an ECS instance by using the ECS console (express version).
64-bit Java 8 and Python 3 are installed on the server.
PrestoDB is installed on the server.
The prestodb-tablestore-connector file based on the PrestoDB version is downloaded and uploaded to the
plugindirectory under the PrestoDB installation directory. The file is decompressed in the installation directory.The following table describes the mapping between the version of the prestodb-tablestore-connector plug-in and the PrestoDB version.
Plug-in version
PrestoDB version
Description
0.280
The plug-in version is the first release. This plug-in is supported by PrestoDB 0.280 or later.
The Tablestore information that is required to connect PrestoDB to Tablestore, such as the account that is used to access Tablestore, instance information, and table information, is obtained.
An AccessKey pair is obtained for a RAM user that is granted the permissions to manage Tablestore. For more information, see Obtain an AccessKey pair.
NoteIf the RAM user is not granted the permissions to manage Tablestore, you must grant the required permissions to the RAM user before you perform subsequent operations. For more information, see Use a RAM policy to grant permissions to a RAM user.
Usage notes
You can access Tablestore data only of the Wide Column model by using PrestoDB.
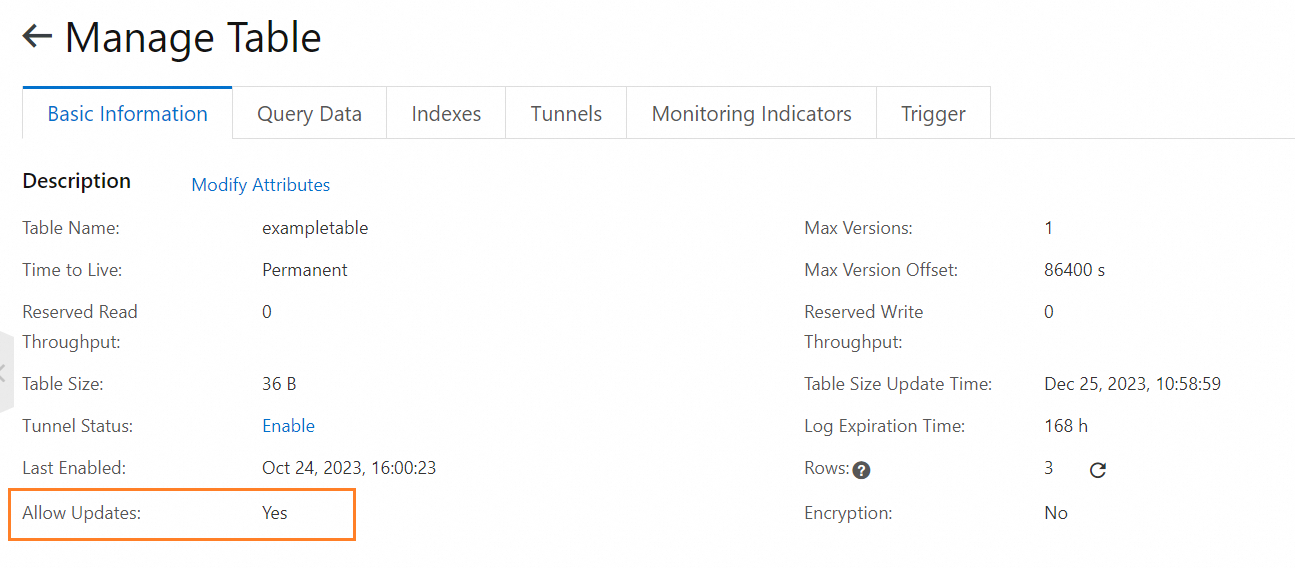
By default, PrestoDB writes data to Tablestore by calling the UpdateRow operation. PrestoDB cannot write data to Tablestore by calling the PutRow operation. If you want to use PrestoDB to write data to a Tablestore table, make sure that the Allow Updates parameter is set to Yes for the table. Otherwise, PrestoDB cannot write data to the table.
ImportantIf you set the Time to Live parameter to a value other than -1 for a Tablestore table and want to create a search index for the table, you must set the Allow updates parameter to No for the table. PrestoDB cannot write data to the table.
If you want to use PrestoDB to write data to Tablestore by calling the PutRow operation, join the DingTalk group 36165029092 to contact Alibaba Cloud technical support.
To check whether a table can be updated, view the value of the Allow Updates parameter on the Basic Information tab of the table in the Tablestore console or call the DescribeTable operation by using Tablestore SDKs.
Data type mappings
Tablestore and PrestoDB support different data types. The following table describes the mappings between data types that are supported by Tablestore and PrestoDB.
Data type supported by Tablestore | Data type supported by PrestoDB |
string | varchar |
integer | bigint |
double | double |
boolean | boolean |
binary | varbinary |
Procedure
To access Tablestore by using PrestoDB, perform the following steps: Connect PrestoDB to Tablestore, run SQL CLI of PrestoDB, create a schema and a mapping table, and then execute SQL statements to perform operations on data.
Step 1: Connect PrestoDB to Tablestore
After you install PrestoDB, you must configure the catalog and schema of PrestoDB to connect PrestoDB to Tablestore. The catalog configuration file is stored in the etc/catalog/tablestore.properties path.
Configuration description
Procedure
Specify the schema configuration mode in the catalog configuration file and configure the required parameters. In this example, the dynamic configuration mode based on a metadata table is used.
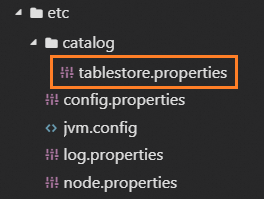
Go to the directory in which PrestoDB is installed. Create the
tablestore.propertiesfile in theetc/catalog/path of the directory.ImportantMake sure that you have execute permissions for the file before you modify the file.
The following figure shows the directory in which the catalog configuration file is located.
Modify the configuration example in the
tablestore.propertiesfile based on your business requirements and copy the file to the catalog file.If you want to configure a schema in dynamic configuration mode based on a metadata table, set the
tablestore.schema-modeparameter tometa-table.NoteIf you want to configure a schema in configuration mode based on a local static file, set the
tablestore.schema-modeparameter tofileand specify the full path of thetablestore.schema-filefile. Then, configure the schema information in the static file. For more information, see the Configure a Presto server section of the " Configure a Presto server and execute sample SQL statements" topic.connector.name=tablestore tablestore.schema-mode=meta-table #tablestore.schema-mode=file tablestore.schema-file=/users/test/tablestore/presto/tablestore.schema tablestore.meta-instance=metastoreinstance tablestore.endpoint=http://metastoreinstance.cn-hangzhou,ots.aliyuncs.com/ tablestore.accessid=**************** tablestore.accesskey=************************** tablestore.meta-table=meta_table tablestore.auto-create-meta-table=trueThe following table describes the parameters in the tablestore.properties file.
Parameter
Example
Required
Description
connector.name
tablestore
Yes
The name of the connector. You must set the parameter to tablestore.
tablestore.schema-mode
meta-table
Yes
The schema configuration mode. In this example, the parameter is set to
meta-table.tablestore.meta-instance
metastoreinstance
Yes
The name of the Tablestore instance that is used to store metadata. Modify the value of this parameter based on your business requirements. For more information, see Instances.
ImportantMake sure that the Tablestore instance that you specify to store metadata is created within your Alibaba Cloud account.
tablestore.endpoint
http://metastoreinstance.cn-hangzhou,ots.aliyuncs.com/
Yes
The endpoint of the Tablestore instance that is used to store metadata. Modify the value of this parameter based on your business requirements. For more information, see Endpoints.
tablestore.accessid
****************
Yes
The AccessKey ID and AccessKey secret of the RAM user that is granted the permissions to access the Tablestore instance that is used to store metadata.
tablestore.accesskey
**************************
tablestore.meta-table
meta_table
Yes
The name of the Tablestore table that is used to store metadata. Modify the value of this parameter based on your business requirements.
tablestore.auto-create-meta-table
true
No
Specifies whether to automatically create a metadata table. The default value is true, which specifies that a metadata table is automatically created when you create a schema.
Save and exit the configuration file.
NoteYou can run the cat command to check whether the configuration file is saved.
Step 2: Run SQL CLI of Presto
After Tablestore is connected to PrestoDB, you can start the Presto server and execute SQL statements.
Obtain the program that can be executed to install the PrestoDB client.
Download the installation package of the PrestoDB client.
In this example, the presto-cli-0.280-executable.jar package is downloaded.
Save the installation package of the PrestoDB client to the
bindirectory under the directory in which PrestoDB is installed.Run the following commands in the
bindirectory to obtain the program that can be executed to install the PrestoDB client.# Rename the installation package of the PrestoDB client to presto. Replace presto-cli-0.280-executable.jar with the actual version name of the PrestoDB client. mv presto-cli-0.280-executable.jar presto # Grant the user the permissions to perform operations on the presto file. chmod +x prestoThe following figure shows the directory in which the program that can be executed to install the PrestoDB client is located.

Run the following commands in the
bindirectory to start the Presto server.ImportantWhen you start the Presto server, you must separately start the coordinator and at least one worker.
# You can run the Presto server in foreground or background. If you run the Presto server in foreground, you can view operation logs in an easier way.
# Method 1: Run the Presto server in background
./launcher start
# Method 2: Run the Presto server in foreground
./launcher run
Run the following command in the
bindirectory to start SQL CLI.NoteBy default, PrestoDB runs on port 8080. If you want to modify the port configuration, change the value of the
http-server.http.portparameter in theetc/config.propertiesfile.After you modify specific configurations, you must restart the Presto server for the new configurations to take effect.
./prestoin the command indicates the relative path of the program that can be executed to install the PrestoDB client in thebindirectory.
./presto --server localhost:8080 --catalog tablestore --schema defaultThe following table describes the parameters in the command.
Parameter
Example
Required
Description
--server
localhost:8080
Yes
The URI of the Presto server. Replace the value with the actual URI of your Presto server. The value of the parameter must be the same as the value of the
discovery.uriparameter in theetc/config.propertiesfile in the directory in which PrestoDB is installed.--catalog
tablestore
Yes
The name of the catalog configuration file. In this example, the parameter is set to tablestore.
--schema
default
Yes
The schema configuration. Retain the default configuration.
Step 3: Create a schema and mapping table
If you configure a schema in dynamic configuration mode based on a metadata table, you must manually create and use the schema to configure the Tablestore instance to which PrstoDB is connected and authenticate user permissions. Then, you can create a mapping table for the Tablestore table to query and analyze data.
If you configure a schema in configuration mode based on a local static file, skip this step.
Execute the following statement to create a schema:
The following sample SQL statement provides an example on how to create a schema named testdb that is used to access the Tablestore instance named myinstance.
CREATE SCHEMA tablestore.testdb
WITH (
  endpoint = 'https://myinstance.cn-hangzhou.ots.aliyuncs.com',
  instance_name = 'myinstance',
  access_id = '************************',
  access_key = '********************************'
);
The following table describes the parameters.
Parameter
Example
Required
Description
endpoint
https://myinstance.cn-hangzhou.ots.aliyuncs.com
Yes
The endpoint of the Tablestore instance. For more information, see Endpoints.
instance_name
myinstance
Yes
The name of the connected Tablestore instance. For more information, see Instance.
access_id
************************
Yes
The AccessKey ID of your Alibaba Cloud account or a RAM user.
access_key
********************************
Yes
The AccessKey secret of your Alibaba Cloud account or a RAM user.
Execute the
use <SCHEMA_NAME>;statement to use the created schema.Replace
<SCHEMA_NAME>with the name of the created schema. You can execute theshow schemas;statement to view a list of schemas.Execute the following statement to create a mapping table for the Tablestore table.
ImportantWhen you create a mapping table, take note of the following items:
Make sure that the data types of columns in the mapping table are mapped to those in the Tablestore table. For more information, see the Data type mappings section of the "Access Tablestore by using PrtestoDB" topic.
The name of the mapping table must be the same as the actual name of the Tablestore table.
The table that is specified by the table_name parameter in the CREATE TABLE statement is mapped to the actual table in Tablestore. You can create multiple mapping tables for the same Tablestore table.
The mapping table must contain all primary key columns of the Tablestore table, but only specific attribute columns.
The names and order of the primary key columns in the mapping table must be the same as those in the Tablestore table. You can map each attribute column in the mapping table to a column name in the actual Tablestore table by specifying the origin_name parameter.
In this example, the main_table Tablestore table that contains two primary key columns named gid and uid and three attribute columns named col1, col2, and col3 is used.
The following sample SQL statement provides an example on how to create a mapping table with the same name as the main_table Tablestore table:
CREATE TABLE if not exists main_table
(
   gid bigint,
   uid bigint,
   c1 boolean with (origin_name = 'col1'),
   c2 bigint with (origin_name = 'col2'),
   c3 varchar with (origin_name = 'col3')
) WITH (
   table_name = 'main_table'
);
Step 4: Execute SQL statements to perform operations on data
Before you execute SQL statements to perform operations on data, make sure that you use the required schema by executing the use <SCHEMA_NAME>; statement.
Execute SQL statements to query schema configurations and metadata of the mapping table, and read data from and write data to the Tablestore table. For more information about sample SQL statements, see the "Common sample SQL statements" section of the Configure a Presto server and execute sample SQL statements topic.
Query schema configurations.
Query a list of schemas
show schemas;Query a list of tables in a specific schema
show tables;
Query the metadata of a specific table
Replace
<TABLE_NAME>with the actual name of a table.describe <TABLE_NAME>;Perform operations on data.
Read and write Tablestore data.
Write data
Insert a row of data
The following sample SQL statement provides an example on how to insert a row of data into the main_table table:
insert into main_table values(10001,10001,true,100,'hangzhou');Import multiple data records at the same time
ImportantBefore you import multiple data records at the same time, make sure that a destination table is created and the schema of the destination table is the same as that of the source table.
The following sample SQL statement provides an example on how to import the gid, uid, c1, c2, and c3 columns of the rows in which the value of the gid column is greater than 0 and the value of the uid column is less than 10000 from the main_table table to the sampletable table:
insert into sampletable select gid, uid, c1, c2, c3 from main_table where gid > 0 and uid < 100000;
Read data
The following sample SQL statement provides an example on how to query the rows in which the value of the gid column is greater than 0, the value of the uid column is less than 10, and the value of the c1 column is true in the sampletable table:
select * from sampletable where gid > 0 and uid < 10 and c1 = true;
Billing
When you use PrestoDB to access Tablestore, you are charged by Tablestore based on the read throughput and write throughput. For more information, see Billing overview.
References
You can use other compute engines such as MaxCompute, Spark, Function Compute, and Realtime Compute for Apache Flink to query and analyze data in Tablestore tables. For more information, see Overview. You can also query and analyze data in Tablestore tables by using the SQL query feature or the aggregation feature that is supported by search indexes. For more information, see SQL query overview and Search index overview.
You can use the Data Integration feature of DataWorks to migrate Tablestore data across tables or instances. For more information, see Synchronize data from one table to another table in Tablestore.
You can use DataV or Grafana to visualize data such as displaying data in charts. For more information, see Data visualization tools.