Websites that use unencrypted HTTP expose user data to interception during transmission, and browsers display "Not Secure" warnings that erode user trust and business security. Deploy an SSL certificate on your Windows Apache server to enable HTTPS encrypted communication. This topic describes how to deploy an SSL certificate on an Apache server that runs Windows and how to verify the deployment.
Requirements
Before you begin, make sure that the following requirements are met:
Certificate Status: You have an SSL certificate issued by a trusted certificate authority (CA). If your certificate is expiring or has expired, you must renew it first.
Domain Name Matching: Ensure the certificate covers all domain names you want to protect. If you need to add or change a domain name, you can purchase a paid certificate or add and replace domain names.
Exact domain name: An exact domain name certificate applies only to the specified domain name.
A certificate for
example.comapplies only toexample.com.A certificate for
www.example.comapplies only towww.example.com.
Wildcard domain name: A wildcard domain name certificate applies only to first-level subdomains.
A certificate for
*.example.comapplies to first-level subdomains such aswww.example.comanda.example.com.A certificate for
*.example.comdoes not apply to the root domainexample.comor multi-level subdomains such asa.b.example.com.
NoteTo match a multi-level subdomain, the Bound Domains field must include the specific domain name (for example,
a.b.example.com) or a corresponding wildcard domain name (for example,*.b.example.com).Server permissions: You must use the
Administratoraccount or an account with administrator privileges.DNS Resolution: The domain name resolves to the server's public IP address.
Environment dependencies: This tutorial uses Windows Server 2025 and Apache 2.x as examples. The sample Apache installation directory is
C:\Apache24.NoteSteps may vary depending on your OS or Apache version.
Procedure
Step 1: Prepare the certificate
Go to the SSL Certificate Service page. In the Actions column for your certificate, click More to open the certificate details page. On the Download tab, download the certificate for the Apache Server Type.
Extract the downloaded certificate package.
If the package contains a certificate file (
<your_domain_name>_public.crt), a certificate chain file (<your_domain_name>_chain.crt), and a private key file (<your_domain_name>.key), store all three files securely for deployment.If the package contains only a certificate file (
<your_domain_name>_public.crt) and a certificate chain file (<your_domain_name>_chain.crt) without a private key file (<your_domain_name>.key), use the private key file you saved locally.NoteIf you generated the CSR with OpenSSL or Keytool, the private key exists only on your local machine. If lost, the certificate becomes unusable and you must purchase a new commercial certificate with a new CSR and private key.
Upload the certificate, chain, and private key files to a directory outside the web root. This guide uses
D:\cert.NoteThe following steps use an Alibaba Cloud ECS instance as an example. For other server types, refer to your server's documentation.
Go to ECS console - Instances. In the top-left corner, select the region and resource group for the target resource.
On the instance details page, click Connect and select Workbench. Log on to the server desktop.
Click the Start menu and open This PC, Computer, or File Explorer.
Under Redirected drives and folders, double-click workbench on ***. Drag the certificate files to this directory, then right-click and select Refresh.
Copy the files to the
D:\certdirectory.ImportantWorkbench clears all uploaded files from Redirected drives and folders on reconnect or sign-out. Use this directory for transfer only — do not store files here permanently.
Step 2: Configure system and network settings
Open port 443 in the security group.
ImportantIf your server is deployed on a cloud platform, make sure that its security group allows inbound traffic on TCP port 443. Otherwise, the service is not accessible from the internet. The following operations use an Alibaba Cloud ECS instance as an example. For other cloud platforms, see their official documentation.
Go to the ECS Instances page, select the region where your target ECS instance is located, and click the instance name to go to the details page.
Click and make sure a rule exists with Action set to Allow, Protocol Type set to TCP, Port Range set to HTTPS(443), and Authorization Object set to Anywhere (0.0.0.0/0).
If such a rule does not exist, add one to the target security group. For more information, see Add a security group rule.
Open port 443 in the server firewall.
Log on to your Windows server, click the Start menu, and then open Control Panel.
Go to .
If the firewall is turned off as shown in the following figure, no further action is required.
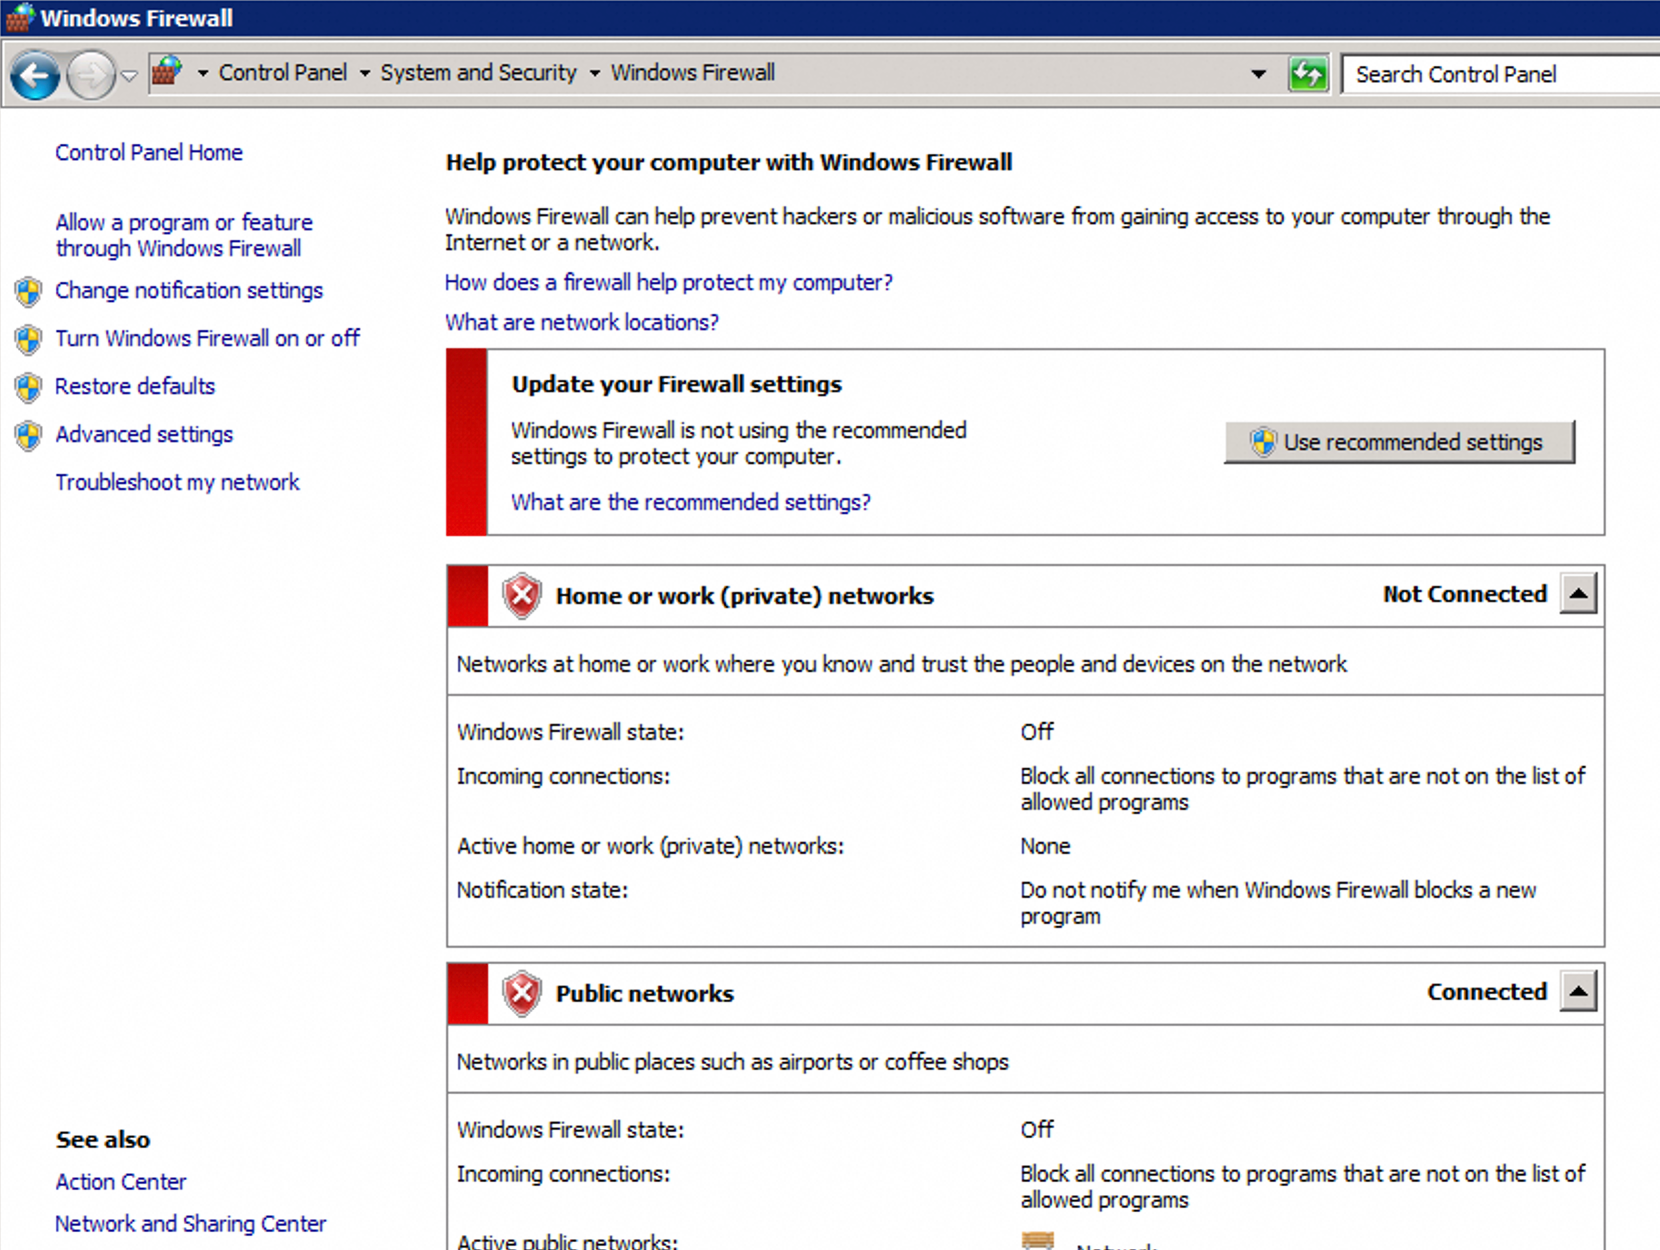
If the firewall is turned on, follow these steps to allow HTTPS traffic.
In the left-side navigation pane, click and check whether an inbound rule exists for which Protocol is TCP, Local Port is 443, and Action is Block.
If such a rule exists, right-click the rule, select Properties, and on the General tab, change the action to Allow the connection. Then, click Apply.
Step 3: Deploy the certificate
Open Command Prompt (cmd.exe) as an administrator:
Navigate to the Apache installation directory and check the version.
# In the command line, go to the Apache installation directory and use a relative path to run the command.
.\httpd.exe -v
Modify the configuration file based on your Apache version.
Apache 2.4.8 and later
Combine the certificate files.
If you have an intermediate certificate, append the server certificate (
your_domain_name_public.crt) and chain file (your_domain_name_chain.crt) into a combined file (your_domain_name_fullchain.pem).# Append the content of the intermediate certificate file to the server certificate file to form a complete certificate chain. copy /b your_domain_name_public.crt + your_domain_name_chain.crt your_domain_name_fullchain.pemAfter combining, you need only two files:
your_domain_name_fullchain.pemandyour_domain_name.key.Edit the configuration file.
Open the SSL configuration file (for example,
httpd-ssl.conf) and add the following:<VirtualHost *:443> # Replace example.com with the domain name that is bound to your certificate. ServerName example.com # Enable the SSL engine. SSLEngine on # Certificate file. Use the path to the actual combined certificate file (your_domain_name_fullchain.pem). # If you do not have an intermediate certificate file, use the path to the server certificate file (your_domain_name_public.crt). SSLCertificateFile D:\cert\your_domain_name_fullchain.pem # Private key file. Replace this with the path to your actual private key file. SSLCertificateKeyFile D:\cert\your_domain_name.key # Other configurations # ... </VirtualHost>
Apache 2.4.7 and earlier
Open the SSL configuration file (for example,
httpd-ssl.conf) and add the following:<VirtualHost *:443> # Replace example.com with the domain name that is bound to your certificate. ServerName example.com # Enable the SSL engine. SSLEngine on # Certificate file. Replace this with the path to your actual certificate file. SSLCertificateFile D:\cert\your_domain_name_public.crt # Certificate chain file (specified separately). Replace this with the path to your actual intermediate certificate file. # If you do not have an intermediate certificate, you do not need to configure this directive. SSLCertificateChainFile D:\cert\your_domain_name_chain.crt # Private key file. Replace this with the path to your actual private key file. SSLCertificateKeyFile D:\cert\your_domain_name.key # Other configurations # ... </VirtualHost>Optional: Set up automatic HTTP-to-HTTPS redirection.
Add the
Rewritedirective to the<VirtualHost>block for your domain:<VirtualHost *:80> ServerName example.com RewriteEngine On RewriteRule ^ https://%{HTTP_HOST}%{REQUEST_URI} [L,R=301] </VirtualHost>Save the configuration, navigate to the Apache
bindirectory, and check for syntax errors..\httpd.exe -tSyntax OKconfirms the configuration is correct. If an error is returned, fix it based on the error message.Restart the Apache service.
After the syntax check passes, run the following command to restart Apache and apply the configuration.
.\httpd.exe -k restartNoteAlternatively, you can find and restart the Apache service in Windows Services (
services.msc).
Step 4: Verify the deployment
Access your domain name over HTTPS. Example:
https://example.com. Replaceexample.comwith your actual domain name.If a lock icon appears in the browser's address bar, the certificate is deployed successfully. If an access error occurs or the lock icon does not appear, clear your browser's cache or try again in incognito or private mode.

Starting with Chrome 117, the
 icon in the address bar has been replaced by a new
  icon. Click this icon to view the security lock information.
If the issue persists, see the FAQ section for troubleshooting.
Deploying to production
When you deploy an application in a production environment, follow these best practices to improve security, stability, and maintainability:
Run the application as a non-administrator user:
Create a dedicated, low-privilege system user for the application. Do not run the application by using an account that has administrative permissions.
NoteWe recommend that you use a gateway-level SSL configuration. This involves deploying the certificate on a reverse proxy, such as an SLB or Nginx instance.
Externalize credential management:
Do not hard-code sensitive information, such as passwords, in your code or configuration files. Use environment variables, a vault, or a Key Management Service provided by your cloud provider to inject credentials.
Enforce HTTP-to-HTTPS redirection:
Make sure that all traffic that accesses your website over HTTP is automatically redirected to HTTPS. This helps prevent man-in-the-middle (MITM) attacks.
Configure modern TLS protocols:
In your server configuration, disable obsolete and insecure protocols, such as SSLv3, TLS 1.0, and TLS 1.1. Enable only TLS 1.2 and TLS 1.3.
Monitor certificates and automate renewal:
After the certificate is deployed, we recommend that you enable domain name monitoring. Alibaba Cloud automatically checks the validity period of the certificate and sends reminders before the certificate expires. This helps you renew the certificate in a timely manner to prevent service interruptions. For more information, see Purchase and enable public domain name monitoring.
FAQ
Certificate not working or HTTPS inaccessible
Common causes:
Port 443 is not open in the server's security group or firewall. For more information, see Step 2: Configure system and network settings.
The domain name does not match any domain in the certificate's Bound Domains. Check Domain name matching.
The Apache service was not restarted after the configuration change. Restart it as described in Step 3: Deploy the certificate.
The certificate files were not replaced correctly, or the configuration points to wrong paths. Verify that your certificate files and Apache configuration are current and valid.
The domain name is integrated with cloud services such as CDN, SLB, or WAF, but the certificate is not installed on the corresponding service. For more information, see Certificate deployment location when traffic passes through multiple cloud services.
The domain name resolves to multiple servers, but the certificate is installed on only some of them. You must install the certificate on each server.
For further troubleshooting, see Troubleshoot certificate deployment issues based on browser errors and SSL certificate deployment troubleshooting guide.
How to update or replace an SSL certificate installed on Apache
Back up existing certificate files (.crt and .key). Download the new certificate from the SSL Certificate Service console, upload the files to the same paths and filenames on your server, and restart Apache.