Server Migration Center (SMC) allows you to migrate incremental data from a VMware VM to Alibaba Cloud. You can specify the time interval between incremental migration operations. Incremental migration reduces the VM downtime and the total duration of cutover. This topic describes how to migrate incremental data from a VMware VM without an agent.
Limits
When you create an incremental migration job, you must set the Destination Type parameter to ECS Image.
Procedure
Step 1: Enable CBT
In this topic, vCenter 6.7 is used. Perform the following steps to enable Changed Block Tracking (CBT). To migrate incremental data from a VMware VM, you must enable CBT for the VM. If you disable CBT, full data is migrated from the VMware VM. If CBT is already enabled, skip this step.
Before you enable CBT, make sure that no snapshots are generated for the VMware VM. Otherwise, the incremental data migrated by using CBT may be incorrect. If you delete the snapshots of the VMware VM when you enable CBT, execute the ./disk/migrate_configure file in the /root/smc directory, which is the home directory of the SMC client. This way, you can reobtain the configuration information about the VMware VM.
To enable CBT, make sure that the following conditions are met:
The version of the ESXi host is ESXi 4.0 or later.
The VM hardware version is 7 or later.
The I/O operations of the VMware VM must be performed in the ESXi storage.
The VMware VM supports Raw Device Mapping (RDM) and Virtual Machine File System (VMFS) in virtual compatibility mode and Network File System (NFS).
The VMware VM does not use independent persistent or nonpersistent disks to store data.
Log on to vCenter Server.
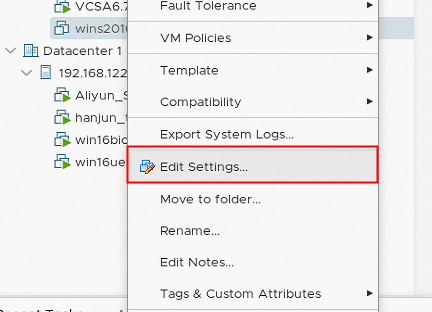
Right-click the VMware VM that has been powered off and select Edit Settings.
On the Edit Settings page, click the VM Options tab.
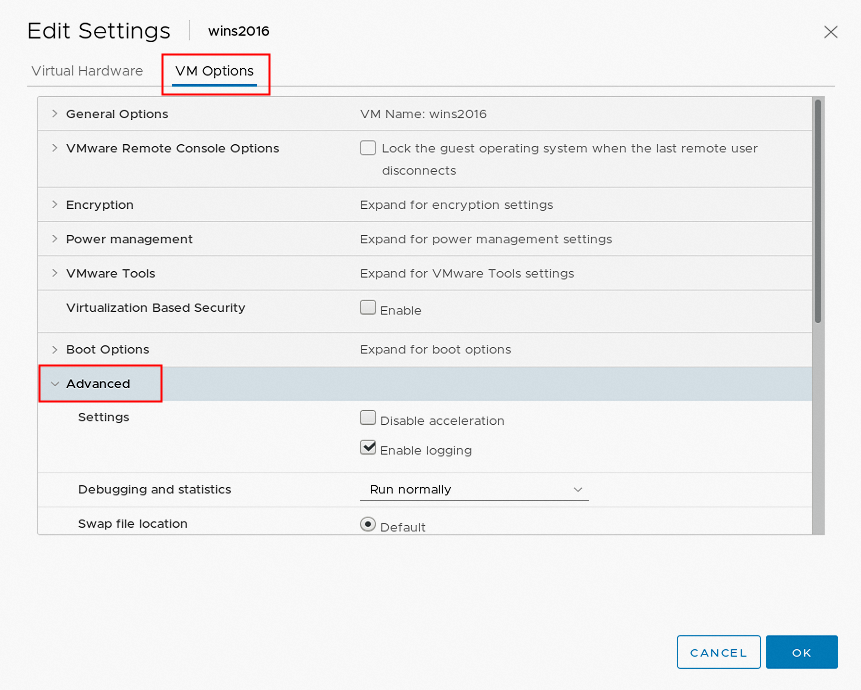
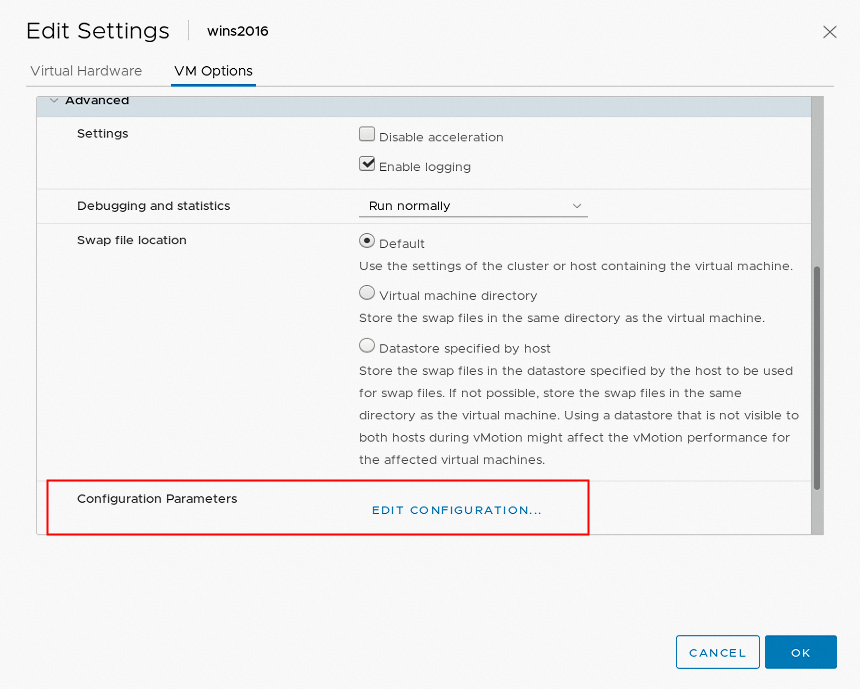
Click Advanced and then click EDIT CONFIGURATION... next to Configuration Parameters.
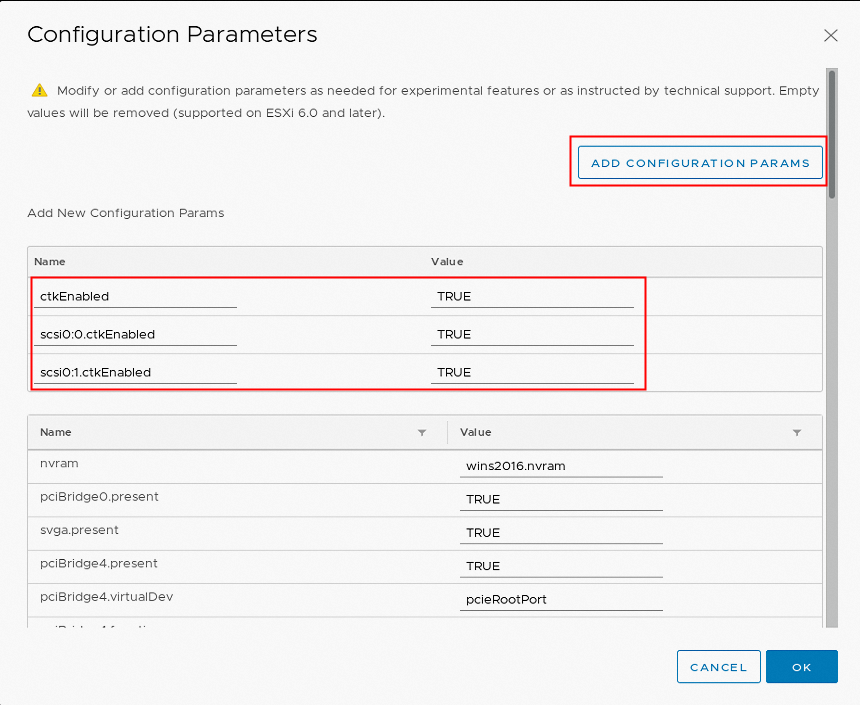
On the Configuration Parameters page, click ADD CONFIGURATION PARAMS and add the parameters that are described in the following table.
Name
Value
Description
ctkEnabled
TRUE
Specifies whether to use CTK files.
scsi0:0.ctkEnabled
TRUE
Specifies whether to allow the use of CTK files for the hard disk whose small computer systems interface (SCSI) ID is 0:0.
scsi0:1.ctkEnabled
TRUE
Specifies whether to allow the use of CTK files for the hard disk whose SCSI ID is 0:1.
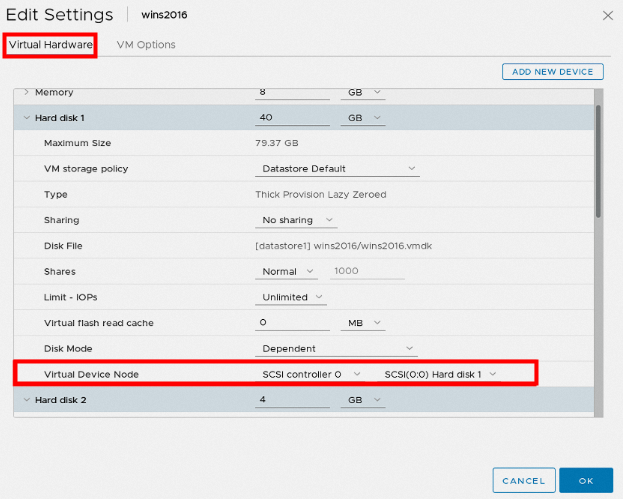
In the scsix:x.ctkEnabled parameter, x:x indicates the SCSI ID. Replace x:x with an SCSI ID based on your business requirements. In this topic, hard disks whose SCSI IDs are 0:0 and 0:1 are used. To query the SCSI IDs of hard disks in the VM, go to the Virtual Hardware tab of the Edit Settings page.
Click OK. Then, right-click the VMware VM and choose to power on the VMware VM.
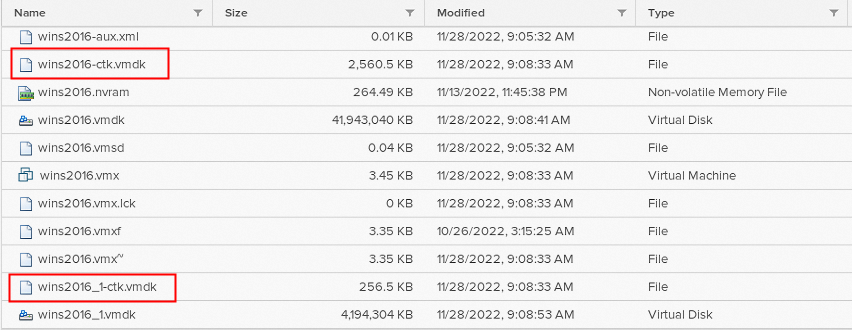
If CBT is enabled, a xx-ctk.vmdk file is added to each virtual disk and snapshot disk.
Step 2: Perform the full migration
After you import the information about a migration source in the SMC console, perform the following steps to create and start an incremental migration job. You do not need to stop your services that are running on the VM. For more information, see Agentless migration for VMware VMs.
When you perform the migration configuration, turn on Automatic Incremental Synchronization. Configure the following parameters related to automatic incremental migration:
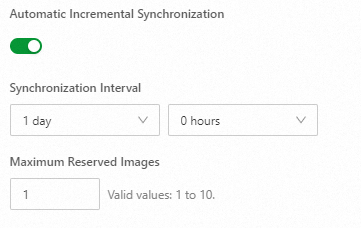
Automatic Incremental Synchronization: specifies whether to enable automatic incremental migration. Turn on this switch.
Synchronization Interval: the time interval between two consecutive incremental migration operations. For example, if Synchronization Interval is set to 1 hour, the next incremental synchronization will start 1 hour after the completion of the current incremental synchronization. You can specify a time interval in the range of one hour to seven days.
Maximum Reserved Images: the maximum number of images that can be retained during incremental migration. Valid values: 1 to 10. An image is generated for each incremental migration operation. If the total number of images exceeds the upper limit, the earliest unused image is deleted.
View the migration results.
If the migration progress is 100%, the first full migration is completed and a full image is generated. Each time the migration is completed, the real-time status of the migration is Waiting to wait for the arrival of the next frequency cycle and continue to migrate incremental data
 Note
NoteYou can perform the following operations based on your business requirements:
Verify the migration result: You can click
 > Create an instance in the Actions column of the migration source, and use this image to create an Elastic Compute Service (ECS) instance for verification.
Modify the synchronization interval: You can click
> Automatic Incremental Synchronization in the Actions column of the migration source to modify the synchronization interval as prompted. The modification will take effect after the next incremental synchronization ends, not immediately.Stop the migration task: You can click
> Pause Migration Job in the Actions column of the migration source to stop the migration task as prompted.Cancel the incremental migration task: You can click
> Cancel Migration in the Actions column of the migration source to cancel the incremental migration task as prompted.
Step 3: Stop the services on the VMware VM and run the incremental migration job again
To ensure that all data can be migrated to Alibaba Cloud, stop the services on the VMware VM and run the incremental migration job during off-peak hours.
In the SMC console, manually run the incremental migration job or wait for the job to automatically run.
The image generated for each incremental migration operation is a full image of the source server at a specific point in time. The image contains the incremental data at the point in time of migration and all earlier migrated data.
After automatic incremental synchronization or manual incremental synchronization starts, data comparison is performed firstly. The data comparison speed is related to the disk I/O capacity and is not limited to the network bandwidth. Therefore, the comparison time is affected by the disk I/O capacity and the amount of disk data. After the data comparison is completed, the incremental data is transmitted, and the time spent in the incremental data transmission phase is affected by the incremental data size and network bandwidth. For more information, see Estimate migration time and test data transfer speed.
-
Log on to the source server and stop the services on the source server.
-
In the SMC console, manually run the incremental migration job or wait for the job to automatically run.
-
Perform incremental migration automatically.
After the first incremental migration is completed, SMC automatically performs the incremental migration and generates a new image at the corresponding time point based on the value of Synchronization Interval that you set.
-
Perform incremental migration manually.
In the Actions column of the destination migration source, click Manual Incremental Synchronization. In the displayed dialog box, click OK.

-
Step 4: Complete incremental synchronization
After the last incremental migration operation is complete, perform the following steps to complete incremental migration.
-
On the OS Migration page, find the migration job that you want to manage and click Complete Incremental Synchronization in the Actions column.

-
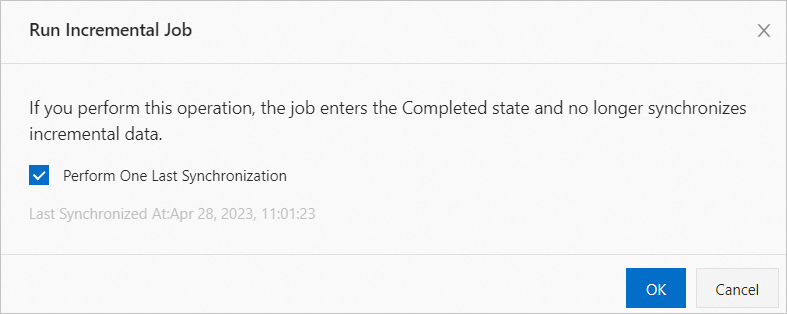
In the Run Incremental Job dialog box, click OK.
You can also select Perform One Last Synchronization in the Run Incremental Job dialog box to perform the last incremental migration operation.
-
On the Server Migration page, view the status of the created job.
The amount of time required for data transmission is subject to factors such as the data size of the migration source and network bandwidth. Wait until the migration job is complete.
Verify the migration result
A successful migration creates an Alibaba Cloud custom image. To view the image detection results, scroll to the right and click View Report in the Migration Deliverables column. For more information, see View image detection results.

Manual verification (recommended)
In the {value, select, ReplicationJobIdWithName {Migration Job ID/Name} ReplicationParameters {Migration Job Type} DrillStatus {Test Status} Status {Status} ReplicationJobTag {Migration Job Tags} SourceIdWithName {Migration Source ID/Name} RegionId {Destination Region} TargetType {Migration Result} VerifyResult {Latest Verification Result} Action {Actions} other {{value}} } column, click Create Instance. You are redirected to the instance creation page in the ECS console, where the new custom image is preselected. For more information about how to create an ECS instance, see Create an instance from a custom image or shared image.

Automatic verification
NoteTo use this feature, the instance must have the Cloud Assistant agent installed and run a supported operating system. For more information, see Install the Cloud Assistant agent.
This feature uses the OOS template
ACS-SMC-CreateAndVerifyInstanceprovided by Alibaba Cloud to automatically verify that an ECS instance can be created and started from the image generated by the migration task.-
In the {value, select, ReplicationJobIdWithName {Migration Job ID/Name} ReplicationParameters {Migration Job Type} DrillStatus {Test Status} Status {Status} ReplicationJobTag {Migration Job Tags} SourceIdWithName {Migration Source ID/Name} RegionId {Destination Region} TargetType {Migration Result} VerifyResult {Latest Verification Result} Action {Actions} other {{value}} } column, click Verify Migration Result.

-
In the dialog box that appears, review the verification process and click Verify Now.
You can also click Customize Verification Parameters to configure the verification parameters.
-
In the Verify Migration Result column, view the verification result.
-
Verified: The migration passed verification. You can click View Report to view the results.
-
Not Verified: The migration failed verification. You can click View Cause to view the error details and troubleshoot the issue.
To view the OOS template's execution history, click the
 icon in the Actions column and then click {value, select,
VerifyMigrationResult {Verify Migration Result}
CreateInstance {Create Instance}
ViewLog {View Logs}
ToOOS {View Verification Records in OOS Console}
Delete {Delete}
other {{value}}
}.
icon in the Actions column and then click {value, select,
VerifyMigrationResult {Verify Migration Result}
CreateInstance {Create Instance}
ViewLog {View Logs}
ToOOS {View Verification Records in OOS Console}
Delete {Delete}
other {{value}}
}. -
After you migrate the server, perform the following steps to ensure that your services run as expected:
-
Verify the data to ensure its integrity and correctness. For more information, see How do I check the system after migrating a Linux server? or How do I check the system after migrating a Windows server?.
-
If applications and services on the source server are not configured to start automatically, you must manually start them after the migration.
-
The IP address changes after migration. If your services rely on the original IP address, you must update settings such as domain name resolution and ICP filing.
-
If a domain name is already mapped to the source server, map the domain name to the new public IP address of the server. For more information, see Add a website resolution.
-
To use the original private IP address for the new instance, you can modify the private IP address after the migration is complete.
-
If the destination is an {value, select, Instance {ECS Instance} TargetInstance {ECS Instance} Image {ECS Image} ContainerImage {Container Image} SwasInstance {Simple Application Server} other {{value}} }: Modify the private IP address when you create an ECS instance. For more information, see Specify the primary private IPv4 address of the primary network interface when you purchase an ECS instance.
-
If the destination is an ECS Instance: If you did not modify the private IPv4 address in the advanced settings of the migration settings step, you can modify it after the migration is complete. For more information, see Modify the primary private IPv4 address of the primary ENI of an existing instance.
-
-
-
Clear resources
During the migration, SMC creates a temporary pay-as-you-go intermediate instance named No_Delete_SMC_Transition_Instance in your destination Alibaba Cloud account to facilitate the migration. You may need to manually release the instance based on the migration outcome:
Successful migration: The intermediate instance is automatically released. No manual action is required.
Migration error: The intermediate instance is retained and continues to incur charges. To avoid unnecessary charges, you can release it in one of the following ways:
If you no longer need the migration task, click the migration source ID. In the Actions column, click Cancel Migration. This action deletes the task and automatically releases the intermediate instance.
Manually Release an instance.