This topic describes how to configure a custom TLS security policy for Application Load Balancer (ALB). In most cases, websites or applications deployed on Alibaba Cloud use HTTPS to encrypt data transmission. ALB provides some commonly used TLS security policies to enhance the security of services that use HTTPS. ALB also allows you to configure custom TLS security policies. For example, you can specify the TLS versions that you want to use, or disable certain TLS cipher suites.
Limits
Basic ALB instances do not support custom TLS security policies. Standard and WAF-enabled ALB instances support custom TLS security policies. If you use a basic ALB instance and want to use custom TLS security policies, upgrade the ALB instance to the standard or WAF-enabled edition. For more information, see Modify the configurations of ALB instances.
When you specify TLS versions and cipher suites for a custom TLS security policy, make sure that the TLS versions and cipher suites are supported by the clients, such as browsers. Otherwise, the clients may fail to establish connections to the server.
Prerequisites
An ALB instance is created. For more information, see Create an ALB instance.
A server group is created. For more information, see Create and manage a server group.
ECS01 and ECS02 are added to the server group, and applications are deployed on ECS01 and ECS02.
A domain name is registered and an Internet content provider (ICP) number is obtained for the domain name. For more information, see Register a domain name on Alibaba Cloud and ICP filing application overview.
Required certificates are deployed. If the certificates are purchased from a third-party service provider, you must upload them to Certificate Management Service. In addition, make sure that the certificates are associated with your domain name. For more information about how to create a certificate, see Get started with SSL Certificates Service.
Step 1: Create a custom TLS security policy
Log on to the ALB console.
In the top navigation bar, select the region in which the ALB instance is deployed.
In the left-side navigation pane, click TLS Security Policies.
On the Custom Policy tab, click Create Custom Policy.
Enter a policy name, select a minimum TLS version, and select the cipher suites that you want to use. For more information, see TLS security policies. After you set the parameters, click Create.
Step 2: Apply the custom TLS security policy to an HTTPS listener
Create an HTTPS listener and apply the custom TLS security policy
Log on to the ALB console.
In the top navigation bar, select the region in which the ALB instance is deployed.
In the left-side navigation pane, click Instances.
On the Instances page, find the ALB instance, and click Create Listener in the Actions column.
In the Configure Listener step, set the parameters. The following table describes some of the parameters. Set the other parameters based on your business requirements, or keep the default values. After you set the parameters, click Next.
Parameter
Description
Listener Protocol
In this example, HTTPS is selected.
Listener Port
In this example, port 443 is selected.
In the Configure SSL Certificate step, set the parameters. The following table describes some of the parameters. Set the other parameters based on your business requirements, or keep the default values. After you set the parameters, click Next.
Parameter
Description
Server Certificate
Select a server certificate.
TLS Security Policy
Select the custom TLS security policy created in Step 1.
In the Select Server Group step, set the parameters. The following table describes some of the parameters. Set the other parameters based on your business requirements, or keep the default values. After you set the parameters, click Next.
Parameter
Description
Server Group
Select a server group.
In the Configuration Review step, check whether the parameters are valid and click Submit.
Apply the custom TLS security policy to an existing HTTPS listener
Log on to the ALB console.
In the top navigation bar, select the region in which the ALB instance is deployed.
In the left-side navigation pane, click Instances.
On the Instances page, click the ID of the ALB instance that you want to manage.
On the Listener tab, click the ID of the HTTPS listener that you want to manage.
In the SSL Certificates section, click the
 icon next to TLS Security Policy.
 In the Edit TLS Security Policy dialog box, select the custom TLS policy that you created, and click Save.
Step 3: Add a DNS record
Log on to the ALB console.
In the top navigation bar, select the region in which the ALB instance is deployed.
Find the ALB instance for which you want to add a DNS record and copy the domain name.
To create a CNAME record, perform the following steps:
Log on to the Alibaba Cloud DNS console.
On the Domain Name Resolution page, click Add Domain Name.
In the Add Domain Name dialog box, enter the domain name of your host and click OK.
ImportantBefore you create the CNAME record, you must use a TXT record to verify the ownership of the domain name.
Find the domain names that you want to manage and click Configure in the Actions column.
On the DNS Settings page, click Add DNS Record.
In the Add Record panel, set the following parameters and click Confirm.
Parameter
Description
Record Type
Select CNAME from the drop-down list.
Hostname
Enter the prefix of the domain name, such as
www.DNS Request Source
Select Default.
Record Value
Enter the CNAME, which is the domain name of the ALB instance.
TTL
Select a time-to-live (TTL) value for the CNAME record to be cached on the DNS server. The default value is used in this example.
Step 4: Verify the result
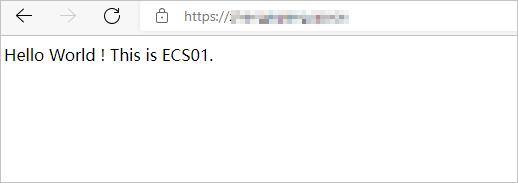
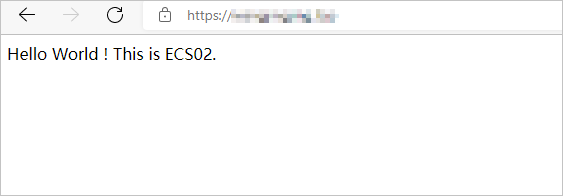
Enter the domain name of the ALB instance into the address bar of your browser and refresh the page multiple times. Check whether requests are alternatively distributed between ECS01 and ECS02 over HTTPS.
References
For more information about HTTPS listeners, see Add an HTTPS listener.
For more information about TLS security policies, default TLS security policies, and the cipher suites supported by different TLS security policies, see TLS security policies.
For more information about how to configure an ALB instance to serve multiple domain names over HTTPS, see Configure an ALB instance to serve multiple domain names over HTTPS.
For more information about how to configure end-to-end HTTPS encryption for data transmission, see Configure end-to-end HTTPS encryption for data transfers.
For business-critical services, you can enable mutual authentication on HTTPS listeners to improve security. For more information, see Configure mutual authentication on an HTTPS listener.