Route HTTPS traffic for multiple domain names to separate backend server groups using a single Application Load Balancer (ALB) instance. This tutorial walks through creating an HTTPS listener, attaching additional Server Name Indication (SNI) certificates, configuring forwarding rules, and setting up DNS records.
In this tutorial, you will:
Create an HTTPS listener on port 443
Add additional certificates for each domain name
Create forwarding rules to route traffic to the correct backend server group
Configure CNAME records to point your domain names to the ALB instance
Verify that each domain resolves to the correct backend server
How it works
When ALB receives an HTTPS request, it uses SNI to match the hostname in the TLS handshake against the certificates attached to the listener. It then returns the matching certificate to the client and forwards the request to the backend server group defined by the matching forwarding rule.
Each listener has one default certificate. The default certificate handles requests in two cases: when the client does not support SNI and therefore does not send a hostname during the TLS handshake, and when no additional certificate matches the requested hostname.
Example configuration
This tutorial uses the following setup:
| Certificate | Domain name | Backend server group |
|---|---|---|
Default certificate (default) | aliyundoc.com | RS1 |
Additional certificate (example1) | www.example.com | RS1 (weight: 100) |
Additional certificate (example2) | www.example.org | RS2 (weight: 100) |
ECS01 is added to RS1 and ECS02 is added to RS2, with applications deployed on both.

Prerequisites
Before you begin, ensure that you have:
An ALB instance. See Create and manage ALB instances
Backend server groups RS1 and RS2, with ECS01 added to RS1 and ECS02 added to RS2. See Create and manage a server group
Registered domain names with an Internet Content Provider (ICP) filing. See Register a domain name on Alibaba Cloud and ICP filing process
Three certificates uploaded to Certificate Management Service and associated with their respective domain names. If you purchased certificates from a third-party provider, upload them to Certificate Management Service first. See Secure your website with HTTPS:
Default certificate
defaultforaliyundoc.comAdditional certificate
example1forwww.example.comAdditional certificate
example2forwww.example.org
Step 1: Create an HTTPS listener
Log on to the ALB console.
In the top navigation bar, select the region where your ALB instance is deployed.
In the left-side navigation pane, click Instances.
On the Instances page, find the ALB instance and click Create Listener in the Actions column.
In the Configure Listener step, set the following parameters, then click Next.
Parameter Value Listener protocol HTTPS Listener port 443 In the Configure SSL Certificate step, set the following parameter, then click Next.
Parameter Value Server certificate Default certificate defaultIn the Select Server Group step, set the following parameter, then click Next.
Parameter Value Server group RS1 In the Configuration Review step, verify the settings and click Submit.
Step 2: Add additional certificates
Additional certificates let a single HTTPS listener serve multiple domain names. The listener matches each incoming hostname against the additional certificate list and returns the matching certificate. The default certificate continues to handle requests when no additional certificate matches — for example, from clients that do not send a hostname during the TLS handshake.
On the Instances page, click the ID of your ALB instance.
On the Listener tab, find the HTTPS listener and click Manage Certificate in the Actions column.
On the Certificates > Server Certificates tab, click Add EV Certificate.
In the Add Additional Certificate dialog box, select
example1and click OK.Repeat steps 3–4 to add the additional certificate
example2.
Step 3: Create forwarding rules
Forwarding rules determine which backend server group receives traffic for each domain name.
On the Instances page, click the ID of your ALB instance.
On the Listener tab, find the HTTPS listener and click View/Modify Forwarding Rule in the Actions column.
On the Forwarding Rules tab, click Add New Rule to create a forwarding rule in the inbound direction.
Configure the two rules as follows, then click OK.
Domain name Forward to Weight www.example.comRS1 100 www.example.orgRS2 100
Step 4: Configure domain name resolution
Create a CNAME record for each domain name that points to the DNS name of your ALB instance. Repeat this process for both www.example.com and www.example.org.
Go to the ALB console, find your ALB instance, and copy its DNS name from the Domain Name column.
Add CNAME records with your DNS hosting provider. This example uses Alibaba Cloud DNS.
Go to the Public Zone page in the Alibaba Cloud DNS console. Click the target domain name to open the Settings page, then click Add Record.
Configure the CNAME record with the following settings, then click OK.
Field Value Record type CNAME Hostname The prefix of your domain name. For www.example.com, enterwww.Query source Default TTL Use a lower Time-to-Live (TTL) value to make changes propagate faster. Record value The DNS name of the ALB instance you copied in step 1.
NoteTo manage a domain not registered with Alibaba Cloud, add it to the Alibaba Cloud DNS console first.
NoteTo resolve a DNS record conflict, delete the conflicting record or use a different hostname.
Verify that the domain name points to the ALB instance. Run
ping <custom_domain_name>ordig <custom_domain_name>on your local machine. If the output includes the ALB DNS name (for example,alb-xxxx.<region-id>.alb.aliyuncsslb.com), the CNAME record is active.NoteNew CNAME records take effect almost immediately. Changes to existing records take longer because DNS resolvers cache the record until its TTL expires.
Step 5: Verify the result
Access each domain from a browser to confirm that requests reach the correct backend server group.
Open
www.example.com. The request is forwarded to ECS01 in RS1 based on the forwarding rule.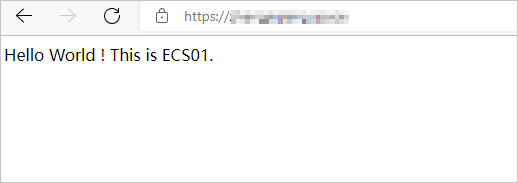
Open
www.example.org. The request is forwarded to ECS02 in RS2 based on the forwarding rule.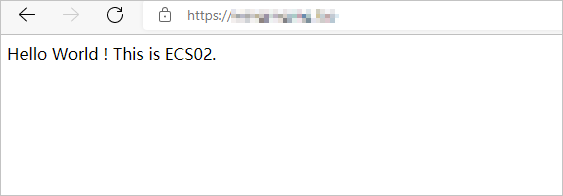
If you cannot access the domain names, restart your browser to clear the cache and try again.