Expose ACK services with an ALB Ingress
ALB Ingress leverages Alibaba Cloud Application Load Balancer (ALB) to provide more powerful Ingress traffic management. Compatible with Nginx Ingress, it supports advanced service routing, automatic certificate discovery, and HTTP, HTTPS, and QUIC protocols. ALB Ingress is ideal for cloud-native applications that require elasticity and large-scale Layer 7 traffic handling. To configure ALB Ingress for traffic management in an ACK cluster, refer to this topic to deploy a service and access it via ALB Ingress.
Background
This topic describes the key concepts of ALB Ingress.
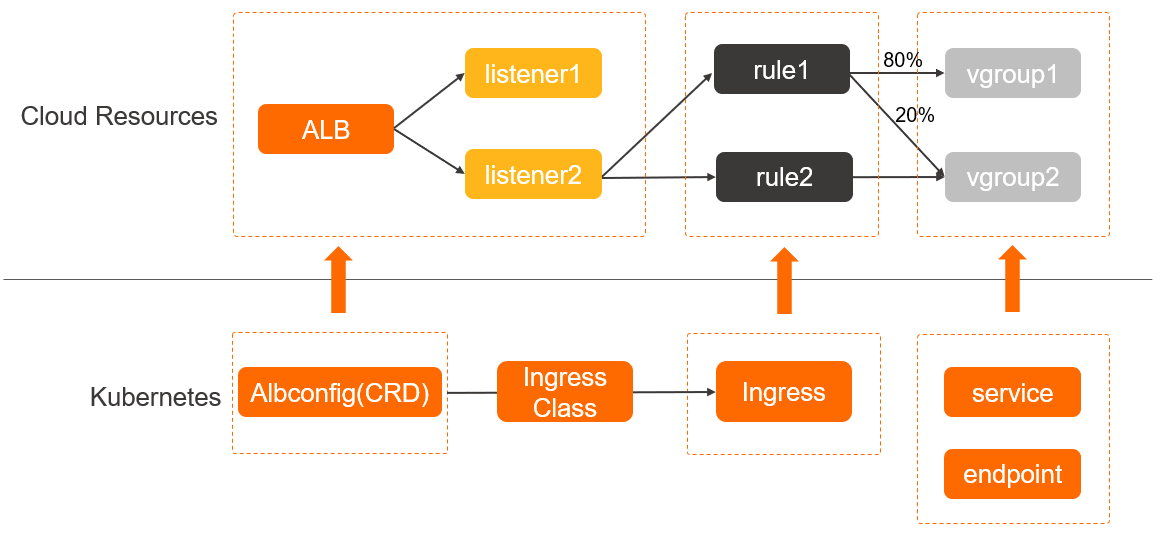
ALB Ingress controller: A Kubernetes component that manages Ingress resources. It acts as an entry point within a cluster, routing external traffic to the appropriate Services. The ALB Ingress controller watches the API server for changes to Ingress resources and dynamically generates AlbConfig objects. It then creates or updates the corresponding ALB instances, listeners, routing rules, and backend server groups.
AlbConfig CRD: A CRD (Custom Resource Definition) is a Kubernetes mechanism that extends the Kubernetes API and allows you to define custom resource types. Each AlbConfig maps to a single ALB instance.
IngressClass: A Kubernetes resource that specifies which Ingress controller should process an Ingress. This allows you to run multiple Ingress controllers in the same cluster and assign a specific controller to each Ingress.
Ingress: A Kubernetes resource that defines routing and access rules for external HTTP and HTTPS traffic to Services. An Ingress controller implements these rules. For ALB Ingress, you can use annotations on the Ingress resource to configure specific forwarding rules. These rules then route requests to the corresponding Services.
Service: In Kubernetes, a Service is an abstraction that defines a logical set of Pods and exposes a stable virtual IP address and port for them.
A Service provides a stable entry point for an application. This allows other applications to communicate with backend Pods through the Service's virtual IP address and port without tracking the IP addresses and ports of individual Pods. A single Service can represent multiple identical backend Pods.
The following figure illustrates the logical relationship between an ALB instance and ALB Ingress.
Limitations
If you use the Flannel network plugin, an ALB Ingress's backend Services must be of type NodePort or LoadBalancer.
The names of AlbConfig, Namespace, Ingress, and Service resources must not start with aliyun.
Older versions of the NGINX Ingress controller do not recognize the
spec:ingressClassNamefield in an Ingress resource. If both NGINX and ALB Ingress controllers are running in a cluster, an older NGINX Ingress controller may incorrectly reconcile your ALB Ingresses. To prevent this, upgrade the NGINX Ingress controller or use an annotation to specify the Ingress class for your ALB Ingresses. For more information, see Upgrade the NGINX Ingress controller or Advanced usage of ALB Ingress.
Example scenario
This tutorial uses four Nginx pods to demonstrate how to configure an ALB Ingress to forward traffic for different URL paths under a single domain name.
Frontend request | Target |
|
|
|
|
Prerequisites
You have an ACK managed cluster or an ACK dedicated cluster. The cluster must run Kubernetes 1.18 or later. For more information, see Create an ACK managed cluster and Create an ACK dedicated cluster (discontinued).
(Optional) Connect to the cluster with kubectl.
A registered domain name with a completed ICP filing. For more information, see Register an Alibaba Cloud domain name and ICP filing process.
Step 1: Install the ALB Ingress controller
To use ALB Ingress, you must first install the ALB Ingress controller.
On cluster creation
When you create an ACK managed cluster or an ACK dedicated cluster, select ALB Ingress in the Ingress section.
For Source of ALB Instance, select Create Rule, Select Existing VPC , or None.
|
Instance source |
Description |
Result |
|
|
(Recommended) New |
|
The controller automatically creates an AlbConfig named |
|
|
(Recommended) Existing |
You can select an existing ALB instance from the drop-down list. Basic ALB instances are not supported. For more information, see Reuse an existing ALB instance. |
||
|
(Optional) None |
This option installs only the ALB Ingress controller and does not create an ALB instance. |
Important
The controller does not create the corresponding resources. You must manually create an AlbConfig and an IngressClass. |
|
On an existing cluster
Log on to the ACK console. In the left navigation pane, click Clusters.
On the Clusters page, click the name of your cluster. In the left navigation pane, click Components and Add-ons.
-
On the Add-ons page, click the Network tab. In the Networking components section, click Install in the lower-right corner of the ALB Ingress Controller component card.
-
In the Install dialog box, select Create, Select Existing VPC , or None for Source of ALB Instance. Then, click OK.
Instance source
Description
Result
(Recommended) New
-
Network Type: You can create a Internet or Private Network ALB instance based on your needs. For information about billing, see ALB billing rules.
-
VPC: The VPC in which the cluster is deployed is used by default.
-
vSwitch: Displays the VSwitches in the selected VPC that correspond to the availability zones supported by ALB. You must select two VSwitches in different availability zones. If you do not select any, the system automatically selects two available VSwitches. You can also click Create vSwitch to create new ones.
The controller automatically creates an AlbConfig named
alband a corresponding IngressClass resource. The AlbConfig includes a default HTTP listener on port 80. To add more listeners, see Create an HTTPS listener.(Recommended) Existing
You can select an existing ALB instance from the drop-down list. Basic ALB instances are not supported. For more information, see Reuse an existing ALB instance.
(Optional) None
This option installs only the ALB Ingress controller and does not create an ALB instance.
ImportantThe controller does not create the corresponding resources. You must manually create an AlbConfig and an IngressClass.
-
If you want to access services through ALB Ingress in an ACK dedicated cluster, you must grant permissions to the ALB Ingress controller before you deploy the services. For more information, see Grant permissions to the ALB Ingress controller for ACK dedicated clusters.
Step 2: Deploy a backend service
Console
Log on to the ACK console.
On the Clusters page, click the name of your cluster. In the left navigation pane, click .
Click Create Resources in YAML.
Sample Template: Select Custom.
Template: Enter the code for the YAML configuration file. This configuration file deploys two Deployments named
coffeeandtea, and two Services namedcoffee-svcandtea-svc.
Click Create. A Created. message is displayed.
Verify that the Deployments and Services were created:
In the left-side navigation pane, choose Workloads > Deployments. The Deployments named coffee and tea appear.
In the left-side navigation pane, choose Network > Services. The Services named coffee-svc and tea-svc appear.
kubectl
Create and copy the following content to the cafe-service.yaml file to deploy two Deployments named
coffeeandtea, and two Services namedcoffee-svcandtea-svc.Run the following command to deploy the two Deployments and two Services:
kubectl apply -f cafe-service.yamlExpected output:
deployment "coffee" created
service "coffee-svc" created
deployment "tea" created
service "tea-svc" created
Run the following commands to check the status of the Deployments and Services.
Check the status of the Deployments:
kubectl get deploymentExpected output:
NAME                             READY   UP-TO-DATE   AVAILABLE   AGE
coffee                           1/2     2            1           2m26s
tea                              1/1     1            1           2m26s
Check the status of the Services:
kubectl get svcExpected output:
NAME                          TYPE           CLUSTER-IP       EXTERNAL-IP           PORT(S)                 AGE
coffee-svc                    NodePort       172.16.XX.XX     <none>                80:32056/TCP            9m38s
tea-svc                       NodePort       172.16.XX.XX     <none>                80:31696/TCP            9m38s
Step 3: Create an AlbConfig
If you select New or Existing for ALB Ingress Source in Step 1: Install the ALB Ingress controller, the controller automatically creates an AlbConfig resource named alb and an IngressClass resource named alb. In this case, you can skip this step.
Console
Log on to the ACK console.
On the Clusters page, click the name of your cluster. In the left navigation pane, click .
On the Custom Resources page, click the CRDs tab, and then click Create Resources in YAML.
Sample Template: Select Custom.
Template: Enter the following YAML manifest.
The following table describes the parameters that you can configure.
Parameter
Required
Description
metadata.name
Yes
The name of the AlbConfig resource.
NoteThe name of the AlbConfig resource must be unique within the cluster.
spec.config.name
No
The name of the Application Load Balancer (ALB) instance.
spec.config.addressType
No
The network type of the ALB instance. Valid values:
Internet (default): Internet-facing. The ALB instance provides services over the internet and is publicly accessible.
NoteAn Internet-facing ALB instance uses an Elastic IP Address (EIP) to provide services. You are charged for the EIP instance and for the bandwidth or data transfer. For more information, see pay-as-you-go.
Intranet: internal-facing. The ALB instance provides services only within a VPC and is not publicly accessible.
spec.config.zoneMappings
Yes
The ID of the vSwitch for the ALB instance. For more information about how to create a vSwitch, see Create and manage vSwitches.
NoteThe specified vSwitch must be in the same VPC as the cluster and in an availability zone that ALB supports. For more information about the regions and availability zones supported by ALB, see ALB supported regions and zones.
ALB supports deployment across multiple availability zones. To ensure high availability, select vSwitches from at least two different availability zones in regions that support this feature.
spec.listeners
No
The port and protocol for the ALB listener. This example configures an HTTP listener on port 80.
A listener accepts incoming traffic based on the specified port and protocol. We recommend that you retain this configuration. Otherwise, you must create a listener before you can use an ALB Ingress.
After you complete the configuration, click Create. A Created. message appears.
Verify that the ALB instance is created:
Log on to the Application Load Balancer (ALB) console.
In the top navigation bar, select the region where the instance is deployed.
On the Instances page, find the ALB instance named
alb-testin the list. The presence of the instance confirms its creation.
kubectl
Create a file named
alb-test.yamlwith the following content to define the AlbConfig resource.The following table describes the parameters that you can configure.
Parameter
Required
Description
metadata.name
Yes
The name of the AlbConfig resource.
NoteThe name of the AlbConfig resource must be unique within the cluster.
spec.config.name
No
The name of the Application Load Balancer (ALB) instance.
spec.config.addressType
No
The network type of the ALB instance. Valid values:
Internet (default): Internet-facing. The ALB instance provides services over the internet and is publicly accessible.
NoteAn Internet-facing ALB instance uses an Elastic IP Address (EIP) to provide services. You are charged for the EIP instance and for the bandwidth or data transfer. For more information, see pay-as-you-go.
Intranet: internal-facing. The ALB instance provides services only within a VPC and is not publicly accessible.
spec.config.zoneMappings
Yes
The ID of the vSwitch for the ALB instance. For more information about how to create a vSwitch, see Create and manage vSwitches.
NoteThe specified vSwitch must be in the same VPC as the cluster and in an availability zone that ALB supports. For more information about the regions and availability zones supported by ALB, see ALB supported regions and zones.
ALB supports deployment across multiple availability zones. To ensure high availability, select vSwitches from at least two different availability zones in regions that support this feature.
spec.listeners
No
The port and protocol for the ALB listener. This example configures an HTTP listener on port 80.
A listener accepts incoming traffic based on the specified port and protocol. We recommend that you retain this configuration. Otherwise, you must create a listener before you can use an ALB Ingress.
Run the following command to create the AlbConfig resource:
kubectl apply -f alb-test.yamlExpected output:
albconfig.alibabacloud.com/alb created
Step 4: Create an IngressClass
We recommend creating one IngressClass for each AlbConfig.
If you select New or Existing for ALB Ingress Source in Step 1: Install the ALB Ingress controller, the controller automatically creates an AlbConfig resource named alb and an IngressClass resource named alb. In this case, you can skip this step.
Console
Log on to the ACK console.
On the Clusters page, click the name of your cluster. In the left navigation pane, click .
On the Custom Resources page, click the CRDs tab, and then click Create Resources in YAML.
Sample Template: Select Custom.
Template: Enter the following YAML manifest.
The following table describes the parameters.
Parameter
Required
Description
metadata.name
Yes
The name of the IngressClass.
NoteThe IngressClass name must be unique within the cluster to prevent naming conflicts.
spec.parameters.name
Yes
The name of the associated AlbConfig.
After completing the configuration, click Create. The Created. message appears.
Verify that the IngressClass was created:
In the navigation pane on the left, choose Workloads > Custom Resources.
Click the Resource Objects tab.
In the API Group search box, enter IngressClass. The corresponding IngressClass appears.
kubectl
Create a file named
alb.yamland copy the following content into it.The following table describes the parameters.
Parameter
Required
Description
metadata.name
Yes
The name of the IngressClass.
NoteThe IngressClass name must be unique within the cluster to prevent naming conflicts.
spec.parameters.name
Yes
The name of the associated AlbConfig.
Run the following command to create the IngressClass.
kubectl apply -f alb.yamlExpected output:
ingressclass.networking.k8s.io/alb created
Step 5: Create an Ingress
Console
Log on to the ACK console.
On the Clusters page, click the name of your cluster. In the left navigation pane, click .
Click Create Resources in YAML.
For Sample Template, select Custom.
In the Template field, enter the following YAML manifest.
The following table describes the parameters.
Parameter
Required
Description
metadata.name
Yes
The name of the Ingress.
NoteThe Ingress name must be unique within the cluster to prevent naming conflicts.
spec.ingressClassName
Yes
The name of the associated IngressClass.
spec.rules.host
No
The hostname specified in the
Hostheader of an HTTP request. Set this parameter to your custom domain name.When you access your custom domain name, such as
http://demo.domain.ingress.top, in a browser, the browser adds aHost: demo.domain.ingress.topheader to the HTTP request. In Kubernetes, thehostfield in an Ingress rule is matched against theHostheader from the incoming request. If a match is found, the Ingress controller routes the request to the corresponding backend Service.NoteIf you use a custom domain name, you must complete an ICP filing for it to ensure it can be resolved. For more information, see ICP filing process.
If this parameter is not specified, the Ingress rule matches all requests that arrive at the Ingress controller.
spec.rules.http.paths.path
Yes
The request path.
spec.rules.http.paths.pathType
Yes
The matching rule for the URL path. For more information, see Route requests by URL path.
spec.rules.http.paths.backend.service.name
Yes
The name of the backend Service.
spec.rules.http.paths.backend.service.port.number
Yes
The service port number of the backend Service.
Ensure this port matches the one exposed by the backend Service to route traffic correctly.
After you complete the configuration, click Create. A Created. message appears.
Verify that the Ingress is created:
In the navigation pane on the left, choose Network > Ingresses. The cafe-ingress Ingress appears in the list.
In the Endpoint column, find the endpoint for the cafe-ingress Ingress.
Kubectl
Create a file named cafe-ingress.yaml and copy the following Ingress manifest into it.
The following table describes the parameters.
Parameter
Required
Description
metadata.name
Yes
The name of the Ingress.
NoteThe Ingress name must be unique within the cluster to prevent naming conflicts.
spec.ingressClassName
Yes
The name of the associated IngressClass.
spec.rules.host
No
The hostname specified in the
Hostheader of an HTTP request. Set this parameter to your custom domain name.When you access your custom domain name, such as
http://demo.domain.ingress.top, in a browser, the browser adds aHost: demo.domain.ingress.topheader to the HTTP request. In Kubernetes, thehostfield in an Ingress rule is matched against theHostheader from the incoming request. If a match is found, the Ingress controller routes the request to the corresponding backend Service.NoteIf you use a custom domain name, you must complete an ICP filing for it to ensure it can be resolved. For more information, see ICP filing process.
If this parameter is not specified, the Ingress rule matches all requests that arrive at the Ingress controller.
spec.rules.http.paths.path
Yes
The request path.
spec.rules.http.paths.pathType
Yes
The matching rule for the URL path. For more information, see Route requests by URL path.
spec.rules.http.paths.backend.service.name
Yes
The name of the backend Service.
spec.rules.http.paths.backend.service.port.number
Yes
The service port number of the backend Service.
Ensure this port matches the one exposed by the backend Service to route traffic correctly.
Run the following command to configure the externally exposed domain names and
pathpaths for thecoffeeandteaservices.kubectl apply -f cafe-ingress.yamlExpected output:
ingress.networking.k8s.io/cafe-ingress created(Optional) Run the following command to get the DNS address of the ALB instance.
kubectl get ingressExpected output:
NAME           CLASS    HOSTS                         ADDRESS                                               PORTS   AGE
cafe-ingress   alb      demo.domain.ingress.top       alb-m551oo2zn63yov****.cn-hangzhou.alb.aliyuncs.com   80      50s
Step 6: Configure a DNS record
If you set the spec.rules.host field to a custom domain name when you created the Ingress, you must add a CNAME record to map the custom domain name to the ALB instance's DNS name. This allows you to access your services through the custom domain name.
Log on to the ACK console.
Click the cluster name to open the cluster management page.
In the left-side navigation pane, choose Network > Ingresses.
In the Endpoint column for the
cafe-ingressIngress, copy the DNS name.Follow these steps to add a CNAME record.
NoteIf your domain name is not registered with Alibaba Cloud, you must first add it to the Alibaba Cloud DNS console before you can configure DNS records. For more information, see Domain Name Management. If your domain name is registered with Alibaba Cloud, you can proceed to the next steps.
-
Log on to the Alibaba Cloud DNS console.
-
On the Authoritative DNS Resolution page, find your domain name and click Settings in the Operations column.
-
On the Settings page, click Add Record.
-
In the Add Record panel, configure the following parameters to create the CNAME record, and then click OK.
Configuration
Description
Record Type
Select CNAME from the drop-down list.
Hostname
The prefix for your domain name. This tutorial uses @.
NoteTo use the root domain, set the host to
@.Query Source
Select Default.
Record Value
Paste the copied DNS name of the ALB instance.
TTL
The Time to Live (TTL) is the amount of time the record is cached on a DNS server. This tutorial uses the default value.
-
Step 7: Test traffic forwarding
Enter the test domain followed by the URL path in a browser to verify that traffic forwarding works.
This example uses demo.domain.ingress.top as the test domain:
Enter
demo.domain.ingress.top/coffeein a browser. The page for thecoffee-svcbackend service appears.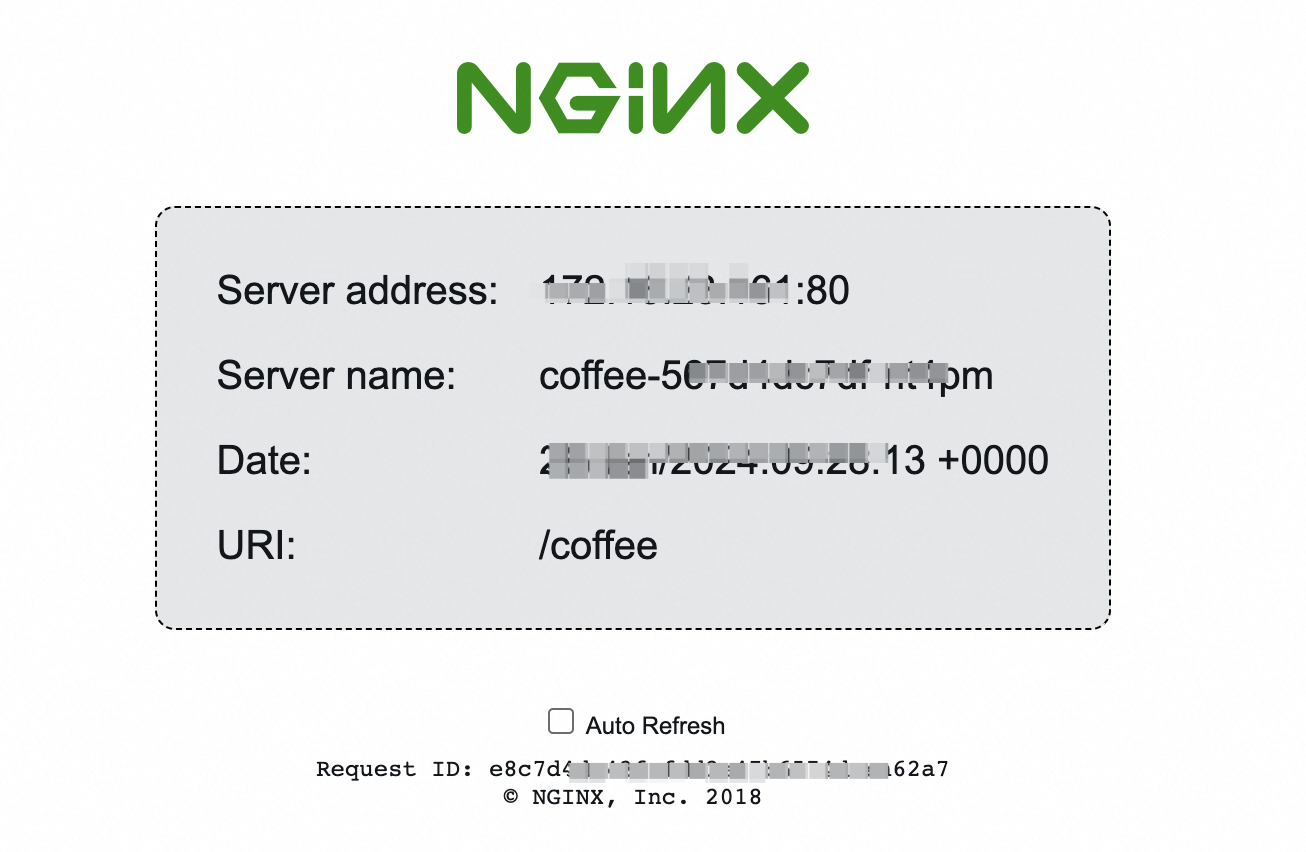
Enter
demo.domain.ingress.top/teain a browser. The page for thetea-svcbackend service appears.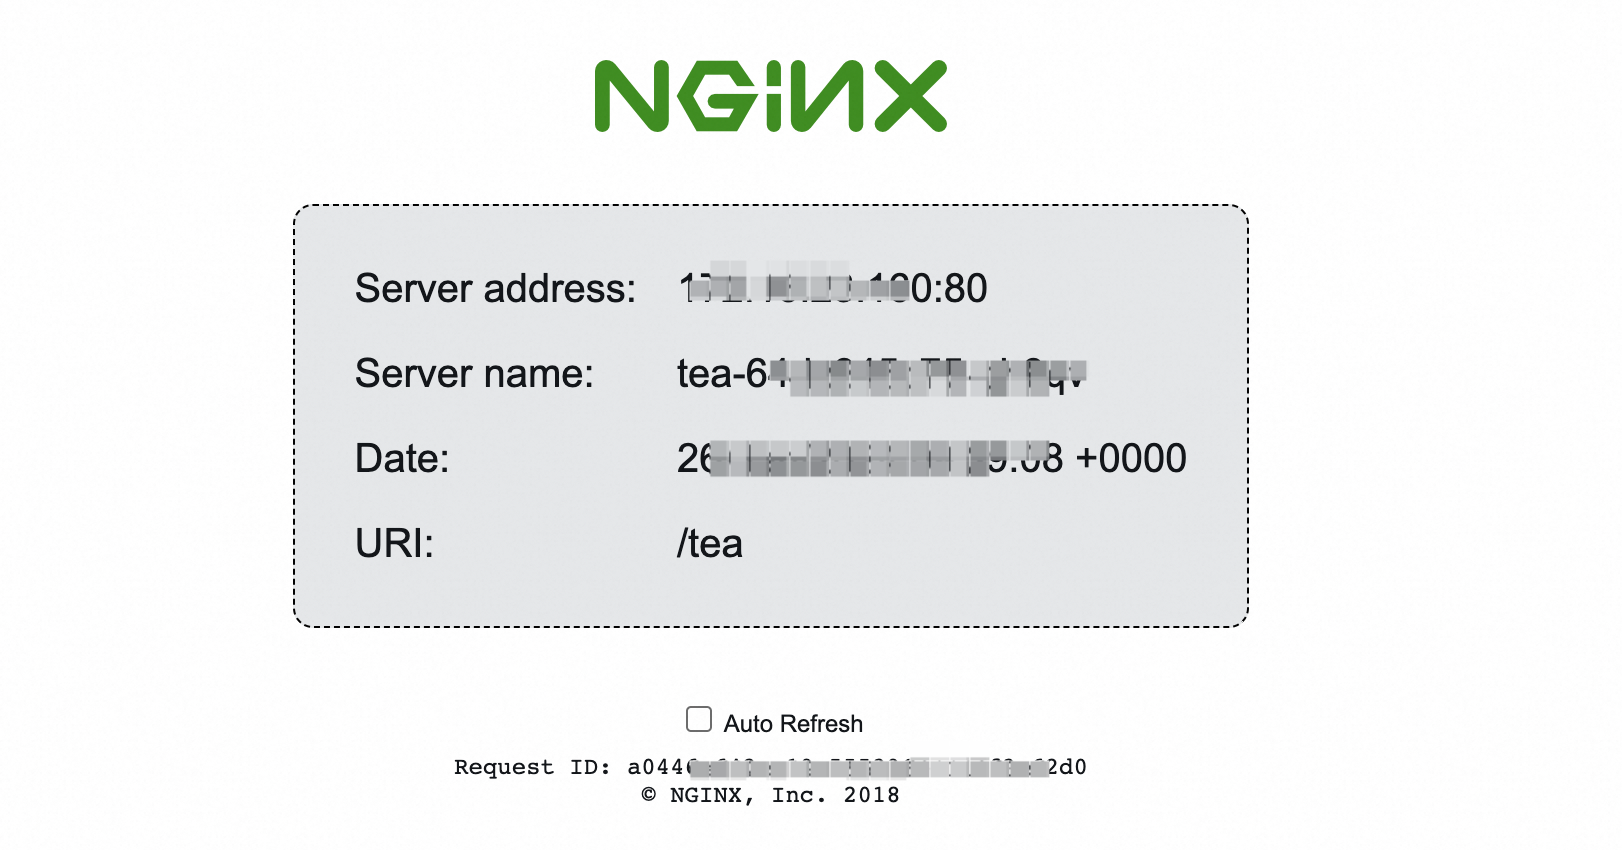
References
To use advanced ALB Ingress features, such as routing requests to different backend server groups based on a domain name or URL path, configuring health checks, redirecting HTTP traffic to HTTPS, performing a canary release, or setting up a custom listener port, see Advanced usage of ALB Ingress.
To configure specific conditions and actions for ALB Ingress forwarding rules, see Customize ALB Ingress forwarding rules.
To enable an HTTPS listener to forward encrypted traffic, see Configure an HTTPS certificate for encrypted communication.
If you encounter issues with an ALB Ingress, see ALB Ingress troubleshooting and ALB Ingress FAQ.