The ALB Ingress controller calls Alibaba Cloud APIs — including Application Load Balancer (ALB), Resource Access Management (RAM), VPC, and ECS APIs — to create and manage load balancer resources on behalf of your cluster. In an ACK dedicated cluster, the controller runs on worker nodes that have no cloud API permissions by default. This topic describes how to grant the required permissions so the controller can manage ALB resources.
This step applies only to ACK dedicated clusters. For ACK managed clusters and ACK Serverless clusters, the ALB Ingress controller already has the required permissions and no additional configuration is needed.
Prerequisites
Before you begin, ensure that you have:
-
An ACK dedicated cluster
-
The ALB Ingress controller component installed in the cluster
Step 1: Create a custom RAM policy
-
Log on to the RAM console as a RAM user with administrative rights.
-
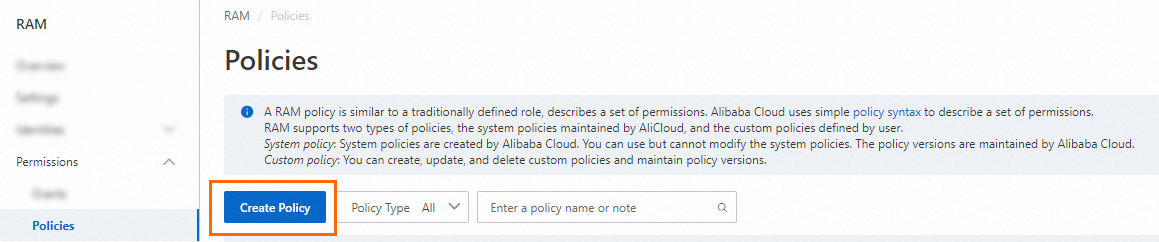
In the left navigation pane, choose Permissions > Policies.
-
On the Policies page, click Create Policy.
-
On the Create Policy page, click the JSON tab.

-
Replace the default content with the following policy document, then click OK.
NoteSeparate multiple policy statements with commas (,).
{ "Version": "1", "Statement": [ { "Action": [ "alb:EnableLoadBalancerIpv6Internet", "alb:DisableLoadBalancerIpv6Internet", "alb:CreateAcl", "alb:DeleteAcl", "alb:ListAcls", "alb:ListAclRelations", "alb:AddEntriesToAcl", "alb:AssociateAclsWithListener", "alb:ListAclEntries", "alb:RemoveEntriesFromAcl", "alb:DissociateAclsFromListener", "alb:TagResources", "alb:UnTagResources", "alb:ListServerGroups", "alb:ListServerGroupServers", "alb:AddServersToServerGroup", "alb:RemoveServersFromServerGroup", "alb:ReplaceServersInServerGroup", "alb:CreateLoadBalancer", "alb:DeleteLoadBalancer", "alb:UpdateLoadBalancerAttribute", "alb:UpdateLoadBalancerEdition", "alb:EnableLoadBalancerAccessLog", "alb:DisableLoadBalancerAccessLog", "alb:EnableDeletionProtection", "alb:DisableDeletionProtection", "alb:ListLoadBalancers", "alb:GetLoadBalancerAttribute", "alb:ListListeners", "alb:CreateListener", "alb:GetListenerAttribute", "alb:UpdateListenerAttribute", "alb:ListListenerCertificates", "alb:AssociateAdditionalCertificatesWithListener", "alb:DissociateAdditionalCertificatesFromListener", "alb:DeleteListener", "alb:CreateRule", "alb:DeleteRule", "alb:UpdateRuleAttribute", "alb:CreateRules", "alb:UpdateRulesAttribute", "alb:DeleteRules", "alb:ListRules", "alb:UpdateListenerLogConfig", "alb:CreateServerGroup", "alb:DeleteServerGroup", "alb:UpdateServerGroupAttribute", "alb:UpdateLoadBalancerAddressTypeConfig", "alb:AttachCommonBandwidthPackageToLoadBalancer", "alb:DetachCommonBandwidthPackageFromLoadBalancer", "alb:UpdateServerGroupServersAttribute", "alb:MoveResourceGroup", "alb:DescribeZones", "alb:ListAScripts", "alb:CreateAScripts", "alb:UpdateAScripts", "alb:DeleteAScripts" ], "Resource": "*", "Effect": "Allow" }, { "Action": "ram:CreateServiceLinkedRole", "Resource": "*", "Effect": "Allow", "Condition": { "StringEquals": { "ram:ServiceName": [ "alb.aliyuncs.com", "audit.log.aliyuncs.com", "nlb.aliyuncs.com", "logdelivery.alb.aliyuncs.com" ] } } }, { "Action": [ "log:GetProductDataCollection", "log:OpenProductDataCollection", "log:CloseProductDataCollection" ], "Resource": "acs:log:*:*:project/*/logstore/alb_*", "Effect": "Allow" }, { "Action": [ "yundun-cert:DescribeSSLCertificateList", "yundun-cert:DescribeSSLCertificatePublicKeyDetail", "yundun-cert:CreateSSLCertificateWithName", "yundun-cert:DeleteSSLCertificate" ], "Resource": "*", "Effect": "Allow" }, { "Action": "vpc:DescribeVSwitches", "Resource": "*", "Effect": "Allow" }, { "Action": "ecs:DescribeNetworkInterfaces", "Resource": "*", "Effect": "Allow" } ] } -
In the Create Policy dialog box, enter a Policy Name and Description, then click OK.
Step 2: Attach the policy to the worker RAM role
-
Log on to the ACK console. In the left navigation pane, click Clusters.
-
On the Clusters page, click the name of your cluster, then click the Basic Information tab.
-
On the Basic Information tab, click the link to the right of Worker RAM Role to open the RAM console.
-
On the Permissions tab, click Grant Permission. In the Grant Permission panel, find and select the custom policy you created in Step 1.
-
Click Grant Permissions, then click Close.
Step 3: Verify the instance RAM role
-
In the left navigation pane of the cluster details page, choose Nodes > Nodes.
-
On the Nodes page, click the instance ID of a worker node — for example,
i-2ze5d2qi9iy90pzb****. -
On the instance details page, click the Instance Details tab. In the Other Information section, check whether a RAM role is displayed next to RAM Role. If no RAM role is attached, attach one to the ECS instance. For more information, see Detach or change an instance RAM role.
Step 4: Restart the ALB Ingress controller pod
Perform this step during off-peak hours.
Restart the alb-ingress-controller pod so it picks up the new permissions.
-
Get the pod name.
kubectl -n kube-system get pod | grep alb-ingress-controllerExpected output:
NAME READY STATUS RESTARTS AGE alb-ingress-controller-*** 1/1 Running 0 60s -
Delete the pod. Replace
alb-ingress-controller-***with the name from the previous step.kubectl -n kube-system delete pod alb-ingress-controller-***Expected output:
pod "alb-ingress-controller-***" deleted -
After a few minutes, confirm the pod is running again.
kubectl -n kube-system get podExpected output:
NAME                           READY   STATUS    RESTARTS   AGE
alb-ingress-controller-***2    1/1     Running   0          60s
A Running status confirms the controller is working correctly with the new permissions.
What's next
To route traffic to services in your cluster using ALB Ingress, see Expose services with an ALB Ingress.