Configure user-based single sign-on (SSO) from Active Directory Federation Services (AD FS) to Alibaba Cloud using SAML 2.0. This guide covers configuring AD FS as a trusted identity provider (IdP) in RAM and Alibaba Cloud as a trusted service provider (SP) in AD FS, using an AD FS instance deployed on an Elastic Compute Service (ECS) instance running Windows Server 2012 R2.
Prerequisites
Before you begin, ensure that you have the following services deployed on an ECS instance running Windows Server 2012 R2:
DNS server: resolves and routes identity authentication requests to the correct Federation Service.
Active Directory Domain Services (AD DS): lets you create, query, and modify domain objects such as users and devices.
-
AD FS: lets you configure a relying party for SSO and authenticate users against it.
ImportantThe Microsoft AD configuration in this guide is for reference only and illustrates the SSO setup process for Alibaba Cloud. Alibaba Cloud does not provide consultation services for Microsoft AD configuration. For AD FS deployment instructions, see Build an AD domain on a Windows instance.
Also collect the following data before you begin:
|
Data |
Example value |
|
Default domain name of the Alibaba Cloud account |
|
|
RAM user username |
|
|
RAM user UPN (User Principal Name) |
|
|
AD FS service name registered in Microsoft AD |
|
|
Microsoft AD domain name |
|
|
Microsoft AD NetBIOS name |
|
|
RAM user |
|
The UPN domain in Microsoft AD (secloud.club) differs from the default domain name of the Alibaba Cloud account (secloud.onaliyun.com). If left unresolved, Alibaba Cloud cannot identify the user. See step 4 in Step 3 for the three methods to resolve this mismatch before you configure AD FS.
Step 1: configure AD FS as a trusted SAML IdP in RAM
In your browser, go to:
https://adfs.secloud.club/FederationMetadata/2007-06/FederationMetadata.xmlDownload the metadata file in XML format.
-
Log on to the RAM console and use the metadata file to configure SSO.
For more information, see Configure SAML on Alibaba Cloud for user SSO.
NoteIf the metadata file exceeds the size limit, delete all content inside
<fed:ClaimTypesRequested>and<fed:ClaimTypesOffered>.
Step 2: configure Alibaba Cloud as a trusted SAML SP in AD FS
In AD FS, the SAML service provider (SP) is called the relying party. To configure Alibaba Cloud as a trusted SP:
-
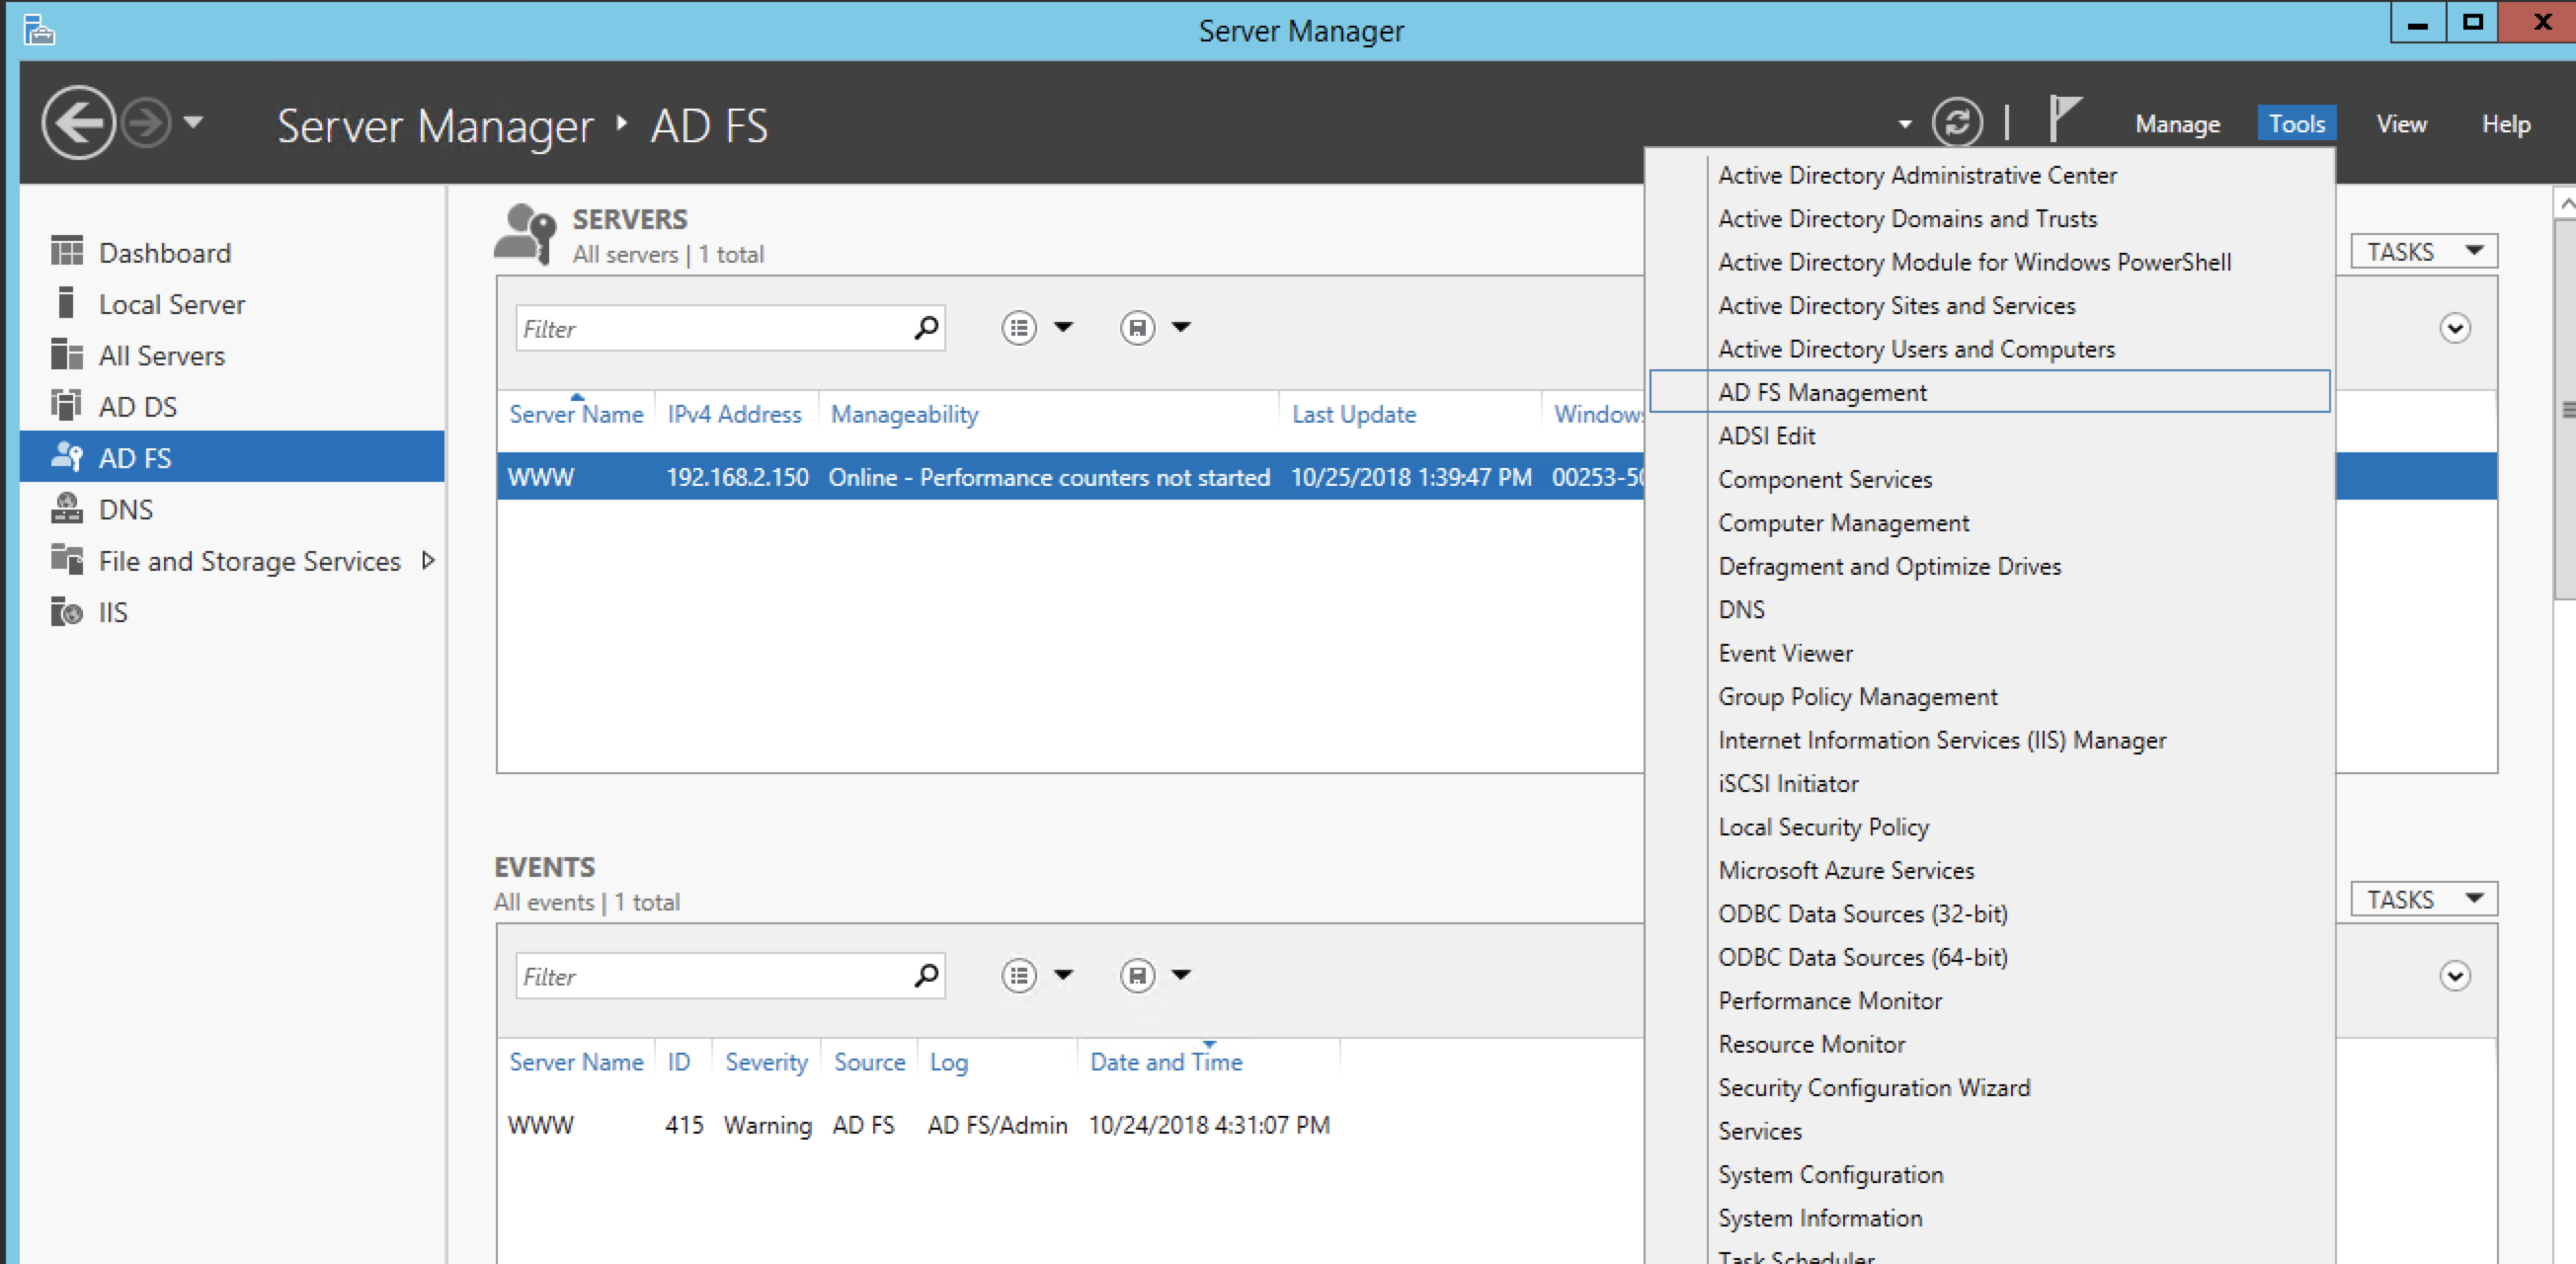
In Server Manager, choose Tools > AD FS Management.
-
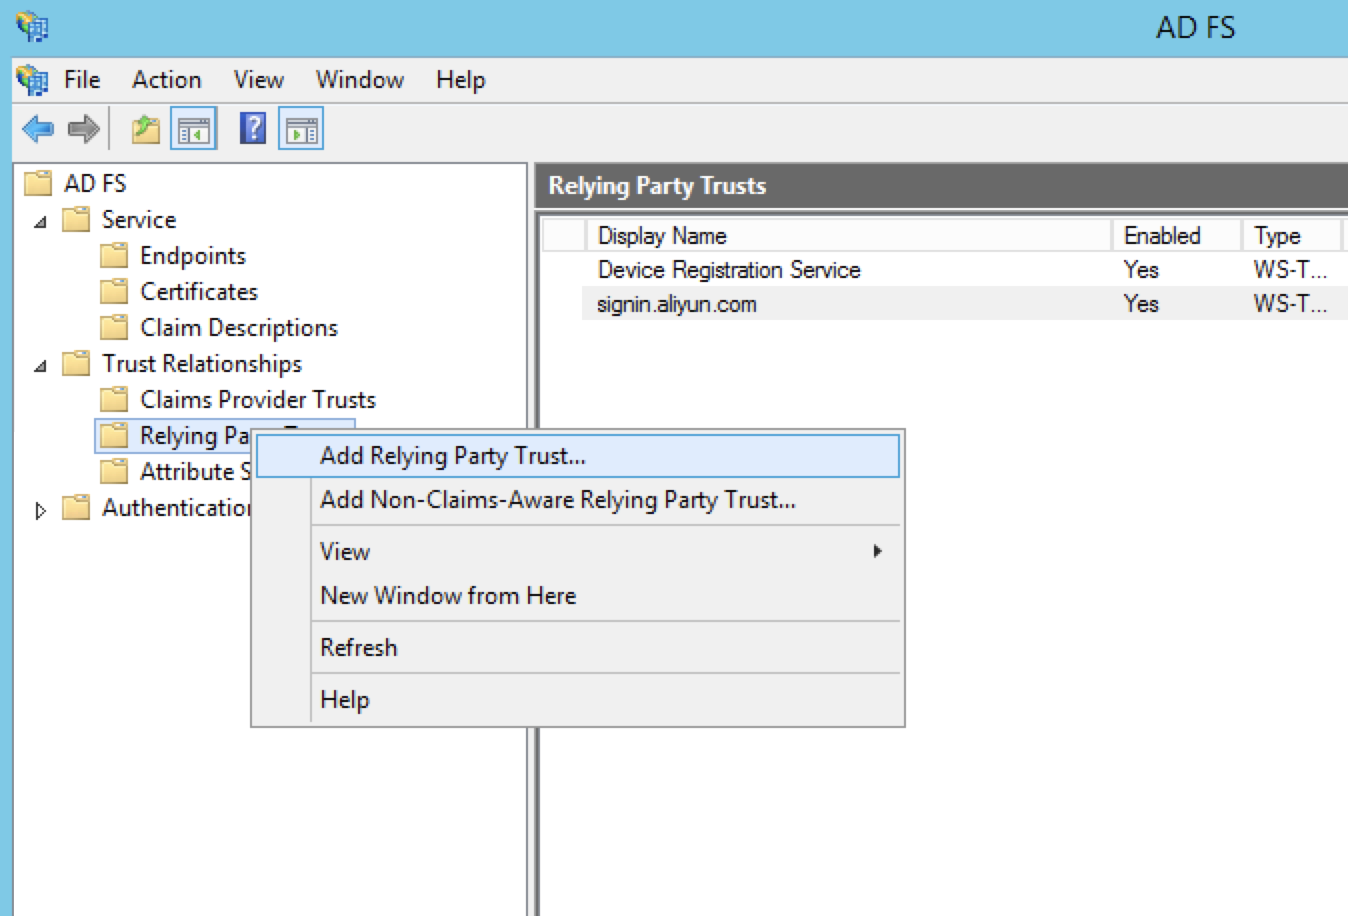
Right-click Relying Parties and select Add Relying Party Trust.
-
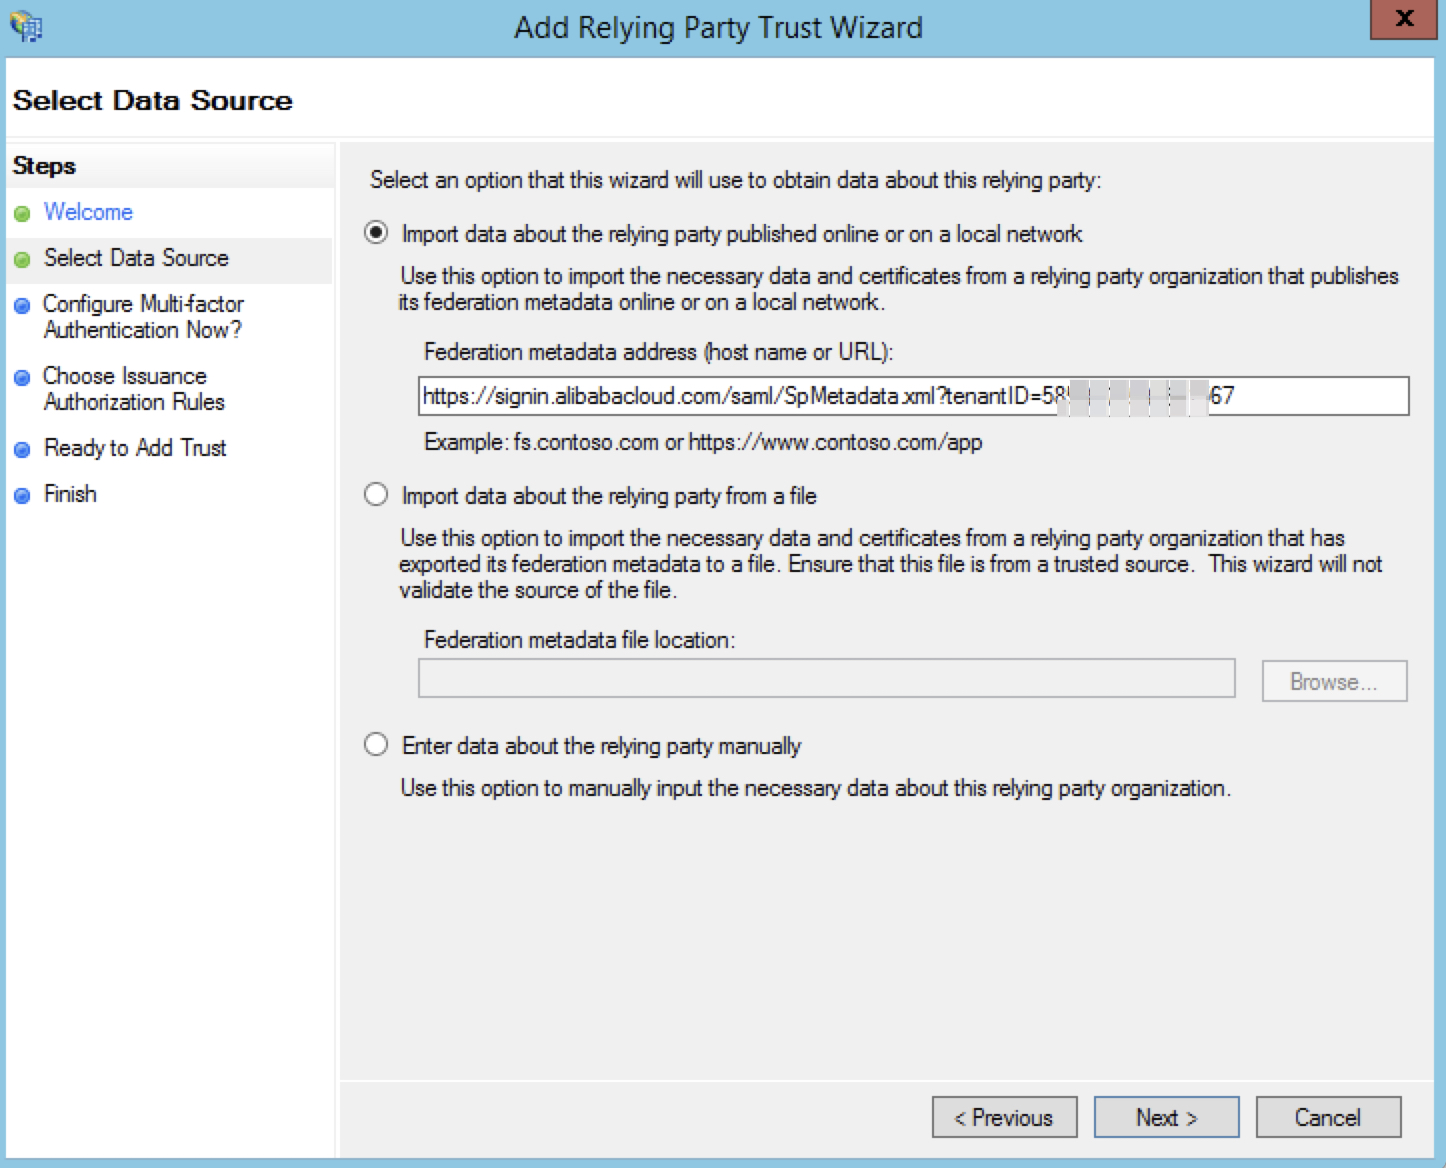
Configure the Alibaba Cloud SAML metadata for the relying party.
To find the metadata URL, log on to the RAM console. In the left-side navigation pane, click SSO. On the User-based SSO tab, find the URL in the Setup SSO section. Enter the metadata URL directly when configuring the relying party in AD FS.
After the relying party is configured, Alibaba Cloud sends authentication requests to the AD FS service (adfs.secloud.club) for RAM users that belong to the Alibaba Cloud account with the default domain name secloud.onaliyun.com. AD FS authenticates the users and returns a SAML response to Alibaba Cloud.
Step 3: configure SAML assertion attributes for the Alibaba Cloud SP
Set the NameID field in the SAML assertion to the UPN of the RAM user. Alibaba Cloud uses this value to locate the correct RAM user from the SAML response.
You must set the UPN in Microsoft AD to the value of NameID in the SAML assertion.
-
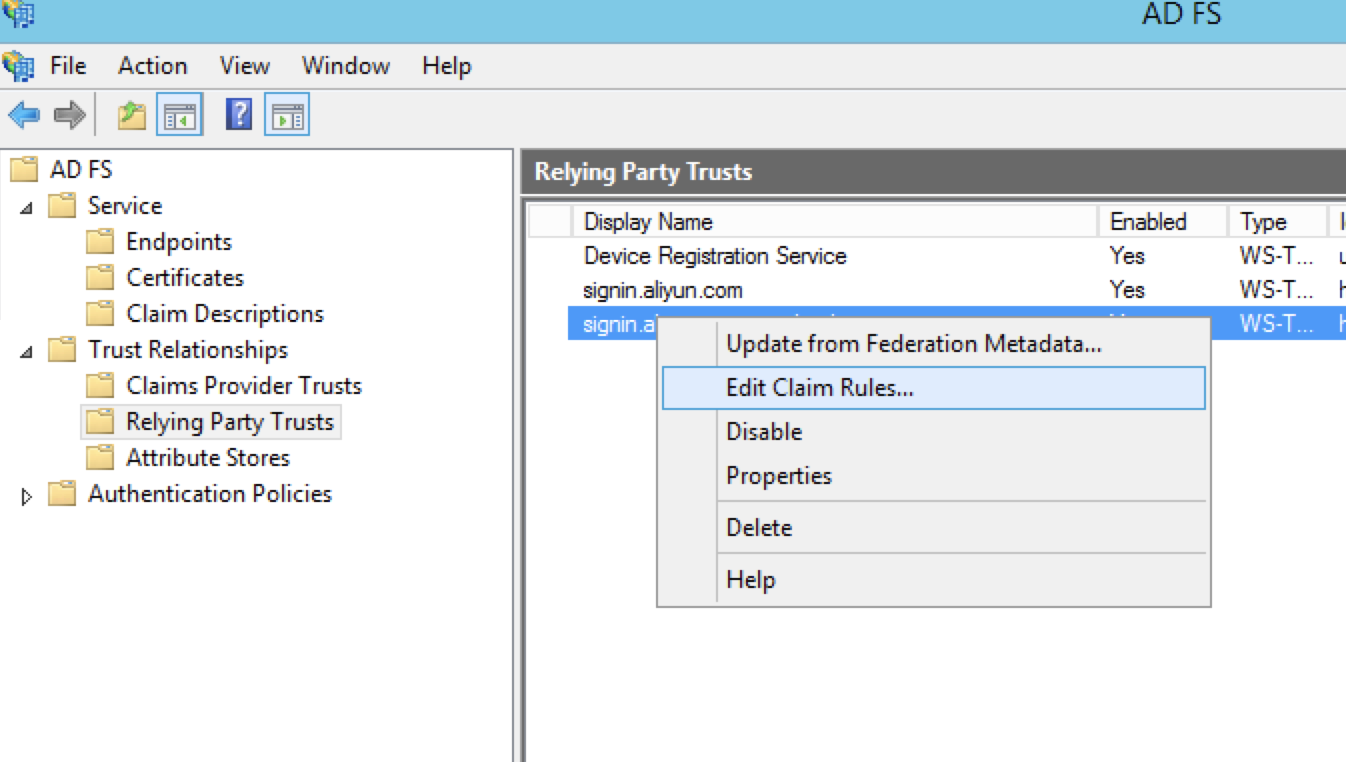
Right-click the display name of the relying party and select Edit Claim Rules.
-
Click Issuance Transform Rules to add a rule.
NoteIssuance transform rules define how to transform a user attribute and issue it in the SAML assertion. To issue the Microsoft AD UPN as a
NameID, you must create a new rule.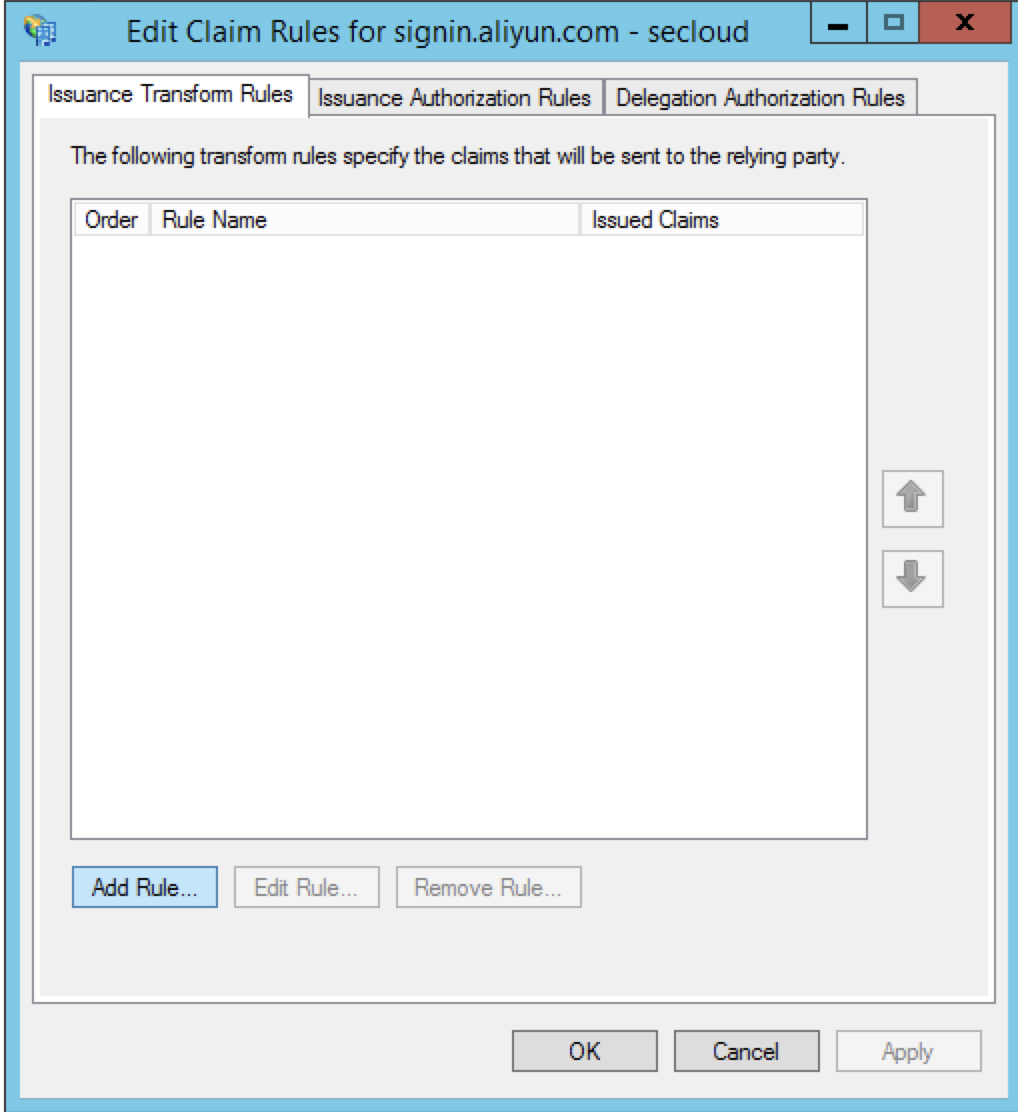
-
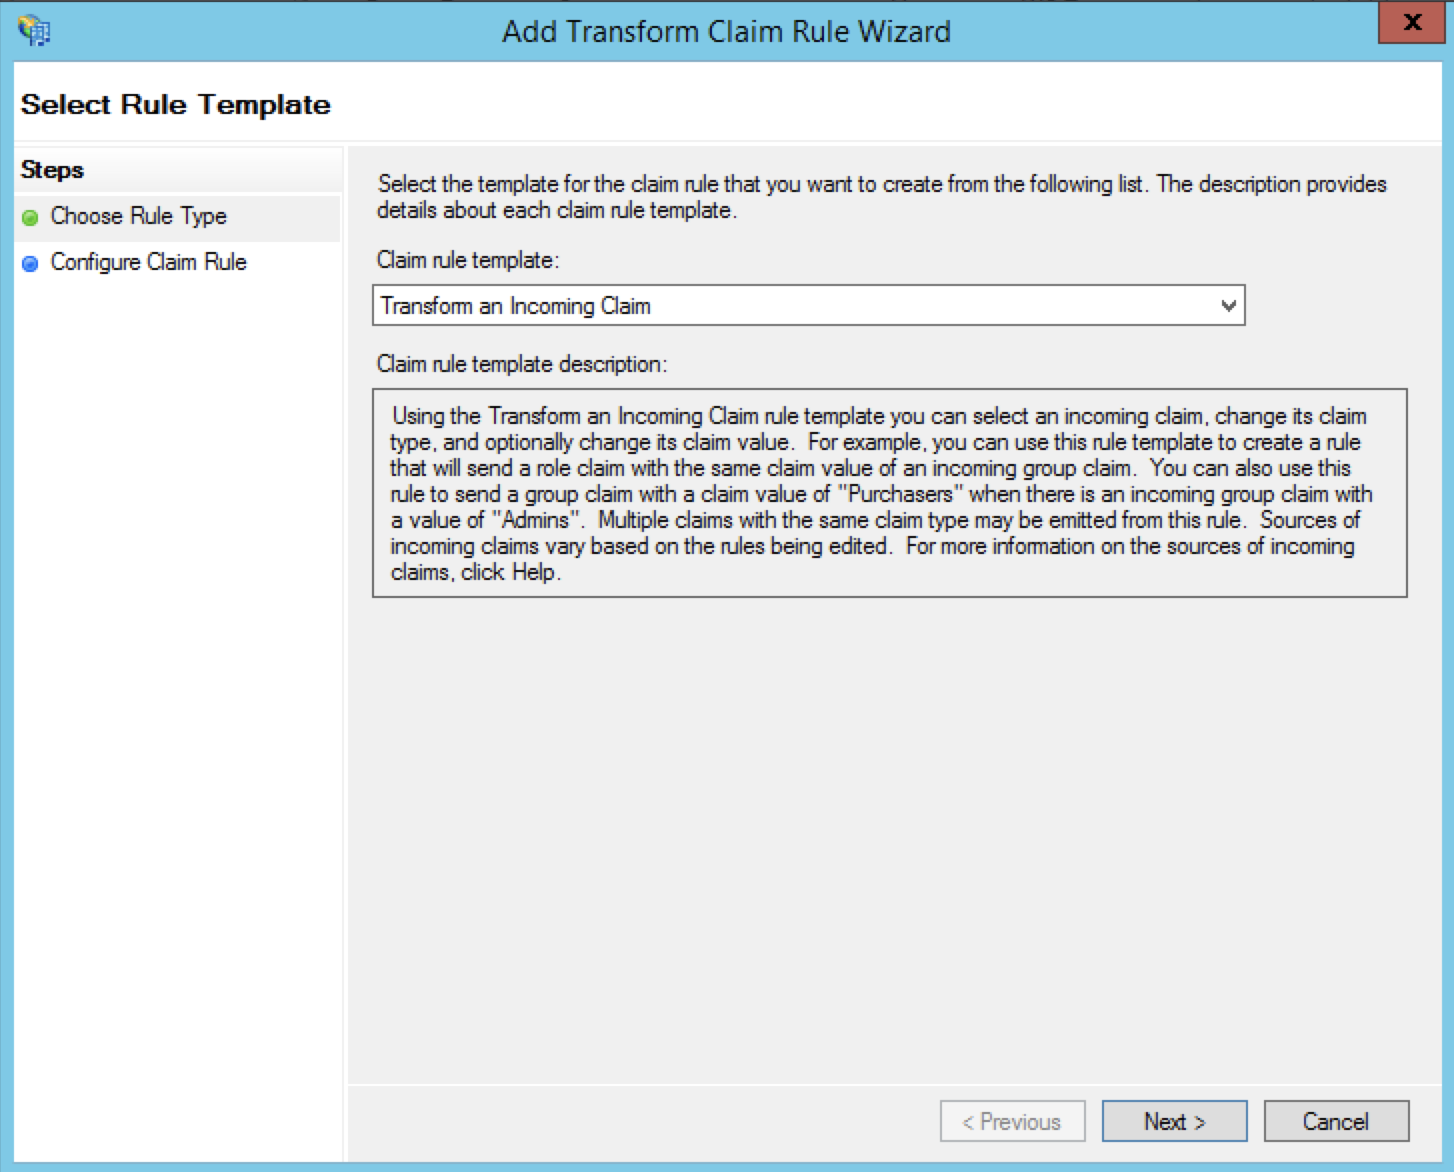
Set Claim rule template to Transform an Incoming Claim.
-
Select Edit Rule and resolve the domain name mismatch using one of the following methods:
NoteIn this example, the UPN domain in the Alibaba Cloud account is
secloud.onaliyun.com, while the UPN domain in Microsoft AD issecloud.club. Mapping the Microsoft AD UPN directly toNameIDprevents Alibaba Cloud from identifying the user. Use one of the methods below to resolve the mismatch.-
Method 1: Set the Microsoft AD domain name as the domain alias configured in RAM.
If
secloud.clubis registered with a public DNS, addsecloud.clubas a domain alias in RAM. For more information, see Create and verify a domain alias.After configuring the domain alias, map the UPN to
NameIDin the Edit Rule dialog box.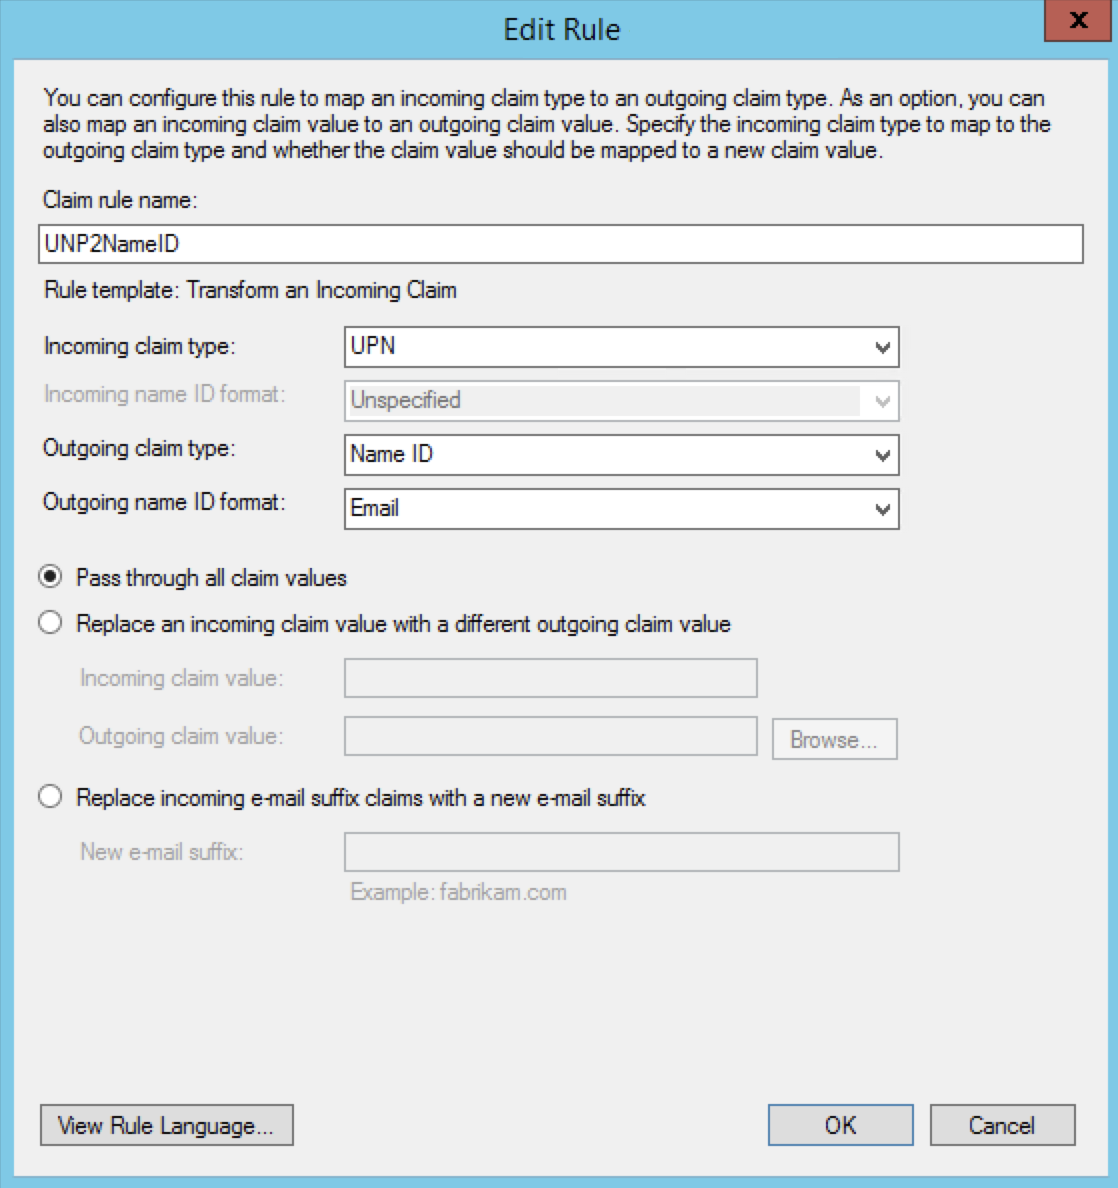
-
Method 2: Transform the domain name in AD FS.
If
secloud.clubis an internal enterprise domain that cannot be verified by Alibaba Cloud, RAM can only use the default domain namesecloud.onaliyun.com.Configure AD FS to replace the domain name suffix
secloud.clubwithsecloud.onaliyun.comin the SAML assertion before sending it to Alibaba Cloud.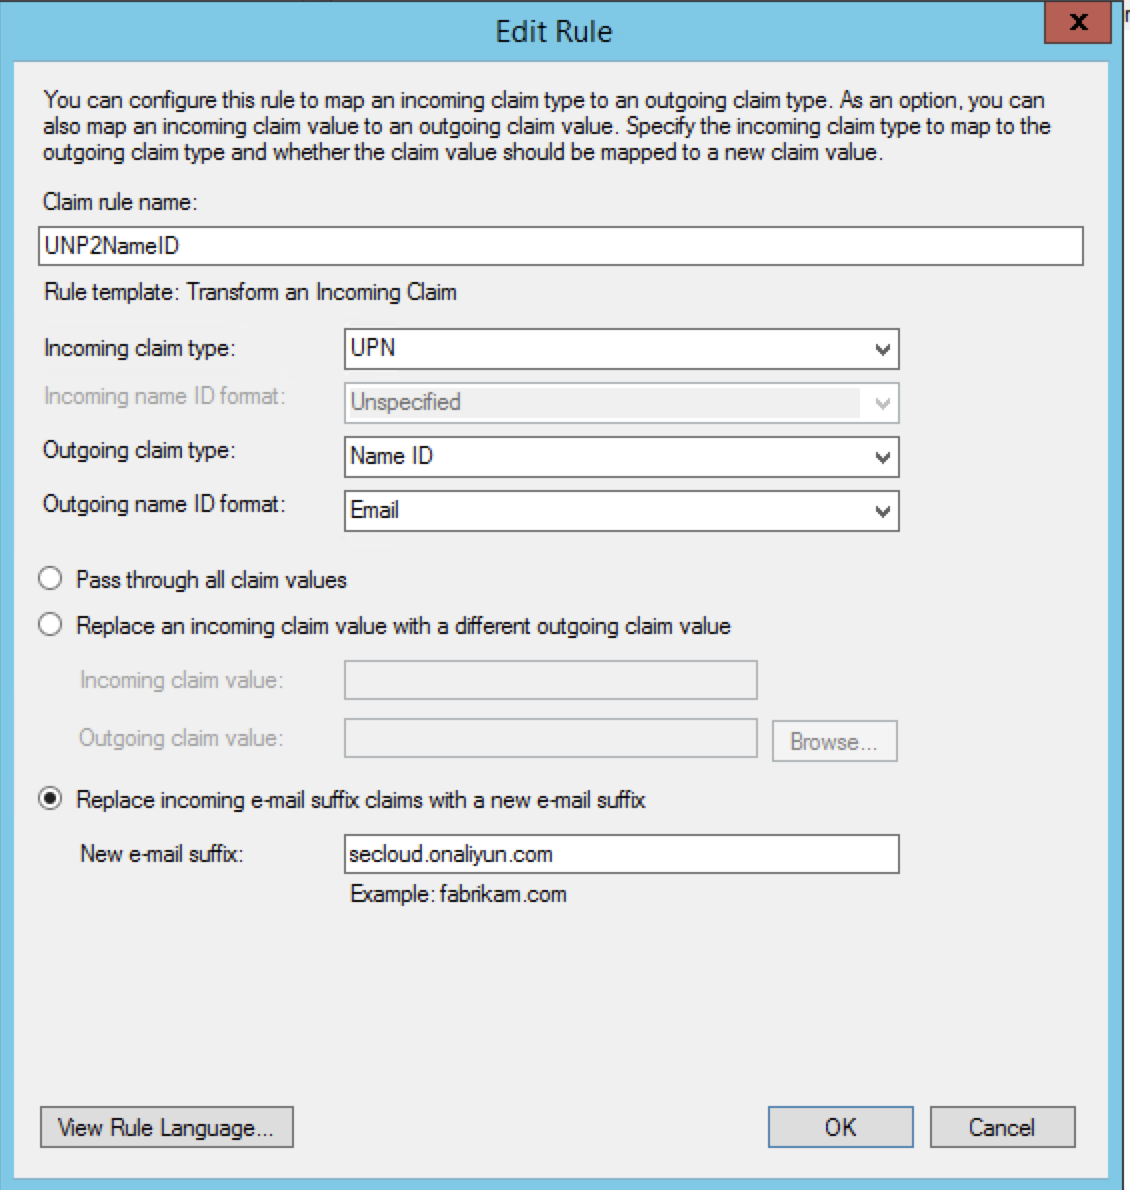
-
Method 3: Specify the Microsoft AD domain name as the auxiliary domain name for user-based SSO.
If
secloud.clubis an internal enterprise domain, specifysecloud.clubas an auxiliary domain name in RAM — no domain name transformation in AD FS is required. For more information, see Configure SAML on Alibaba Cloud for user SSO.After specifying the auxiliary domain name, map the UPN to
NameIDin the Edit Rule dialog box.
-