This tutorial guides you through the process of configuring role-based single sign-on (SSO) from Microsoft Active Directory Federation Services (AD FS) to Alibaba Cloud. After completing this configuration, users in your Active Directory (AD) can log on to the Alibaba Cloud Management Console by assuming a Resource Access Management (RAM) role based on their AD group memberships.
Prerequisites
You have an operational AD FS environment. This tutorial uses AD FS on an Elastic Compute Service (ECS) instance that runs Windows Server 2012 R2 as an example.
You have created the necessary AD user groups to map to specific RAM roles (such as an Admins group and a Readers group).
You have administrative permissions in both your AD FS environment and your Alibaba Cloud account.
This tutorial provides a reference for integrating AD FS with Alibaba Cloud. Alibaba Cloud does not provide support for the configuration of third-party software like AD FS. For detailed information on deploying AD FS, see Build an AD domain on a Windows instance.
Configuration overview
The process involves establishing a two-way trust relationship by exchanging metadata and configuring claims.
Configure Alibaba Cloud to trust AD FS. You will create a SAML identity provider (IdP) and the RAM roles that your federated users will assume.
Configure AD FS to trust Alibaba Cloud. You will add Alibaba Cloud as a trusted service provider (relying party) in AD FS.
Configure claim rules in AD FS. You will define rules that instruct AD FS to send the required identity and role information in the SAML assertion.
Verify the SSO configuration. You will test the IdP-initiated SSO flow.
Step 1: Configure Alibaba Cloud to trust AD FS
Obtain the AD FS federation metadata.
In a browser, navigate to your AD FS federation metadata URL. The URL is typically in the format:
https://<your_adfs_server>/FederationMetadata/2007-06/FederationMetadata.xml. Save the resulting XML file to your computer.Create an SAML IdP in Alibaba Cloud.
Log on to the RAM console, navigate to . On the SAML sub-tab, click Create IdP to upload the metadata file you just downloaded. For detailed instructions, see Configure SAML on Alibaba Cloud (as SP).
NoteIf the metadata file is too large, you can reduce its size by removing the content within the
<fed:ClaimTypesRequested>and<fed:ClaimTypesOffered>tags before uploading.Create RAM roles for federation.
Create the RAM roles that your federated users will assume (such as
ADFS-AdminandADFS-Reader). When creating each role, select IdP as the trusted principal type and choose the SAML IdP you created in the previous step. After creating the roles, attach the appropriate policies (such asAdministratorAccessandReadOnlyAccess). For more information, see Create a RAM role for a trusted IdP.Repeat this process for each Alibaba Cloud account you want to integrate.
Step 2: Configure AD FS to trust Alibaba Cloud
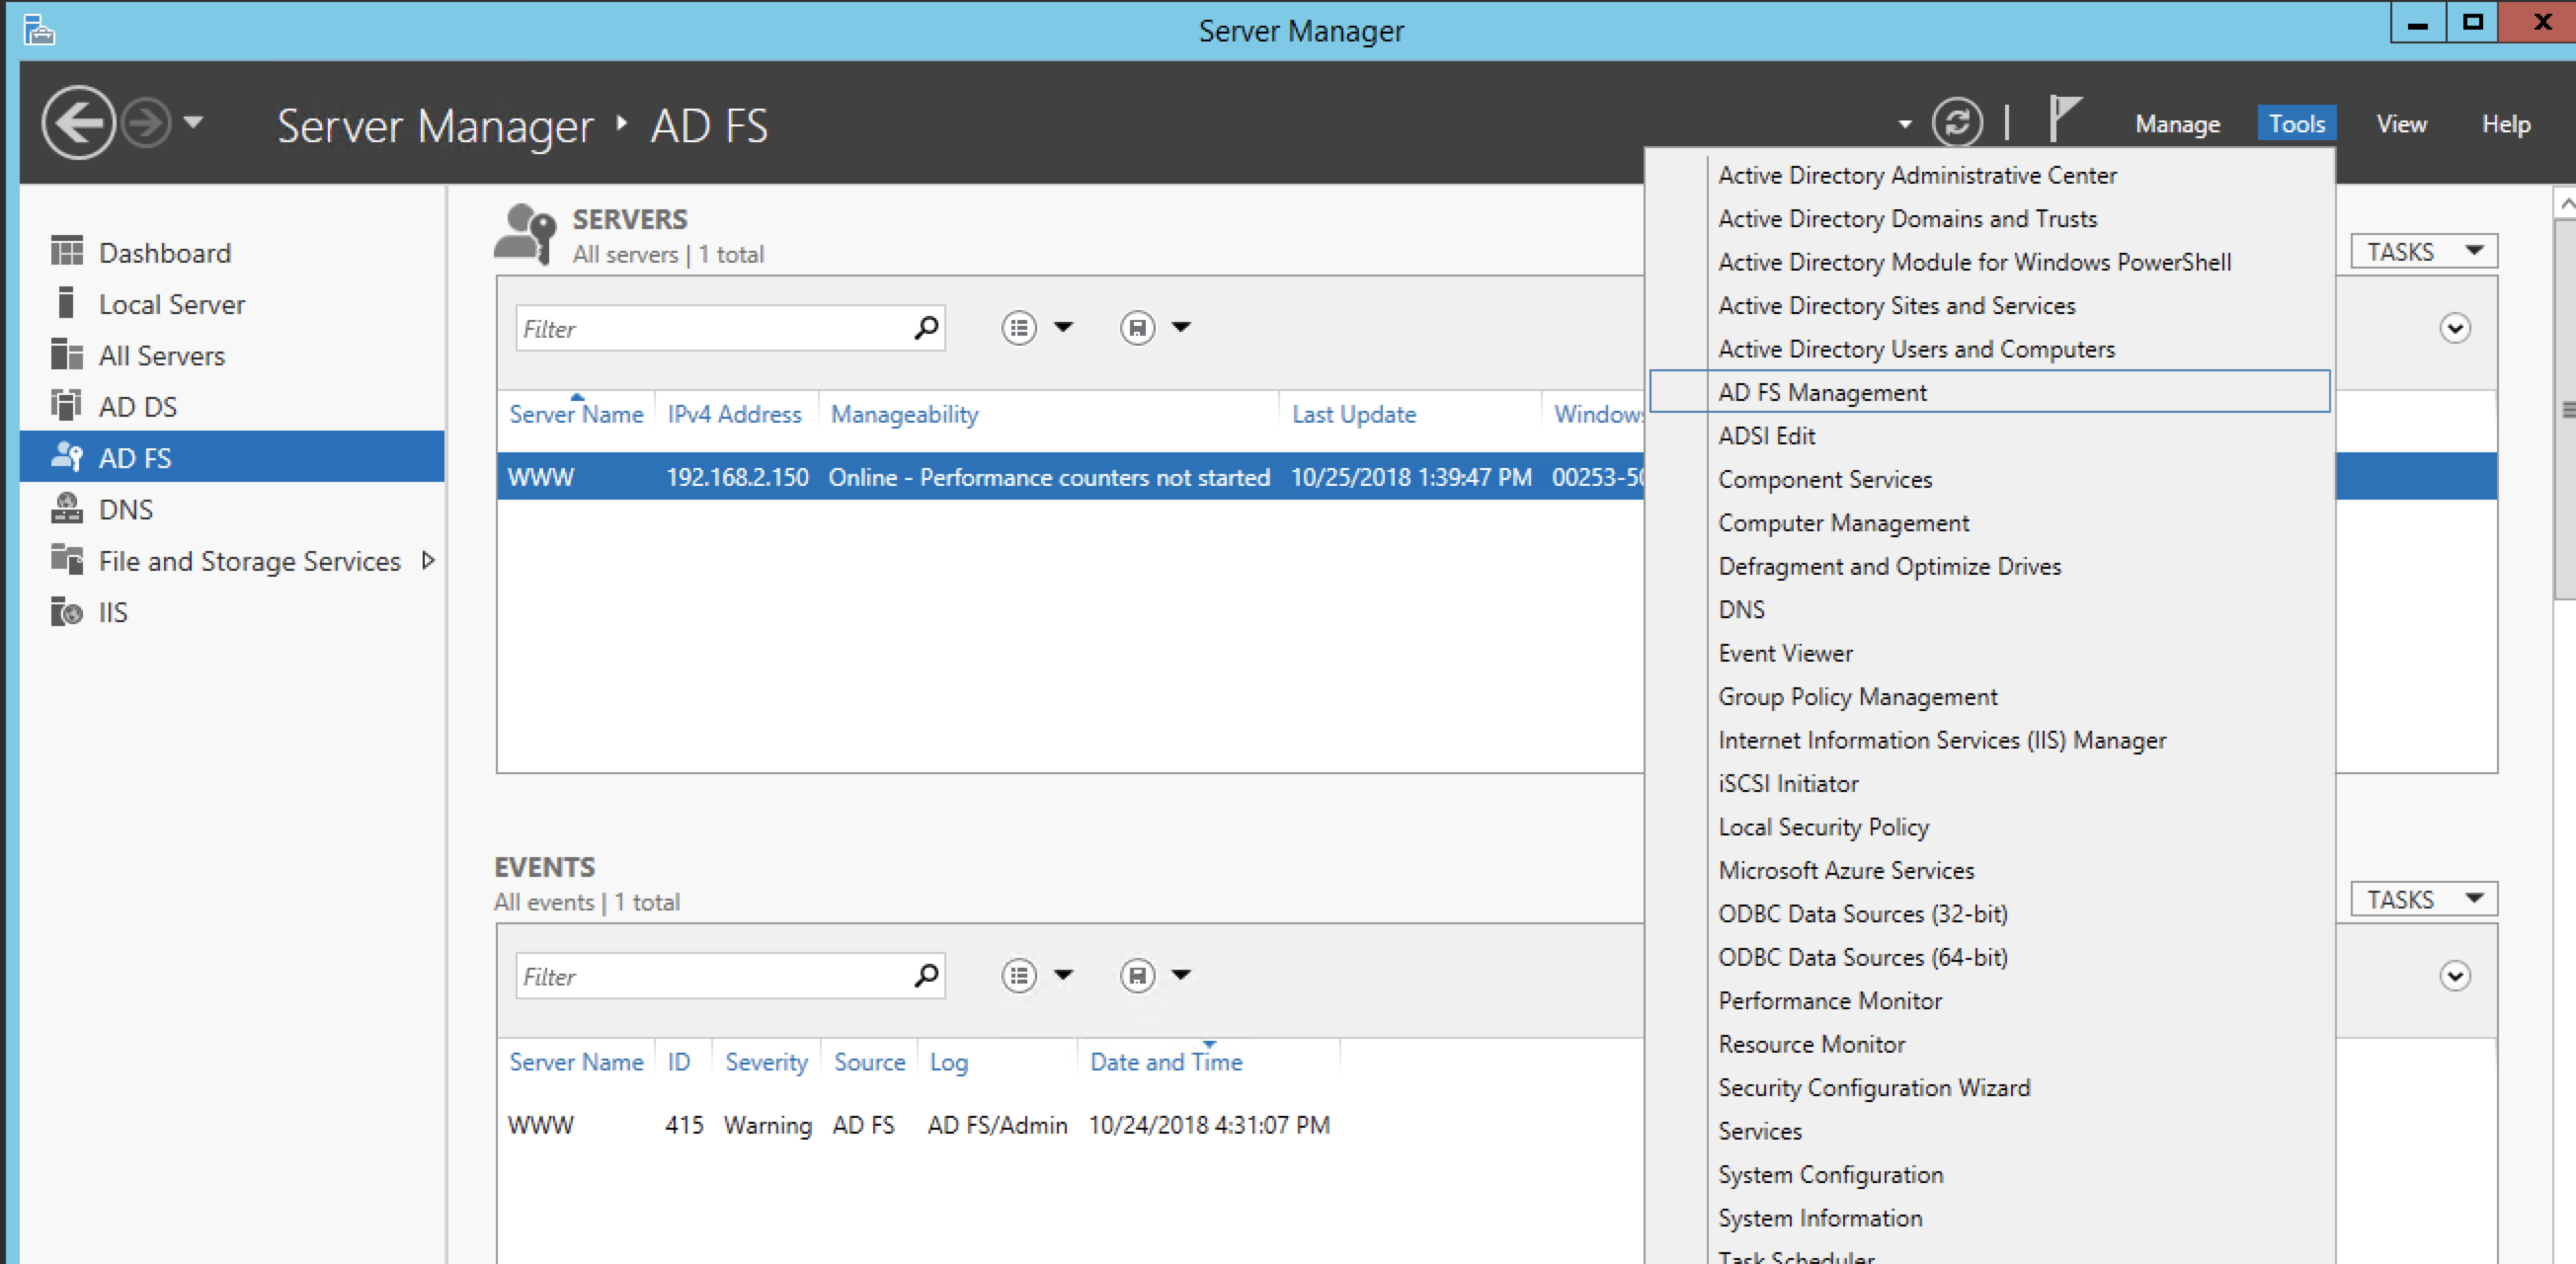
On your AD FS server, open Server Manager.
In Server Manager, click Tools, and then select AD FS Management.
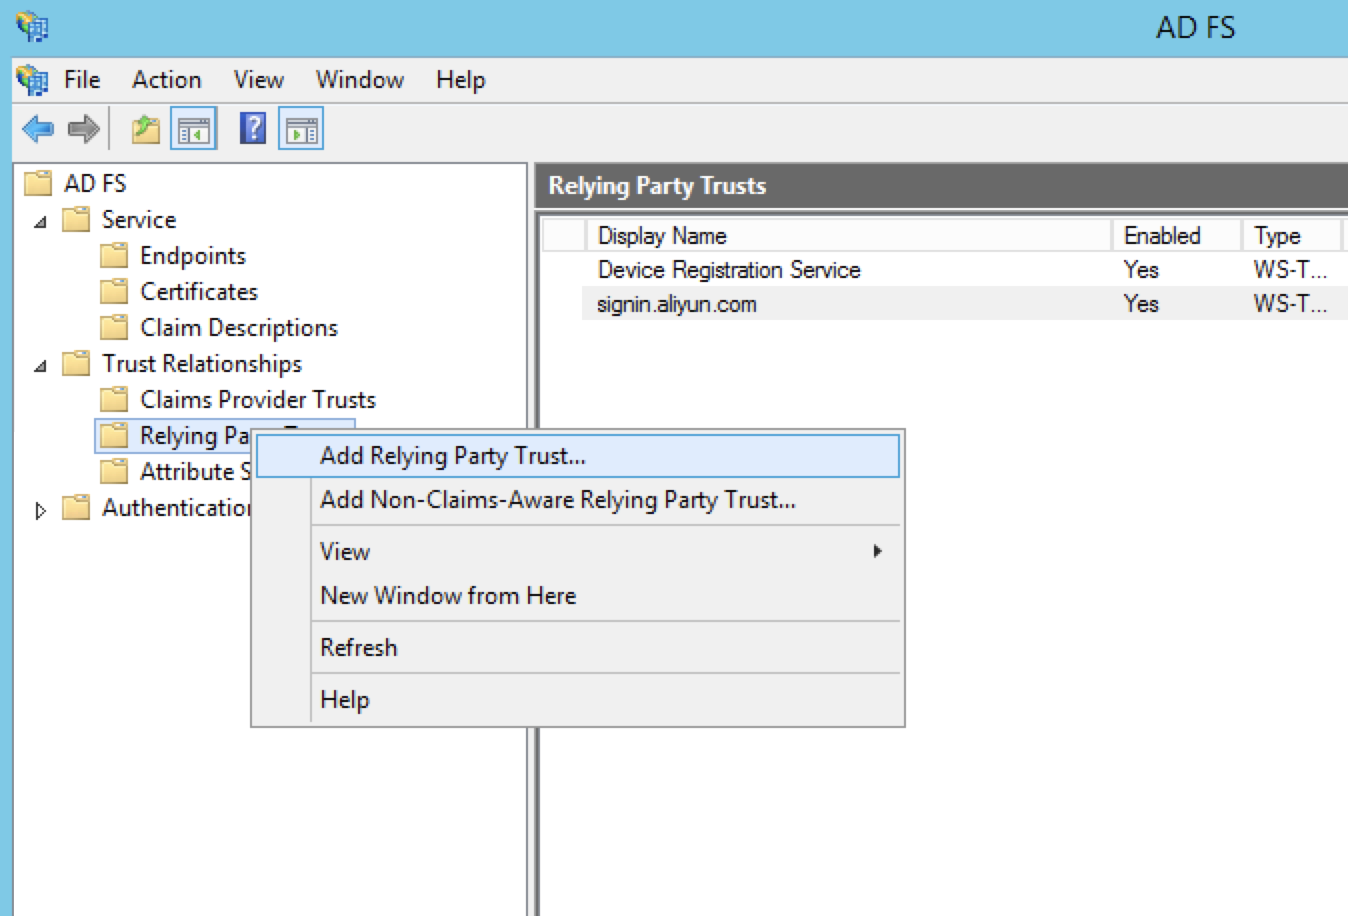
Navigate to Relying Party Trusts, right-click, and select Add Relying Party Trust.
In the wizard, on the Select Data Source page, select Import data about the relying party published online or on a local network.
In the text box, enter the Alibaba Cloud SAML SP metadata URL:
https://signin.alibabacloud.com/saml-role/sp-metadata.xml. Click Next.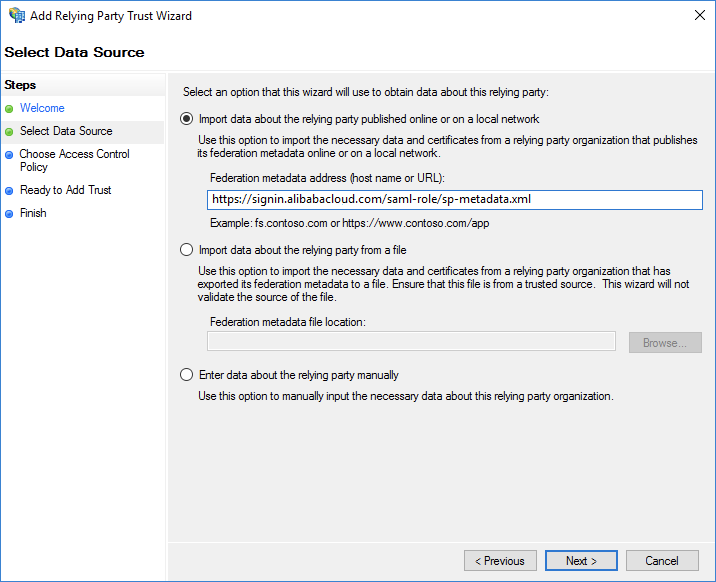
Complete the wizard using the default settings.
Step 3: Configure claim rules in AD FS
Claim rules instruct AD FS on which attributes to send in the SAML assertion. For role-based SSO, Alibaba Cloud requires the NameID, RoleSessionName, and Role attributes.
Right-click the display name of the relying party you created and select Edit Claim Rules. On the Issuance Transform Rules tab, add the following rules in order.
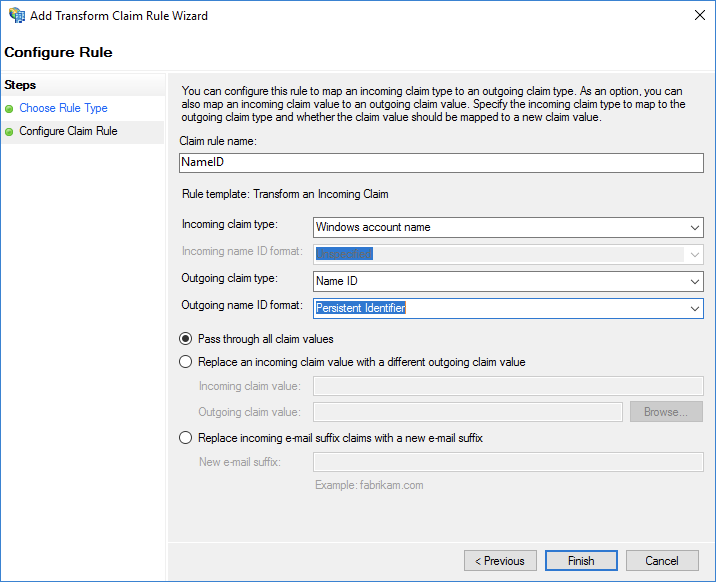
Rule 1: Send Windows account name as NameID
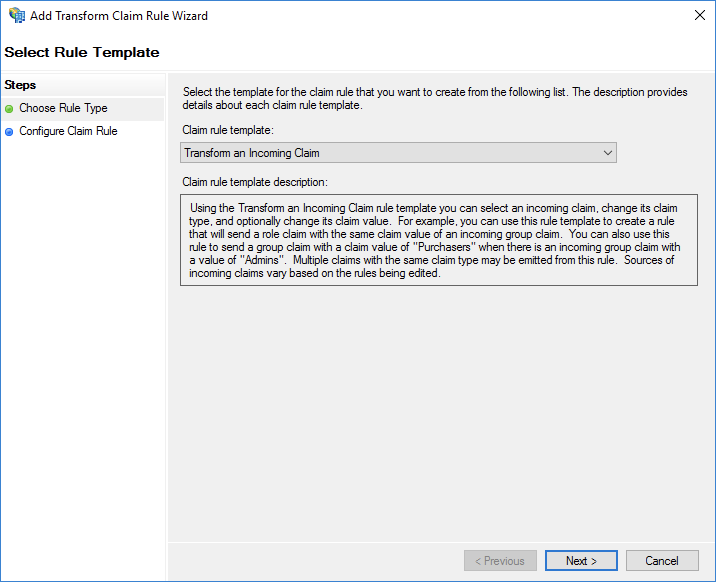
Click Add Rule and choose the Transform an Incoming Claim template.
Configure the rule with the following settings:
Claim rule name: Enter a descriptive name, such as
NameID.Incoming claim type: Select Windows account name.
Outgoing claim type: Select Name ID.
Outgoing name ID format: Select Persistent Identifier.
Select the Pass through all claim values option.
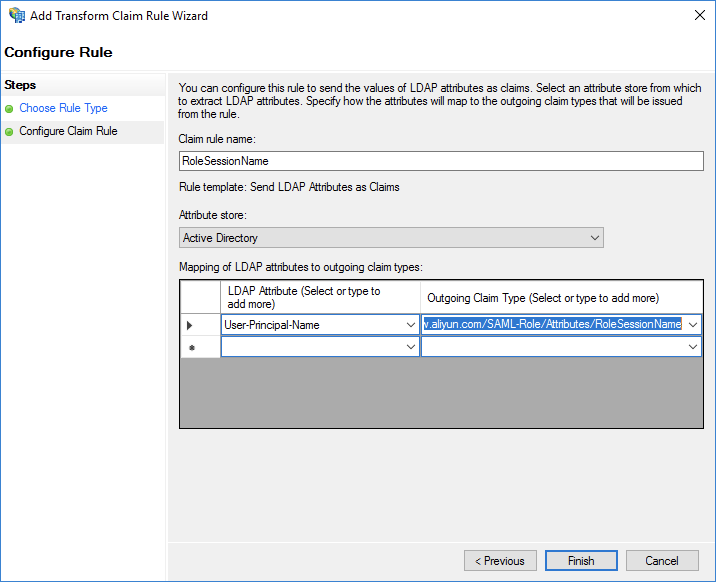
Rule 2: Send UPN as RoleSessionName
Click Add Rule and choose the Send LDAP Attributes as Claims template.
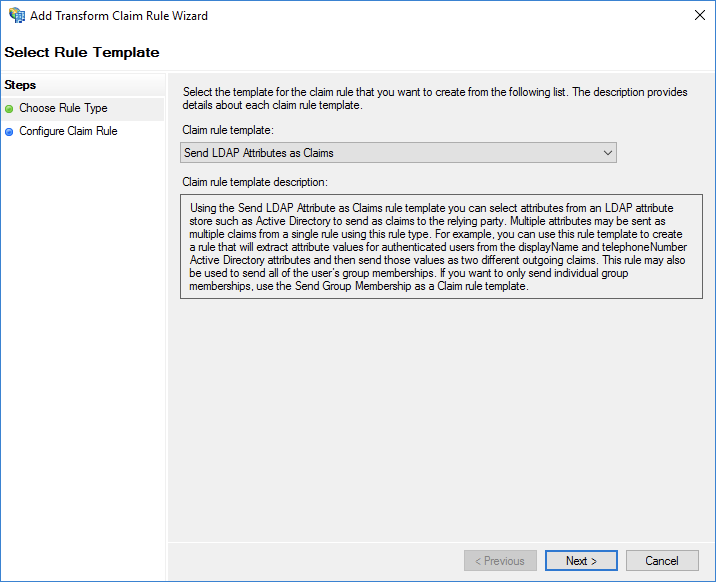
Configure the rule with the following settings:
Claim rule name: Enter a descriptive name, such as
RoleSessionNameAttribute store: Select Active Directory.
Map the LDAP Attribute User-Principal-Name to the Outgoing Claim Type
https://www.aliyun.com/SAML-Role/Attributes/RoleSessionName.
Rules 3 & 4: Send AD groups as RAM roles
Mapping AD groups to RAM roles requires a two-step custom rule process. The first rule retrieves all of the user's group memberships, and the second rule filters and transforms them into the format that Alibaba Cloud requires for the Role attribute.
Create Rule 3: Get AD groups
Click Add Rule and choose the Send Claims Using a Custom Rule template.
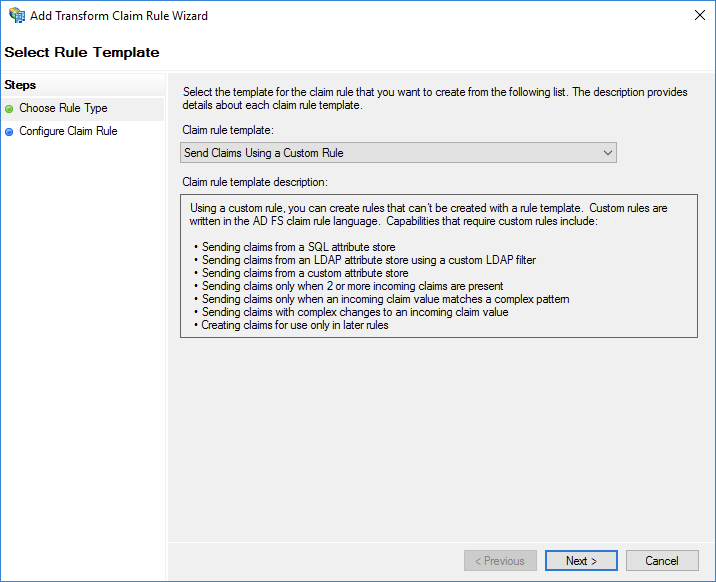
Claim rule name: Enter a descriptive name, such as
Get AD Groups.Custom rule: Enter the following code. This rule queries for the user's group memberships and stores them in a temporary variable.
c:[Type =="http://schemas.microsoft.com/ws/2008/06/identity/claims/windowsaccountname", Issuer == "AD AUTHORITY"] => add(store = "Active Directory",types = ("http://temp/variable"), query = ";tokenGroups;{0}", param =c.Value);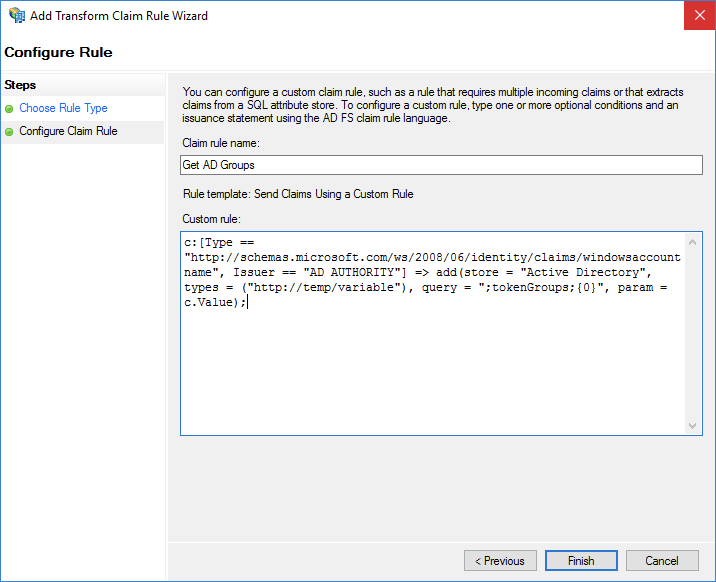
Create Rule 4: Transform groups to RAM roles
Click Add Rule again and choose the Send Claims Using a Custom Rule template.
Claim rule name: Enter a descriptive name, such as
Role.Custom rule: Enter the following code. This rule uses a regular expression to match AD group names that follow the pattern
Aliyun-<account_id>-<role_name>and transforms them into the requiredRoleattribute format.c:[Type == "http://temp/variable", Value =~ "(?i)^Aliyun-([\d]+)"] => issue(Type = "https://www.aliyun.com/SAML-Role/Attributes/Role",Value = RegExReplace(c.Value, "Aliyun-([\d]+)-(.+)", "acs:ram::$1:role/$2,acs:ram::$1:saml-provider/<provider-name>"));NoteReplace
<provider-name>with the name of the SAML IdP you created in Step 1.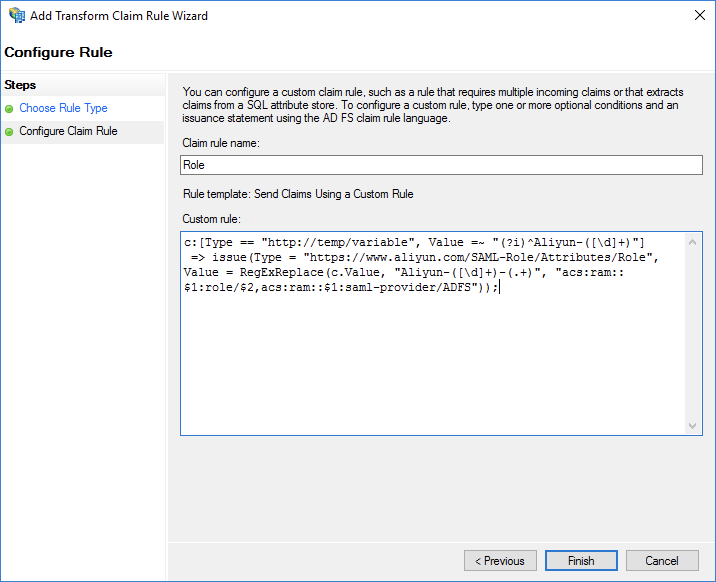
Step 4: Verify the SSO Configuration
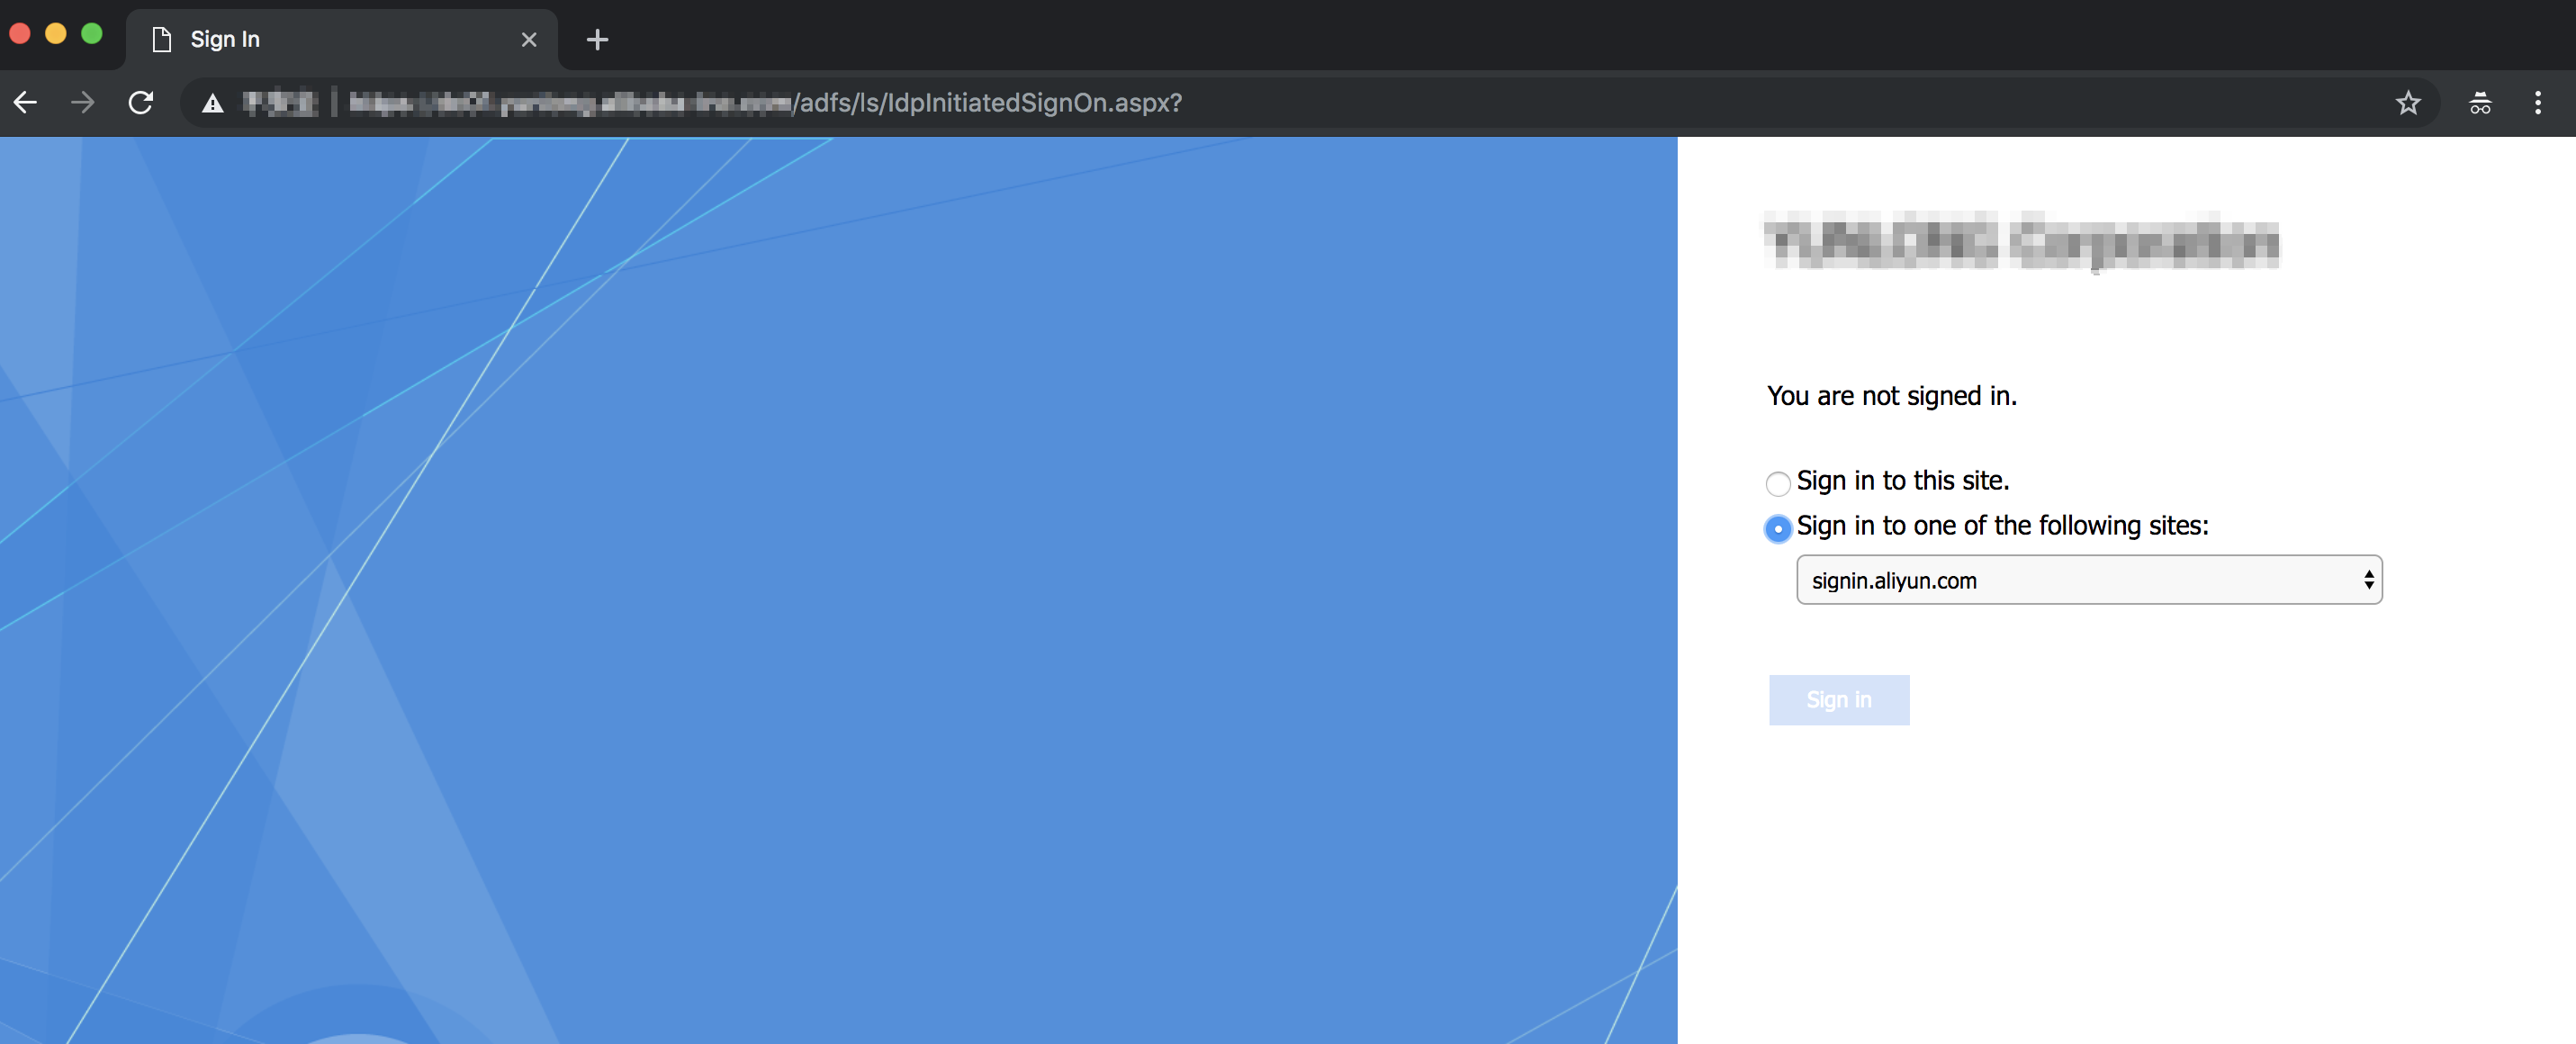
Navigate to your AD FS IdP-initiated SSO page, typically at
https://<ADFS-server>/adfs/ls/IdpInitiatedSignOn.aspx.Select the Alibaba Cloud application from the list and log on with your Active Directory credentials.
 Note
NoteIf this page is disabled, you may need to enable it by running the
Set-AdfsProperties -EnableIdpInitiatedSignonPage $Truecommand in PowerShell on your AD FS server.You will be redirected to the Alibaba Cloud RAM role selection page. Choose one of the available roles and click Log On.
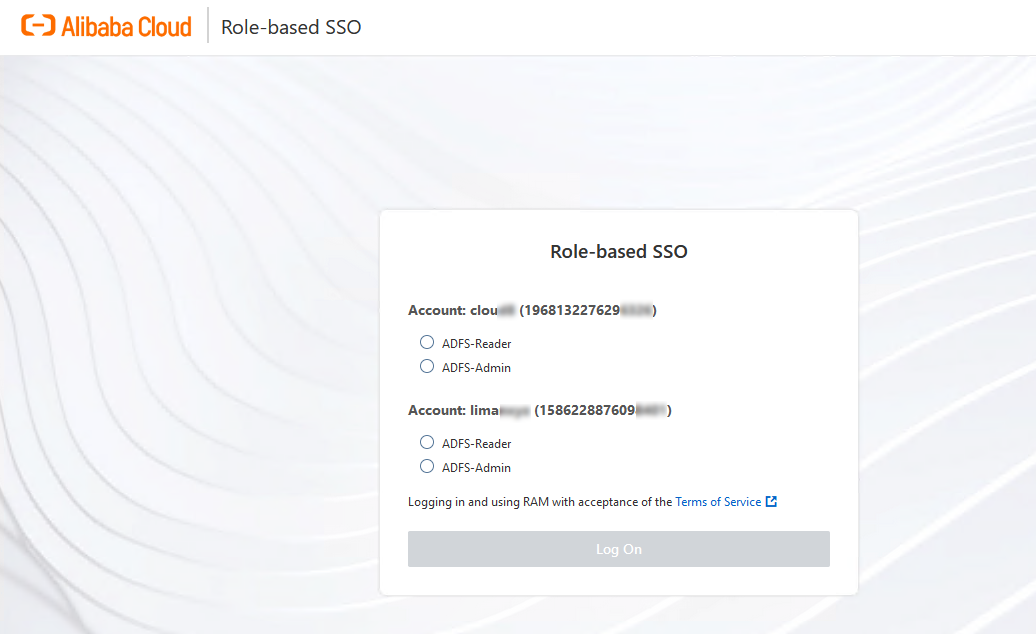
If you are successfully logged on to the Alibaba Cloud Management Console, your SSO configuration is working correctly.