When you stress test a registration or login endpoint, each virtual user (VU) must submit unique credentials. Performance Testing Service (PTS) solves this with the file parameter feature: you upload a CSV file that contains usernames and passwords, and PTS injects a different row of credentials into each request. This guide walks through the setup for both registration and login scenarios.
How it works
Prepare a CSV file with one set of credentials per row.
Upload the file as a data source in your PTS scenario.
Reference the CSV columns in the HTTP request body with
${column_name}syntax.During the stress test, PTS substitutes values from the CSV file into each request. You can configure whether each row is used only once or recycled.
Prerequisites
Before you begin, make sure you have:
An activated PTS instance. For more information, see Activate PTS
A CSV parameter file formatted as follows. For format requirements, see Parameter file conventions
username,password
user1,Password1
user2,Password2
user3,Password3
The first row contains column names (username, password). Each subsequent row is one set of test credentials.
Step 1: Upload the parameter file
Log on to the PTS console, choose Performance Test > Create Scenario, and then click PTS.
Click Data Sources. On the Files tab, click + Upload File and select your local CSV file.
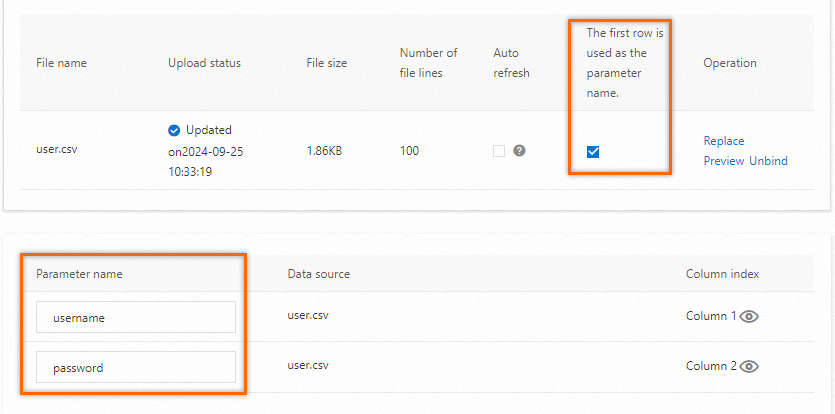
After the upload completes, select Use First Row as Parameter Name. When this option is enabled, PTS treats the first row as column headers and skips it when reading test data.
NoteIf the first row of your CSV file contains actual test data instead of column names, leave this option unselected and specify parameter names manually.
Step 2: Add a parameter node
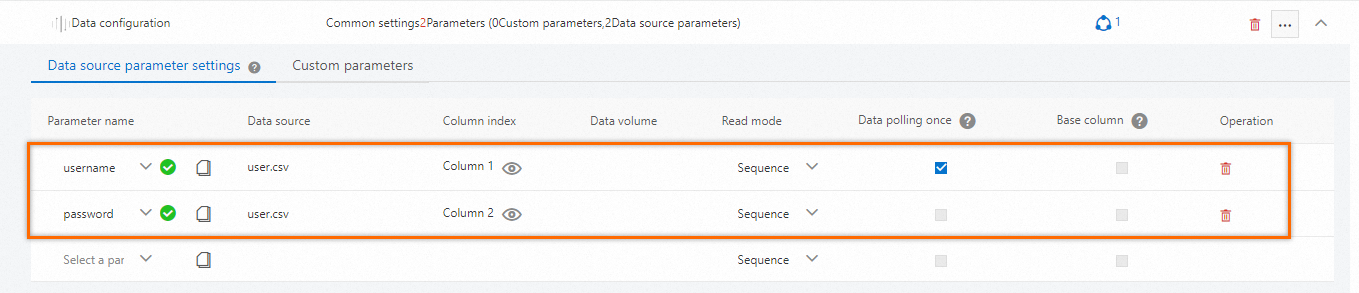
On the Scenario Settings tab, add a stress testing API. Click the drop-down arrow next to Add Instruction and select Parameter.
On the Data Source Parameters tab, select the parameter names that match your CSV columns.
Data consumption behavior
How PTS consumes rows from the parameter file depends on the Use Once setting:
| Setting | Behavior |
|---|---|
| Use Once selected | Each row is used exactly once. After all rows are consumed, PTS stops generating new requests regardless of the configured load level. Use this for registration tests where every request must carry unique credentials. |
| Use Once unselected (default) | Rows are recycled from the beginning after all are consumed. Use this for login tests where the same credentials can be reused. |
Use Once and Baseline Column are mutually exclusive. Selecting one disables the other.
Step 3: Configure the API request
Set up the HTTP request that PTS sends to your registration or login endpoint.
Test URL: Enter the target URL.
Registration example:
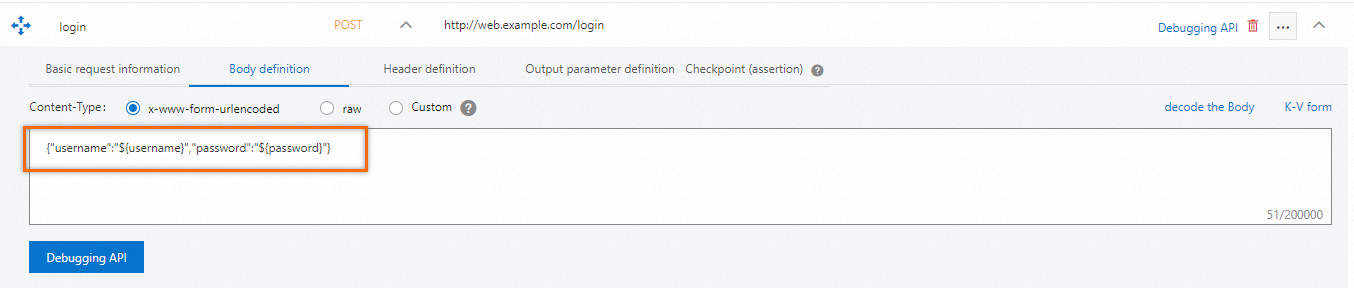
http://web.example.com/registerLogin example:
http://web.example.com/login
Request Method: Select
POST.Body definition: Set Content-Type to
x-www-form-urlencoded. Click Text Format in the upper-right corner of the text editor and enter: PTS replaces${username}and${password}with values from the corresponding CSV columns for each request.{"username":"${username}","password":"${password}"}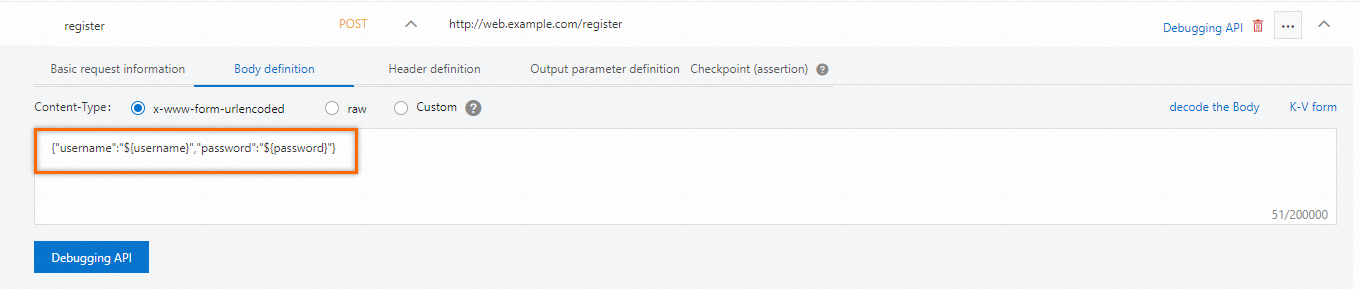
For more advanced configurations, see HTTP nodes, Parameters, and Commands.
The only difference between registration and login scenarios is the test URL. All other settings, including the parameter file, the parameter node, and the request body, remain the same.
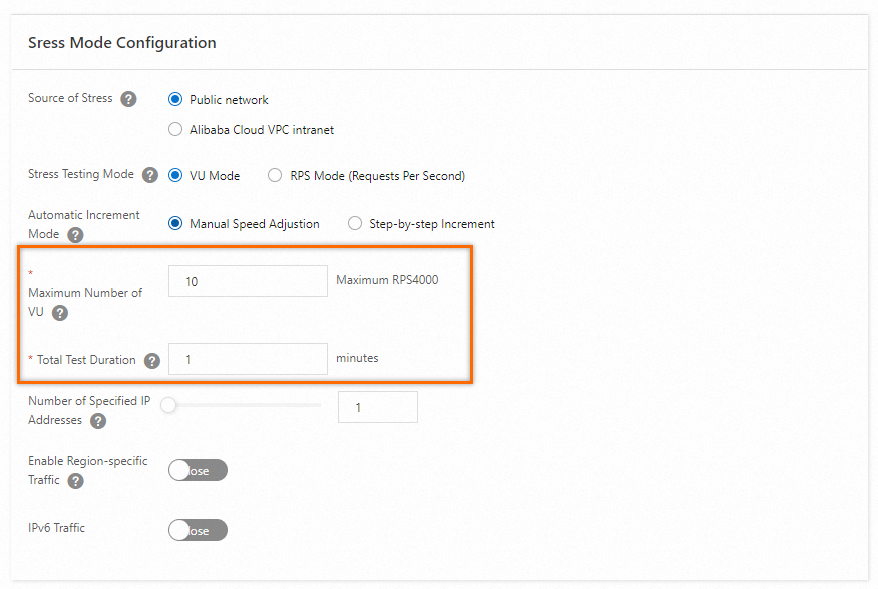
Step 4: Configure stress mode settings
Set the load level for your test. For example:
| Parameter | Example value |
|---|---|
| Maximum VUs | 10 |
| Total test duration | 1 minute |
Use default values for the remaining parameters.
Stress tests incur charges. Set the load level based on your actual requirements. For pricing details, see Billing overview. For guidance on choosing the right model, see Configure the stress testing model and level.
Step 5 (optional): Bind a domain name
In the Advanced Settings section, configure the Bound Domain Name parameter. This lets you switch the endpoint being tested across multiple stress tests without modifying the test URL each time.
Step 6: Debug and start the stress test
Debug the scenario to verify that your configurations are correct before you run a full test. For more information, see Debug a scenario.
Click Save and Test. In the Note dialog box, select Execute Now and The test is permitted and complies with the applicable laws and regulations, then click Start.
Analyze the results
After the stress test completes, PTS generates a report that includes scenario metrics, business details, monitoring details, and API sampling logs. View the report on the Reports page. For more information, see View a PTS-based stress testing report.

What to do next
To simulate login sessions that persist across multiple requests using cookies, see Use cookies to simulate logons.