This topic explains how to configure a DingTalk chatbot to receive alert notifications in a specific DingTalk group.
Add a chatbot and get a webhook URL
Follow these steps to add a custom DingTalk chatbot and get its webhook URL.
In the DingTalk desktop client, open the group where you want to add the alert chatbot, and then click the group settings icon in the upper-right corner.
In the Group Settings panel, click Group Assistant.
In the Group Assistant panel, click Add Robot.
In the ChatBot dialog box, click the + icon in the Add Robot area, and then select Custom.
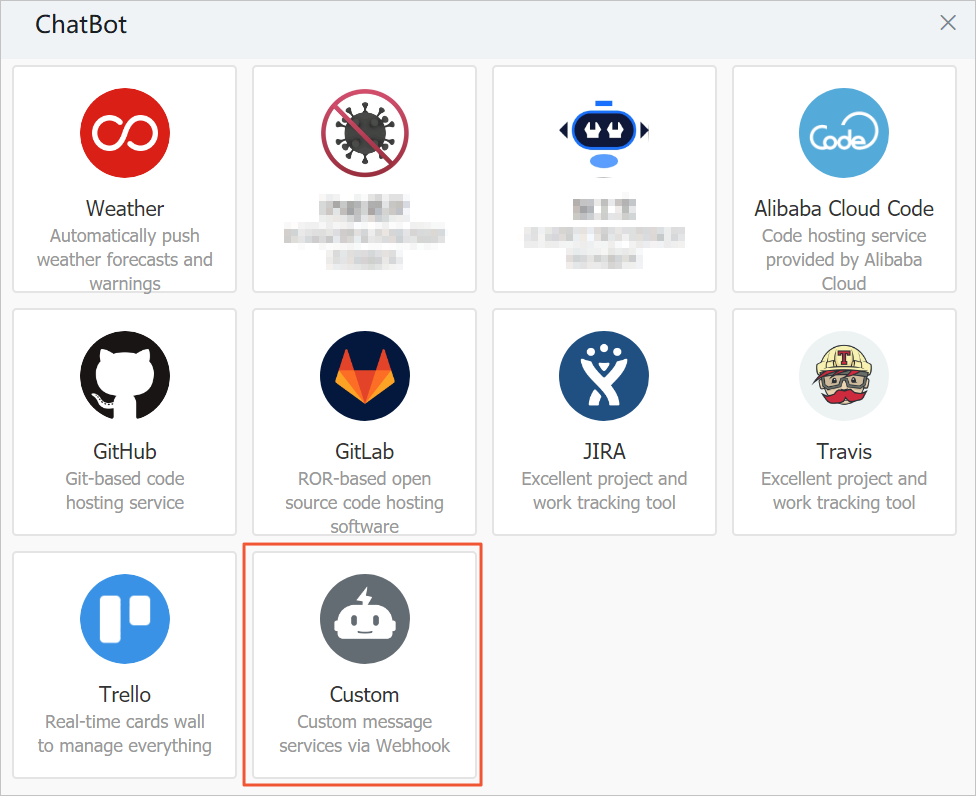
In the Robot details dialog box, click Add.
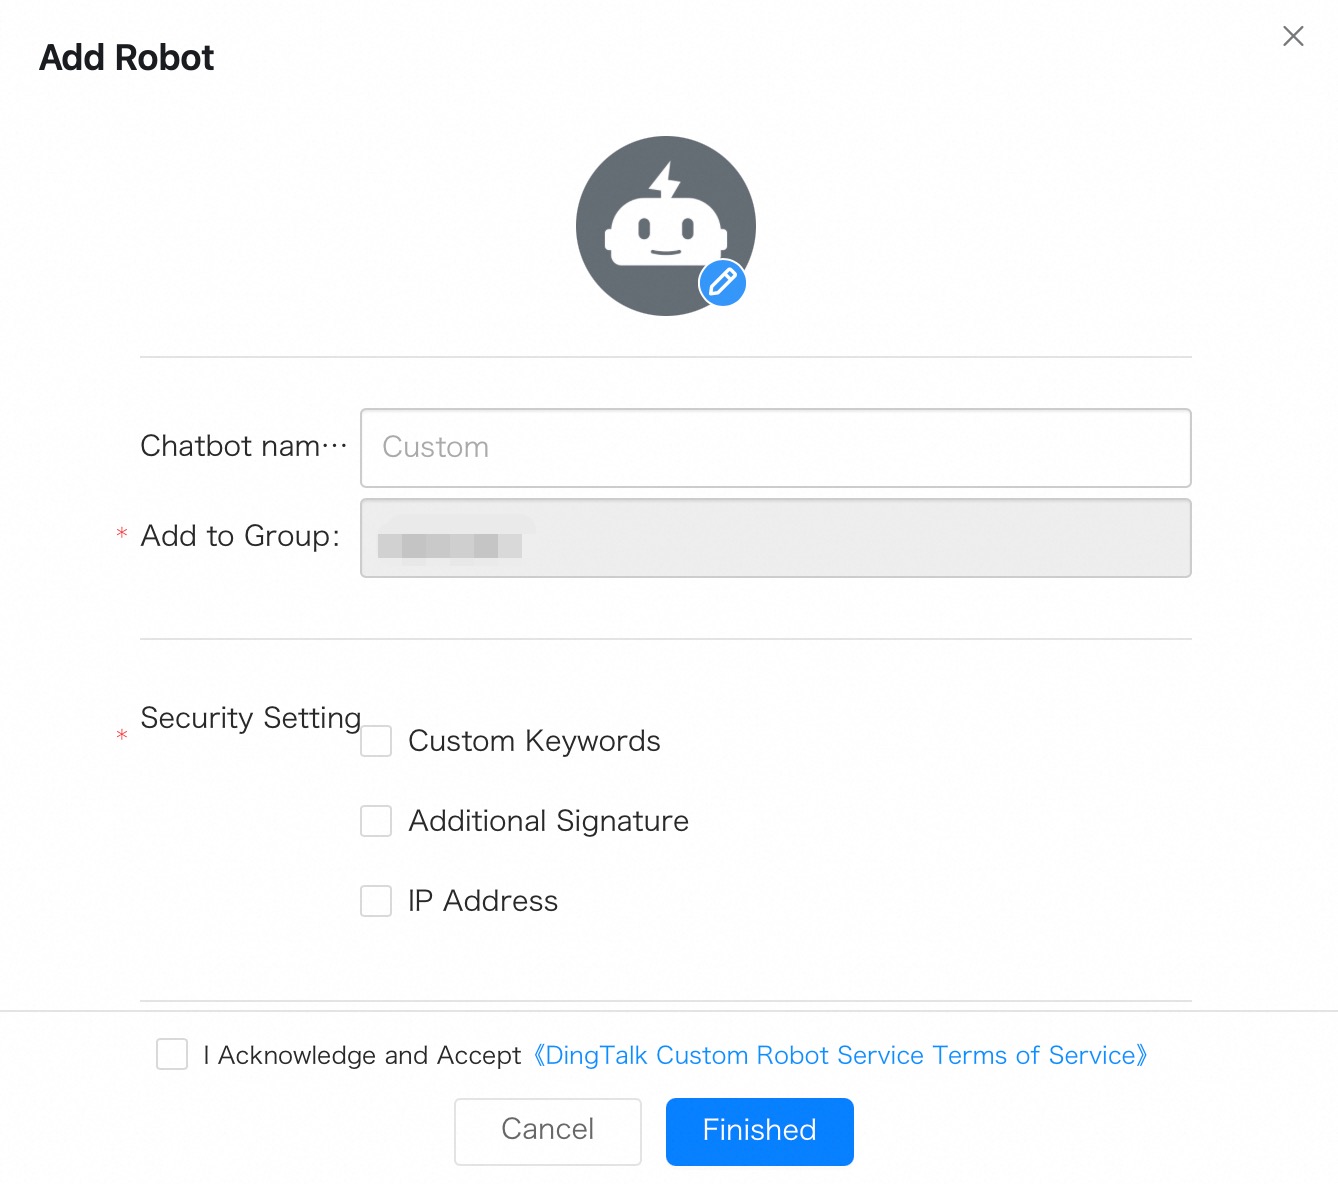
In the Add Robot dialog box, edit the chatbot's avatar and name, select at least one Security Settings option, and select I have read and accepted DingTalk Custom Robot Service Terms of Service. Click Finished.
ImportantIn the Security Settings section, you must select Custom Keywords and set the keywords to at least alert and dispatch to receive alert notifications.
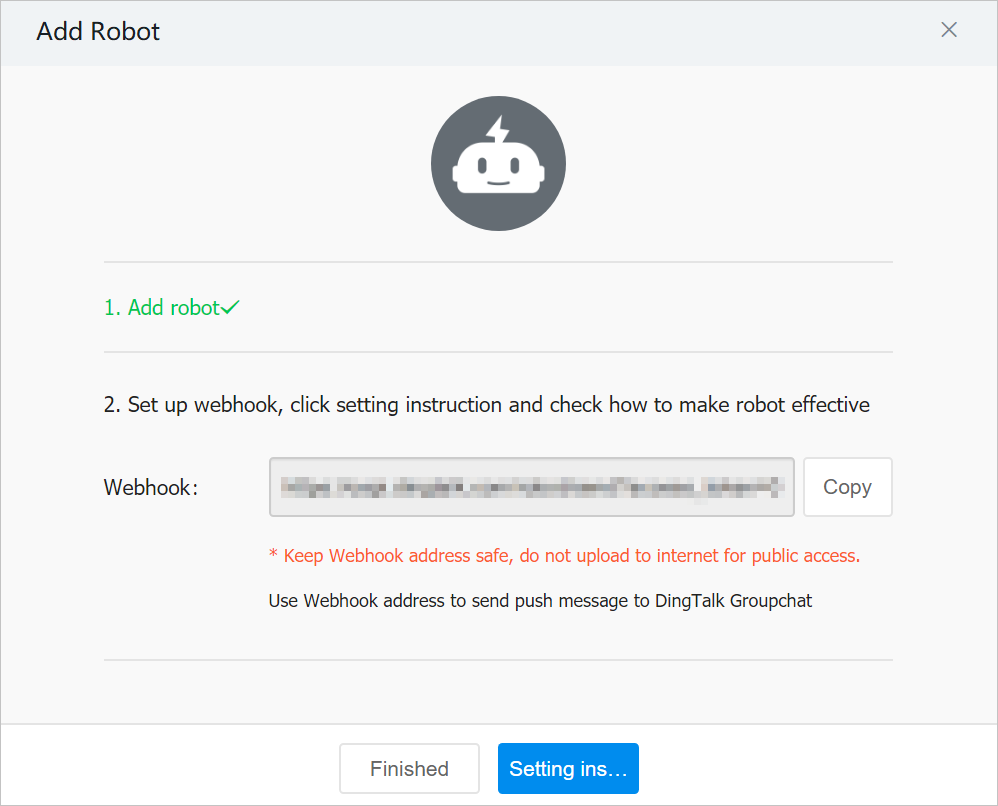
In the Add Robot dialog box, copy the generated webhook URL, and then click Finished.
Add a webhook URL and set an alert handler
Create or edit a contact and enter the DingTalk chatbot webhook URL in the DingTalk Chatbot field. For more information, see Contacts.
Optional: Create or edit a contact group and add the contact configured with the DingTalk chatbot webhook URL. For more information, see Contact Groups.
Create or edit a dispatch rule. Set the Handler to the contact or contact group configured with the DingTalk chatbot webhook URL, and select DingTalk from the Notification Method section. For more information, see notification policy.
Result
Your DingTalk chatbot is now configured to receive alert notifications. When an alert is triggered, you will receive a notification in the specified DingTalk group. The notification looks similar to this: