Deploy encrypted models and run inference in a confidential computing environment to protect model confidentiality.
How it works
Confidential inference involves three steps:
-
-
Encrypt the model: Encrypt with Gocryptfs or Sam, then upload to a data source such as Object Storage Service (OSS) for EAS to mount during deployment.
-
Store the decryption key: Store the key in Key Management Service (KMS) via a remote attestation service deployed on ACK Serverless to attest the deployment and inference environments.
-
-
Step 2: Deploy the encrypted model by using EAS
EAS connects to Trustee for environment attestation, then decrypts, mounts, and deploys the model.
-
Step 3: Call the service to run confidential inference
After deployment, send inference requests to the service.
Step 1: Prepare an encrypted model
A remote attestation service controls access to the KMS-managed decryption key. Encrypt your model in a local or trusted environment. This example uses Qwen2.5-3B-Instruct.
1. Prepare the model (optional)
If you already have a model, skip this section and proceed to 2. Encrypt the model.
Use ModelScope to download the Qwen2.5-3B-Instruct model. Python 3.9 or later is required.
pip3 install modelscope importlib-metadata
modelscope download --model Qwen/Qwen2.5-3B-Instruct
The model is downloaded to the ~/.cache/modelscope/hub/models/Qwen/Qwen2.5-3B-Instruct/ directory.
2. Encrypt the model
Two encryption methods are available. This example uses Sam.
-
Gocryptfs: AES-256-GCM encryption compatible with the open source Gocryptfs standard.
-
Sam: An Alibaba Cloud trusted AI model encryption format that prevents unauthorized use and license tampering.
Sam encryption
-
Download and extract the Sam encryption module package RAI_SAM_SDK_2.1.0-20240731.tgz.
# Extract the Sam encryption module tar xvf RAI_SAM_SDK_2.1.0-20240731.tgz -
Encrypt the model.
# Navigate to the encryption directory of the Sam encryption module
cd RAI_SAM_SDK_2.1.0-20240731/tools

# Encrypt the model
./do_content_packager.sh <model_directory> <plaintext_key> <key_ID>
Parameters:
-
<model_directory>: Directory of the model to encrypt. Relative or absolute paths are supported, such as
~/.cache/modelscope/hub/models/Qwen/Qwen2.5-3B-Instruct/. -
<plaintext_key>: Custom encryption key, 4 to 128 bytes, such as
0Bn4Q1wwY9fN3P. Upload this key to the Trustee remote attestation service later. -
<key_ID>: Custom key identifier, 8 to 48 bytes, for example,
LD_Demo_0001.
After encryption, the encrypted model is in the
<key_ID>directory in the current path.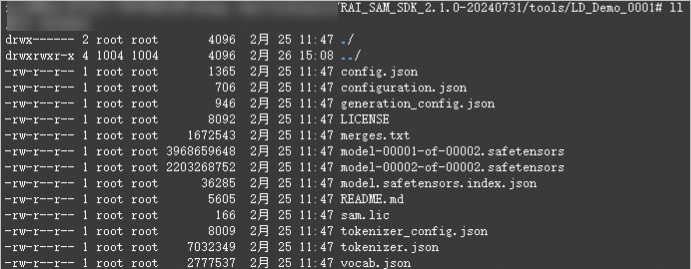
-
Gocryptfs encryption
-
Install Gocryptfs v2.4.0 with default encryption parameters. Only v2.4.0 is supported.
Install via yum
If you use Alinux 3 or AnolisOS 23, install Gocryptfs from the yum repository.
Alinux 3
sudo yum install gocryptfs -yAnolisOS 23
sudo yum install anolis-epao-release -y
sudo yum install gocryptfs -y
Download binary
# Download the pre-compiled Gocryptfs package wget https://github.jobcher.com/gh/https://github.com/rfjakob/gocryptfs/releases/download/v2.4.0/gocryptfs_v2.4.0_linux-static_amd64.tar.gz # Extract and install tar xf gocryptfs_v2.4.0_linux-static_amd64.tar.gz sudo install -m 0755 ./gocryptfs /usr/local/bin -
Create a Gocryptfs key file. You will upload this key to Trustee later.
This example stores the key
0Bn4Q1wwY9fN3Pincachefs-password. In production, use a strong random key.cat << EOF > ~/cachefs-password 0Bn4Q1wwY9fN3P EOF -
Use the created key to encrypt the model.
-
Configure the path of the plaintext model.
NoteSpecify your plaintext model path. Replace if using a different model.
PLAINTEXT_MODEL_PATH=~/.cache/modelscope/hub/models/Qwen/Qwen2.5-3B-Instruct/ -
Use Gocryptfs to encrypt the model directory.
After encryption, the model is stored in ciphertext in the
./cipherdirectory.mkdir -p ~/mount cd ~/mount mkdir -p cipher plain # Install Gocryptfs runtime dependencies sudo yum install -y fuse # initialize gocryptfs cat ~/cachefs-password | gocryptfs -init cipher # mount to plain cat ~/cachefs-password | gocryptfs cipher plain # move AI model to ~/mount/plain cp -r ${PLAINTEXT_MODEL_PATH}/. ~/mount/plain
-
3. Upload the model
Various storage backends are supported for encrypted models. EAS mounts the decrypted model to the service instance during deployment. For more information, see Storage mounts.
This example uses Object Storage Service (OSS). Follow the instructions in Console quick start to create a bucket and a directory named qwen-encrypted, for example, oss://examplebucket/qwen-encrypted/. For large model files, use ossbrowser to upload the encrypted model to the directory.
If you use the ossutil command-line tool, use multipart upload.
An uploaded Sam-encrypted model is shown below. With Gocryptfs, filenames are also encrypted and appear as garbled text.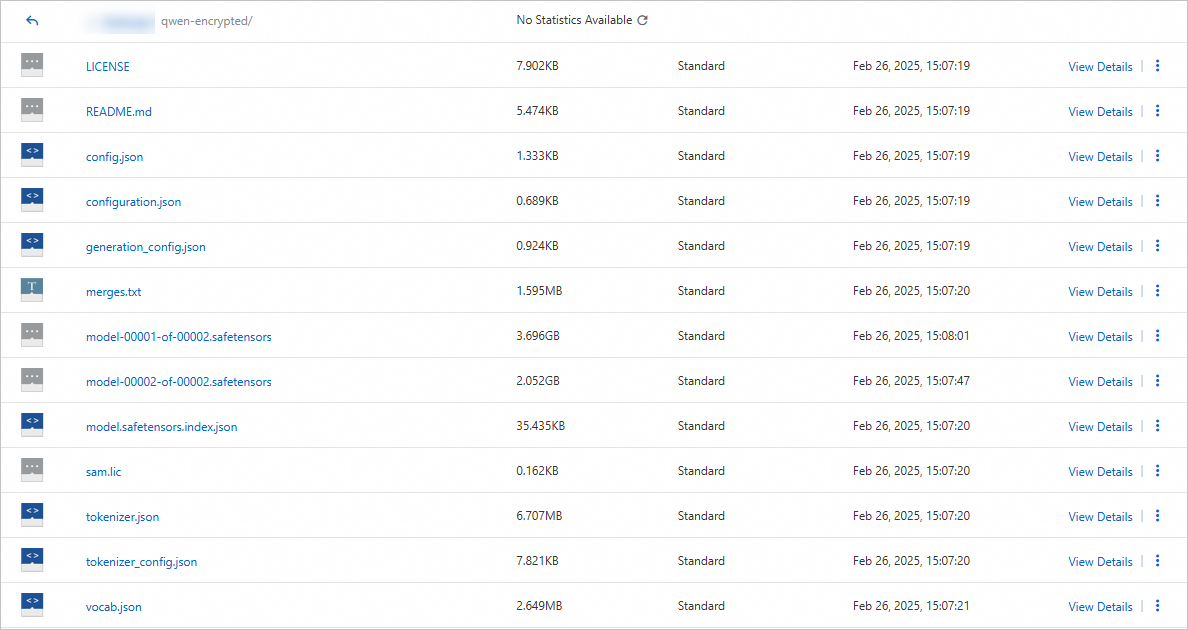
4. Set up the attestation service and upload the key
The remote attestation service hosts the decryption key and releases it only after EAS passes trust verification.
Deploy the self-managed Trustee remote attestation service on ACK Serverless with KMS as the key storage backend.
-
The ACK Serverless cluster does not need to be in the same region as the EAS service.
-
The KMS instance must be in the same region as the ACK Serverless cluster where the Trustee remote attestation service is deployed.
-
Create a VPC and two vSwitches before creating the KMS instance and ACK cluster. For more information, see Create and manage a VPC.
-
Create a KMS instance as the key storage backend.
-
Go to the KMS console. In the left-side navigation pane, choose . On the Software Key Management tab, create and enable an instance. When you enable the instance, select the same Virtual Private Cloud (VPC) as the ACK cluster. For more information, see Purchase and enable a KMS instance.
Activation takes about 10 minutes.
-
After the instance is enabled, in the left-side navigation pane, choose . On the Keys page, create a customer master key (CMK) for the instance. For more information, see Step 1: Create a software key.
-
In the left-side navigation pane, choose . On the Application Access tab, create an application access point for the instance. For Scope, select the KMS instance that you created. For more configuration details, see Method 1: Quick creation.
After the application access point is created, your browser automatically downloads a ClientKey*.zip file. This file contains:
-
Credential (ClientKeyContent): The default filename is
clientKey_****.json. -
Credential Password (ClientKeyPassword): The default filename is
clientKey_****_Password.txt.
-
-
Go to the page and click the name of the KMS instance. On the Details page, click Instance CA Certificate next to Download to export the public key certificate file
PrivateKmsCA_***.pem.
-
-
Create an ACK Serverless cluster and install the csi-provisioner component.
-
Go to the Create cluster page to create an ACK Serverless cluster. For more information, see Create a cluster. Key parameters:
-
Cluster configurations: Configure the following parameters and click Next: Component configurations.
Parameter
Description
VPC
Select Use Existing and select the Configure SNAT for VPC checkbox. This is required to pull the Trustee image.
vSwitch
Ensure at least two vSwitches exist in the VPC. Otherwise, a public-facing ALB cannot be exposed.
-
Component configurations: Configure the following parameters and click Next: Confirm configuration.
Parameter
Description
Service Discovery
Select CoreDNS.
Ingress
Select ALB Ingress. For the ALB cloud-native gateway instance source, select New, and select two vSwitches.
-
Confirm configuration: Confirm the configuration information and terms of service, and then click Create Kubernetes Cluster.
-
-
After the cluster is created, install the csi-provisioner (Managed) component. For more information, see Manage components.
-
-
Deploy the Trustee remote attestation service in the ACK cluster.
-
Connect to the cluster over the public network or an internal network. For more information, see Connect to a cluster.
-
Upload the KMS credential (
clientKey_****.json), password (clientKey_****_Password.txt), and CA certificate (PrivateKmsCA_***.pem) to the ACK Serverless cluster environment. Then run the following command to deploy Trustee with KMS as the key backend.# Install the plugin helm plugin install https://github.com/AliyunContainerService/helm-acr helm repo add trustee acr://trustee-chart.cn-hangzhou.cr.aliyuncs.com/trustee/trustee helm repo update export DEPLOY_RELEASE_NAME=trustee export DEPLOY_NAMESPACE=default export TRUSTEE_CHART_VERSION=1.7.6 # Set the region of the ACK cluster, for example, cn-hangzhou export REGION_ID=cn-hangzhou # Information about the KMS instance that you exported # Replace with your KMS instance ID export KMS_INSTANCE_ID=kst-hzz66a0*******e16pckc # Replace with the path to your KMS instance application identity credential export KMS_CLIENT_KEY_FILE=/path/to/clientKey_KAAP.***.json # Replace with the path to your KMS instance credential password export KMS_PASSWORD_FILE=/path/to/clientKey_KAAP.***_Password.txt # Replace with the path to your KMS instance CA certificate export KMS_CERT_FILE=/path/to/PrivateKmsCA_kst-***.pem helm install ${DEPLOY_RELEASE_NAME} trustee/trustee \ --version ${TRUSTEE_CHART_VERSION} \ --set regionId=${REGION_ID} \ --set kbs.aliyunKms.enabled=true \ --set kbs.aliyunKms.kmsIntanceId=${KMS_INSTANCE_ID} \ --set-file kbs.aliyunKms.clientKey=${KMS_CLIENT_KEY_FILE} \ --set-file kbs.aliyunKms.password=${KMS_PASSWORD_FILE} \ --set-file kbs.aliyunKms.certPem=${KMS_CERT_FILE} \ --namespace ${DEPLOY_NAMESPACE}Notehelm plugin install...may be slow. If it fails, runhelm plugin uninstall cm-pushand retry.Example output:
NAME: trustee LAST DEPLOYED: Tue Feb 25 18:55:33 2025 NAMESPACE: default STATUS: deployed REVISION: 1 TEST SUITE: None -
Get the Trustee service endpoint.
export TRUSTEE_URL=http://$(kubectl get AlbConfig alb-$DEPLOY_RELEASE_NAME -o jsonpath='{.status.loadBalancer.dnsname}')/api
echo ${TRUSTEE_URL}
Example output:
http://alb-ppams74szbwg2f****.cn-shanghai.alb.aliyuncsslb.com/api. -
Test the connectivity of the Trustee service.
cat << EOF | curl -k -X POST ${TRUSTEE_URL}/kbs/v0/auth -H 'Content-Type: application/json' -d @-
{
    "version":"0.4.0",
    "tee": "tdx",
    "extra-params": "foo"
}
EOF
A successful connection returns output similar to:
{"nonce":"PIDUjUxQdBMIXz***********IEysXFfUKgSwk=","extra-params":""}
-
-
Configure a network whitelist for Trustee.
NoteThis allows the EAS deployment environment to access Trustee.
-
Go to the ALB console, create an access control policy group, and add the IP addresses or address ranges that require access to Trustee. For more information, see Access control. Add the following address ranges:
-
The public IP address of the VPC where the EAS service is deployed.
-
The egress IP address of the inference client.
-
-
Run the following command to get the ALB instance ID used by the Trustee instance.
kubectl get ing --namespace ${DEPLOY_NAMESPACE} frontend-ingress -o jsonpath='{.status.loadBalancer.ingress[0].hostname}' | cut -d'.' -f1 | sed 's/[^a-zA-Z0-9-]//g'Expected output:
alb-llcdzbw0qivhk0**** -
In the left-side navigation pane of the ALB console, choose . Find the ALB instance from the previous step in your cluster's region and click its ID to go to the details page. At the bottom of the page, in the Instance Information section, turn off Configuration Read-only Mode.
-
Switch to the Listener tab. In the access control column of the target listener, enable access control and set the whitelist to the access control policy group that you created.
-
-
Create a secret to store the model decryption key.
Trustee stores the model decryption key in KMS. The key is released only after attestation succeeds.
Go to the KMS console. In the left-side navigation pane, choose . On the Generic Secrets tab, click Create Secret. Key parameters are described below:
-
Secret name: A custom name used to index the key, for example,
model-decryption-key. -
Secret value: Enter the key that you used to encrypt the model. For example, 0Bn4Q1wwY9fN3P. Use your actual key.
-
Encryption key: Select the customer master key (CMK) that you created.
-
-
Log on to the Trustee management UI to view key access history.
-
Get the address of the Trustee frontend management UI.
kubectl get AlbConfig alb-$DEPLOY_RELEASE_NAME -o jsonpath='{.status.loadBalancer.dnsname}'Access the address in a browser.
-
Get the private key for logging on to the Trustee frontend management UI.
kubectl get secret kbs-auth-keypair -o jsonpath="{.data.private\.key}" | base64 -dPaste the key into the UI to log on.
-
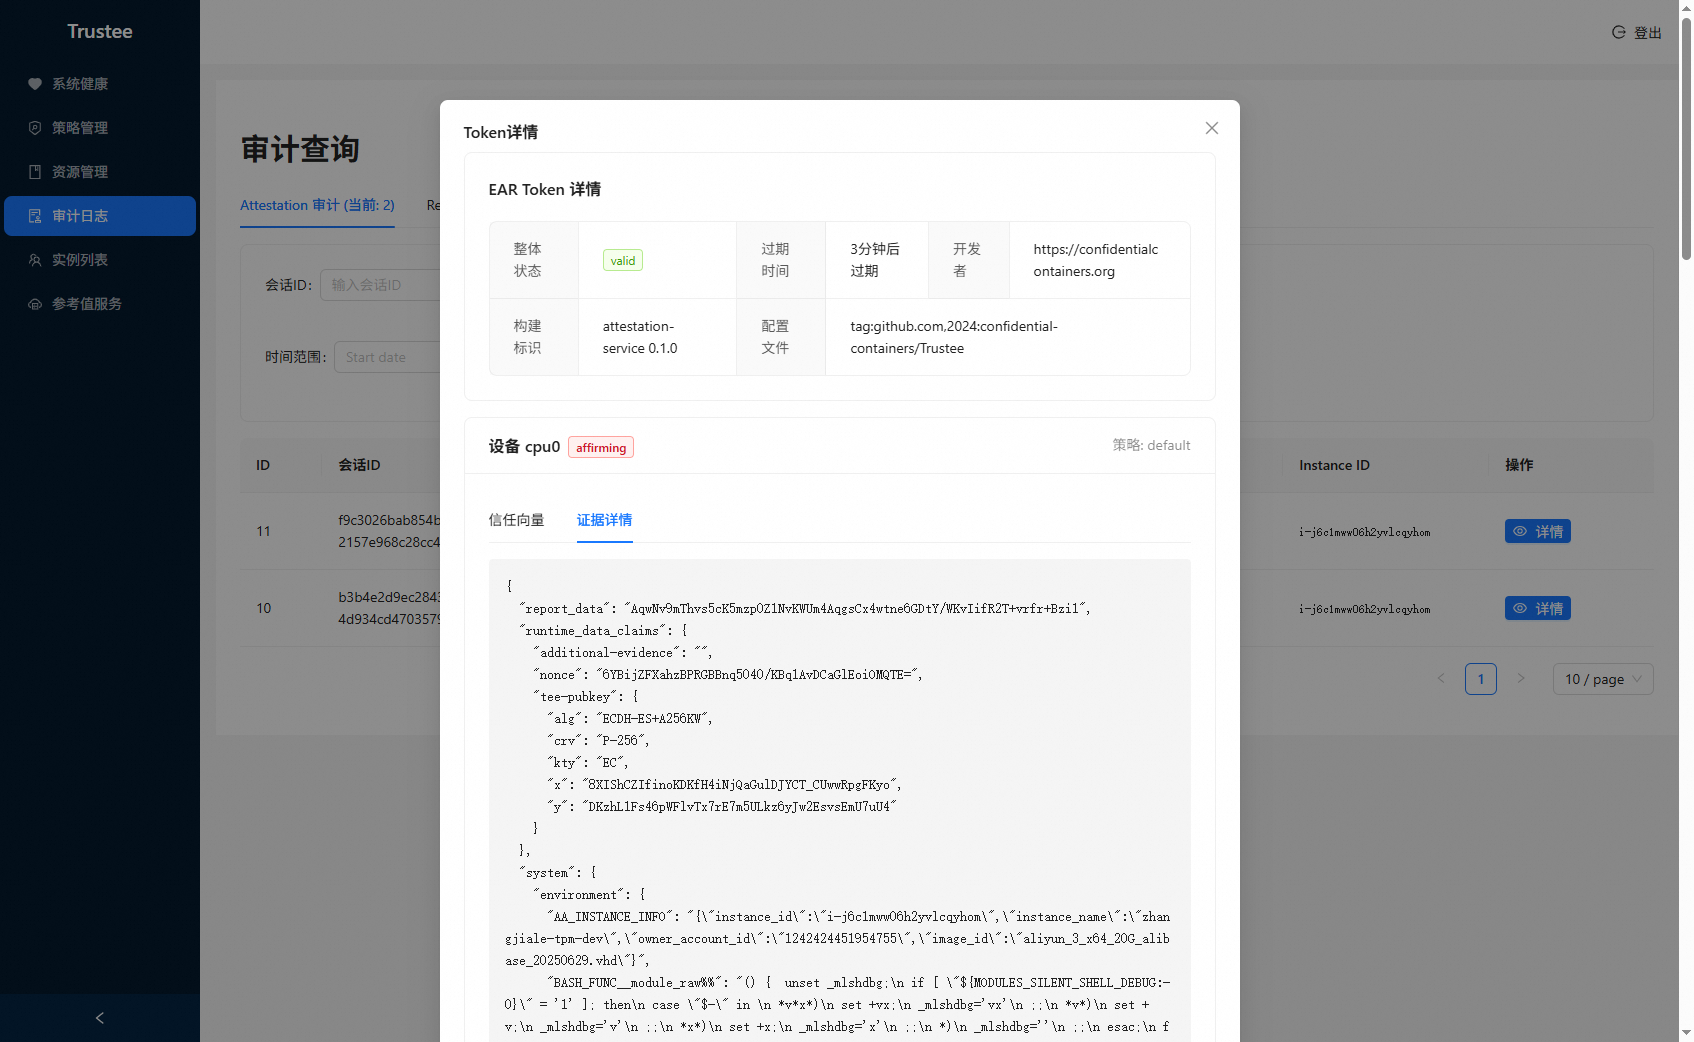
On the Trustee Gateway Management Platform, click Audit log in the left-side navigation pane. Then, click the Resource audit interface to view the history of model decryption key access.
-
Step 2: Deploy the encrypted model
-
Log on to the PAI console. Select a region on the top of the page. Then, select the desired workspace and click Elastic Algorithm Service (EAS).
-
On the Inference Service page, click Deploy Service. In the Custom Model Deployment section, click Custom Deployment.
-
Configure the following parameters. Other options are described in Custom Deployment.
Parameter
Description
Environment Information
Deployment Method
Select Image-based Deployment.
Image Configuration
Select an image. In this example, select Alibaba Cloud Image > chat-llm-webui:3.0-vllm.
Storage Mount
Select OSS and configure the following parameters:
-
Uri: Select the directory where the encrypted model is stored. Example:
oss://examplebucket/qwen-encrypted/. Use your actual path. -
Mount Path: The directory to which the plaintext model is mounted. Example:
/mnt/model.
Command to Run
Example:
python webui/webui_server.py --port=8000 --model-path=/mnt/model --backend=vllm. The--model-pathvalue must match the mount path.Port Number
Set to 8000.
Environment Variables
Add environment variables for Trustee attestation. In this example, an environment variable with the key
eas-testand the value1234is added.Resource Information
Deployment
In this example, the instance type is ml.gu7i.c32m188.1-gu30.
Network Information
VPC
Configure a VPC and set an SNAT public IP address for the VPC. Public network access is required for EAS to reach the remote attestation service.
vSwitch
Security Group Name
Features
Configure Secure Encryption Environment
Enable Configure Secure Encryption Environment and configure the following parameters:
-
Encryption Method: The method used to encrypt the model. Both Sam and Gocryptfs are supported. This example uses Sam.
-
System Trust Management Service Address: The endpoint of the deployed Trustee service. Example:
http://alb-ppams74szbwg2f****.cn-shanghai.alb.aliyuncsslb.com/trustee. -
KBS URI of Decryption Key: The KBS URI of the model decryption key, formatted as
kbs:///default/aliyun/<secret_name>. Replace<secret_name>with the name of the secret that you created.
Example JSON configuration:
-
-
After you configure the parameters, click Deploy.
When Service Status shows Running, the deployment is complete. To verify attestation, check the key access history in the Trustee management UI.
Step 3: Run confidential inference
1. View the service endpoint
On the Inference Service tab, click the target service name to open the Overview page. In the Overview area, click View Endpoint Information.
2. Call the EAS service
Send an inference request using cURL.
curl <Service_URL> \
  -H "Content-type: application/json" \
  --data-binary @openai_chat_body.json \
  -v \
  -H "Connection: close" \
  -H "Authorization: <Token>"
Parameters:
-
<Service_URL>: The EAS service endpoint.
-
<Token>: The EAS service token.
-
openai_chat_body.json: The inference request body. Example:
{
    "max_new_tokens": 4096,
    "use_stream_chat": false,
    "prompt": "What is the capital of Canada?",
    "system_prompt": "Act like you are a knowledgeable assistant who can provide information on geography and related topics.",
    "history": [
        [
            "Can you tell me what's the capital of France?",
            "The capital of France is Paris."
        ]
    ],
    "temperature": 0.8,
    "top_k": 10,
    "top_p": 0.8,
    "do_sample": true,
    "use_cache": true
}
Example response:
{
    "response": "The capital of Canada is Ottawa.",
    "history": [
        [
            "Can you tell me what's the capital of France?",
            "The capital of France is Paris."
        ],
        [
            "What is the capital of Canada?",
            "The capital of Canada is Ottawa."
        ]
    ]
}