The ossutil 2.0 command-line tool lets you efficiently manage Alibaba Cloud OSS resources across multiple operating systems. It enables you to quickly upload, download, sync, and manage files. This tool is ideal for developers, O&M engineers, and enterprises managing large-scale data migration and daily O&M.
Operating system | Architecture | Download link | SHA256 checksum |
Linux | x86_32 | 29cbd49b6c401c740c2f036cdf9d44ee8da340b16bdb3be71a33bcbebbe35ec5 | |
x86_64 | 3ae4d9fc85a7a6e9f5654d1599766f1a3a42a3692870887b5ae9338d582ef65a | ||
arm32 | 8aff883c676961a11c89ac98b807fafa54fb424851d0557b1691b9d320324b9e | ||
arm64 | f6c95ba0c2d2ef30290af686ce4d706c701f4734ce8090bee4288a77e3f1d764 | ||
macOS | x86_64 | 8437fdd3ef1a3eb12310f61fcf1c00a5bff5cdab47b4fea815527472e7cf896c | |
arm64 | 058fd048f321f8c80def8b748030531646eefe3a82837bf16b581ba7d9c84ac7 | ||
Windows | x86_32 | ae5f20b0bfe2aadf61c87931cbb342f743e266bb56b49dace16f59942305c1ea | |
x86_64 | 98209156987667b39fd12a0c7b940342900daef61a9306ea7f34acf17f287da2 | ||
x86_64 | 0b9249d1c1437a9f052a9bf5eeaf1d4358b515e08efa82a3b7048950ce7efdea |
Quick start
To use the ossutil 2.0 command line interface, you need to:

Install ossutil
Linux
Install the unzip tool.
Alibaba Cloud Linux
sudo yum install -y unzipCentOS
sudo yum install -y unzipUbuntu
sudo apt install -y unzipSelect the installation package for your operating system and architecture (Linux x86 32-bit, Linux x86 64-bit, Linux ARM 32-bit, or Linux ARM 64-bit), or use curl to download it. The following example shows how to use the curl command on a Linux x86_64 system:
curl -o ossutil-2.3.0-linux-amd64.zip https://gosspublic.alicdn.com/ossutil/v2/2.3.0/ossutil-2.3.0-linux-amd64.zipIn the download directory, unzip the package:
unzip ossutil-2.3.0-linux-amd64.zipGo to the ossutil-2.3.0-linux-amd64 directory.
cd ossutil-2.3.0-linux-amd64Grant execute permissions to the ossutil file:
chmod 755 ossutilRun the following command to make ossutil globally available.
sudo mv ossutil /usr/local/bin/ && sudo ln -s /usr/local/bin/ossutil /usr/bin/ossutilTo verify that ossutil is successfully installed, run the
ossutilcommand.ossutilThe installation is successful if ossutil displays its help information.
Windows
Install ossutil.
Select the installation package that corresponds to your operating system and architecture (Windows x86 32-bit, Windows x86 64-bit, or Windows 7, Windows 8, Windows Server 2008R2).
Unzip the downloaded .zip package to a destination folder, and then navigate to the extracted directory.
Copy the path of the extracted ossutil folder. You will add this path to a system environment variable.
Click the path bar of the current directory and copy the displayed folder path.
Open the Environment Variables dialog box. In the System variables section, find and double-click the Path variable. Click New, and then paste the copied path of the ossutil folder into the new entry box.
Verify the installation:
ossutilThe installation is successful if ossutil displays its help information.
macOS
Select the installation package for your operating system and architecture (macOS x86 64-bit or macOS ARM 64-bit), or use curl to download the package. The following example shows how to use the curl command on a macOS ARM64 system:
curl -o ossutil-2.3.0-mac-arm64.zip https://gosspublic.alicdn.com/ossutil/v2/2.3.0/ossutil-2.3.0-mac-arm64.zipIn the download directory, unzip the package:
unzip ossutil-2.3.0-mac-arm64.zipGo to the ossutil-2.3.0-mac-arm64 directory.
cd ossutil-2.3.0-mac-arm64Grant execute permissions to the ossutil file:
chmod 755 ossutilRun the following command to make ossutil globally available.
sudo mv ossutil /usr/local/bin/ && sudo ln -s /usr/local/bin/ossutil /usr/bin/ossutilVerify the installation:
ossutilThe installation is successful if ossutil displays its help information.
Configure ossutil
To avoid errors from missing settings, we recommend using the ossutil config wizard to quickly configure your AccessKey ID, AccessKey Secret, and region ID. For advanced options, see the Configuration guide to manually configure access credentials.
This example shows how to use the configuration wizard to quickly configure the AccessKey pair of a RAM user as your access credentials.
Linux
Enter the configuration command.
ossutil configWhen prompted, set the path for the configuration file. You can press Enter to use the default path.
Please enter the config file name,the file name can include path(default /root/.ossutilconfig, carriage return will use the default file. If you specified this option to other file, you should specify --config-file option to the file when you use other commands):By default, ossutil uses /root/.ossutilconfig as the configuration file.
Follow the prompts to set the AccessKey ID, AccessKey Secret, and region ID.
Enter your AccessKey ID.
Please enter Access Key ID [****************id]:yourAccessKeyIDEnter your AccessKey Secret.
Please enter Access Key Secret [****************sk]:yourAccessKeySecretEnter the region of the OSS data center. If you leave this blank, it defaults to cn-hangzhou.
Please enter Region [ap-southeast-1]:ap-southeast-1Enter the endpoint for the OSS data center. If you do not require a custom endpoint, you can press Enter to skip this parameter.
After you set the region, ossutil uses the corresponding public endpoint by default. For example, if you set the
region-idtoap-southeast-1, the default public endpoint ishttps://oss-ap-southeast-1.aliyuncs.com.If you require a custom endpoint for the region where your OSS data center is located, enter the endpoint. For example, if you want to access OSS from other Alibaba Cloud services in the same region, use an internal endpoint, such as
https://oss-ap-southeast-1-internal.aliyuncs.com.Please enter Endpoint (optional, use public endpoint by default) [None]: https://oss-ap-southeast-1-internal.aliyuncs.com
The following table describes the parameters.
Parameter
Required
Description
accessKeyID
Yes
The AccessKey pair for your account. To learn how to obtain an AccessKey pair, see Create an AccessKey pair.
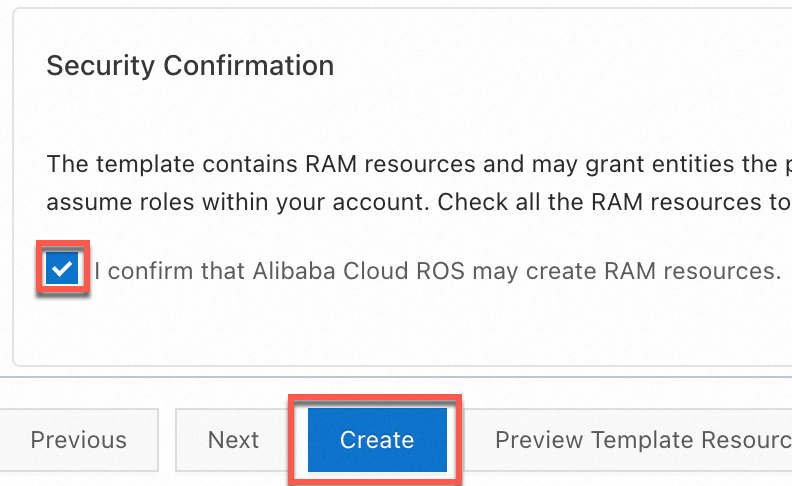
On the Create Stack page of the Resource Orchestration Service (ROS) console, select the confirmation checkbox under Security Confirmation, and then click Create.
After the stack is created, copy the AccessKey pair from the Outputs tab.

accessKeySecret
Yes
Region
Yes
The ID of the region where the bucket is located. This topic uses the Singapore region as an example. Set this parameter to
ap-southeast-1. For more information about the IDs of other regions, see Regions and endpoints.endpoint
No
The endpoint of the region where the bucket is located. If you do not manually set an endpoint, a public endpoint is automatically generated based on the region. You must explicitly specify an internal endpoint. For example, this topic uses the public endpoint for the Singapore region. Set this parameter to
https://oss-ap-southeast-1.aliyuncs.com.If you want to access OSS from other Alibaba Cloud services in the same region, use an internal endpoint. Set this parameter to
https://oss-ap-southeast-1-internal.aliyuncs.com.For more information about the endpoints of different regions, see Regions and endpoints.
ImportantDue to a policy change to improve compliance and security, starting March 20, 2025, new OSS users must use a custom domain name (CNAME) to perform data API operations on OSS buckets located in Chinese mainland regions. Default public endpoints are restricted for these operations. Refer to the official announcement for a complete list of the affected operations. If you access your data via HTTPS, you must bind a valid SSL Certificate to your custom domain. This is mandatory for OSS Console access, as the console enforces HTTPS.
Windows
Enter the configuration command.
ossutil configWhen prompted, set the path for the configuration file. You can press Enter to use the default path.
Please enter the config file name,the file name can include path(default "C:\Users\issuser\.ossutilconfig", carriage return will use the default file. If you specified this option to other file, you should specify --config-file option to the file when you use other commands):By default, ossutil uses C:\Users\issuser\.ossutilconfig as the configuration file.
Follow the prompts to set the AccessKey ID, AccessKey Secret, and region ID.
Enter your AccessKey ID.
Please enter Access Key ID [****************id]:yourAccessKeyIDEnter your AccessKey Secret.
Please enter Access Key Secret [****************sk]:yourAccessKeySecretEnter the region of the OSS data center. If you leave this blank, it defaults to cn-hangzhou.
Please enter Region [ap-southeast-1]:ap-southeast-1Enter the endpoint for the OSS data center. If you do not require a custom endpoint, you can press Enter to skip this parameter.
After you set the region, ossutil uses the corresponding public endpoint by default. For example, if you set the
region-idtoap-southeast-1, the default public endpoint ishttps://oss-ap-southeast-1.aliyuncs.com.If you require a custom endpoint for the region where your OSS data center is located, enter the endpoint. For example, if you want to access OSS from other Alibaba Cloud services in the same region, use an internal endpoint, such as
https://oss-ap-southeast-1-internal.aliyuncs.com.Please enter Endpoint (optional, use public endpoint by default) [None]: https://oss-ap-southeast-1-internal.aliyuncs.com
The following table describes the parameters.
Parameter
Required
Description
accessKeyID
Yes
The AccessKey pair for your account. To learn how to obtain an AccessKey pair, see Create an AccessKey pair.
On the Create Stack page of the Resource Orchestration Service (ROS) console, select the confirmation checkbox under Security Confirmation, and then click Create.
After the stack is created, copy the AccessKey pair from the Outputs tab.

accessKeySecret
Yes
Region
Yes
The ID of the region where the bucket is located. This topic uses the Singapore region as an example. Set this parameter to
ap-southeast-1. For more information about the IDs of other regions, see Regions and endpoints.endpoint
No
The endpoint of the region where the bucket is located. If you do not manually set an endpoint, a public endpoint is automatically generated based on the region. You must explicitly specify an internal endpoint. For example, this topic uses the public endpoint for the Singapore region. Set this parameter to
https://oss-ap-southeast-1.aliyuncs.com.If you want to access OSS from other Alibaba Cloud services in the same region, use an internal endpoint. Set this parameter to
https://oss-ap-southeast-1-internal.aliyuncs.com.For more information about the endpoints of different regions, see Regions and endpoints.
ImportantDue to a policy change to improve compliance and security, starting March 20, 2025, new OSS users must use a custom domain name (CNAME) to perform data API operations on OSS buckets located in Chinese mainland regions. Default public endpoints are restricted for these operations. Refer to the official announcement for a complete list of the affected operations. If you access your data via HTTPS, you must bind a valid SSL Certificate to your custom domain. This is mandatory for OSS Console access, as the console enforces HTTPS.
macOS
Enter the configuration command.
ossutil configWhen prompted, set the path for the configuration file. You can press Enter to use the default path.
Please enter the config file name,the file name can include path(default "/Users/user/.ossutilconfig", carriage return will use the default file. If you specified this option to other file, you should specify --config-file option to the file when you use other commands):By default, ossutil uses /Users/user/.ossutilconfig as the configuration file.
Follow the prompts to set the AccessKey ID, AccessKey Secret, and region ID.
Enter your AccessKey ID.
Please enter Access Key ID [****************id]:yourAccessKeyIDEnter your AccessKey Secret.
Please enter Access Key Secret [****************sk]:yourAccessKeySecretEnter the region of the OSS data center. If you leave this blank, it defaults to cn-hangzhou.
Please enter Region [ap-southeast-1]:ap-southeast-1Enter the endpoint for the OSS data center. If you do not require a custom endpoint, you can press Enter to skip this parameter.
After you set the region, ossutil uses the corresponding public endpoint by default. For example, if you set the
region-idtoap-southeast-1, the default public endpoint ishttps://oss-ap-southeast-1.aliyuncs.com.If you require a custom endpoint for the region where your OSS data center is located, enter the endpoint. For example, if you want to access OSS from other Alibaba Cloud services in the same region, use an internal endpoint, such as
https://oss-ap-southeast-1-internal.aliyuncs.com.Please enter Endpoint (optional, use public endpoint by default) [None]: https://oss-ap-southeast-1-internal.aliyuncs.com
The following table describes the parameters.
Parameter
Required
Description
accessKeyID
Yes
The AccessKey pair for your account. To learn how to obtain an AccessKey pair, see Create an AccessKey pair.
On the Create Stack page of the Resource Orchestration Service (ROS) console, select the confirmation checkbox under Security Confirmation, and then click Create.
After the stack is created, copy the AccessKey pair from the Outputs tab.

accessKeySecret
Yes
Region
Yes
The ID of the region where the bucket is located. This topic uses the Singapore region as an example. Set this parameter to
ap-southeast-1. For more information about the IDs of other regions, see Regions and endpoints.endpoint
No
The endpoint of the region where the bucket is located. If you do not manually set an endpoint, a public endpoint is automatically generated based on the region. You must explicitly specify an internal endpoint. For example, this topic uses the public endpoint for the Singapore region. Set this parameter to
https://oss-ap-southeast-1.aliyuncs.com.If you want to access OSS from other Alibaba Cloud services in the same region, use an internal endpoint. Set this parameter to
https://oss-ap-southeast-1-internal.aliyuncs.com.For more information about the endpoints of different regions, see Regions and endpoints.
ImportantDue to a policy change to improve compliance and security, starting March 20, 2025, new OSS users must use a custom domain name (CNAME) to perform data API operations on OSS buckets located in Chinese mainland regions. Default public endpoints are restricted for these operations. Refer to the official announcement for a complete list of the affected operations. If you access your data via HTTPS, you must bind a valid SSL Certificate to your custom domain. This is mandatory for OSS Console access, as the console enforces HTTPS.
Run commands
Create a bucket.
ossutil mb oss://examplebucketThe following output indicates that the bucket examplebucket was created.
0.668238(s) elapsedUpload a file to the bucket.
Create a local file named
uploadFile.txt.echo 'Hello, OSS!' > uploadFile.txtUpload a file to the
examplebucketbucket.ossutil cp uploadFile.txt oss://examplebucketThe following output indicates that the file has been successfully uploaded to
examplebucket.Success: Total 1 file, size 12 B, Upload done:(1 objects, 12 B), avg 44 B/s 0.271779(s) elapsed
Download a file.
Download the uploadFile.txt file from the examplebucket bucket to the localfolder directory.
ossutil cp oss://examplebucket/uploadFile.txt localfolder/The following output indicates that the file was successfully downloaded to the localfolder directory.
Success: Total 1 object, size 12 B, Download done:(1 files, 12 B), avg 74 B/s

0.162447(s) elapsed
List the files in the examplebucket bucket.
ossutil ls oss://examplebucketThe following output indicates that the files in the examplebucket bucket were successfully listed.
LastModifiedTime                   Size(B)  StorageClass   ETAG                                  ObjectName
2024-11-26 14:35:29 +0800 CST           12      Standard   1103F650EB2C292D179A032D2A97B0F5      oss://examplebucket/uploadFile.txt
Object Number is: 1

0.124679(s) elapsed
Delete the uploadFile.txt file from the examplebucket bucket.
ossutil rm oss://examplebucket/uploadFile.txtThe following output indicates that uploadFile.txt was successfully deleted from the examplebucket bucket.
0.295530(s) elapsedDelete the examplebucket bucket.
ossutil rb oss://examplebucketThe following output indicates that the examplebucket bucket was successfully deleted.
0.478659(s) elapsed
Configuration
ossutil is highly flexible and can be configured using a configuration file, environment variables, or command-line options.
Configuration precedence
ossutil reads settings in the following order of precedence:
command-line options (such as -i, -k, and -e) > environment variables (such as OSS_ACCESS_KEY_ID) > configuration file (~/.ossutilconfig)
Starting from version 2.2.0, you can use the
--ignore-env-varcommand-line option to ignore environment variables that have theOSS_prefix.Starting from version 2.3.0, the
--job,--parallel,--bigfile-threshold,--part-size, and--write-buffer-sizeoptions can be set in the configuration file. Append them inkey=valueformat, such asjob=10, to the corresponding profile section in the configuration file, or use theossutil config setcommand to write them. Command-line options have a higher priority than the configuration file.
Configuration file
You can configure ossutil by using a configuration file. The default path is ~/.ossutilconfig, or you can specify a custom path by using the -c flag. If you use the default configuration file, you can run ossutil commands directly without specifying the file path. For example:
ossutil ls oss://examplebucketIf you use a custom configuration file path, such as /path/yourconfig, you must use the -c option to specify the path. For example:
ossutil -c /path/yourconfig ls oss://examplebucketConfiguration file format
The configuration file uses the INI format, which groups settings into sections of key-value pairs. You can use the --profile option to select a specific section. By default, ossutil uses the settings in the [default] section. To use a different set of parameters, you can create and reference other sections.
Sections and key-value pairs
Each section in the configuration file is identified by a name enclosed in square brackets [ ], and settings within the section are in the key=value format. For example:
[default]
accessKeyID = "your-access-key-id"
accessKeySecret = "your-access-key-secret"
The settings in the section use the
key=valueformat.Section names and keys are case-insensitive.
Configuration parameter keys support multiple formats, such as all lowercase, camelCase, kebab-case (hyphen-separated), and snake_case (underscore-separated). For example,
accesskeyid,accessKeyId,access-key-id, andaccess_key_idare all treated as the same parameter name.Lines that start with a number sign (
#) are comments.
Supported section types
Section name | Description | Notes |
[default] | Stores the default settings. This section is used when the | A simplified form of |
[profile name] | Configures parameters referenced using | Supports referencing other configurations by using |
[buckets name] | Configures endpoints for specific buckets, including | Supports inline notation. |
You can use the config command to view and set configurations. For more information, see config.
Profile
This section configures access credentials and global parameters. The following parameters are supported:
Access credential parameters
Parameter
Alias
Description
mode
/
Specifies the authentication mode.
Valid values:
AK,StsToken,RamRoleArn,EcsRamRole, andAnonymous.access-key-id
accessKeyId
access_key_id
The AccessKey ID used to access OSS.
access-key-secret
accessKeySecret
access_key_secret
The AccessKey Secret used to access OSS.
sts-token
stsToken
sts_token
The security token used to access OSS.
role-arn
roleArn
role_arn
The ARN of the RAM role. This parameter is mainly used in
RamRoleArnmode.role-session-name
roleSessionName
role_session_name
The session name. This parameter is mainly used in
RamRoleArnmode.ecs-role-name
ecsRoleName
ecs_role_name
The role name. This parameter is mainly used in
EcsRamRolemode.credential-process
credentialProcess
credential_process
Specifies an external command.
credential-uri
credentialUri
credential_uri
Specifies a URI from which to obtain access credentials.
oidc-provider-arn
oidcProviderArn
oidc_provider_arn
Specifies the ARN of the OIDC provider in the format
acs:ram::account-id:oidc-provider/provider-name.oidc-token-file-path
oidcTokenFilePath
oidc_token_file_path
Specifies the file path where the OIDC token is stored.
credential-process-timeout
credentialProcessTimeout
credential_process_timeout
Specifies the timeout for an external credential request, in seconds. The default value is 15 seconds, and the maximum value is 600 seconds (10 minutes). For example,
credential-process-timeout = 60specifies a 60-second timeout. This feature is supported in version 2.0.3 and later.Global parameters
Parameter
Alias
Description
region
/
The region ID. This parameter is required.
loglevel
/
The log level. Valid values:
off(default)infodebug
read-timeout
readTimeout
read_timeout
The timeout for client read and write requests, in seconds. Default value: 20.
connect-timeout
connectTimeout
connect_timeout
The timeout for client connections, in seconds. Default value: 10.
retry-times
retryTimes
retry_times
The number of times to retry a failed request. Default value: 10.
skip-verify-cert
skipVerifyCert
skip_verify_cert
Skips server-side digital certificate verification.
sign-version
signVersion
sign_version
The signature algorithm version used for requests. Valid values:
v1v4(default)
output-format
outputFormat
output_format
The output format. Valid values:
raw(default)jsonxmlyaml
addressing-style
addressingStyle
addressing_style
The format of the request address. Valid values:
virtual(default)pathcname
language
/
The display language.
endpoint
/
The endpoint for the service. This parameter is optional.
Other parameters
Parameter
Alias
Description
source-profile
sourceProfile
source_profile
References parameters from a specified profile. For example:
[profile cred]
access-key-id=ak
access-key-secret=sk

[profile dev]
region=cn-hangzhou
source-profile=cred
buckets
/
References parameters from a specified
bucketssection.[profile dev] region=cn-hangzhou access-key-id=ak access-key-secret=sk buckets=dev-bucket [buckets dev-bucket] bucket-name-hz = endpoint=oss-cn-hangzhou-internal.aliyuncs.com bucket-name-bj = region=cn-beijingendpoint-suffix-list-path-style
/
Specifies the list of endpoint suffixes that automatically use the path-style request mode. Multiple suffixes are separated by a comma (
,). Supported since version 2.2.0.Example 1:
endpoint-suffix-list-path-style=DEFAULTExample 2:
endpoint-suffix-list-path-style=DEFAULT,.path-style.comDEFAULTindicates the built-in default list, which is currently .privatelink.aliyuncs.com.
Buckets
This section configures mappings between buckets and endpoints. It supports a nested structure where subsections for individual buckets are defined using bucket-name =. The format is as follows:
[buckets name]
bucket-name =
  key=value
In this format, name is the name of the buckets section, bucket-name is the name of a specific bucket, and key=value represents a configuration parameter. The following parameters are supported:
Parameter | Alias | Description |
region | / | The region where the data center is located. If not set, the |
endpoint | / | The endpoint for the service. This parameter is optional. |
addressing-style | addressingStyle addressing_style | The format of the request address. Valid values:
|
The following is an example of a buckets section:
[buckets dev-bucket]
bucket-hz-01 =
  region=cn-hangzhou
bucket-hz-02 =
  region=cn-hangzhou
  endpoint=test.com
  addressing-style=cname
bucket-bj-01 =
  region=cn-beijing
Configure environment variables
Linux
Run the following commands to append the environment variable settings to the
~/.bashrcfile:echo "export OSS_ACCESS_KEY_ID='your-access-key-id'" >> ~/.bashrc echo "export OSS_ACCESS_KEY_SECRET='your-access-key-secret'" >> ~/.bashrcRun the following command to apply the changes:
source ~/.bashrcRun the following commands to verify that the environment variables have taken effect:
echo $OSS_ACCESS_KEY_ID
echo $OSS_ACCESS_KEY_SECRET
macOS
In the terminal, run the following command to view the default shell type:
echo $SHELLZsh
Run the following commands to append the environment variable settings to the
~/.zshrcfile:echo "export OSS_ACCESS_KEY_ID='your-access-key-id'" >> ~/.zshrc echo "export OSS_ACCESS_KEY_SECRET='your-access-key-secret'" >> ~/.zshrcRun the following command to apply the changes:
source ~/.zshrcRun the following commands to verify that the environment variables have taken effect:
echo $OSS_ACCESS_KEY_ID
echo $OSS_ACCESS_KEY_SECRET
Bash
Run the following commands to append the environment variable settings to the
~/.bash_profilefile:echo "export OSS_ACCESS_KEY_ID='your-access-key-id'" >> ~/.bash_profile echo "export OSS_ACCESS_KEY_SECRET='your-access-key-secret'" >> ~/.bash_profileRun the following command to apply the changes:
source ~/.bash_profileRun the following commands to verify that the environment variables have taken effect:
echo $OSS_ACCESS_KEY_ID
echo $OSS_ACCESS_KEY_SECRET
Windows
Run the following commands in Command Prompt (CMD):
setx OSS_ACCESS_KEY_ID "your-access-key-id"
setx OSS_ACCESS_KEY_SECRET "your-access-key-secret"
Open a new CMD window.
In the new CMD window, run the following commands to verify that the environment variables have taken effect:
echo %OSS_ACCESS_KEY_ID%
echo %OSS_ACCESS_KEY_SECRET%
The following environment variables are supported:
Environment variable | Parameter |
OSS_ACCESS_KEY_ID | access-key-id |
OSS_ACCESS_KEY_SECRET | access-key-secret |
OSS_SESSION_TOKEN | sts-token |
OSS_ROLE_ARN | role-arn |
OSS_ROLE_SESSION_NAME | role-session-name |
OSS_REGION | region |
OSS_ENDPOINT | endpoint |
OSSUTIL_CONFIG_FILE | config-file |
OSSUTIL_PROFILE | profile |
Command-line options
ossutil provides multiple command-line options, including global command-line options. Command-line options have the highest precedence and override parameters set in the configuration file or environment variables.
Passing access keys through command-line options can expose them in log systems, creating a security risk. Use this method with caution.
ossutil ls oss://examplebucket -i "your-access-key-id" -k "your-access-key-secret" --region cn-hangzhouAccess credentials
RAM user AccessKey pair
If your application runs in a secure environment, requires long-term access to OSS, and cannot rotate credentials frequently, you can initialize the credential provider with the AccessKey pair (AccessKey ID and AccessKey Secret) of an Alibaba Cloud account or a RAM user. This method requires manual maintenance of an AccessKey pair, which increases both security risks and maintenance overhead.
Configuration file
Create the following configuration file and save it as ~/.ossutilconfig.
[default]
accessKeyID = yourAccessKeyID
accessKeySecret = yourAccessKeySecret
region=ap-southeast-1
Run the following command to query objects in examplebucket:
ossutil ls oss://examplebucket -c ~/.ossutilconfigEnvironment variables
export OSS_ACCESS_KEY_ID=yourAccessKeyID
export OSS_ACCESS_KEY_SECRET=yourAccessKeySecret
ossutil ls oss://examplebucket
Command-line options
Run the following command to query objects in examplebucket:
ossutil ls oss://examplebucket -i yourAccessKeyID -k yourAccessKeySecretTemporary security credential
If your application requires temporary access to OSS, you can initialize the credential provider with a temporary security credential (AccessKey ID, AccessKey Secret, and security token) obtained from Security Token Service (STS). This method requires manual maintenance of the security token, increasing security risks and complexity. You must also refresh the token manually for repeated temporary access.
Configuration file
Create the following configuration file and save it as ~/.ossutilconfig.
[default]
accessKeyID = yourSTSAccessKeyID
accessKeySecret = yourSTSAccessKeySecret
stsToken = yourSecurityToken
region=ap-southeast-1
Run the following command to query objects in examplebucket:
ossutil ls oss://examplebucket -c ~/.ossutilconfigEnvironment variables
export OSS_ACCESS_KEY_ID=yourSTSAccessKeyID
export OSS_ACCESS_KEY_SECRET=yourSTSAccessKeySecret
export OSS_SESSION_TOKEN=yourSecurityToken
ossutil ls oss://examplebucket
Command-line options
Run the following command to query objects in examplebucket:
ossutil ls oss://examplebucket -i yourSTSAccessKeyID -k yourSTSAccessKeySecret -t yourSecurityToken --region cn-hangzhouRAM role ARN
If your application needs authorized access to OSS, for example, to access OSS across Alibaba Cloud accounts, you can use RAMRoleARN to initialize the credential provider. This method uses STS tokens internally. By specifying the ARN (Alibaba Cloud Resource Name) of a RAM role, the credentials tool obtains an STS token from the STS service and calls the AssumeRole API to request a new STS token before the session expires. In addition, you can assign a value to policy to restrict the RAM role to a smaller set of permissions.
An Alibaba Cloud account has full permissions on its resources. If the AccessKey pair of an Alibaba Cloud account is leaked, it poses a significant security risk to your system. We recommend using the AccessKey pair of a RAM user with the minimum required permissions instead.
To create an AccessKey pair for a RAM user, see Create an AccessKey pair. The AccessKey ID and AccessKey Secret of a RAM user are displayed only at the time of creation. You must save them immediately. If you forget the AccessKey pair, create a new one to rotate your credentials.
To obtain a RAM role ARN, see Create a role.
Create the following configuration file and save it as ~/.ossutilconfig. This configuration cannot be set by using environment variables or command-line options.
[default]
accessKeyID = yourAccessKeyID
accessKeySecret = yourAccessKeySecret
mode = RamRoleArn
roleArn = acs:ram::137918634953****:role/Alice
roleSessionName = session_name_example
region=ap-southeast-1
To query objects in the examplebucket bucket, run the following command:
ossutil ls oss://examplebucket -c ~/.ossutilconfigECS instance RAM role
If your application runs on an ECS instance, an ECI instance, or a worker node of Container Service for Kubernetes, we recommend that you use an ECSRAMRole to initialize the credential provider. This method uses STS tokens in its underlying implementation. An ECSRAMRole allows you to associate a role with an ECS instance, an ECI instance, or a worker node of Container Service for Kubernetes to automatically refresh the STS token within the instance. This method eliminates the need to provide an AccessKey (AK) or an STS token and removes the risks associated with manual maintenance. For more information about how to obtain an ECSRAMRole, see Create a role.
This method cannot be configured by using environment variables.
EcsRamRole mode
Configuration file
Create the following configuration file and save it as ~/.ossutilconfig.
[default]
mode = EcsRamRole
# The ecsRoleName parameter is optional. If it is not set, the role is automatically obtained.
ecsRoleName = EcsRamRoleOss
region=ap-southeast-1
Run the following command to query objects in examplebucket:
ossutil ls oss://examplebucket -c ~/.ossutilconfigCLI
Run the following command to query objects in examplebucket:
ossutil ls oss://examplebucket --mode EcsRamRoleEcsRamRole IMDSv2 mode
The EcsRamRole IMDSv2 mode is supported in ossutil 2.2.0 and later.
Configuration file
Create the following configuration file and save it as ~/.ossutilconfig.
[default]
mode = Ali-EcsRamRole
# The ecsRoleName parameter is optional. If it is not set, the role is automatically obtained.
ecsRoleName = EcsRamRoleOss
region=ap-southeast-1
Run the following command to query objects in examplebucket:
ossutil ls oss://examplebucket -c ~/.ossutilconfigCLI
Run the following command to query objects in examplebucket:
ossutil ls oss://examplebucket --mode Ali-EcsRamRoleOIDC role ARN
After you configure a worker node RAM role in Container Service for Kubernetes, applications in Pods on that node can obtain the STS token for the associated role through the metadata service, just like applications deployed on ECS instances. However, if untrusted applications, such as applications submitted by customers with closed-source code, are deployed on the container cluster, you may not want them to obtain the STS token of the RAM role that is associated with the worker node instance through the metadata service. To avoid compromising the security of your cloud resources while allowing these untrusted applications to securely obtain the required STS tokens and implement application-level least privilege, you can use the RRSA (RAM Roles for Service Account) feature. This method is based on STS tokens. The Alibaba Cloud container cluster creates and mounts a corresponding service account OIDC token file for each application Pod and injects the related configuration information into environment variables. A credentials tool then retrieves the configuration information from the environment variables and calls the AssumeRoleWithOIDC API of the STS service to exchange the OIDC token for an STS token that is associated with the role. This method does not require you to provide an Access Key (AK) or an STS token, which eliminates the risks associated with manually maintaining AKs or STS tokens. For more information, see Configure RAM permissions for a ServiceAccount by using RRSA to implement pod-level permission isolation.
Create the following configuration file and save it as ~/.ossutilconfig. You cannot specify this configuration by using environment variables or command-line options.
[default]
mode = oidcRoleArn
# Specifies the ARN (Aliyun Resource Name) of the OIDC provider. The format is acs:ram::account-id:oidc-provider/provider-name.
OIDCProviderArn=acs:ram::113511544585****:oidc-provider/TestOidcProvider
# Specifies the file path where the OIDC token is stored.
OIDCTokenFilePath=OIDCTokenFilePath
# The ARN of the role to assume. The format is acs:ram::account-id:role/role-name.
roleArn=acs:ram::113511544585****:role/testoidc
# A custom role session name to distinguish different tokens.
roleSessionName= TestOidcAssumedRoleSession
region=ap-southeast-1
Run the following command to query objects in examplebucket:
ossutil ls oss://examplebucket -c ~/.ossutilconfigExternal process credentials
ossutil can execute an external command to obtain credentials. The external process returns the credentials to ossutil through standard output (stdout).
To avoid security risks, the command that generates credentials must not be accessible to unauthorized users or processes.
The command that generates credentials must not write any secret information to
stderrorstdout, as this information could be captured in logs and exposed to unauthorized users.
The external command can return a long-term credential or a temporary credential in the following formats.
Long-term credential
{
  "AccessKeyId" : "ak",
  "AccessKeySecret" : "sk"
}
Temporary credential
{
  "AccessKeyId" : "ak",
  "AccessKeySecret" : "sk",
  "Expiration" : "2023-12-29T07:45:02Z",
  "SecurityToken" : "token"
}
Create the following configuration file and save it to ~/.ossutilconfig. These settings cannot be configured by using environment variables or command-line options.
[default]
mode = Process
credentialProcess = user-cmd
region=ap-southeast-1
Run the following command to query objects in the examplebucket bucket:
ossutil ls oss://examplebucket -c ~/.ossutilconfigAnonymous access
If you only need to access OSS resources with the public-read permission, you can use anonymous access without providing any credentials.
ossutil cat oss://bucket/public-object --mode AnonymousCommand reference
ossutil provides three types of commands: high-level commands, API-level commands, and helper commands.
Command structure
The basic syntax for ossutil commands is as follows:
ossutil command [argument] [flags]

ossutil command subcommond [argument] [flags]

ossutil topic
argument: A string argument.
flags: Options with a short name format (
-o[=value]/ -o [ value]) and a long name format (--options[=value]/--options[ value]). If you specify an exclusive flag more than once, only the last value is used.
The following are examples of commands:
Command:
ossutil cat oss://bucket/objectCommand with a subcommand:
ossutil api get-bucket-cors --bucket bucketexampleHelp topic:
ossutil filter
Command list
High-level commands
These commands are for managing buckets and objects. You can use them to create and delete buckets, copy data, and modify object properties.
Command name
Meaning
Create a bucket
Delete a bucket
Get the storage size of a bucket or a specified prefix
Display the description of a bucket or an object
Create an object whose name ends with the suffix character
/Append content to an appendable object
Concatenate object content to standard output
List buckets or objects
Upload, download, or copy objects
Delete objects in a bucket
Set the properties of an object
Generate a signed URL for an object
Restore an object from the frozen state to a readable state
Revert an object to a specified version
Synchronize a local directory or objects from a source to a destination
Calculate the hash value of a file or an object
API-level commands: These commands provide direct access to API operations and their configuration arguments.
NoteOnly some commands are listed. Run
ossutil api -hto view all commands.Command name
Description
Sets or modifies the access permissions of a bucket.
Gets the access permissions of a bucket.
....
Sets the cross-origin resource sharing (CORS) rules for a bucket.
Gets the CORS rules for a bucket.
Deletes the CORS rules for a bucket.
Helper commands: Use these commands to manage configuration files and access additional help topics.
Command name
Description
Gets help information.
Creates a configuration file to store configuration items and access credentials.
Updates the version.
Displays version information.
Runs a probe.
Command option types
Option type | Flag | Description |
String |
|
For example: |
Boolean |
| Enables or disables a flag. For example: |
Integer |
| An unsigned integer. For example: |
Timestamp |
| A timestamp in ISO 8601 format (DateTime or Date). For example: |
Byte unit suffix |
| The default unit is the byte (B). You can also use suffixes. Supported suffixes are: K (KiB) = 1024 bytes, M (MiB), G (GiB), T (TiB), P (PiB), and E (EiB). For example, for a minimum size of 1024 bytes:
|
Time unit suffix |
| A time duration. The default unit is seconds. Supported suffixes are: ms (milliseconds), s (seconds), m (minutes), h (hours), d (days), w (weeks), M (months), and y (years). Decimal values are supported. For example: 1.5 days.
|
String list |
| Supports specifying the flag multiple times. A single flag can also accept multiple values separated by a comma ( Supports multiple instances of a single value. For example: |
String array |
| Supports specifying the flag multiple times. Each instance accepts only a single value. For example: |
Load data from other sources
While arguments are typically provided on the command line, complex values can be loaded from a file. You can also pipe data from standard input, which is useful for chaining commands.
Starting with
file://indicates that it is loaded from a file path.A parameter value of
-indicates that data is loaded from standard input.
For example, to set the cross-origin resource sharing (CORS) settings for a bucket, you can load the configuration from a JSON file. The cors-configuration.json file is as follows:
{
  "CORSRule": {
    "AllowedOrigin": ["www.aliyun.com"],
    "AllowedMethod": ["PUT","GET"],
    "MaxAgeSeconds": 10000
  }
}
ossutil api put-bucket-cors --bucket examplebucket --cors-configuration file://cors-configuration.jsonAlternatively, you can provide the CORS configuration directly as the option's value. The compact JSON string is as follows:
{"CORSRule":{"AllowedOrigin":["www.aliyun.com"],"AllowedMethod":["PUT","GET"],"MaxAgeSeconds":10000}}ossutil api put-bucket-cors --bucket examplebucket --cors-configuration "{\"CORSRule\":{\"AllowedOrigin\":[\"www.aliyun.com\"],\"AllowedMethod\":[\"PUT\",\"GET\"],\"MaxAgeSeconds\":10000}}"The following example shows how to load arguments from standard input:
cat cors-configuration.json | ossutil api put-bucket-cors --bucket examplebucket --cors-configuration -Control command output
Output format
For the subcommands of the api command and the du and stat commands, you can adjust the output format by using the --output-format parameter. The supported formats are as follows:
Format name | Description |
raw | The output is the raw data returned by the server. |
json | The output is formatted as a JSON string. |
yaml | The output is formatted as a YAML string. |
xml | The output is formatted as an XML string. |
For example, the original content for get-bucket-cors is as follows:
ossutil api get-bucket-cors --bucket bucketexample
<?xml version="1.0" encoding="UTF-8"?>
<CORSConfiguration>
  <CORSRule>
    <AllowedOrigin>www.aliyun.com</AllowedOrigin>
    <AllowedMethod>PUT</AllowedMethod>
    <AllowedMethod>GET</AllowedMethod>
    <MaxAgeSeconds>10000</MaxAgeSeconds>
  </CORSRule>
  <ResponseVary>false</ResponseVary>
</CORSConfiguration>
The JSON output is as follows:
ossutil api get-bucket-cors --bucket bucketexample --output-format json
{
  "CORSRule": {
    "AllowedMethod": [
      "PUT",
      "GET"
    ],
    "AllowedOrigin": "www.aliyun.com",
    "MaxAgeSeconds": "10000"
  },
  "ResponseVary": "false"
}
Filter output
ossutil provides a built-in, JSON-based client-side filtering feature through the --output-query value flag.
This option is supported only for ossutil api subcommands.
This feature is based on JMESPath syntax. When you use this feature, the output is converted to JSON, filtered by using JMESPath, and then displayed in the specified output format. For more information about JMESPath syntax, see JMESPath Specification.
For example, to display only the AllowedMethod content for the get-bucket-cors command, run the following command:
ossutil api get-bucket-cors --bucket bucketexample --output-query CORSRule.AllowedMethod --output-format json
[
  "PUT",
  "GET"
]
Human-readable format
For high-level commands (du, stat), the --human-readable option is provided to display byte and quantity data in a human-readable format. Byte data is converted to a format with Ki, Mi, Gi, Ti, or Pi suffixes (base 1024), and quantity data is converted to a format with k, m, g, t, or p suffixes (base 1000).
Example: Raw mode
ossutil stat oss://bucketexample
ACL                         : private
AccessMonitor               : Disabled
ArchiveObjectCount          : 2
ArchiveRealStorage          : 10
ArchiveStorage              : 131072
...
StandardObjectCount         : 119212
StandardStorage             : 66756852803
Storage                     : 66756852813
StorageClass                : Standard
TransferAcceleration        : Disabled
Human-readable mode
ossutil stat oss://bucketexample --human-readable
ACL                         : private
AccessMonitor               : Disabled
ArchiveObjectCount          : 2
ArchiveRealStorage          : 10
ArchiveStorage              : 131.072k
...
StandardObjectCount         : 119.212k
StandardStorage             : 66.757G
Storage                     : 66.757G
StorageClass                : Standard
TransferAcceleration        : Disabled
Command return codes
When you run ossutil in a script, you can check its final return code to verify the outcome. This code indicates whether the operation succeeded and lets you handle errors programmatically.
Linux
Run the command to obtain the return code: echo $?.
Windows
Run the command to obtain the return code: echo %errorlevel%.
macOS
Run the command to obtain the return code: echo $?.
Return code | Description |
0 | The command operation was successful. The request sent to the server executed successfully, and the server returned a 200 response. |
1 | Invalid parameter. This error occurs when a required subcommand or parameter is missing, or an unknown command or parameter is used. |
2 | The command was parsed successfully and a request was sent to the specified service, but the service returned an error (a non-2xx response). |
3 | A non-server error was encountered when calling the OSS Go SDK. |
4 | Some requests failed during a batch operation, such as cp or rm. |
5 | Interruption error. A command was canceled by pressing ctrl +c during execution. |
Command-line options
Some commands require parameters to specify a target or an option. For these commands, provide the required values. For example:
ossutil ls --profile devThe command ossutil ls --profile dev specifies the dev configuration profile. For options that require a parameter value, separate the option name from the value with a space or an equal sign (=), such as --profile dev or --profile=dev. Enclose parameter values that contain spaces in double quotation marks to ensure they are parsed correctly, for example, --description "OSS bucket list".
Global command-line options
Parameter | Type | Description |
-i, --access-key-id | string | Specifies the AccessKey ID for accessing OSS. |
-k, --access-key-secret | string | Specifies the AccessKey Secret for accessing OSS. |
--addressing-style | string | Specifies the request addressing style. Valid values:
|
-c, --config-file | string | Specifies the path to the configuration file. The default path is |
--connect-timeout | int | Connection timeout in seconds. The default value is 10. |
-n, --dry-run | / | Shows the operations that would be performed without executing them. |
-e, --endpoint | string | Specifies the service endpoint to connect to. |
-h, --help | / | Displays help information. |
--language | string | Specifies the display language. |
--loglevel | string | Specifies the log level. Valid values:
|
--mode | string | Specifies the authentication mode. Valid values:
|
--output-format | string | Specifies the output format. The default value is raw. |
--output-query | string | Specifies the JMESPath query condition. |
--profile | string | Specifies the profile to use from the configuration file. |
-q, --quiet | / | Suppresses all output except for errors. |
--read-timeout | int | Timeout in seconds for read and write requests. The default value is 20. |
--region | string | The destination region for the request. For example, you can set the value to cn-hangzhou. |
--retry-times | int | Specifies the number of times to retry a failed request. The default value is 10. |
--sign-version | string | Specifies the signature algorithm version for requests. Valid values:
|
--skip-verify-cert | / | Disables server-side SSL certificate verification. |
-t, --sts-token | string | Specifies the STS token for accessing OSS. |
--proxy | string | Specifies the proxy server to use. This option is available in version 2.0.1 and later. Valid values:
|
--log-file | string | Specifies the log output file. This option is available in version 2.0.1 and later. The value can be:
If this option is not specified, logs are written to the default log file. |
--cloudbox-id | string | Specifies the CloudBox ID. This option is used in CloudBox scenarios and is available in version 2.1.0 and later. |
--ignore-env-var | / | Ignores all environment variables prefixed with |
--bind-address | string | Specifies the local IP address (IPv4 or IPv6) to bind outbound connections to. This option is available in version 2.2.0 and later. |
--account-id | string | Specifies the account ID. This is used for identity verification and resource ownership in vector bucket scenarios. This option is available in version 2.2.0 and later. |
--user-agent | string | Appends the specified value to the default User-Agent string. This option is available in version 2.2.2 and later. |
Common command-line options
Command scope | Supported options |
All high-level commands |
|
Commands that support batch operations |
|
Commands that support destination filtering rules |
|
Commands that support single objects | --version-id string: Specifies the version ID of the object. |
Commands that support list mode | --list-format: Specifies the format of the list file. Valid values: plain, inventory. --list-manifest-from: Reads the description of the list file format from a file. This parameter is required when --list-format is set to inventory. |
FAQ
Ossutil error: region must be set in sign version 4
Cause: You did not specify the region ID when you configured ossutil 2.0.
Solution: To prevent errors, configure the following required items: AccessKey ID, AccessKey Secret, and region ID. The region ID is required because the signature version has been upgraded to V4. For more information on obtaining a region ID, see Regions and endpoints.