This topic describes how to use the ComfyUI tool.
Log on to the PAI ArtLab console.
Prerequisites
-
You have completed PAI ArtLab Activation and Authorization.
-
(Optional) You have claimed free trial resources or a coupon, or purchased a resource plan. For more information, see PAI ArtLab Billing.
Use the resources, coupon, or resource plan within their validity period. For more information, see View Your Usage and Validity Period.
Procedure
This section shows you how to use ComfyUI (Shared Edition) to generate a style transfer image and then create a video from that image.
-
Log in to PAI ArtLab. In the upper-right corner, hover over the
 icon and select the China (Shanghai) region.
 -
On the Toolbox page, click the ComfyUI (Shared Edition) card to start the tool.
-
Generate a style transfer image.
-
Drag the sample workflow file into the ComfyUI interface.
-
In the Upload Style Image ① area, upload a sample style image. In the Upload Style Image ② area, upload a sample building image. Then, click execute and wait for the image to generate.
-
-
Generate a video.
-
On the workflow page, click the
 icon to browse example templates.
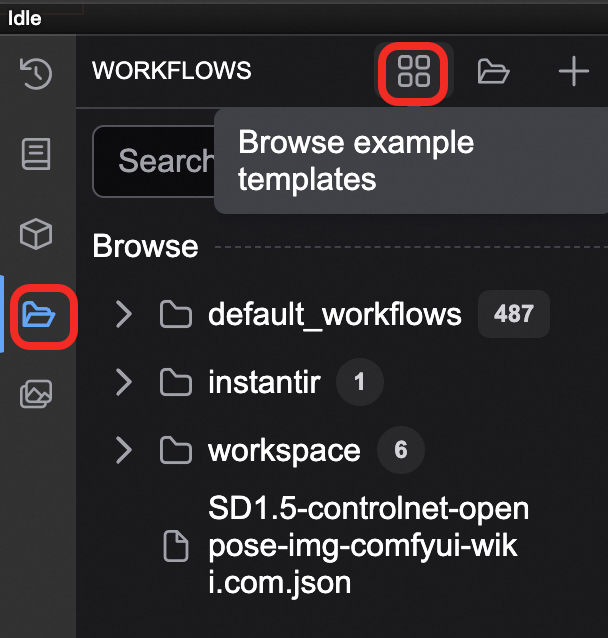
-
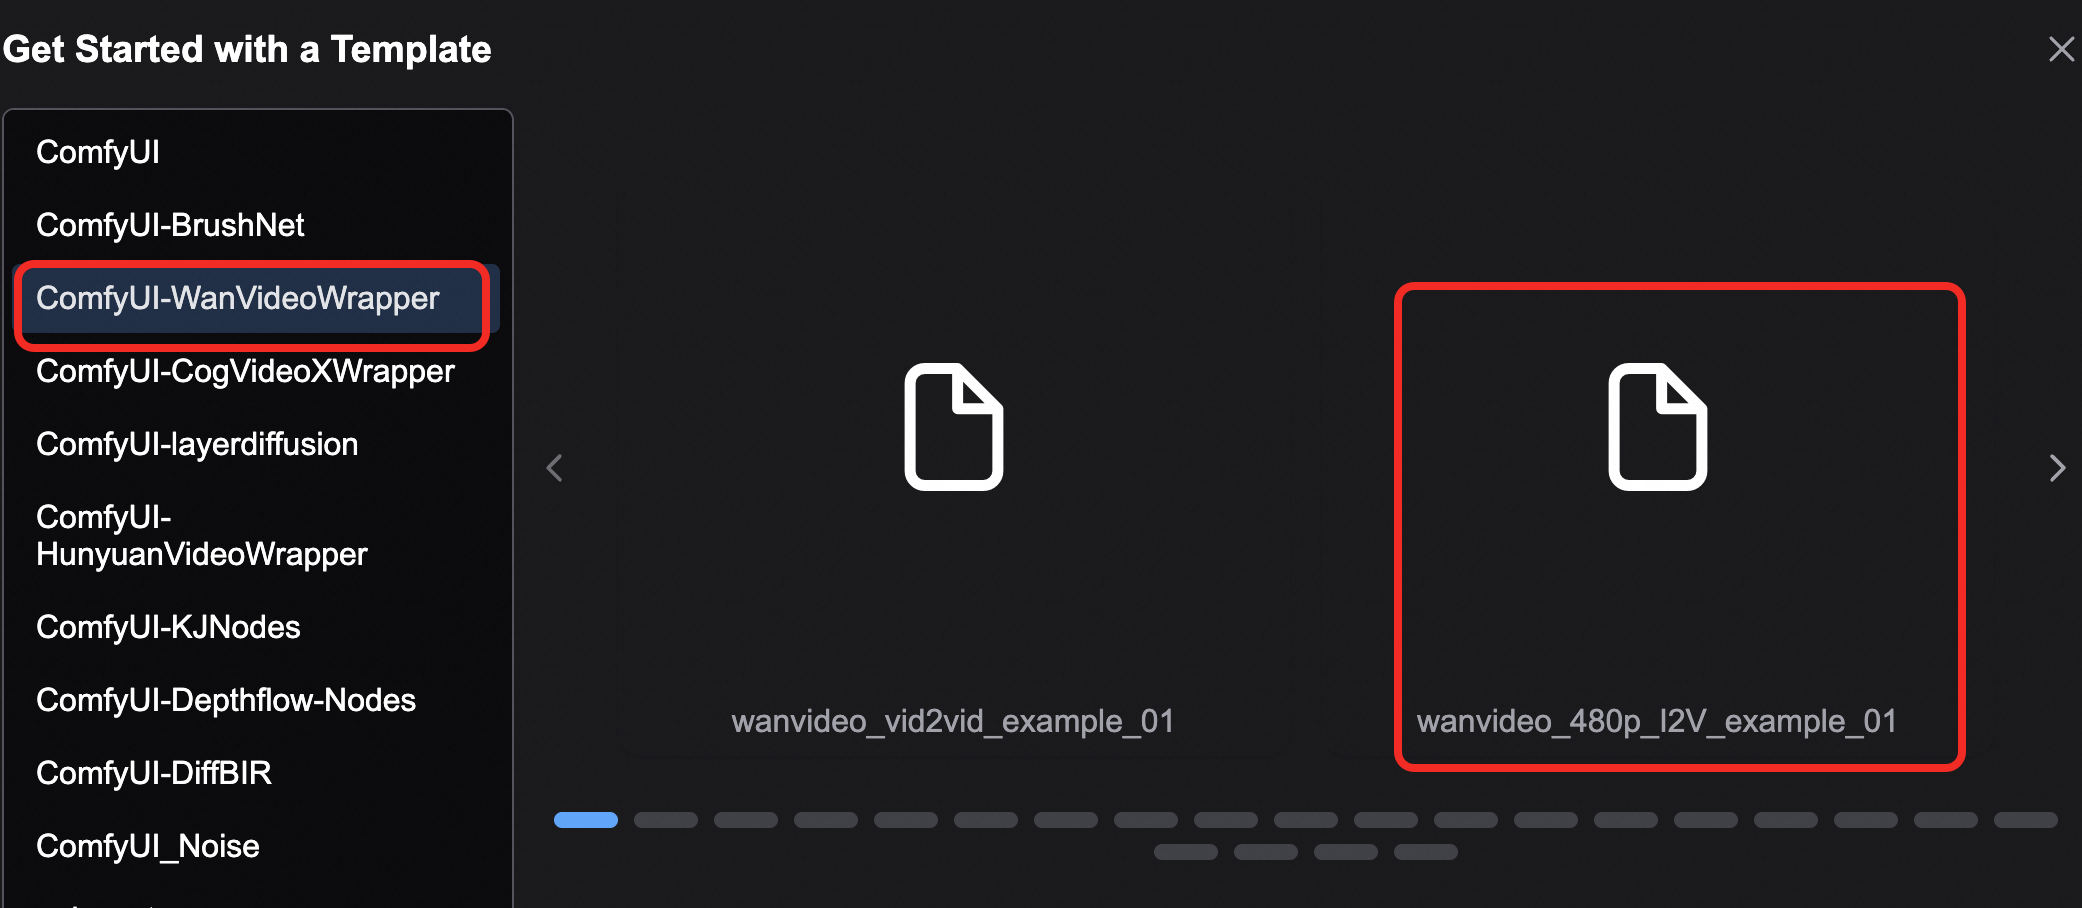
Select ComfyUI-WanVideoWrapper > wanvideo_480p_I2V_example_01.
-
Configure the following parameters.
Node
Description
#22 WanVideoWrapper
(WanVideo Model Loader)
Set model to WanVideo/Wan2_1-I2V-14B-480P_fp8_e4m3fn.safetensors.
#16 WanVideoWrapper
(WanVideo TextEncode)
This iconic building is completely covered by beautiful pink flowers, lush green leaves, intricate vines, spring garden aesthetics, as well as falling petals and fluttering butterflies. Surrealism, rich details, warm sunshine, 8K resolution, realistic natural and architectural scenes, advanced aesthetics, surrealism, high quality, and ultra clarity.#21 WanVideoWrapper
(WanVideo VAE Loader)
Set model_name to WanVideo_1_VAE_bf16.safetensors.
#18
(Load Image)
Click upload to load the generated style transfer image.
-
Click execute and wait for the video to generate.
-
Related operations
Third-party models and custom nodes (ComfyUI plug-ins)
-
Only ComfyUI (Exclusive Edition) supports third-party models and custom nodes.
-
Go to the Object Storage Service (OSS) directory mounted to your workflow. In the upper-right corner, click the
 icon, and then click the storage bucket link.
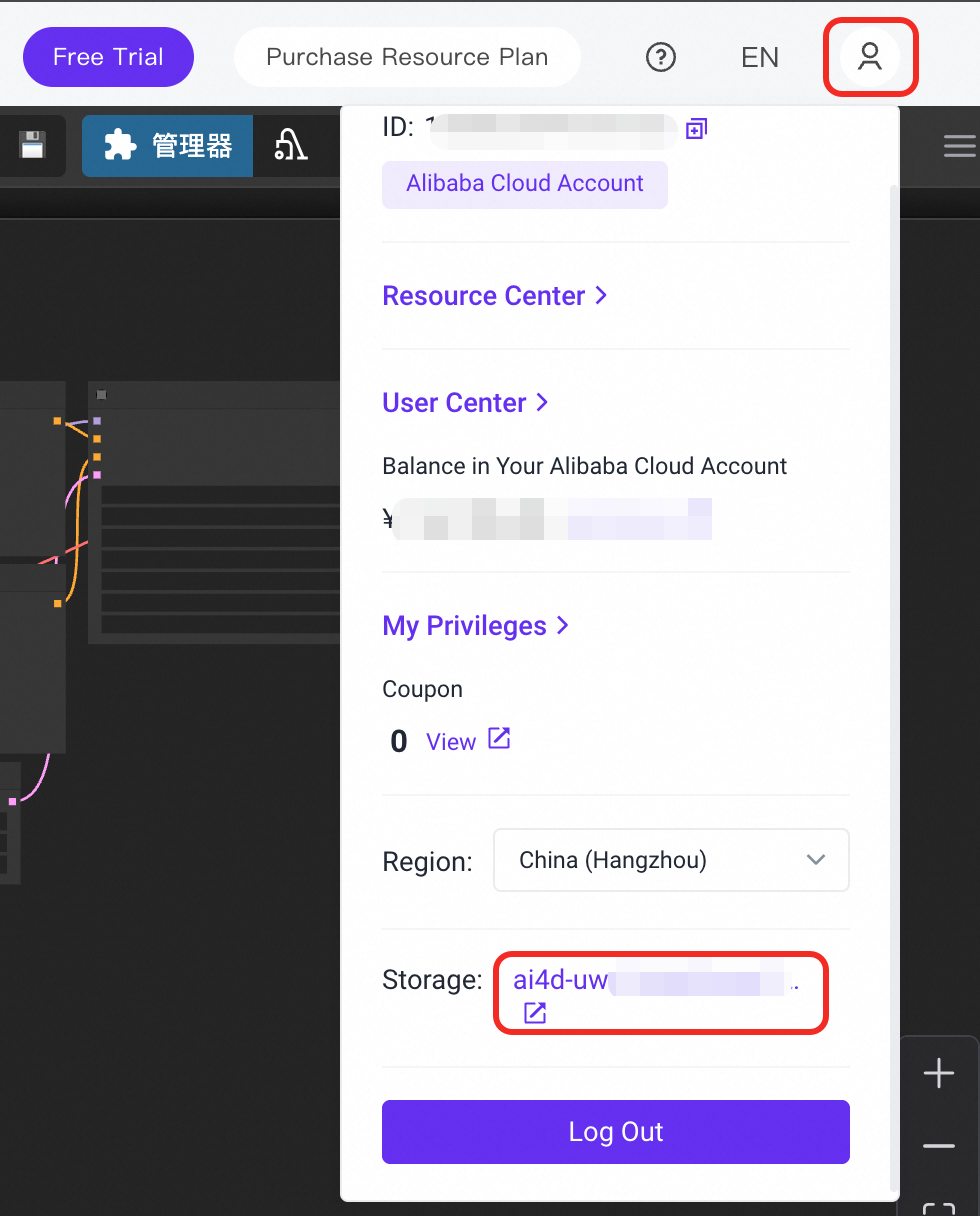
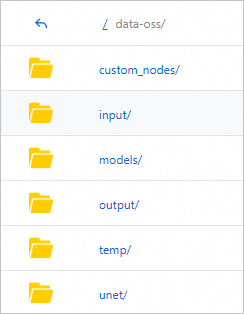
The OSS path contains the following directory structure:
-
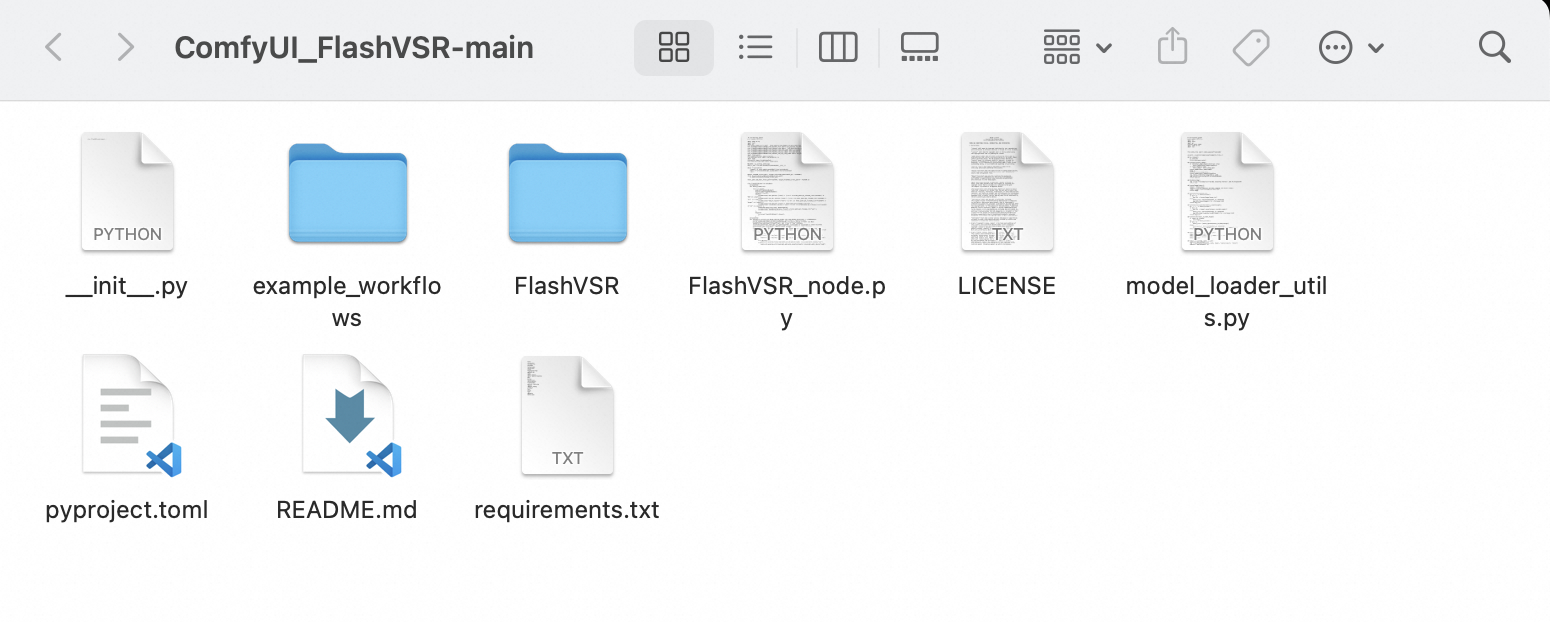
custom_nodes: This directory is used to store node files.-
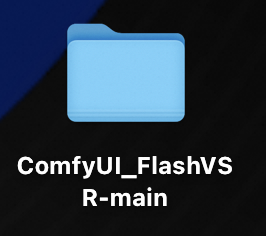
Example: To install a third-party node, you must download its library package from the third-party platform and upload it to the
custom_nodesdirectory. For example, download theComfyUI_FlashVSR-mainfolder, which is the library for a specific node, and upload it to thecustom_nodesdirectory.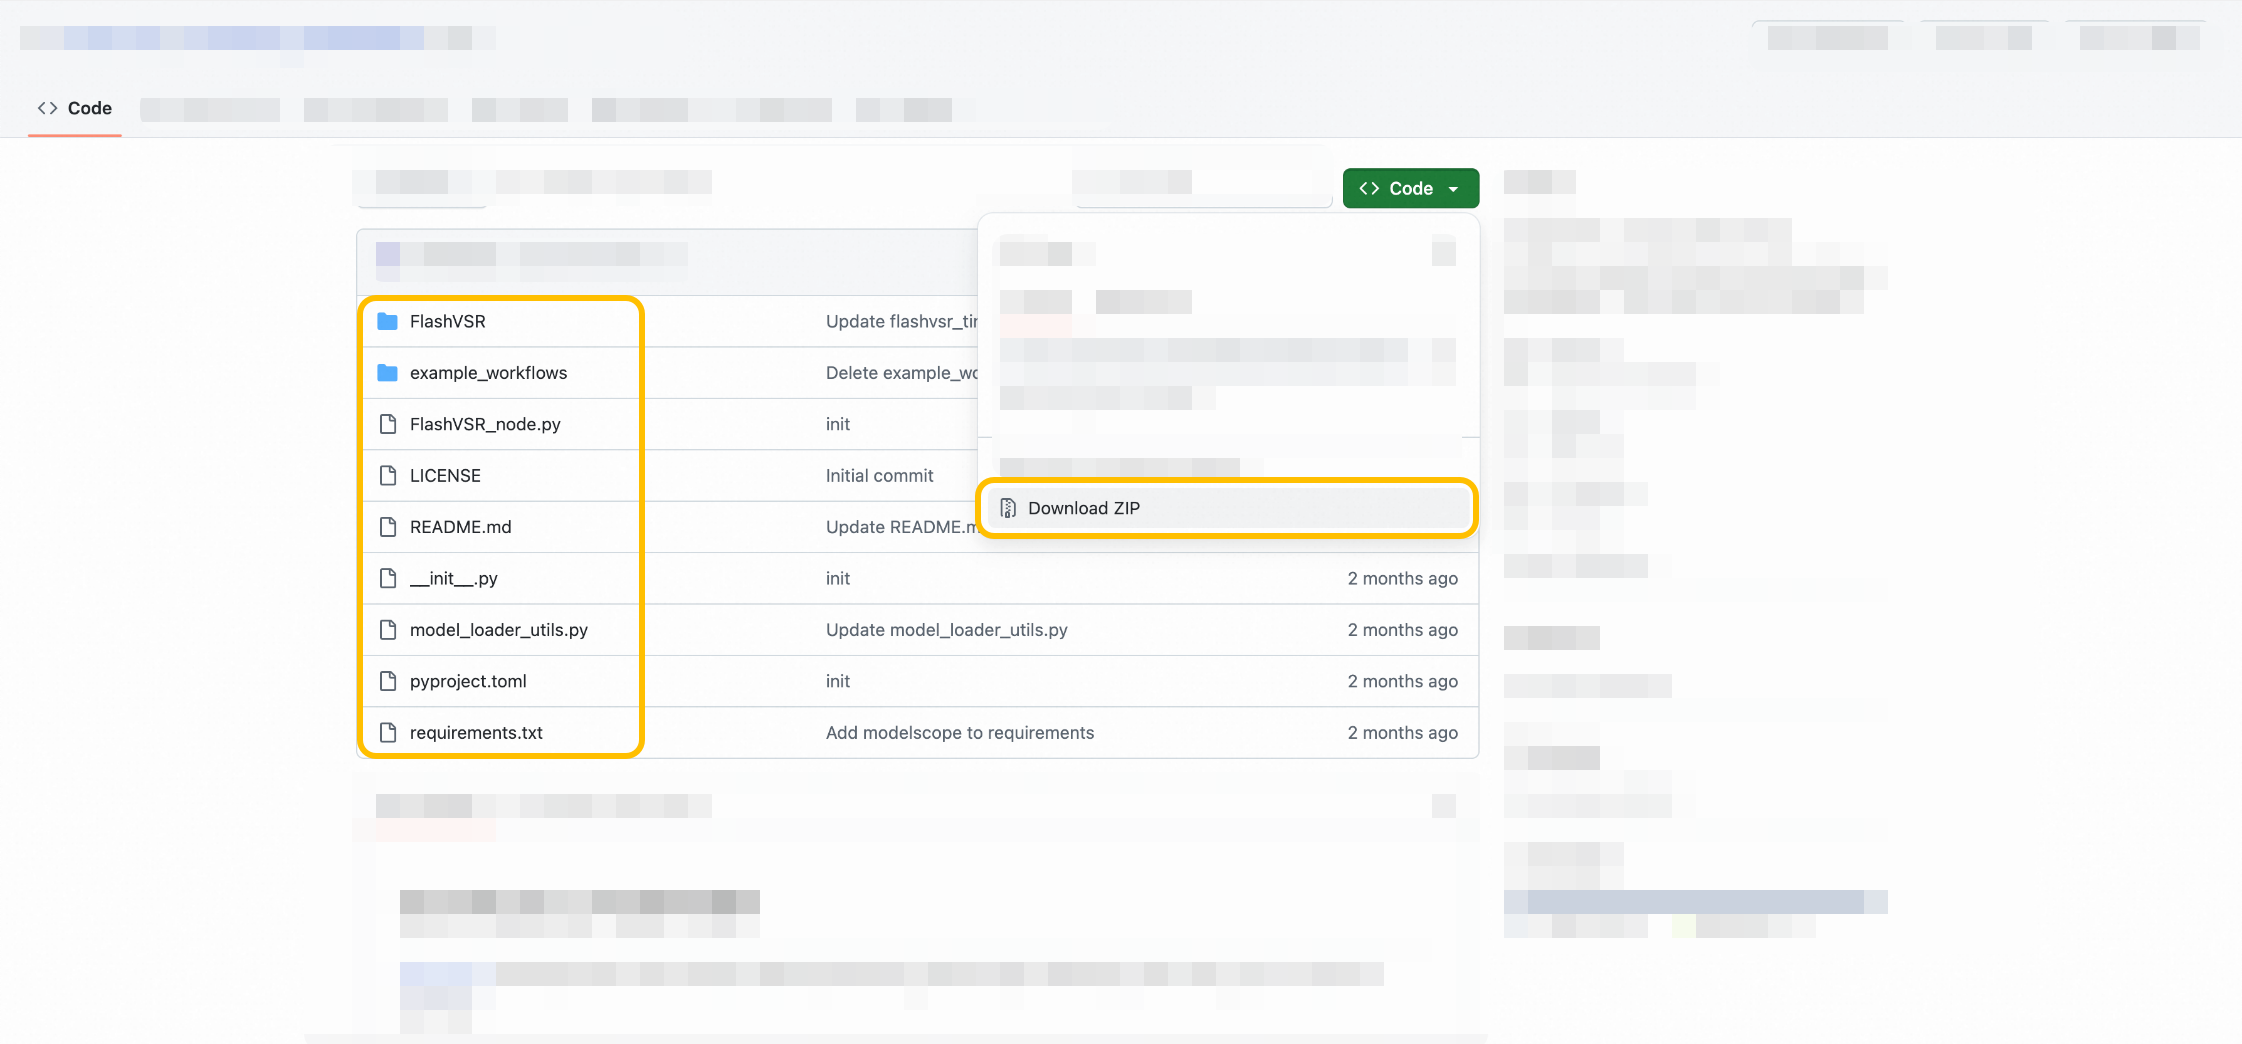
-
-
models: This directory is used to store model files.-
Example 1: Models required by a node library.
-
As mentioned, a typical node library often involves different models. For the nodes to run correctly, you must download and upload their required models. As shown in the figure below, upload the corresponding models to the
FlashVSRandvaesubdirectories within themodelsdirectory. For the model files shown in the figure, upload all of them tomodels/FlashVSRandmodels/vae.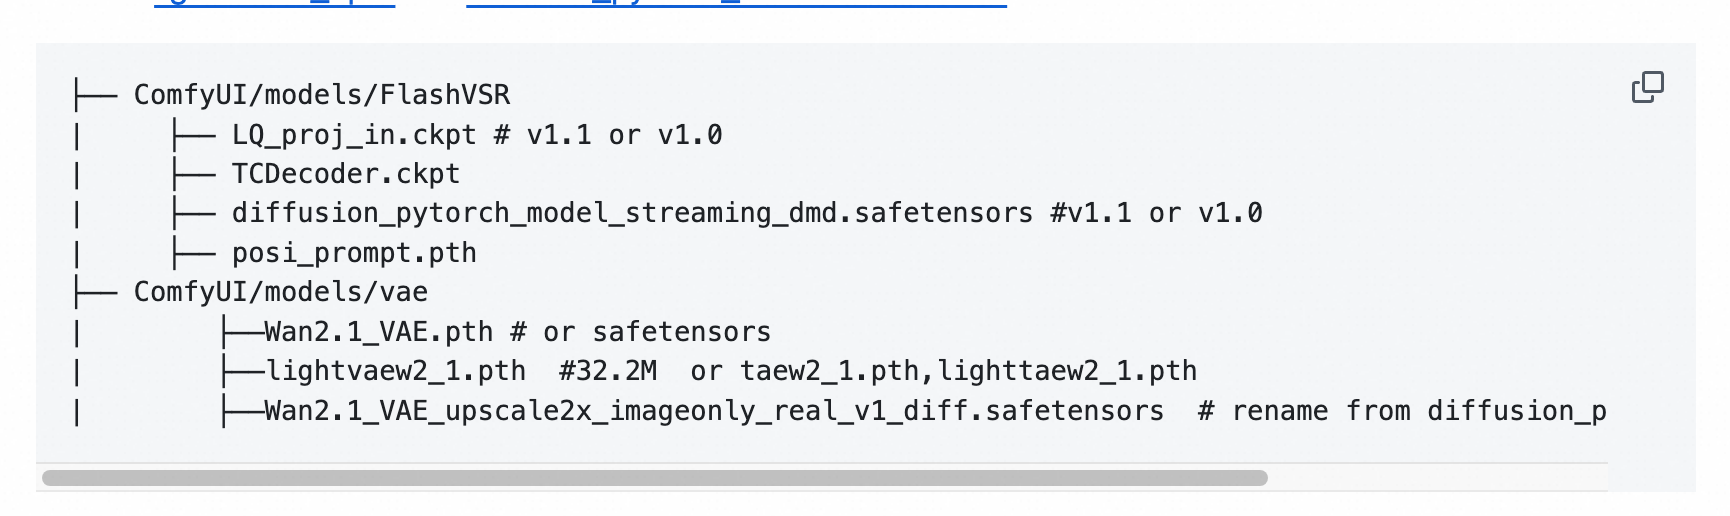
-
-
Example 2: A workflow reports a missing model.
-
For example, the following error occurs because the platform cannot connect to the public internet by default. To resolve this, you must add the model to the
modelsdirectory. For example, add the depth_anything_v2_vits_fp16.safetensors model to themodels/depthanything/directory in OSS.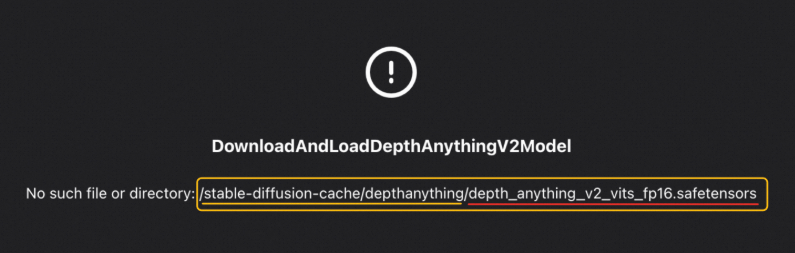
-
If a required directory does not exist in your OSS bucket, create it.
-
-
-
-
Load a new model or node.
After you upload a model to the mounted storage space, click PaiCustom > load new model. If the model does not appear, click restart process. After the process restarts, refresh your browser.
After uploading a node file, click restart process. After the process restarts, refresh your browser.
If the new model or node is still not found, go to Developer Center in the left navigation pane, find the corresponding ComfyUI service, Stop the service, and then Start it again.

-
Upload a model or node file. You can upload files to OSS through the console. For large files, refer to How do I upload large objects to OSS?.
Workflow export (API or original)
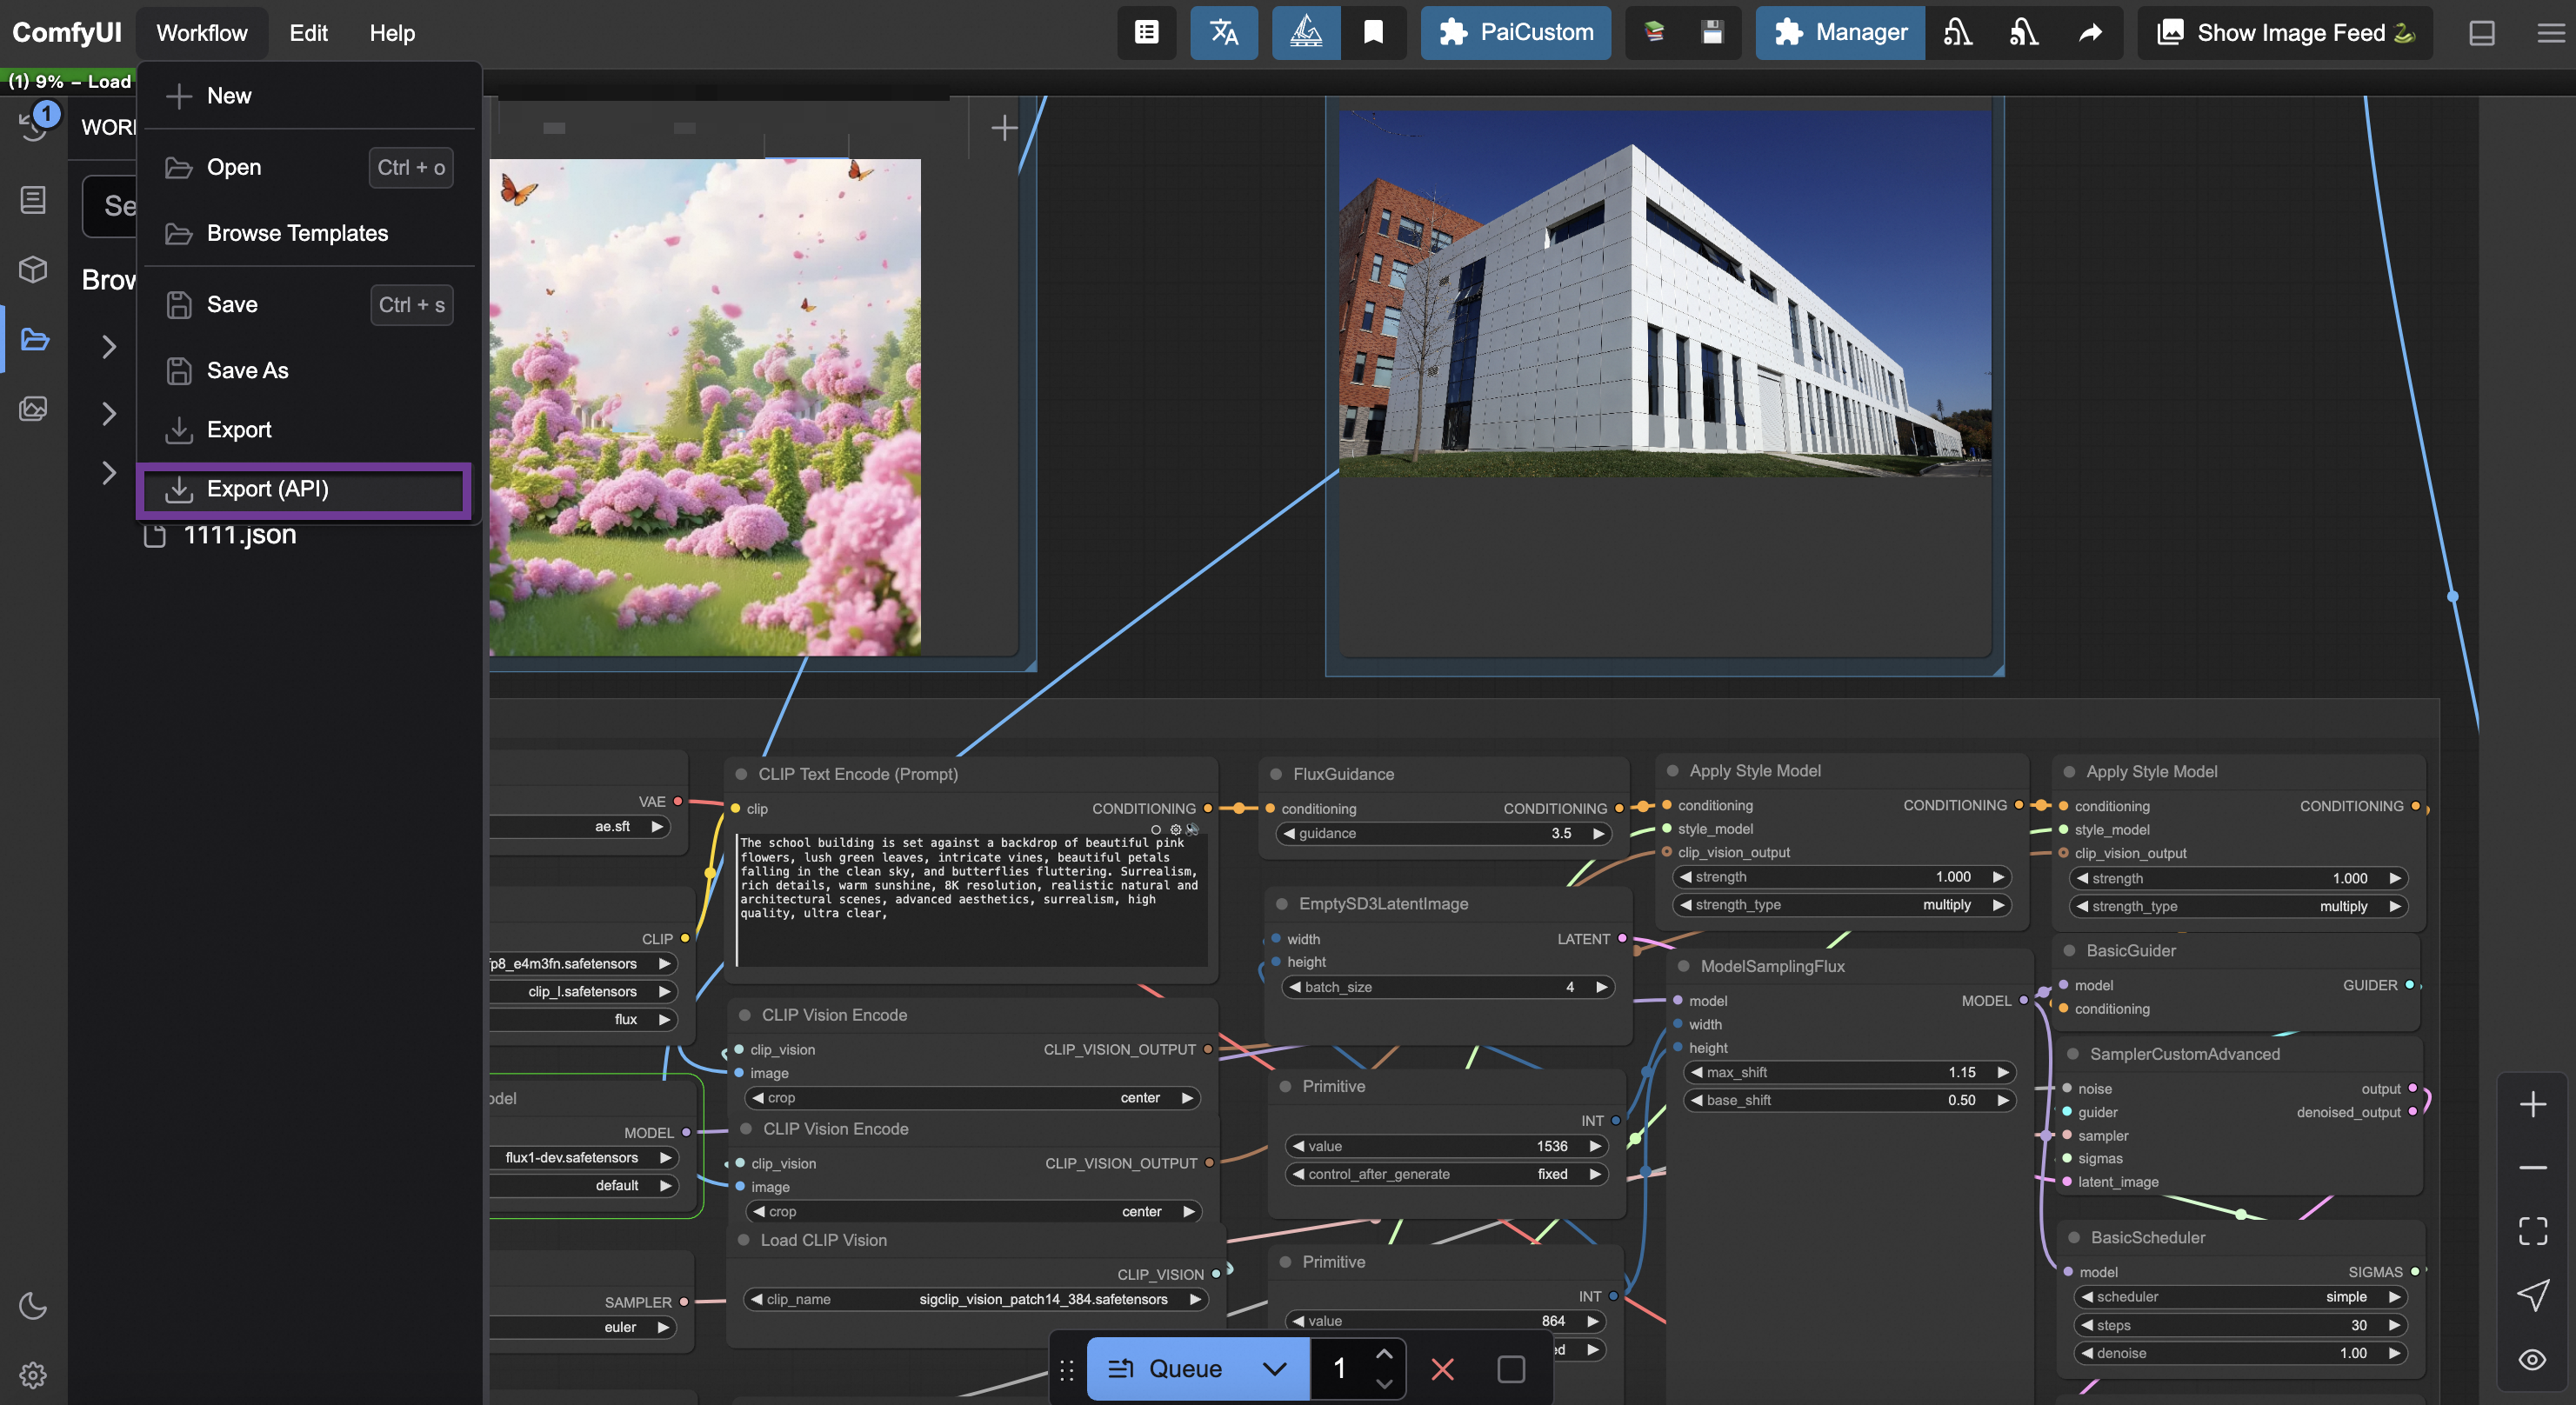
Shared edition (New UI)
To export the API version of the workflow, click Workflow > Export (API). To export the original workflow, click Export.
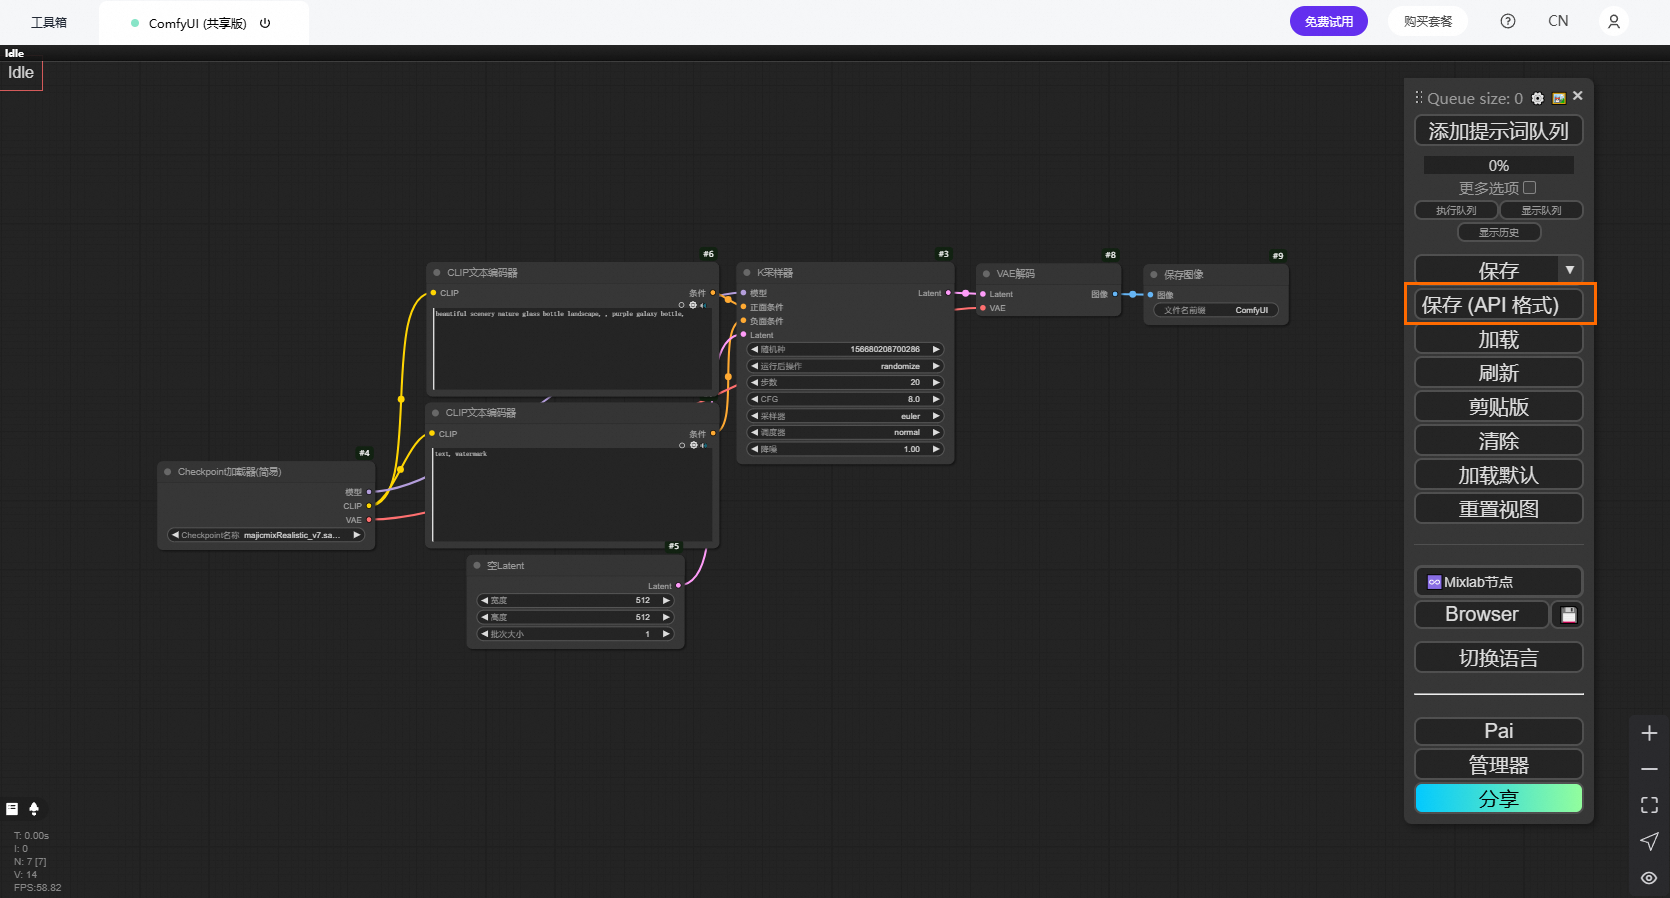
Shared edition (Old UI)
To export the API version of the workflow, click Save (API format). To export the original workflow, click Save.
Exclusive edition
To export the API version of the workflow, click Export (API). To export the original workflow, click Export.

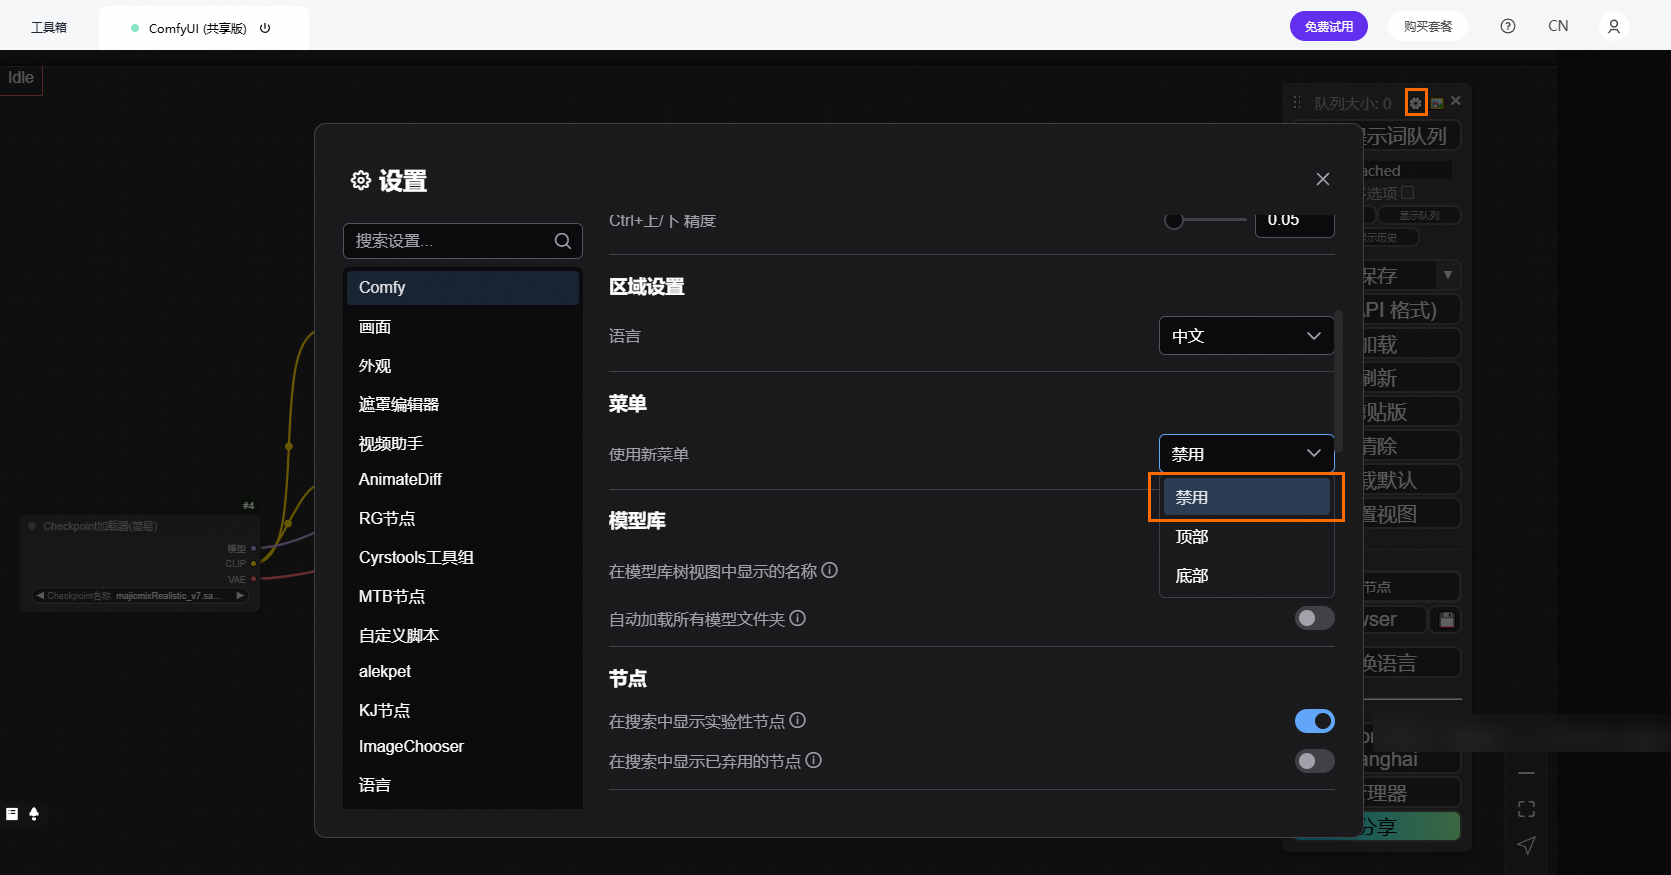
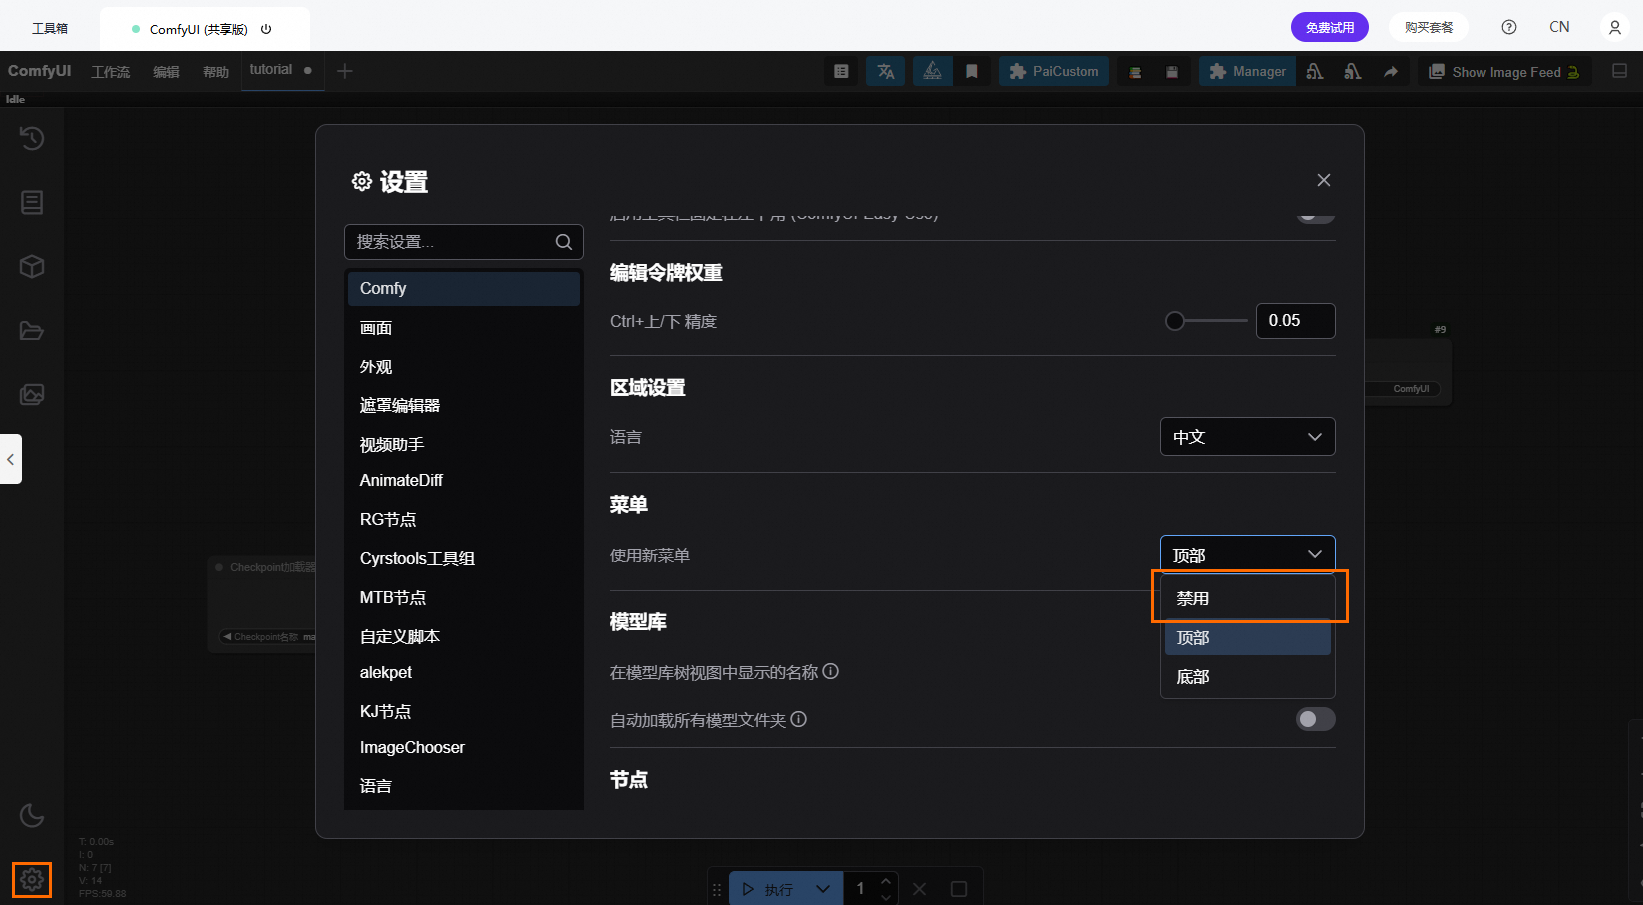
Switch UI versions
-
Switch from the old UI to the new UI:
-
Switch from the new UI to the old UI:
ComfyUI API validation
For details, see PAI ArtLab Developer Center Usage Guide.