Network Intelligence Service (NIS) uses the trusted service feature of Alibaba Cloud Resource Management to consolidate multiple Alibaba Cloud accounts (main accounts) into a resource directory. Each account becomes a member account, and you can delegate a specific member as the administrator account for NIS. The resource directory administrator or delegated administrator can then use NIS to centrally perform enterprise-level, multi-account cloud network operations and maintenance.
Limitations
-
Only Alibaba Cloud accounts (main accounts) that have completed enterprise identity verification can enable a resource directory and the multi-account management feature of NIS.
-
NIS supports multi-account management only for Reachability Analyzer, CEN topology, and VPC topology.
Procedure
To use multi-account management, enable a resource directory, invite member accounts, enable multi-account management in NIS, and add a delegated administrator account. You can then centrally manage all member accounts.

Step 1: Enable a resource directory
Log on to the Account Center console and verify that your current account has completed Identity Verification as an enterprise account. The accounts you invite must also be enterprise accounts.
-
Log on to the Resource Management console.
-
In the navigation pane on the left, choose .
-
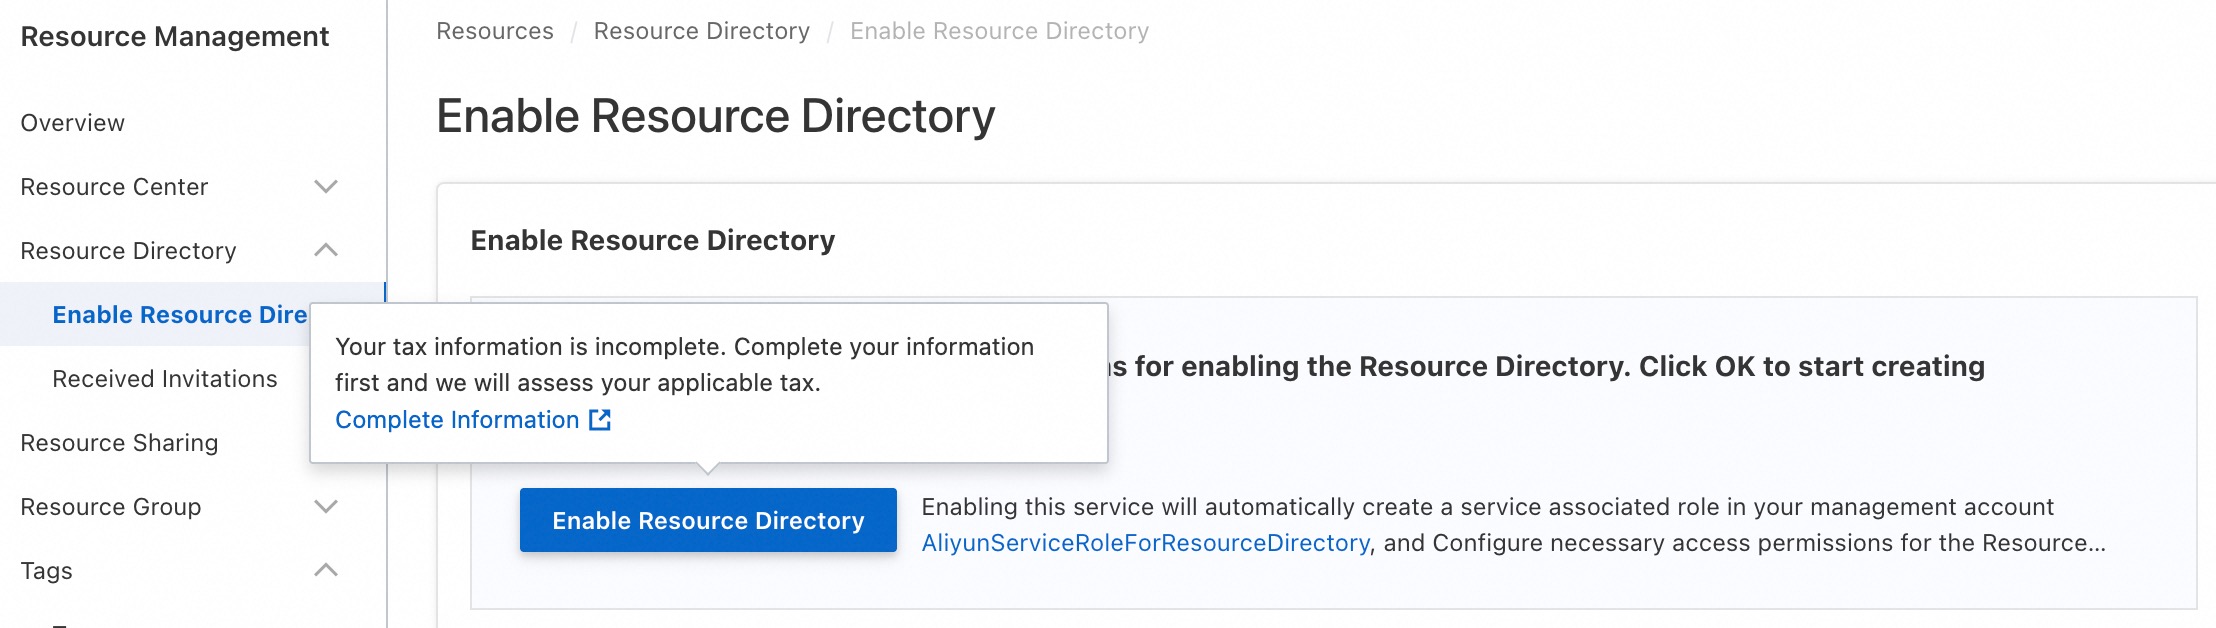
If the billing information for the current account is incomplete, a pop-up message appears when you hover over the Enable Resource Directory button to inform you of the missing information. This message is a strong recommendation and not a blocker. You can still click Enable Resource Directory to complete the enablement. We recommend that you first click the Complete Now link in the pop-up to complete your billing information before you proceed.
-
Click Enable Resource Directory.
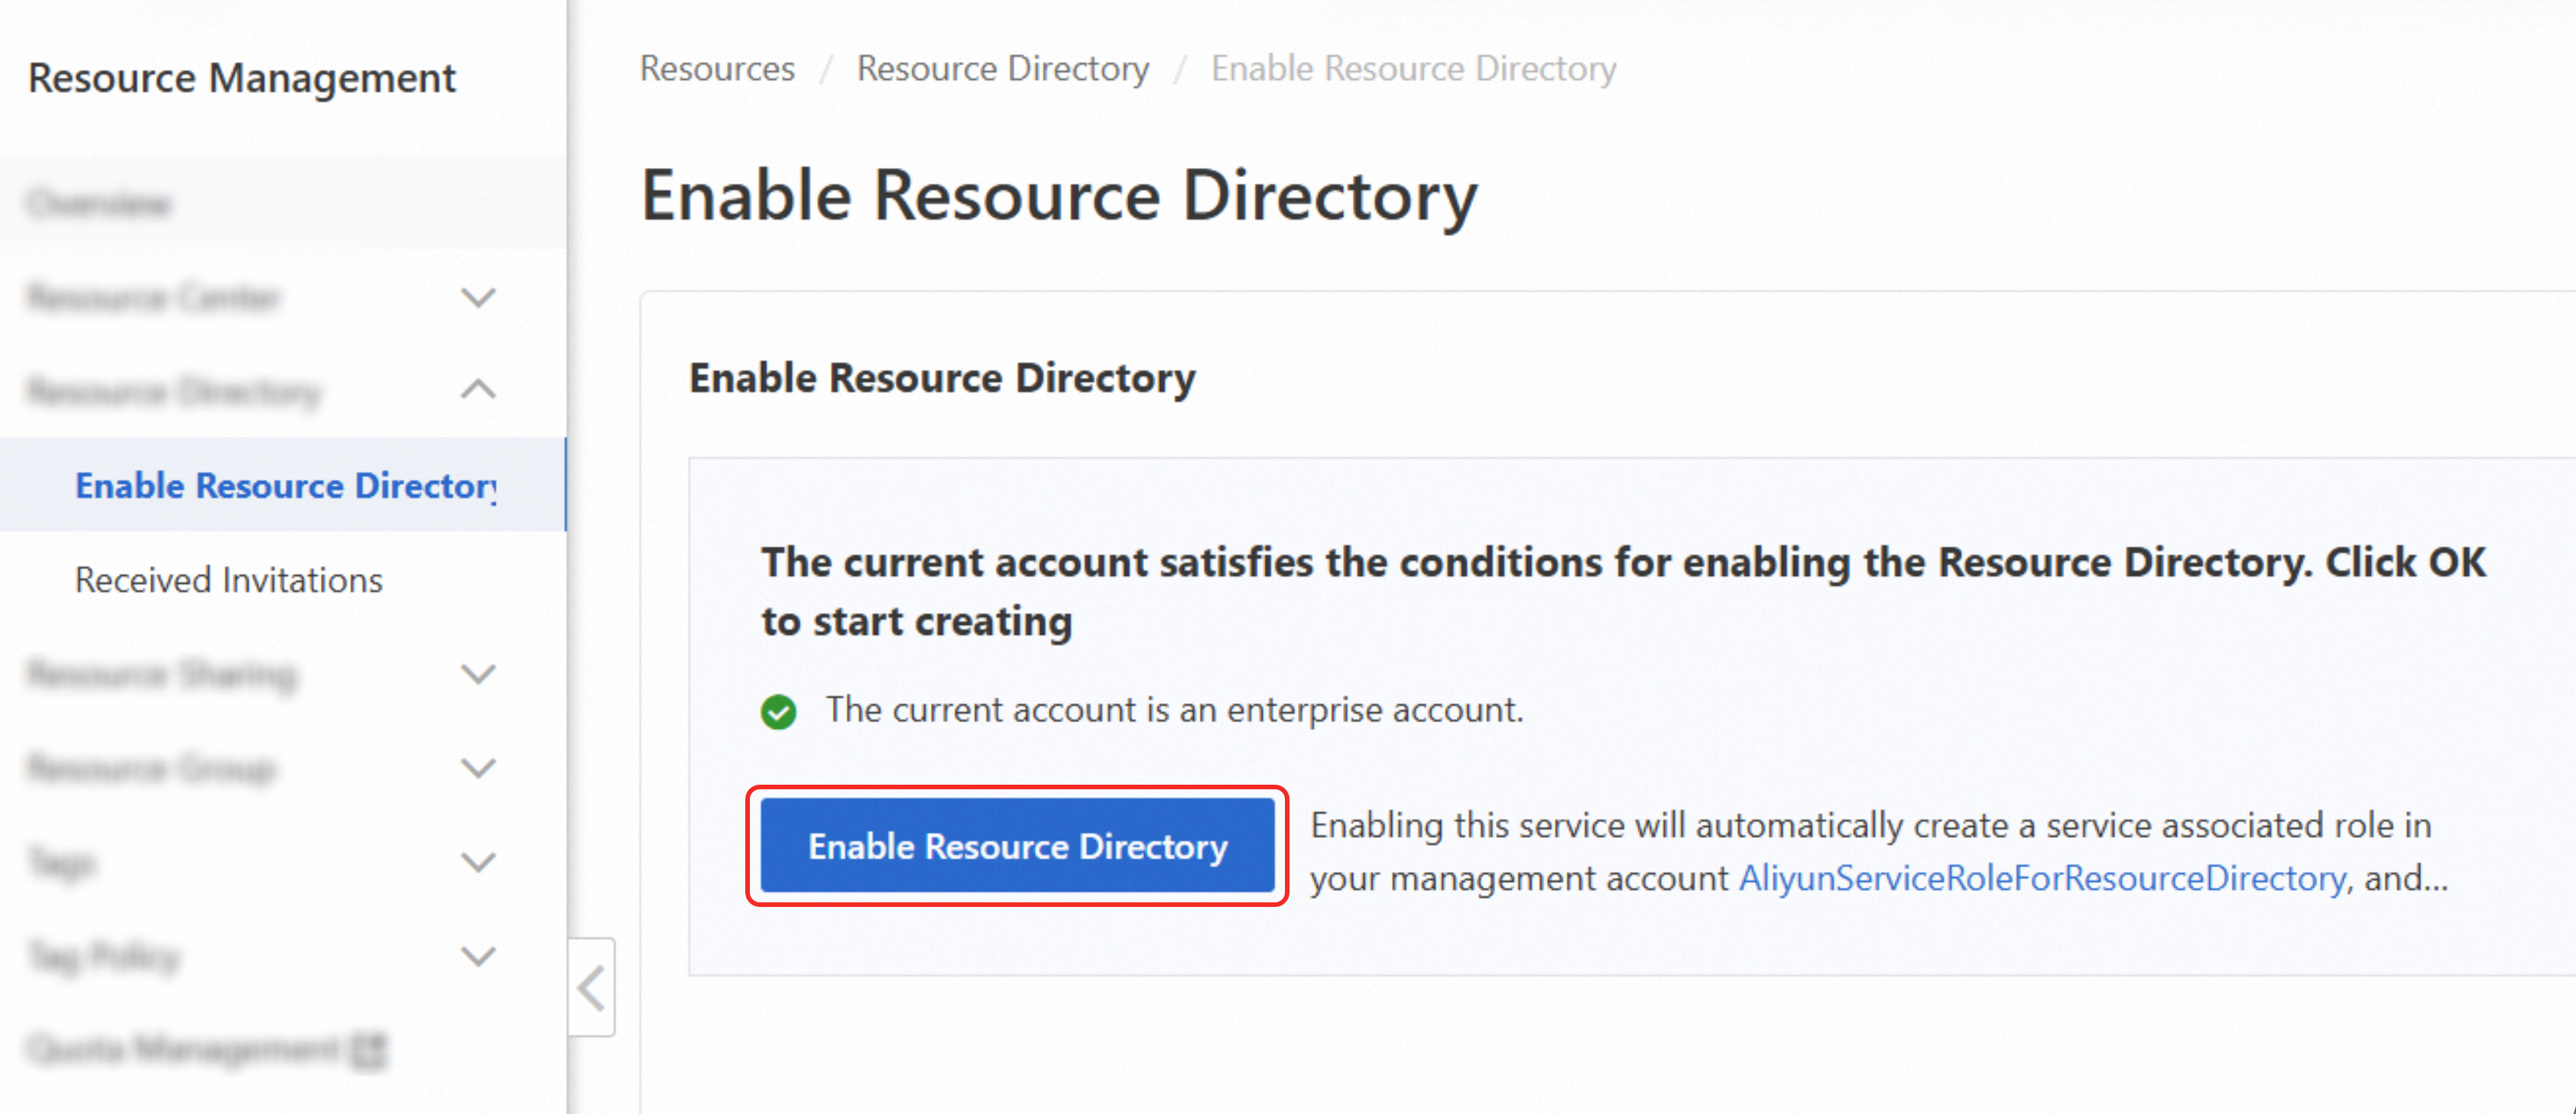
After enabling Resource Directory, the system creates a Root folder and sets your current account as the management account.
The system also automatically creates a service-linked role named
AliyunServiceRoleForResourceDirectoryin the management account. This role allows trusted services to access your Resource Directory. For more information about service-linked roles, see RAM roles in Resource Directory.
Step 2: Invite members
-
Log on to the Resource Management console with a management account.
-
In the left-side navigation pane, choose .
-
Click Invite Member.
-
In the Invite Member dialog box, enter the required information, review and select the risk notice, and then click OK.
Parameter
Description
Account ID or logon email address
-
Account ID: To find an account ID, see How do I find my Alibaba Cloud account ID?.
-
Logon email address: The email address that you used to register the account. If an account does not have a logon email, use its account ID.
To invite multiple accounts, enter their account IDs or logon email addresses, separated by commas.
Remarks
Enter a remark for the invitation. This helps the invitee verify the invitation's authenticity and respond faster.
Tag
Add a tag to the member for easier filtering and management.
Parent Folder
By default, the invited member is placed in the Root folder. You can click Modify to move the member to a different folder. You can also change the folder after the member accepts the invitation.
-
After an invited account successfully joins the resource directory, it becomes a member account and is centrally managed by the resource directory:
-
By default, the invited account's original name becomes its display name and account name within the Resource Directory. The management account can change the member's display name, but not its account name.
-
Resource Directory automatically creates a RAM role named ResourceDirectoryAccountAccessRole for the member. The management account assumes this role for centralized management.
Step 3: Enable multi-account management for NIS
The management account or a delegated administrator account can enable multi-account management.
Log on to the NIS console.
-
In the left-side navigation pane, choose .
-
On the Corp Multi-account page, click Enable NIS Multi-account Management.
-
On the Corp Multi-account page, a message indicates that multi-account management is enabled for your account. You can then enable the multi-account management mode for the following NIS features. For more information, see Usage examples.
-
Reachability Analyzer
-
CEN topology
-
VPC topology
-
Step 4: Add a delegated administrator account
The management account of the resource directory has super-administrator permissions by default. As a best practice for enterprise cloud management, the management account should focus on organizational management within the resource directory rather than on specific cloud service configurations, which helps prevent operational errors from misusing super-administrator permissions. Therefore, the management account can designate a member account as a NIS for NIS. The delegated administrator can then useNIS to centrally view and manage network assets across multiple accounts.
-
Use the management account to log on to the Resource Management console.
-
In the left-side navigation pane, choose .
-
On the Trusted Services page, find Network Intelligence Service in the Service column, and then click Manage in the Actions column.
-
On the Network Intelligence Service page, in the Delegated Administrator Account section, click Add.
-
In the Add Delegated Administrator Account panel, select a member account and click OK.
After the account is successfully added, you can use this delegated administrator account to access the multi-account management module of NIS and manage resources across the resource directory.
Usage examples
Multi-account access for CEN topology
-
Log on to the Network Intelligence Service console with your management or delegated administrator account.
-
In the left-side navigation pane, choose , and then enable Multi-account mode for CEN Topology.
-
In the left-side navigation pane, choose .
-
Select a target member account and a CEN ID, and then click Generate Topology to view and manage your cloud network. For more information, see Use CEN topology.
Multi-account access for VPC topology
-
Log on to the Network Intelligence Service console with your management or delegated administrator account.
-
In the left-side navigation pane, choose , and then enable Multi-account mode for VPC Topology.
-
In the left-side navigation pane, choose .
-
Select a target member account, a region, and a VPC ID, and then click Generate Topology to view and manage the VPC topology. For more information, see Use VPC topology.
Multi-account access for Reachability Analyzer
-
Log on to the Network Intelligence Service console with your management or delegated administrator account.
-
In the left-side navigation pane, choose , and then enable Multi-account mode for Reachability Analyzer.
-
In the left-side navigation pane, choose .
-
Click Analyze. On the Analyze page, select a target member account, configure the required parameters, and then click Analyze. On the Analysis Details page, you can view the analysis results. For more information, see Use Reachability Analyzer.