This tutorial walks you through an end-to-end workflow: use Flink to capture MySQL CDC changes, write the data to OSS in Paimon format, and register the metadata in Data Lake Formation (DLF). Then use MaxCompute external schemas to run federated SQL queries on that lake data—without moving any data.
Supported regions
MaxCompute, OSS, DLF, and Flink must all be deployed in the same region.
| Region name | Region ID |
|---|---|
| China (Hangzhou) | cn-hangzhou |
| China (Shanghai) | cn-shanghai |
| China (Beijing) | cn-beijing |
| China (Zhangjiakou) | cn-zhangjiakou |
| China (Shenzhen) | cn-shenzhen |
| China (Hong Kong) | cn-hongkong |
| Singapore | ap-southeast-1 |
| Germany (Frankfurt) | eu-central-1 |
Prerequisites
Before you begin, make sure you have:
-
An activated OSS service
-
An activated DLF service
-
An activated Flink service
-
A MaxCompute project with schema support for project-level metadata enabled
Step 1: Grant MaxCompute permissions to access DLF and OSS
MaxCompute cannot access DLF or OSS without explicit authorization. Choose one of the following methods:
-
One-click authorization: If the same account created the MaxCompute project and deployed DLF, click Authorize DLF to authorize in one step.
-
Custom authorization: Use custom authorization for DLF. This method works even when different accounts created the MaxCompute project and deployed DLF.
Step 2: Prepare MySQL test data
Skip this step if you already have MySQL test data.
-
Log on to the RDS console.RDS consoleRDS console
-
In the left navigation pane, click Instances, then select a region in the upper-left corner.Data Lake Formation (DLF) console
-
Click the target instance's Instance ID/Name.
-
In the left navigation pane, click Databases.
-
Click Create Database and configure the following parameters:
Parameter Required Description Example Database Name Required 2–64 characters; starts with a letter, ends with a letter or digit; lowercase letters, digits, underscores ( _), and hyphens (-) only; must be unique within the instance. Note: hyphens in the name are stored as@002din the folder name.mysql_paimonSupported Character Set Required Select a character set as needed. utf8Authorized by Optional Accounts that can access this database. Leave blank to attach an account after creation. Only standard accounts appear here; privileged accounts have full access by default. DefaultDescription Optional A description for easier management. Up to 256 characters. Create a Flink test database. -
Click Log On to Database. In the left navigation pane, select Database Instances and double-click the database you created. On the SQLConsole page, run the following SQL to create a test table and insert data:
If the target database does not appear after expanding the instance, the logon account may lack access permissions. Go to the Accounts page of the RDS instance to modify account permissions or change the logon account. Alternatively, the metadata may be out of sync—hover over the instance, then click the
 button to refresh the database list.
-- Create a table CREATE TABLE sales ( id INT NOT NULL AUTO_INCREMENT, year INT NOT NULL, amount DECIMAL(10,2) NOT NULL, product_name VARCHAR(100) NOT NULL, customer_name VARCHAR(100) NOT NULL, order_date DATE NOT NULL, region VARCHAR(50) NOT NULL, status VARCHAR(20) NOT NULL, PRIMARY KEY (id,year) ) PARTITION BY RANGE (year) ( PARTITION p2020 VALUES LESS THAN (2021), PARTITION p2021 VALUES LESS THAN (2022), PARTITION p2022 VALUES LESS THAN (2023), PARTITION p2023 VALUES LESS THAN (2024) ); -- Insert test data INSERT INTO sales (year, amount, product_name, customer_name, order_date, region, status) VALUES (2020, 100.00, 'Product A', 'Customer 1', '2020-01-01', 'Region 1', 'Completed'), (2020, 200.00, 'Product B', 'Customer 2', '2020-02-01', 'Region 2', 'Pending'), (2021, 150.00, 'Product C', 'Customer 3', '2021-03-01', 'Region 3', 'Completed'), (2021, 300.00, 'Product D', 'Customer 4', '2021-04-01', 'Region 4', 'Pending'), (2022, 250.00, 'Product E', 'Customer 5', '2022-05-01', 'Region 5', 'Completed'), (2022, 400.00, 'Product F', 'Customer 6', '2022-06-01', 'Region 6', 'Pending'), (2023, 350.00, 'Product G', 'Customer 7', '2023-07-01', 'Region 7', 'Completed'), (2023, 500.00, 'Product H', 'Customer 8', '2023-08-01', 'Region 8', 'Pending'), (2020, 450.00, 'Product I', 'Customer 9', '2020-09-01', 'Region 1', 'Completed'), (2021, 600.00, 'Product J', 'Customer 10', '2021-10-01', 'Region 2', 'Pending'); -
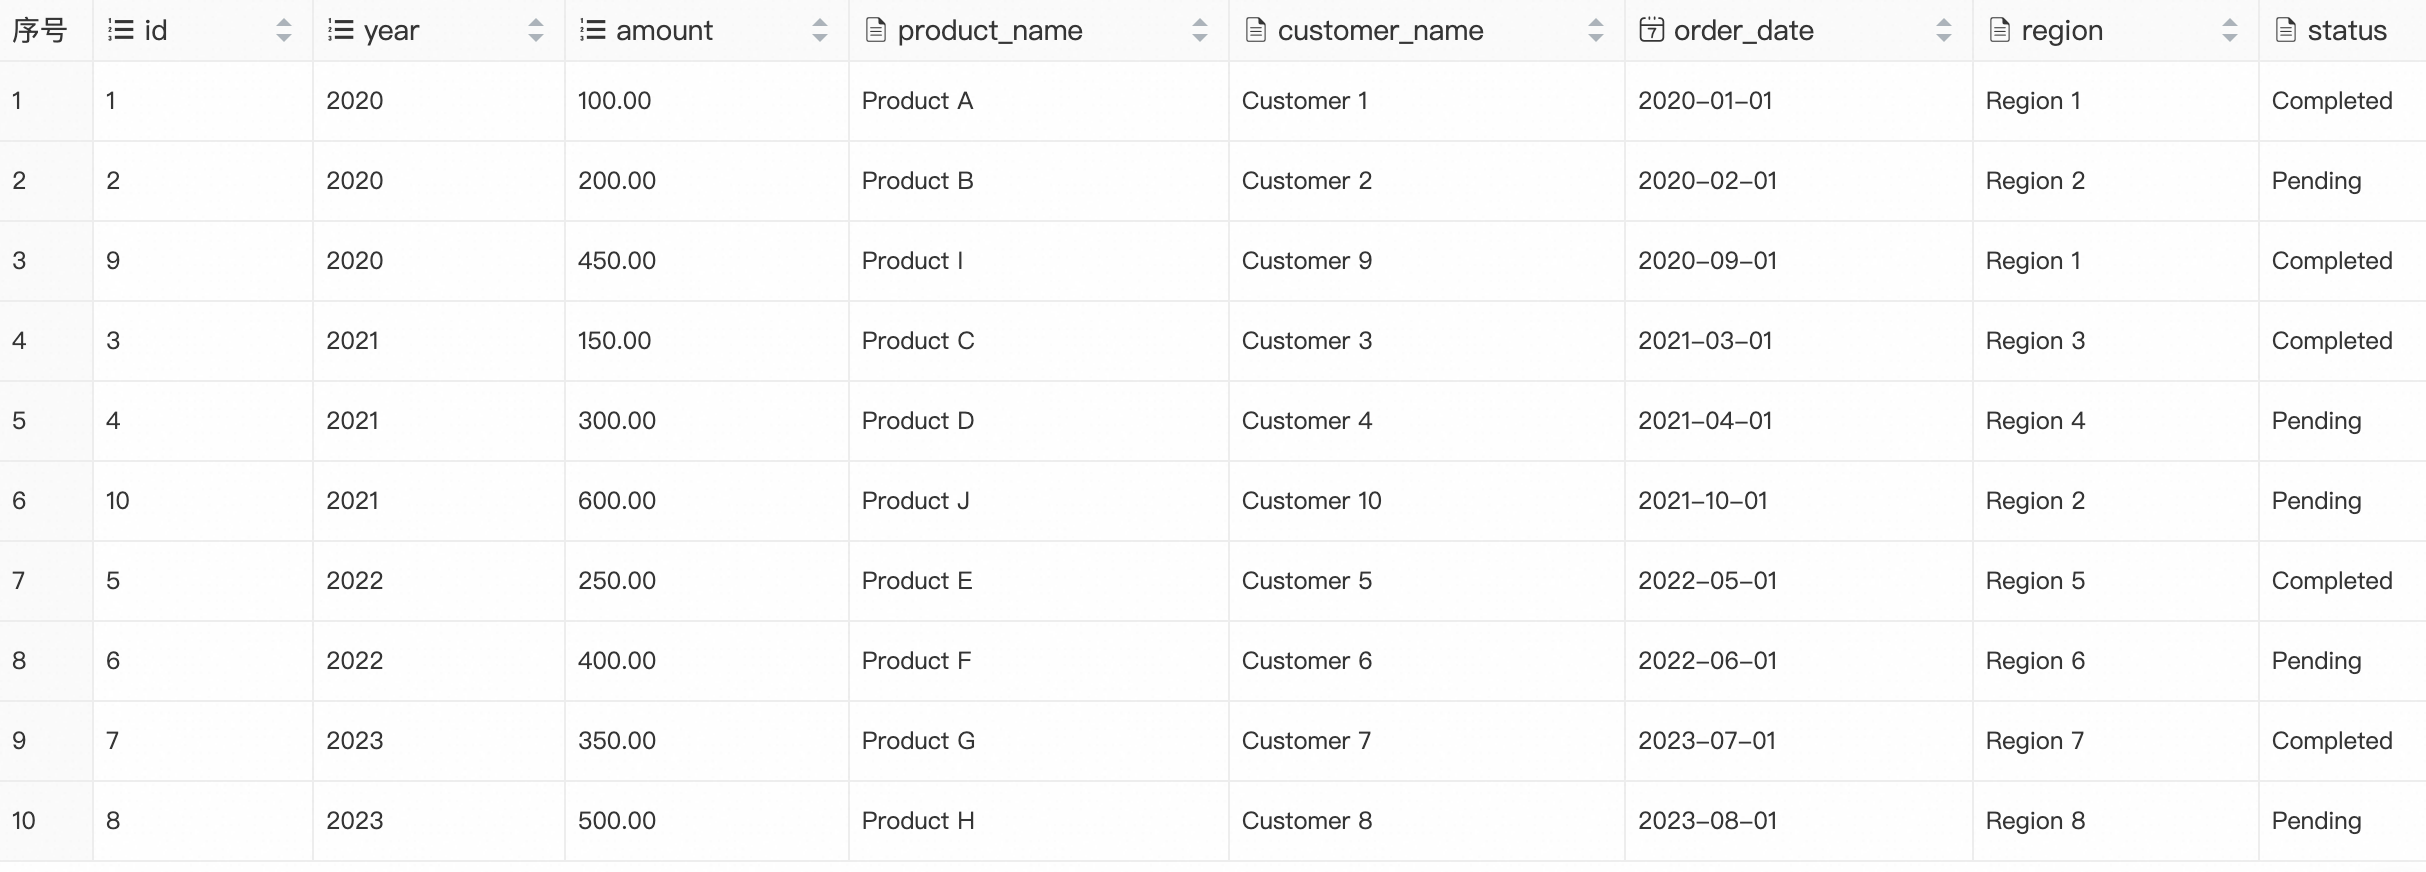
Verify the data:
SELECT * FROM sales;Expected result:
Step 3: Prepare a DLF metadatabase
-
Log on to the OSS console and create a bucket. This example uses
mc-lakehouse-dlf-oss. -
Inside the bucket, create a folder named
flink_paimon. -
Log on to the DLF console and select a region.Data Lake Formation (DLF) console
-
In the left navigation pane, choose Metadata > Metadata.
-
On the Metadata page, click the Database tab.
-
Under the default Catalog List, click Create Database and configure the following parameters:
Parameter Required Description Catalog Required Use default for this example. Database Name Required A custom name: 1–128 characters, starts with a letter, letters/digits/underscores only. Example: db_dlf_oss.Database Description Optional A custom description. Select Path Required The OSS storage location. Example: oss://mc-lakehouse-dlf-oss/flink_paimon/.
Step 4: Create Paimon and MySQL catalogs using Flink
Create a Paimon catalog
-
Log on to the Flink console and select a region.Flink consoleFlink console
-
Click the target workspace name. In the left navigation pane, select Catalogs.
-
On the Catalog List page, click Create Catalog. In the Create Catalog dialog, select Apache Paimon, click Next, and configure the following parameters:
Basic parameters
Parameter Required Description metastore Required Select dlf.catalog name Required Select the DLF catalog version to associate. Select v1.0.warehouse Required The OSS directory for the data warehouse. Example: oss://mc-lakehouse-dlf-oss/flink_paimon/.OSS credentials
Parameter Required Description fs.oss.endpoint Required OSS endpoint for your region. Example for China (Hangzhou): oss-cn-hangzhou-internal.aliyuncs.com.fs.oss.accessKeyId Required AccessKey ID for OSS access. fs.oss.accessKeySecret Required AccessKey secret for OSS access. DLF credentials
Parameter Required Description dlf.catalog.accessKeyId Required AccessKey ID for DLF access. dlf.catalog.accessKeySecret Required AccessKey secret for DLF access.
Create a MySQL catalog
Before creating the MySQL catalog, add the Flink workspace's CIDR block to the RDS MySQL whitelist so Flink can connect to the database.
-
Log on to the Flink console and select a region.Flink consoleFlink console
-
In the Actions column for the target workspace, click Details. In the Workspace Details panel, copy the CIDR Block of the vSwitch.
-
Log on to the RDS console. Click the target instance's Instance ID/Name.
-
In the left navigation pane, click Whitelist and SecGroup. On the Whitelist Settings tab, click Modify.
-
In the Edit Whitelist dialog, add the copied CIDR block to the IP Addresses field and click OK.
-
Return to the Flink console. Click the target workspace name, then select Catalogs in the left navigation pane.
-
On the Catalog List page, click Create Catalog. In the Create Catalog dialog, select MySQL, click Next, and configure the following parameters:
Parameter Required Description catalog name Required A custom name for the MySQL catalog. Example: mysql-catalog.hostname Required IP address or hostname of the MySQL database. Find it in the ApsaraDB RDS for MySQL console under Database Connection on the instance details page. For cross-VPC or public network access, see Network connectivity. port Default Port to connect to the server. Default: 3306.default database Required Default database name. Example: mysql_paimon.username Required Username for the MySQL database. Find it under Accounts on the instance details page in the ApsaraDB RDS for MySQL console. password Required Password for the MySQL database. Find it under Accounts on the instance details page.
Step 5: Use Flink to read MySQL data, write to Paimon, and sync metadata to DLF
-
Log on to the Flink console and select a region.
-
Click the target workspace name. In the left navigation pane, select Development > ETL.
-
On the Drafts tab, click
 to create a new folder.
 -
Right-click the folder and select New Blank Stream Draft. In the New Draft dialog, enter a Name and select an Engine Version.
-
Enter the following CREATE TABLE AS (CTAS) statement. Replace the placeholder names with your actual configuration:
CREATE TABLE IF NOT EXISTS `<dlf_meta_db_name>`.`<oss_bucket_name>`.`sales` AS TABLE `<mysql_catalog_name>`.`<rds_mysql_name>`.`sales`; -- Using the names from this tutorial: CREATE TABLE IF NOT EXISTS `db_dlf_oss`.`flink_paimon`.`sales` AS TABLE `mysql-catalog`.`mysql_paimon`.`sales`; -
(Optional) Click Validate in the upper-right corner to check the SQL syntax.
-
Click Deploy. In the Deploy draft dialog, specify the Comment, Label, and Deployment Target, then click Confirm.
-
Click the target workspace name. In the left navigation pane, select O&M > Deployments.
-
On the Deployments page, click the target job name to open its Configuration page.
-
Click Start in the upper-right corner, select Initial Mode, and click Start.
-
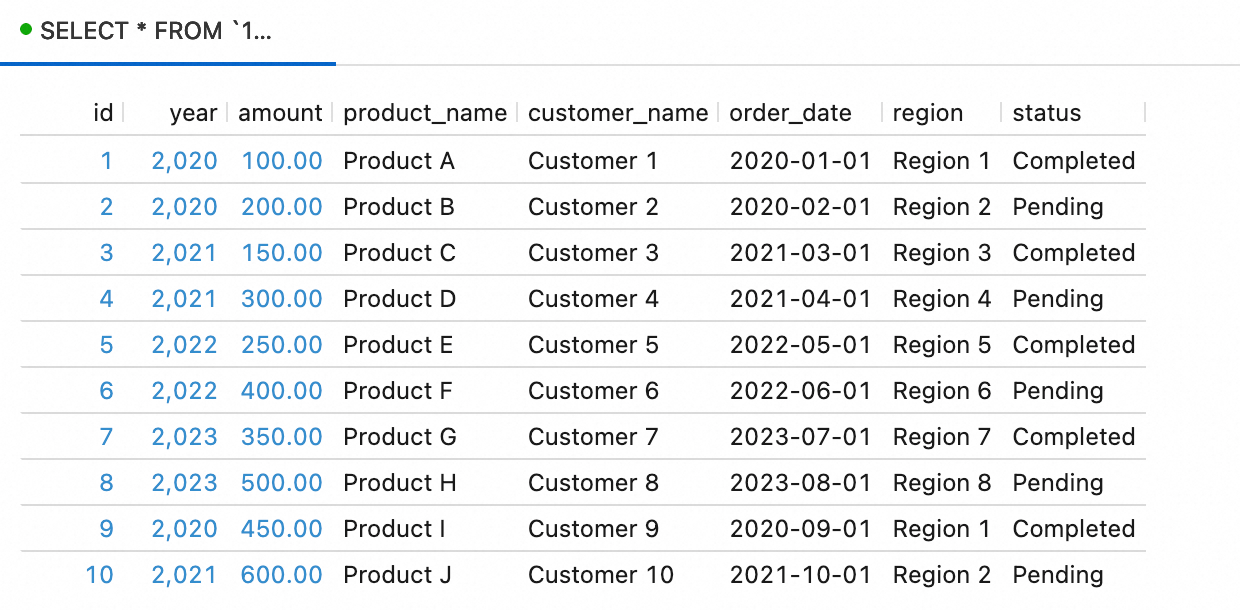
Verify that the data was written to Paimon. In the left navigation pane, select Development > Scripts. On the New Script tab, click
 to create a query script and run:
SELECT * FROM `<paimon_catalog_name>`.`flink_paimon`.`sales`;Expected result:
-
In the OSS console, navigate to the
mc-lakehouse-dlf-oss/flink_paimon/directory and confirm asales/folder has been created: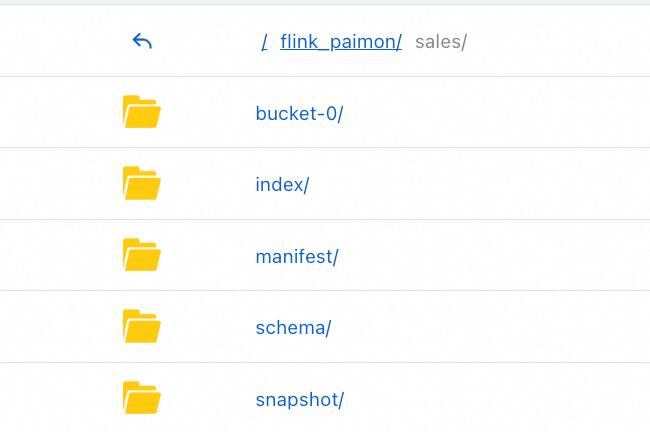
-
Log on to the DLF console and select a region. In the left navigation pane, choose Metadata > Metadata. Click the
flink_paimondatabase name to confirm thesalestable is registered:
Step 6: Create a DLF+OSS external data source in MaxCompute
-
Log on to the MaxCompute console and select a region.MaxCompute console
-
In the left navigation pane, choose Manage Configurations > External Data Source.
-
On the External Data Source page, click Create External Data Source.
-
Configure the following parameters:
Connection parameters
Parameter Required Description External Data Source Type Required Select DLF+OSS. External Data Source Name Required A custom name: starts with a letter, lowercase letters/underscores/digits only, max 128 characters. Example: mysql_paimon_dlf.Description Optional A description as needed. Region Required Defaults to the current region. Access credentials
Parameter Required Description DLF Endpoint Required Defaults to the DLF endpoint of the current region. OSS Endpoint Required Defaults to the OSS endpoint of the current region. RoleARN Required The ARN of a RAM role with permissions to access both DLF and OSS. To find the ARN: log on to the RAM console, choose Identities > Roles, and find the ARN in the Basic Information section. Example: acs:ram::124****:role/aliyunodpsdefaultrole.Foreign Server Supplemental Properties Optional Additional properties for the external data source. For supported parameters, see the official documentation. -
Click OK.
-
On the External Data Source page, find the data source you created and click Details in the Actions column to verify the configuration.
Step 7: Create an external schema
Connect to MaxCompute and run the following command. The SET odps.namespace.schema=true statement enables schema-level namespace access, which is required for external schemas.
SET odps.namespace.schema=true;

CREATE EXTERNAL SCHEMA IF NOT EXISTS <external_schema>
WITH <external_data_source>
ON '<dlf_data_catalogue>.dlf_database';
Replace the following placeholders:
| Placeholder | Description | Example |
|---|---|---|
<external_schema> |
Name of the external schema | es_mc_dlf_oss_paimon |
<external_data_source> |
Name of the external data source you created. The external schema and external data source must be in the same region. | mysql_paimon_dlf |
<dlf_data_catalogue> |
ID of the DLF data catalog. See Create a data catalog. | db_dlf_oss |
dlf_database |
Name of the database in the DLF data catalog. See Databases, tables, and functions. | flink_paimon |
Step 8: Query OSS data with SQL
Run SET odps.namespace.schema=true before each query to enable schema-level access. Then switch to the external schema and run your queries.
-
List the tables in the external schema:
SET odps.namespace.schema=true; use schema es_mc_dlf_oss_paimon; SHOW tables IN es_mc_dlf_oss_paimon; -- Expected result: ALIYUN$xxx:sales OK -
Query data from the
salestable:SET odps.namespace.schema=true; SELECT * FROM <maxcompute_project_name>.es_mc_dlf_oss_paimon.sales;Expected result:
+------------+------------+------------+--------------+---------------+------------+------------+------------+
| id         | year       | amount     | product_name | customer_name | order_date | region     | status     |
+------------+------------+------------+--------------+---------------+------------+------------+------------+
| 1          | 2020       | 100        | Product A    | Customer 1    | 2020-01-01 | Region 1   | Completed  |
| 2          | 2020       | 200        | Product B    | Customer 2    | 2020-02-01 | Region 2   | Pending    |
| 3          | 2021       | 150        | Product C    | Customer 3    | 2021-03-01 | Region 3   | Completed  |
| 4          | 2021       | 300        | Product D    | Customer 4    | 2021-04-01 | Region 4   | Pending    |
| 5          | 2022       | 250        | Product E    | Customer 5    | 2022-05-01 | Region 5   | Completed  |
| 6          | 2022       | 400        | Product F    | Customer 6    | 2022-06-01 | Region 6   | Pending    |
| 7          | 2023       | 350        | Product G    | Customer 7    | 2023-07-01 | Region 7   | Completed  |
| 8          | 2023       | 500        | Product H    | Customer 8    | 2023-08-01 | Region 8   | Pending    |
| 9          | 2020       | 450        | Product I    | Customer 9    | 2020-09-01 | Region 1   | Completed  |
| 10         | 2021       | 600        | Product J    | Customer 10   | 2021-10-01 | Region 2   | Pending    |
+------------+------------+------------+--------------+---------------+------------+------------+------------+