This topic walks you through the core workflow of Lingma Enterprise Dedicated Edition to help you get started.
Step 1: Create an enterprise and purchase Lingma
-
Log on to the console with an Alibaba Cloud account or an authorized Resource Access Management (RAM) user.
-
In the left-side navigation pane, choose . Then, click Create Instance.
For more information, see Create an Enterprise Dedicated instance.
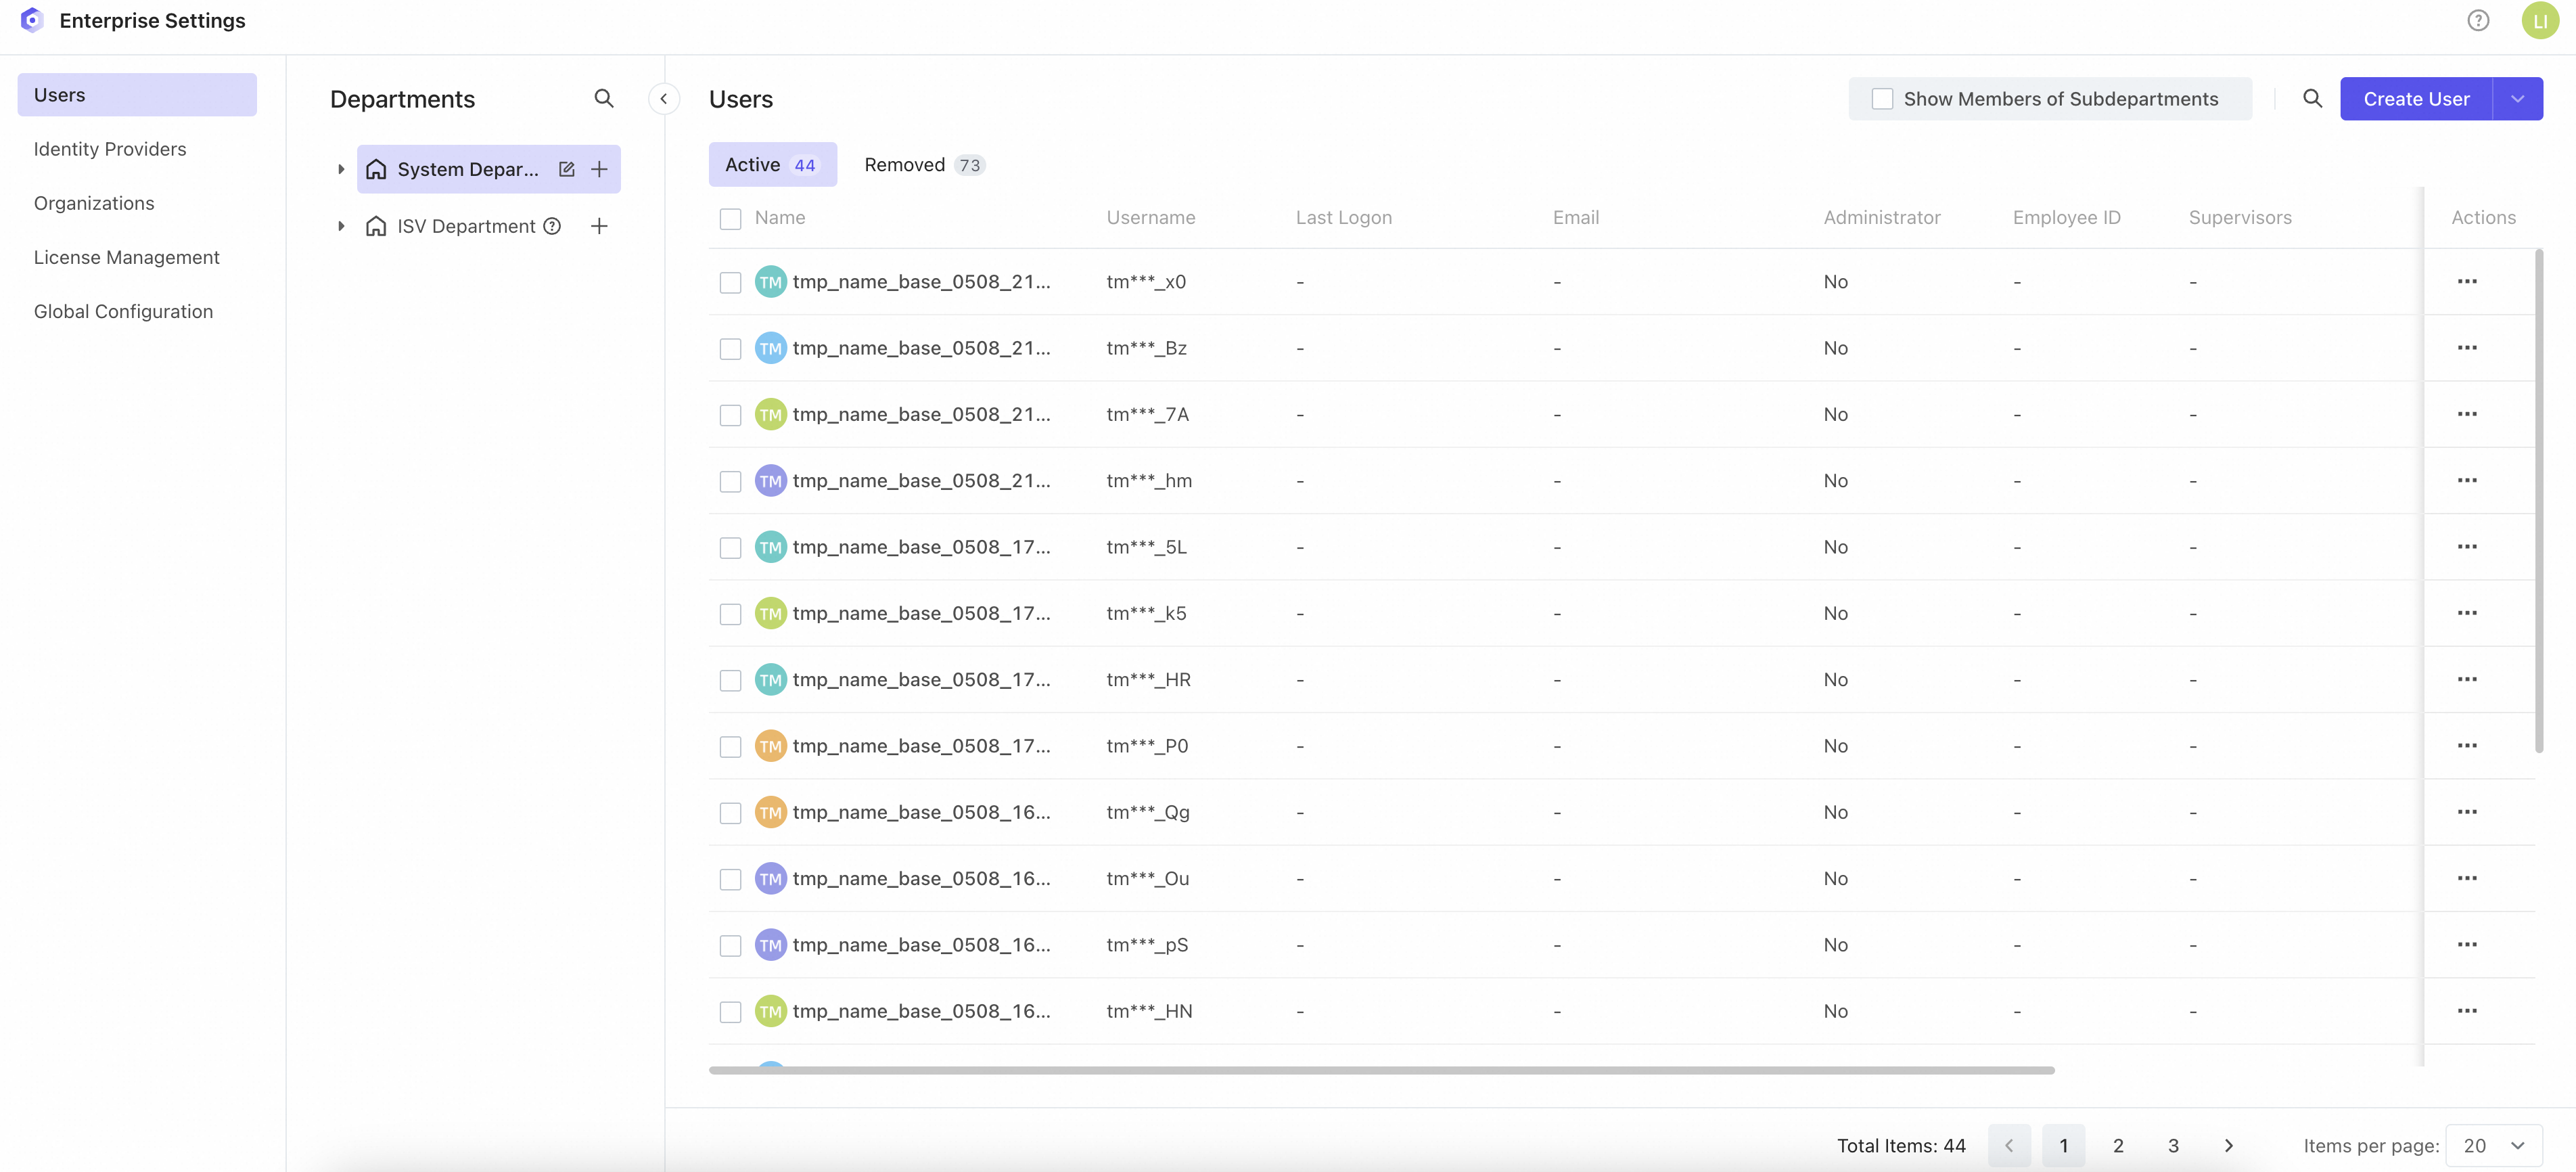
Step 2: Manage users and departments
Once the Enterprise Dedicated Edition is set up, a default initial enterprise administrator account is automatically created. You can use this account to access the enterprise management console. Here are some of the actions you can perform:
-
Manage users, organizations, and licenses.
-
Manage the information of all organizations within your enterprise instance.
-
Set up integrations with third-party user identity providers, such as customer-owned user systems.
For more information, see User and department management and Identity providers.
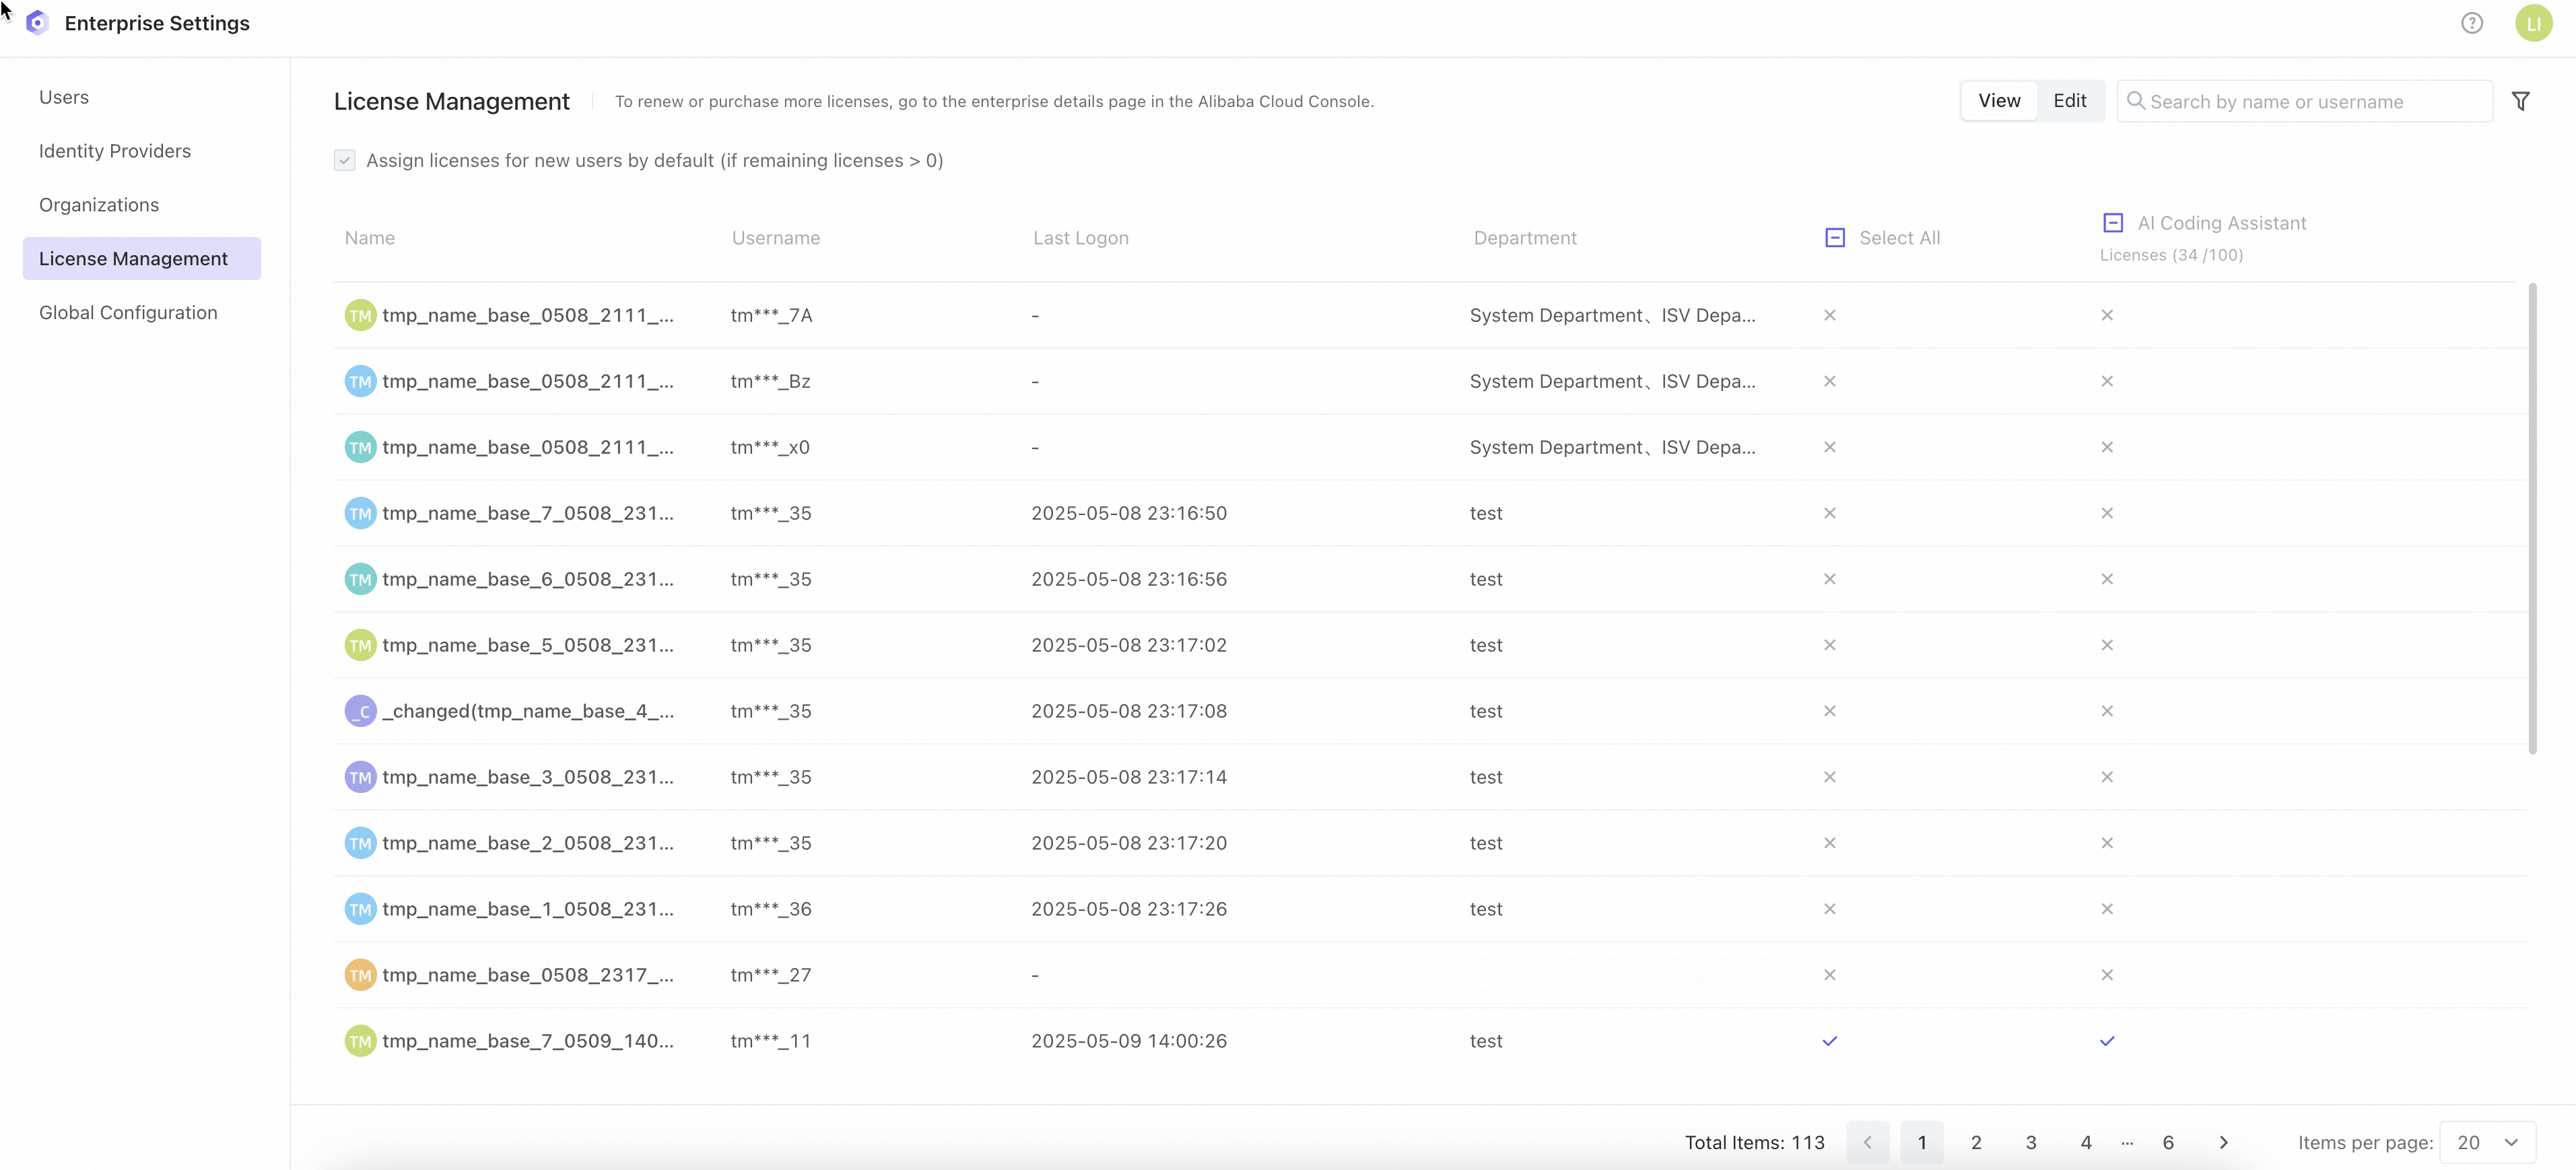
Step 3: Authorize a license
Enterprise management supports multi-organization management, allowing you to:
-
Create multiple organizations to isolate and manage usage permissions and statistics for different organizations.
-
Select the scope of users to be synchronized when you create an organization.
To authorize a member, proceed as follows:
-
Assign licenses:
-
Go to the Enterprise Settings page.
-
Assign licenses to the users that you select.
-
-
Handle multiple organizations for a user who belongs to multiple organizations:
-
Only perform a single-site license authorization once. The authorization will take effect for all organizations.
-
At logon, users can select their developer identity from the organization to proceed.
-
For more information about how to authorize a user to a license, see Manage licenses.
Step 4: Create an organization and synchronize users
To manage permissions and statistics separately, follow the steps below:
-
Go to the Enterprise Settings page.
-
Select user groups for synchronization.
-
During the creation process, specify user groups that must be included in this organization.
-

For more information about how to manage an organization, see Manage organizations.
Step 5: Grant developer permissions
Once your organization is created, the selected user groups are automatically synchronized. To grant developer permissions for these user groups to access the Lingma console, follow the steps below:
-
Access an organization under Enterprise Settings > Organizations.

-
Manage developer permissions
-
Go to the Authorization page.
-
Select Add Developers.

-
Note: Enable auto-authorize for automatic synchronization. For more information, see Manage authorization.
Step 6: Log on to Lingma
-
Download the latest version of the Lingma plugin from your IDE plugin marketplace. Or download Lingma IDE. For more information, see Installation guide.
-
Set up the domain URL of Enterprise Dedicated Edition.
-
Open Lingma and click Log in with Enterprise Dedicated URL in the chat box. If your enterprise uses Single Sign-On (SSO), you are automatically redirected to the SSO logon page of your enterprise.
-
You can see the successful logon page if you have the necessary permissions.
You can now start using Lingma in your IDE. For more information, see Log on to Enterprise Dedicated Edition.
Log off from Lingma
To log off, click the drop-down bar next to your username and select Log out.