This topic describes how to connect a GB/T 32960 vehicle-mounted device to IoT Platform and enable communication by using an IoT Platform gateway. In this example, a Github open source project is used.
Prerequisites
An Exclusive Enterprise Edition instance is purchased.
In this example, an Exclusive Enterprise Edition instance is purchased in the China (Shanghai) region. For more information, see Purchase Enterprise Edition instances.
A custom certificate is available.
In this example, the custom certificate contains the root certificate file named
root-ca.crt, the server-side private key file namedserver.key, and the server-side certificate file namedserver.crt.You can use OpenSSL to generate a custom certificate. For more information about how to generate the certificate, see Generate a custom certificate.
Background information
IoT Platform provides GB/T 32960 gateways and allows you to connect devices to IoT Platform over TCP and TLS. We recommend that you do not use TCP because TCP does not provide strong security. If you connect devices to IoT Platform over TLS, you can enable server-side one-way verification, Online Certificate Status Protocol (OCSP) for devices, two-way secure connections between devices and servers, and other features.
In this example, one-party verification is performed on a device and the device is connected to IoT Platform over TLS by using a GB/T 32960 gateway
For more information about verification and communication between GB/T 32960 gateways and devices, see GB/T 32960 gateways.
Open source code that is used to implement a GB/T 32960 client is available on Github. For more information, see Github open source project.
Prepare an environment
In this example, the git command is used to download open source code and the patch command is used to apply patches. You must install the commands in your operating system and the operating system must support the commands.
In this example, Java is used to develop a program. A Java development environment that meets the following requirements is prepared:
Java Development Kit (JDK): JDK 8
Integrated development environment (IDE): IntelliJ IDEA Community Edition
Download open source code
In this example, the open source demo is simplified. You must apply a patch by downloading a patch file. Perform the following steps:
Run the following command to obtain the
tspdemo file:git clone https://github.com/zhengyishan/tsp.git cd tsp git checkout 5ef2907b7160f74cf4948b641d75fccd50c5dd6a -b demo_branchDownload a patch file named
gb32960.patchand save the file to the directory where thetspdemo file is stored.Run the following command to apply the patch to the
tspdemo file:patch -p1 < gb32960.patch
Create a gateway and a device
Log on to the IoT Platform console.
In the upper-left corner of the IoT Platform console, select the region where IoT Platform is activated.
On the Overview page, click the card of the Exclusive Enterprise Edition instance.
In the left-side navigation pane, choose Devices > Gateway. On the Gateway page, click Add Gateway.
In the Add Gateway dialog box, configure the parameters, as shown in the following figure. Set the Private Key of Server Certificate parameter to the content of the
server.keyfile and set the Server Certificate parameter to the content of the server.crt file.For more information about the parameters, see Create a gateway.
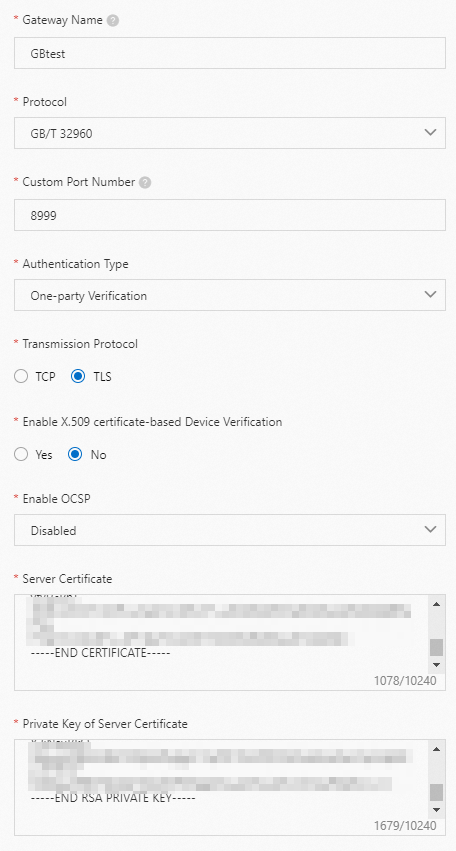
In the message that appears, click OK.
On the Gateway page, find the gateway that you created and copy the endpoint and port number in the Gateway URL column of the gateway.

Add a device to the gateway
In the left-side navigation pane, choose Devices > Products. Find the gateway that you created and click Manage Devices in the Actions column.
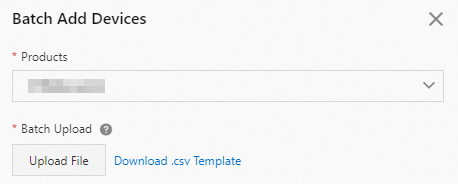
On the Devices page, click Batch Add.
In the Batch Add Devices dialog box, click Download .csv Template to download a template in the CSV format.
Specify the vehicle identification number (VIN) of a device in the template. Example: device10000000001. Then, save the template as a
.CSVfile.ImportantThe VIN cannot exceed 17 characters in length, and can contain letters and digits.
Go to the Batch Add Devices dialog box, click Upload File, upload the saved file to the IoT Platform console, and then click OK.
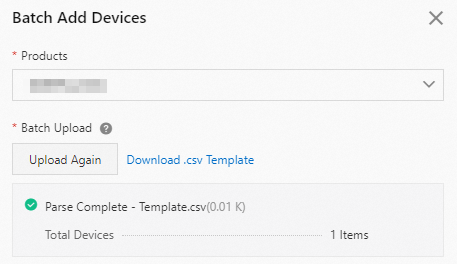
After the identity information of the device is imported, IoT Platform creates the device and uses the VIN that you specified as the DeviceName of the device. The device is displayed on the Devices page.

Develop a device-side program
After devices are created in the IoT Platform console, you must develop a device-side program to connect the devices to IoT Platform. In this example, Link SDK for Java is used to configure a device named device10000000001 and connect the device to IoT Platform.
Open IntelliJ IDEA and import the tsp demo file that you obtained.
Import the
root-ca.crtroot certificate file to the/dyy-gateway-tcu/src/main/resourcesdirectory of the project.Open the
/dyy-gateway-tcu/src/main/java/com/dyy/tsp/gateway/tcu/config/TcuProperties.javafile of the project and modify the corresponding device connection parameters.You must replace the values of the following parameters with actual values and configure other parameter based on your business requirements.
    // The endpoint of the gateway. Replace the endpoint with the endpoint of your gateway.
    private String gatewayHost = "iot-*******.igw.iothub.aliyuncs.com";

    // The port number of the gateway. Replace the port number with the port number of your gateway.
    private Integer gatewayPort = 8999;

    // The path where the root-ca.crt root certificate file is stored.
    private String CA_PATH = "dyy-gateway-tcu/src/main/resources/root-ca.crt";

    // The VIN. It cannot exceed 17 characters in length. Replace the VIN with the VIN of your vehicle-mounted device and create a device based on the VIN.
    private String vin = "device10000000001";
Parameter
Example
Description
gatewayHost
iot-*******.igw.iothub.aliyuncs.comThe endpoint of the GB/T 32960 gateway.
The value is the same as the domain name in the Gateway URL column of the gateway that you created.
gatewayPort
8999The custom port number of the gateway endpoint. Default value:
8999.The value is the same as the port number in the Gateway URL column of the gateway that you created.
CA_PATH
dyy-gateway-tcu/src/main/resources/root-ca.crtThe absolute path where the
root-ca.crtroot certificate file is stored in the project.vin
device10000000001The VIN. The value is the same as the VIN of the gateway device that you added.
The
/dyy-gateway-tcu/src/main/java/com/dyy/tsp/gateway/tcu/handler/BusinessHandler.javafile of the project includes the code that is used to implement vehicle logon, heartbeat submission, real-time data submission, and vehicle deregistration. You can modify the file to implement more features.
Run the device-side program
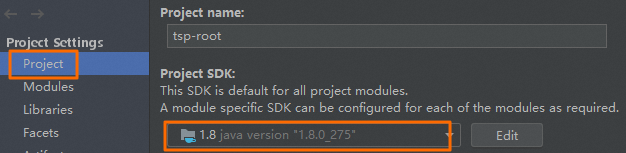
Open IntelliJ IDEA and choose File > Project Structure.
Select Project SDK 1.8 and click Apply.
Click OK.
Run the main program of the
TcuApplication.javafile.Two-way verification between the device and IoT Platform is successful. The device is connected.

View run logs
Device operation logs
After the device-side program runs, the program prints the details of upstream and downstream device packets.
The following code shows a packet that includes a device logon request. The third and fourth bytes (
01 fe) of the packet indicate a device logon request.+-------------------------------------------------+ | 0 1 2 3 4 5 6 7 8 9 a b c d e f | +--------+-------------------------------------------------+----------------+ |00000000| 23 23 01 fe 31 32 33 34 35 36 37 38 39 30 31 32 |##..device100000| |00000010| 33 34 35 36 37 01 00 1e 17 05 06 10 23 19 00 01 |00001.......#...| |00000020| 31 32 33 34 35 36 37 38 39 30 31 32 33 34 35 36 |1234567890123456| |00000030| 37 38 39 30 00 00 ee |7890... | +--------+-------------------------------------------------+----------------+The following code shows a packet that includes a response from IoT Platform to the device. The third and fourth bytes (
01 01) of the packet indicate that the device is logged on to IoT Platform.+-------------------------------------------------+ | 0 1 2 3 4 5 6 7 8 9 a b c d e f | +--------+-------------------------------------------------+----------------+ |00000000| 23 23 01 01 31 32 33 34 35 36 37 38 39 30 31 32 |##..device100000| |00000010| 33 34 35 36 37 01 00 1e 17 05 06 10 23 19 00 01 |00001.......#...| |00000020| 31 32 33 34 35 36 37 38 39 30 31 32 33 34 35 36 |1234567890123456| |00000030| 37 38 39 30 00 00 11 |7890... | +--------+-------------------------------------------------+----------------+The following code shows a packet that includes heartbeat submission data. The third and fourth bytes (
07 fe) of the packet indicate that an upstream heartbeat is submitted.+-------------------------------------------------+ | 0 1 2 3 4 5 6 7 8 9 a b c d e f | +--------+-------------------------------------------------+----------------+ |00000000| 23 23 07 01 31 32 33 34 35 36 37 38 39 30 31 32 |##..device100000| |00000010| 33 34 35 36 37 01 00 00 36 |00001...6 | +--------+-------------------------------------------------+----------------+The following code shows a packet that includes a response from IoT Platform to the heartbeat submission packet. The third and fourth bytes (
07 01) of the packet indicate a downstream heartbeat.+-------------------------------------------------+ | 0 1 2 3 4 5 6 7 8 9 a b c d e f | +--------+-------------------------------------------------+----------------+ |00000000| 23 23 07 01 31 32 33 34 35 36 37 38 39 30 31 32 |##..device100000| |00000010| 33 34 35 36 37 01 00 00 36 |00001...6 | +--------+-------------------------------------------------+----------------+The following code shows a packet that includes real-time data submitted by the device. The third and fourth bytes (
02 fe) of the packet indicate real-time data submission.+-------------------------------------------------+ | 0 1 2 3 4 5 6 7 8 9 a b c d e f | +--------+-------------------------------------------------+----------------+ |00000000| 23 23 02 fe 31 32 33 34 35 36 37 38 39 30 31 32 |##..device100000| |00000010| 33 34 35 36 37 01 00 14 17 05 06 10 23 23 08 01 |00001.......##..| |00000020| 01 00 05 00 06 00 04 00 07 01 00 0a df |............. | +--------+-------------------------------------------------+----------------+
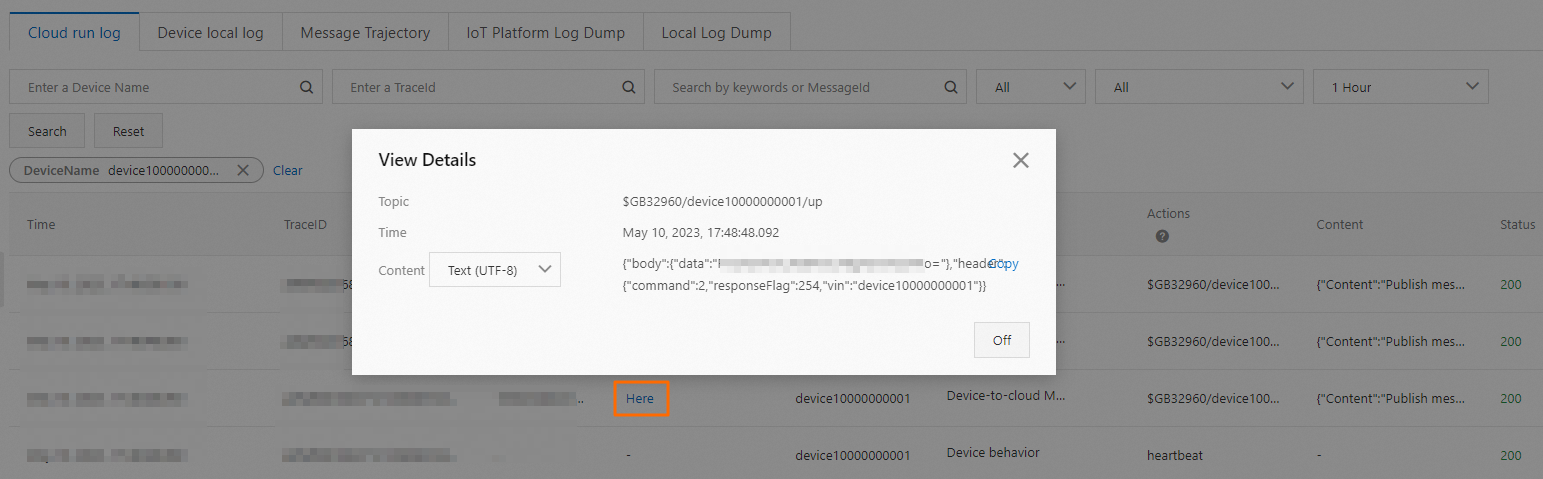
IoT Platform logs
Go to the Instance Details page of the instance that you want to manage in the IoT Platform console. In the left-side navigation pane, choose Maintenance > Device Log. On the Device Log page, view the data that is submitted by the device.
For more information, see IoT Platform logs.