Create, configure, and monitor MediaLive inputs to ensure secure and stable content transmission.
Overview
An input is a media source that MediaLive processes. You must create at least one input before you can use MediaLive.
-
Each input supports a primary and a secondary source.
-
Each input can be associated with only one channel.
-
Supported codecs: H.264 and H.265 for video, MP3 and AAC for audio.
Create an input
-
Log on to the IMS console and select a region in the upper-left corner.
-
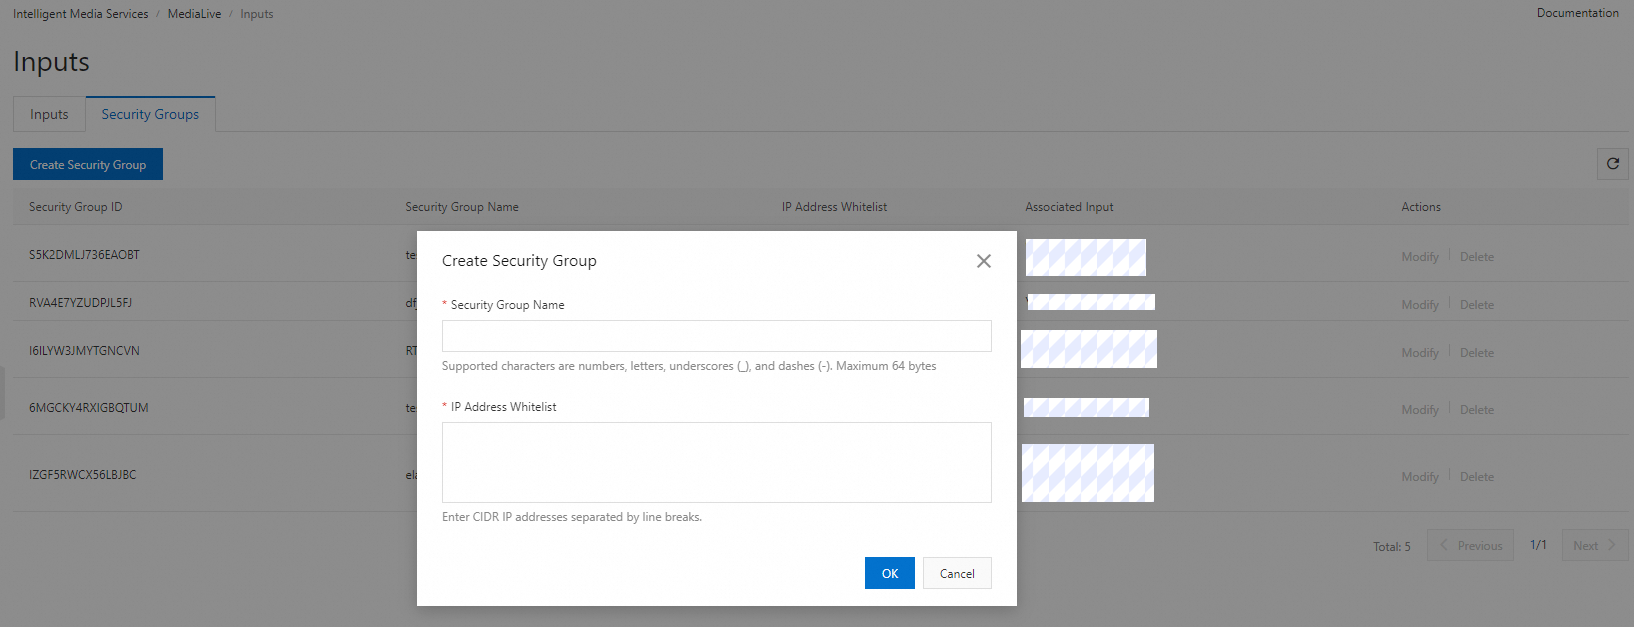
In the left-side navigation pane, choose MediaLive > Inputs. On the Security Groups tab, click Create Security Group and configure the following parameters.
Parameter
Description
Security Group Name
1 to 64 characters. Can contain digits, letters, underscores (_), and hyphens (-).
IP Address Whitelist
IP addresses allowed by this security group. Specify CIDR blocks, one per line.
NoteSecurity groups are required only for PUSH inputs.
-
Click OK.
-
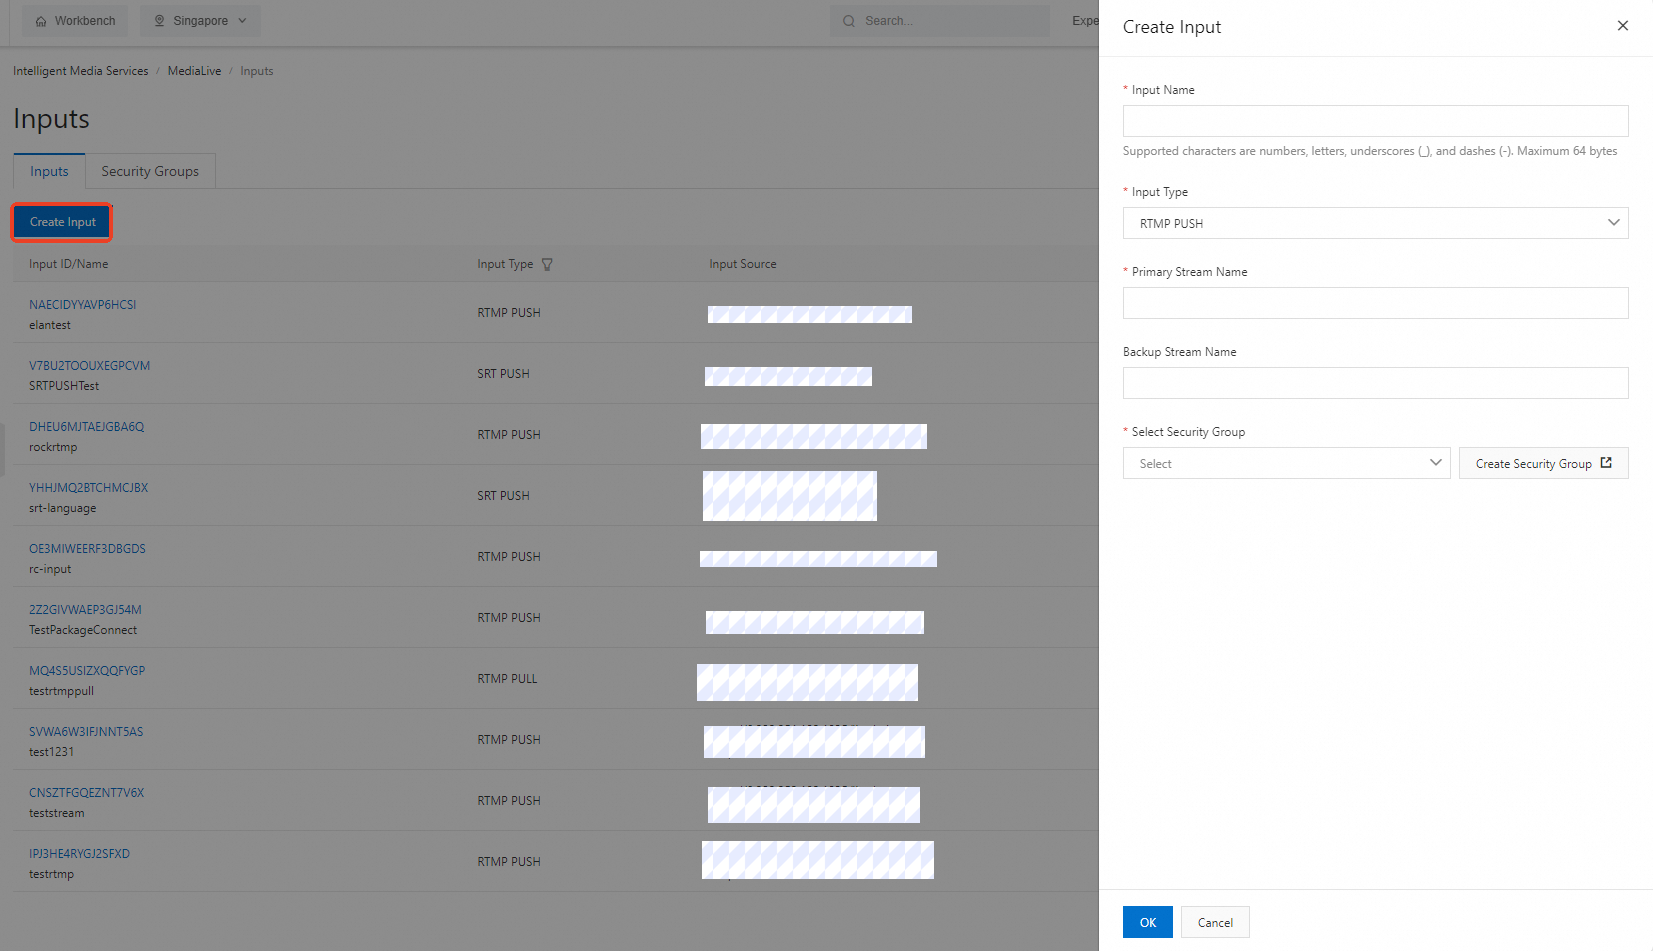
Click the Inputs tab and click Create Input. Configure the following parameters.
Parameter
Description
Input Name
1 to 64 characters. Can contain digits, letters, underscores (_), and hyphens (-).
Input Type
Valid values:
-
SRT-PUSH
-
SRT-PULL
-
RTMP-PUSH
-
RTMP-PULL
-
MediaConnect
Note-
For PUSH inputs, the system generates ingest URLs. Streams can be pushed only when the associated channel is running.
-
For PULL inputs, provide the source stream URL. MediaLive pulls content from this URL when data is available.
-
For MediaConnect inputs, specify the flow ID and its output.
PUSH inputs
Primary Stream Name
Required. The primary stream name.
Backup Stream Name
Optional. The backup stream name.
Select Security Group
Select the security group created in Step 2.
You can also click the following button to create one:
 Note
NoteDisassociate a security group from its input before you modify or delete it.
PULL inputs
Primary URL
Required. The primary ingest URL. Must start with rtmp:// or srt://.
Backup URL
Optional. The backup ingest URL. Must start with rtmp:// or srt://.
Inputs from MediaConnect
Primary Flow
Required. The flow ID and output name from MediaConnect. Find this information on the Flows page.
Secondary Flow
Optional. The flow ID and output name from MediaConnect. Find this information on the Flows page.
-
-
Click OK.
-
To modify or delete an input that is not associated with a channel, click Modify or Delete in the Actions column on the Inputs page.

View inputs
-
The Inputs tab on the Inputs page lists all inputs in reverse chronological order.
-
Each input shows its Input ID/Name, Input Type, Input Source, and Channel Association. You can edit or delete an input in the Actions column. For more information, see View inputs.
-
Click the refresh button on the right side of the Inputs tab to reload the list. Each page displays up to 10 inputs.

View security groups
-
The Security Groups tab on the Inputs page lists all security groups in reverse chronological order.
-
Each security group shows its Security Group ID, Security Group Name, IP Address Whitelist, and Associated Input. You can edit or delete a security group in the Actions column. For more information, see View security groups.
-
Click the refresh button on the right side of the Security Groups tab to reload the list. Each page displays up to 10 security groups.

