This topic describes how to use the OpenID Connect (OIDC) protocol to configure logon with Azure AD for the IDaaS EIAM user portal.
Step 1: Create an Azure AD application
Create a new application.
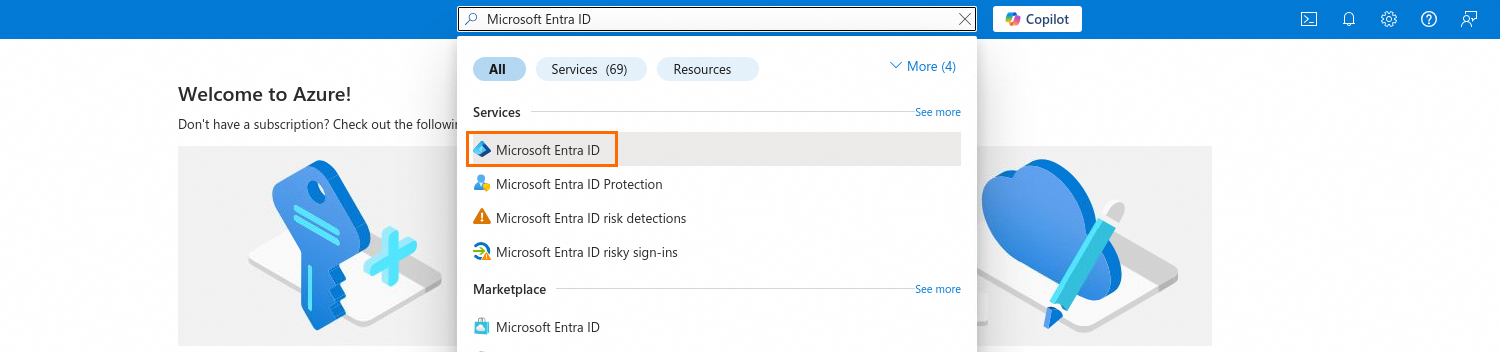
Go to the Azure Active Directory Management Center. In the top search box, enter "Microsoft Entra ID", and then click the search result under Services.
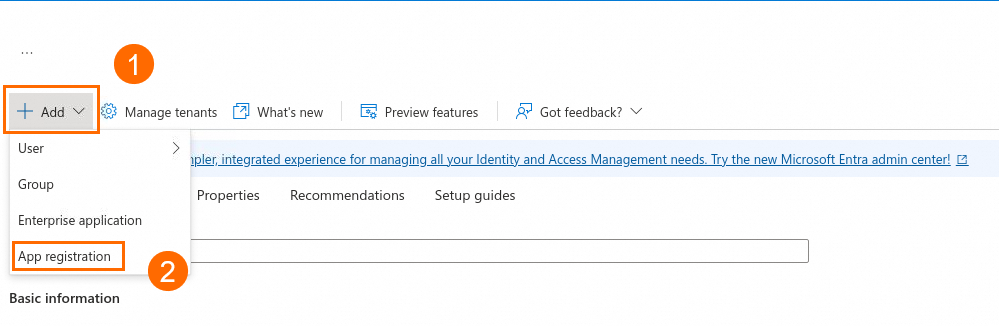
On the Overview page, click .
On the Register an application page, enter IDaaS as the application name. For Supported account types, select Any organizational directory. For Redirect URI, select Web. Click Register to create the application.
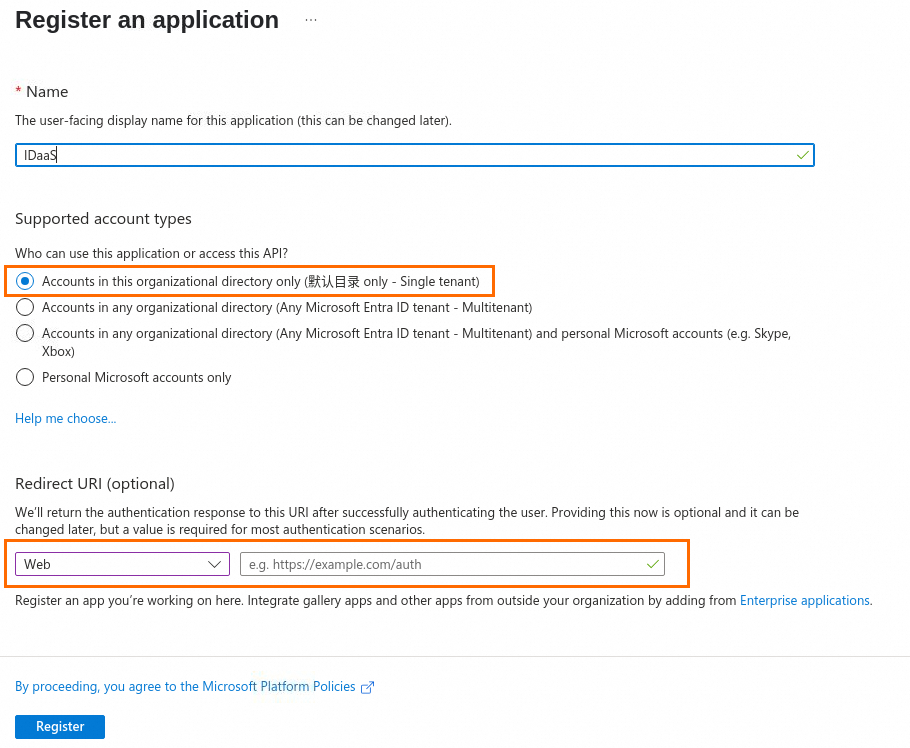
The Redirect URI is the IDaaS Redirect URI that you obtained in Step 3.

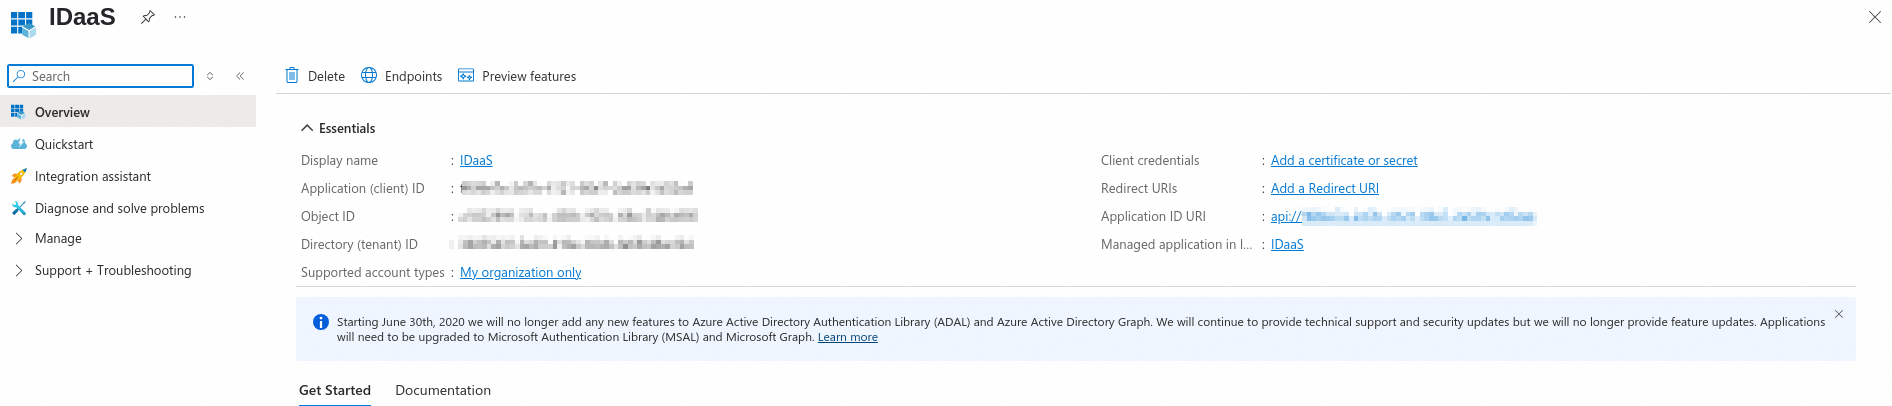
Complete the basic configuration for the new application.
After you create an application, its Overview page is displayed. You can find the application under .
 Note
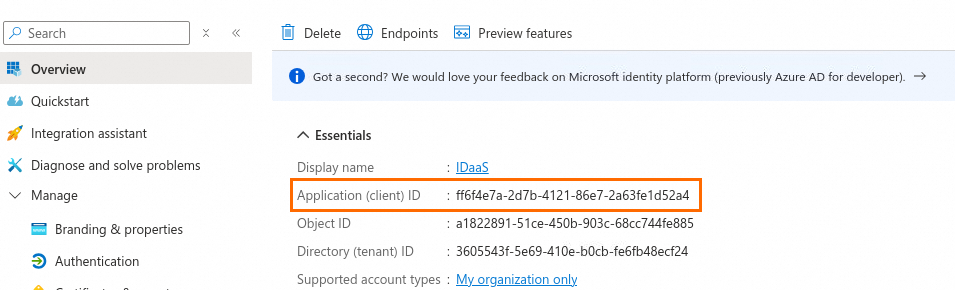
NoteThe Application (client) ID is the Client ID for the OIDC client configuration.
Add a client secret.
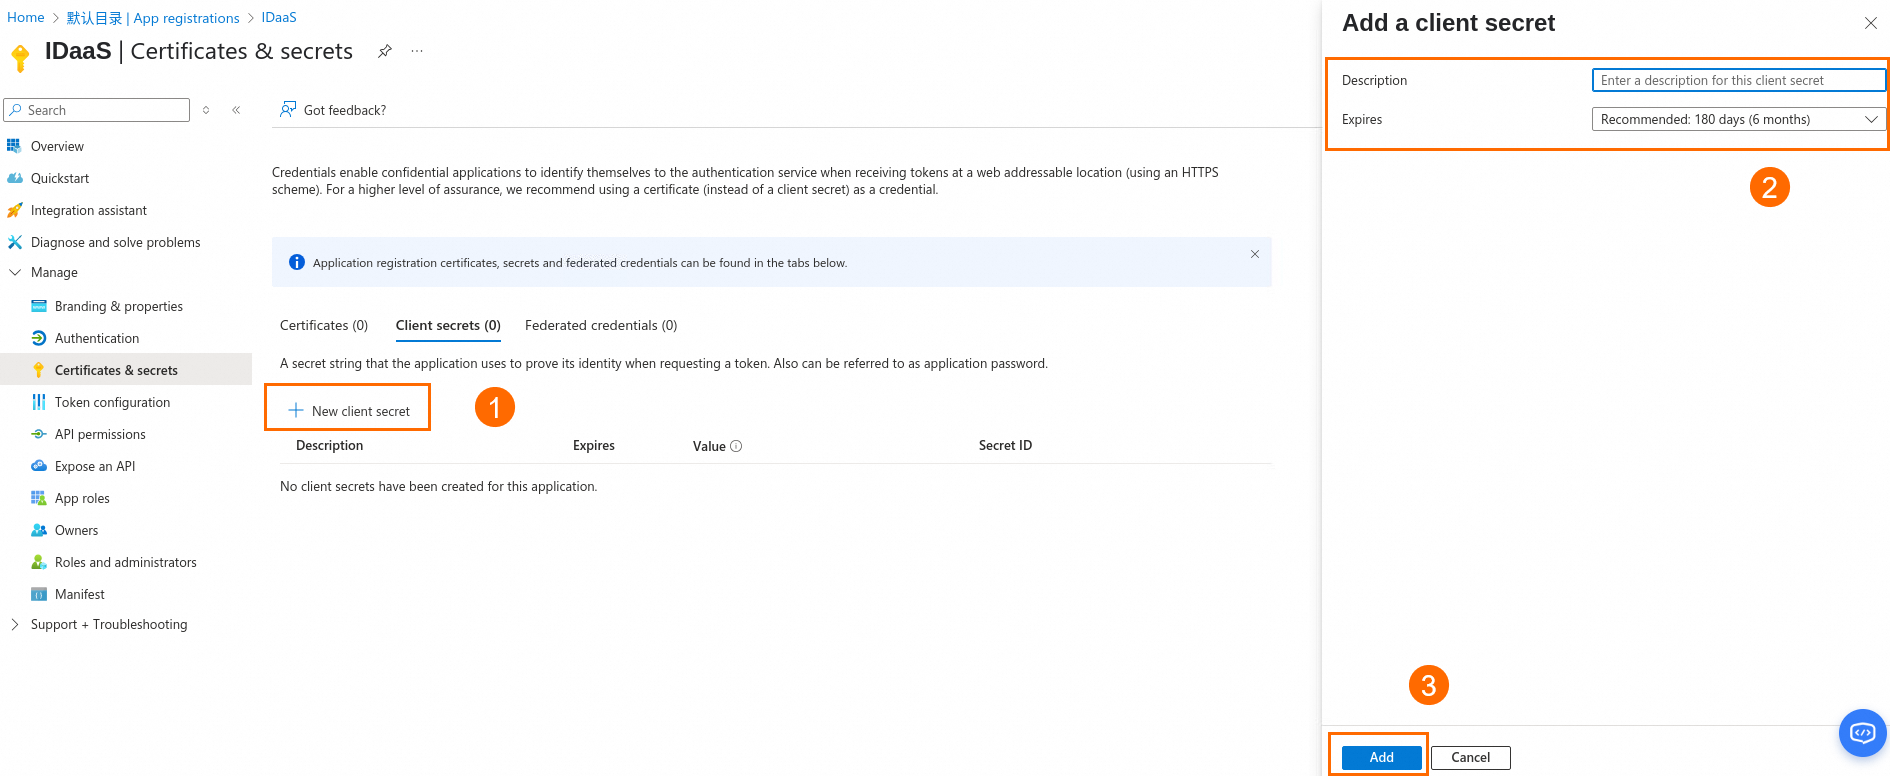 Note
NoteThe value of the secret is the Client Secret for the OIDC client configuration. Copy this value immediately because it will not be displayed again.
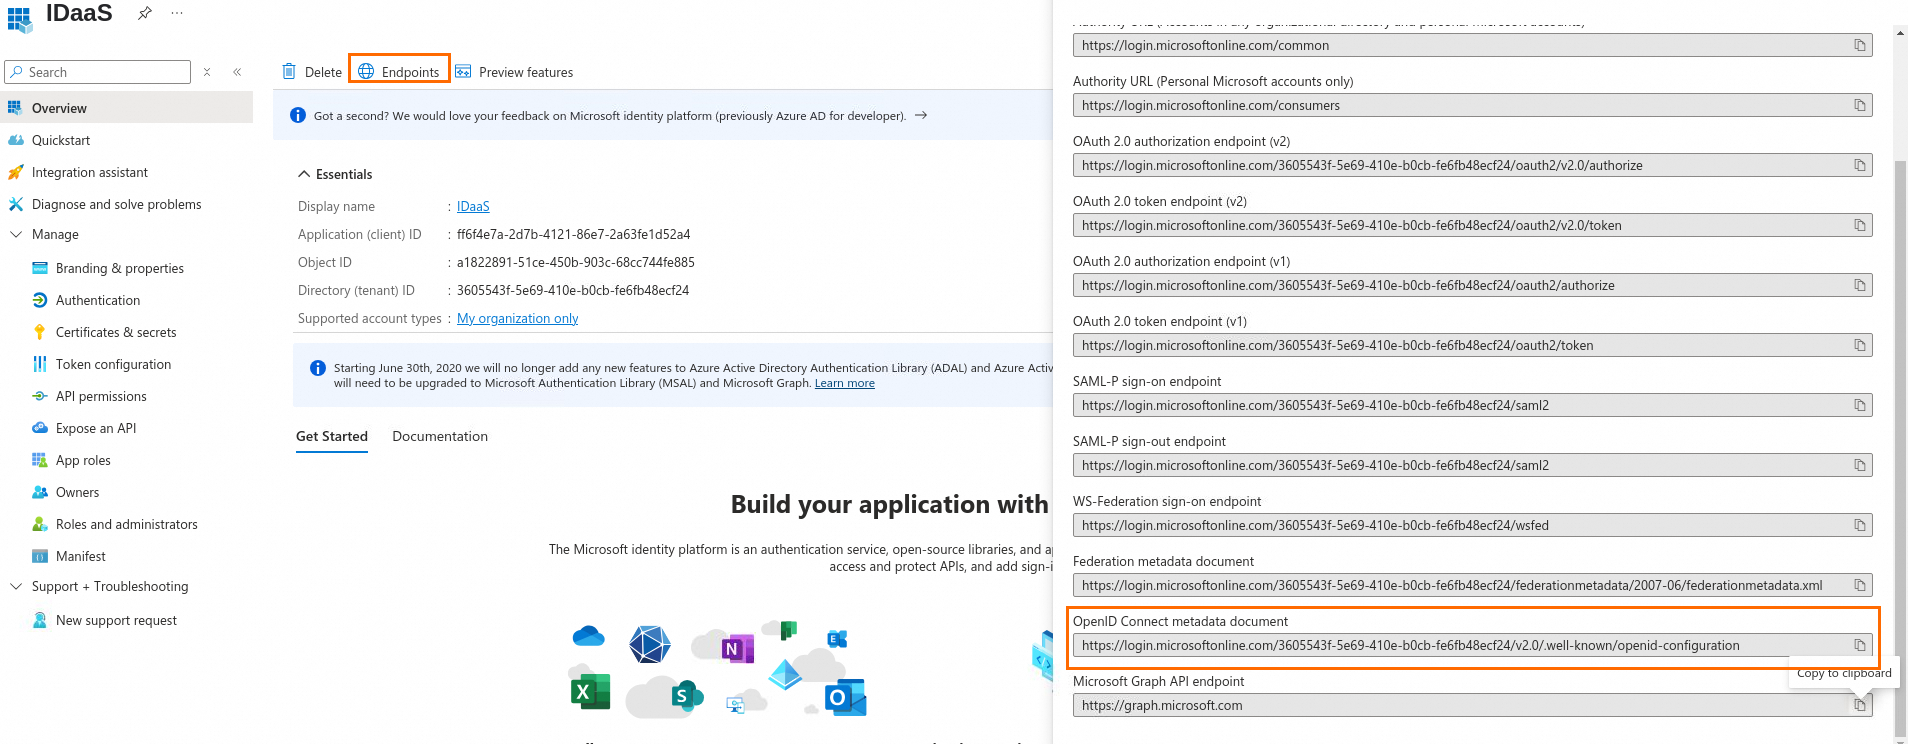
Obtain the OIDC protocol endpoint information for the application.
On the page, you can obtain the Issuer value for the OpenID Connect client configuration from the OpenID Connect metadata document at https://login.microsoftonline.com/common/v2.0.
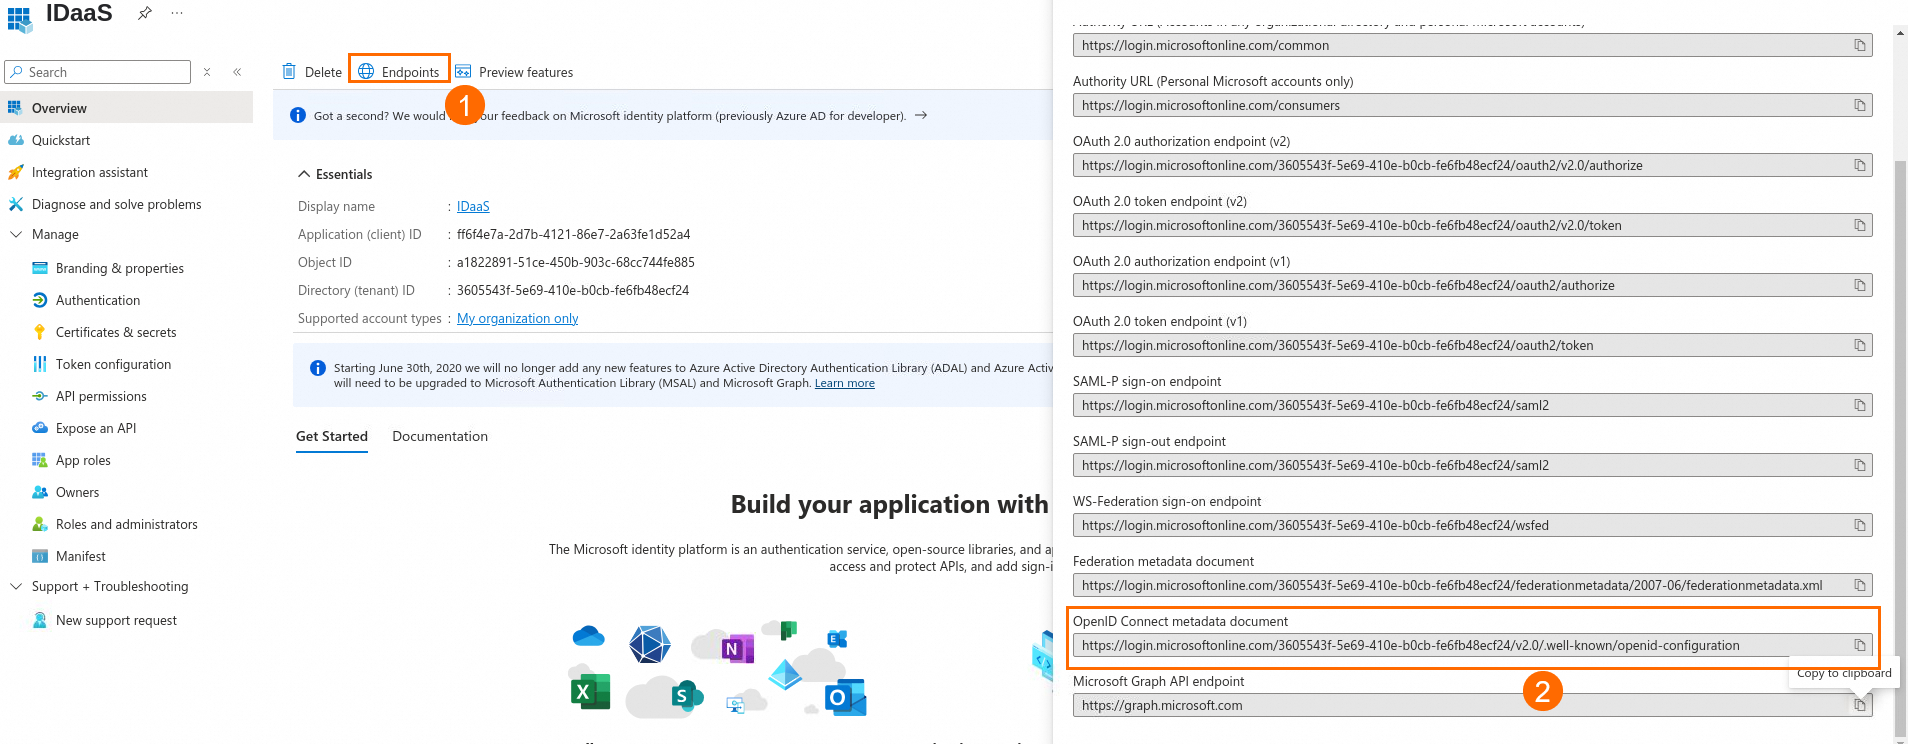
You have now obtained the three key pieces of configuration information.
Step 2: Start the connection process
Log on to the IDaaS console. Select the target IDaaS instance, and in the Actions column, click Manage.
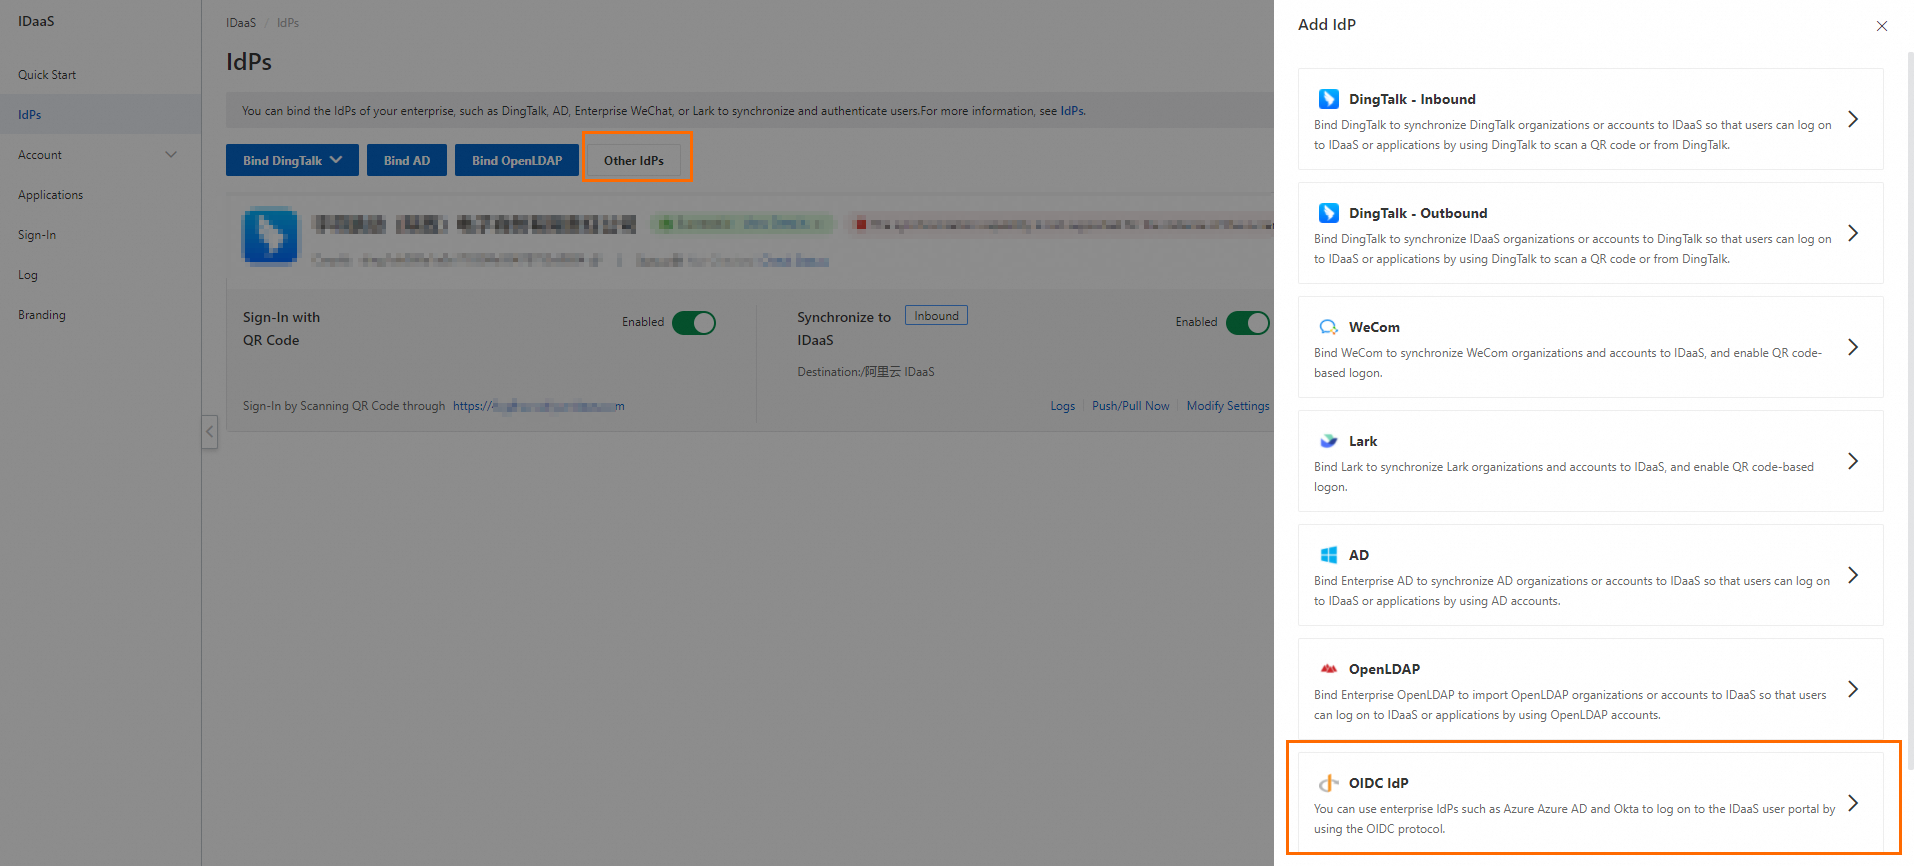
In the IdPs menu, click to begin the connection process.
Step 3: Connect the OIDC identity provider
Basic Information
Logon Method Icon: You can upload an icon to represent the identity provider on the logon page. The icon must be a PNG or JPG file and cannot exceed 1 MB. A 256 × 256 pixel square icon is recommended.
Display Name: Enter a Display Name. This name is used for the logon method and is displayed on the logon page. All new or modified names are automatically submitted for review. During the review, the previous name is displayed. The name is automatically updated after it is approved.
Network Configurations
Network Access Endpoint: Select Shared Network Access Endpoint or Dedicated Network Access Endpoint. For more information, see Network Endpoints.
Logon Settings
Grant Types: Select an OIDC authorization mode. The most common mode is Authorization Code. PKCE provides additional security verification and can be selected if required.
Authentication Method: Select an option.
client_secret_post: Attaches the key information to the POST request body when calling the authorization endpoint. This is a common option.
client_secret_basic: Passes the encoded key information in the Authorization header of the request.
Client ID: On the Overview tab of the application created in Step 1, copy the Application (client) ID and paste it into this field.
Client Secret: On the Overview tab for the application created in Step 1, click Client secrets. On the Certificates & secrets page, add a client secret and paste its value into the IDaaS form.

Scopes: Select the scopes that you require. For example, to retrieve the email field, select email.

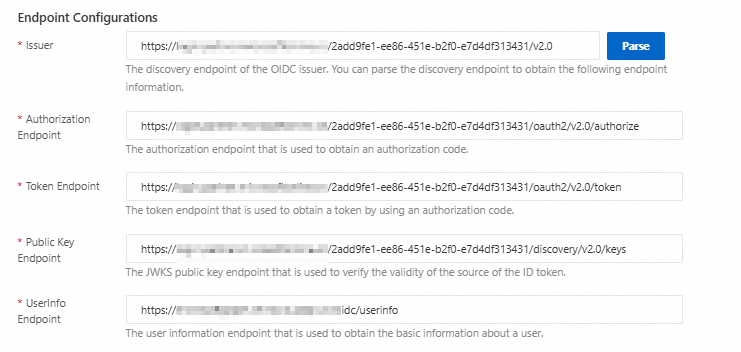
Endpoint Configurations
Issuer: As described in Step 1, navigate to to obtain the Issuer address. Copy the address and paste it into the IDaaS form.
In the IDaaS form, click Parse to automatically populate the endpoint information.
Confirm that the information is correct, and then click Next to proceed to the scenario selection flow. For more information, see Select a Scenario.
IDaaS Redirect URI: Enter this URI as the Redirect URI in Step 1 in the OIDC service.

Step 4: Verify the user logon flow
The following section describes the logon flow for an Azure AD user.
When a user accesses the IDaaS EIAM user portal, the logon method that you configured is displayed.
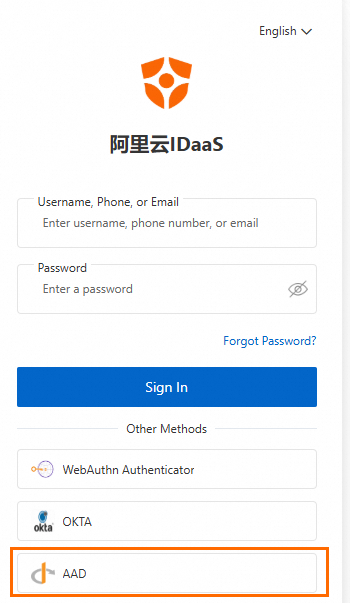
After the user clicks the logon method, they are directed to Azure AD for authentication. If the user is not logged on to their Azure AD account, a logon page appears. If they are already logged on, they are redirected to IDaaS.
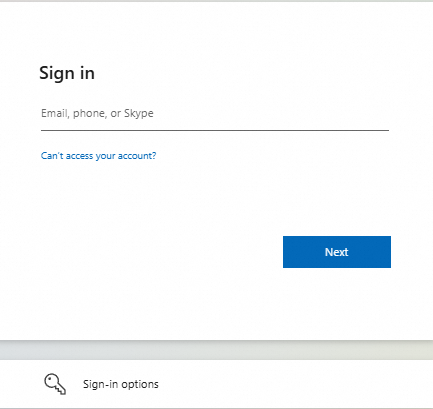
If the Azure AD account is already attached to an IDaaS account, the user logs on to the IDaaS account directly. If the account is not attached, the system first attempts to automatically attach it. If automatic attachment fails, the user must manually attach the account or have an account automatically created, as described in Select a Scenario.