Function Compute pipelines build container images and push them to Alibaba Cloud Container Registry. Two execution environments are available: a default (managed) environment for standard builds, and a custom environment for large base images, VPC-connected registries, or Container Registry Enterprise Edition.
Prerequisites
Before you begin, make sure that you have:
A Container Registry image repository (Personal Edition or Enterprise Edition)
(Private repositories) The AliyunFCServerlessDevsRole role with write permissions on Container Registry, such as the
AliyunContainerRegistryFullAccesspolicy. For details, see Attach a custom policy to a RAM user.(Container Registry Enterprise Edition) A custom execution environment configured with VPC access. See Use a custom execution environment.
(Image build tasks) The
component: fc build --use-dockerhook removed from yours.yamlfile to prevent duplicate image builds during deployment
Default execution environment limits
| Constraint | Limit |
|---|---|
| Disk size | 10 GB |
| Build timeout | 15 minutes |
| Fixed IP addresses or CIDR blocks | Not supported |
| IP address whitelist access | Not supported |
Code source and region requirements:
| Code source | Region | Site |
|---|---|---|
| GitHub | Singapore | International site (alibabacloud.com) |
| GitLab or Codeup | China (Hangzhou) | China site (aliyun.com) |
If these limits do not meet your requirements, use a custom execution environment.
Build an image in the default execution environment
Log on to the Function Compute console.
Find the target application and click the Pipeline Management tab.
In the Pipeline Details section, click the Task Template tab, choose Create > Image Build, and then edit the
.yamlfile on the right side of the page.
Define the pipeline YAML. The following example shows a minimal image build configuration:
kind: Pipeline
name: "image-build-pipeline"
description: 'demo pipeline'
labels:
  myLabel: image-build
spec:
  templateSpec:
    tasks:
      - name: build-push
        context:
          data:
            # Display name shown in the console.
            displayName: image build
            # Set to true to enable this task. Default: disabled.
            enable: true
            build:
              # Path to the Dockerfile relative to the code repository root.
              # Default: ./Dockerfile
              dockerfile: code/Dockerfile
              # Target Container Registry image name.
              image: registry-vpc.cn-hangzhou.aliyuncs.com/pipeline-demo/demo-repo:latest
              # Build context directory. Default: the Dockerfile directory.
              context: ./context
        # Built-in template for image build tasks.
        taskTemplate: build-image-task
        runAfters: []
Pipeline YAML fields:
| Field | Description | Default |
|---|---|---|
build.dockerfile | Path to the Dockerfile, relative to the code repository root | ./Dockerfile |
build.image | Full Container Registry image name, including tag | Required |
build.context | Build context directory | The Dockerfile directory |
data.displayName | Task display name in the console | -- |
data.enable | Enable or disable task execution | false |
taskTemplate | Must be build-image-task (built-in template) | -- |
Use a custom execution environment to build an image
When the default environment does not meet your requirements, configure a custom execution environment to run pipelines within your account. A custom environment lets you specify the region, network configuration, resource specifications, and timeout.
Custom execution environments run tasks in functions within your account, which may incur fees. For details, see Billing overview.
Configure the execution environment by editing the pipeline graphically or through a YAML file:
Graphical editing: See Manage pipelines.
YAML editing: See Built-in custom task templates.
For general information about custom execution environments, see Manage pipelines.
Speed up builds with NAS caching
When the Dockerfile references large base images (for example, machine learning models or CUDA environments), pulling the base image during each build can slow down the process or exhaust disk space. Use File Storage NAS (NAS) to cache base images and speed up subsequent builds.
Steps
Configure a custom execution environment for the pipeline and bind a virtual private cloud (VPC) and a NAS file system.
Use image prefetching to cache the base images to the NAS file system.
Reference the NAS cache directory during the image build.
Combined prefetch and build
The following YAML prefetches base images and builds in a single task:
kind: Pipeline
name: "image-build-use-cache-pipeline"
description: 'demo pipeline'
labels:
myLabel: image-build-use-cache
spec:
templateSpec:
context:
data:
# Custom execution environment configuration.
runnerConfig:
regionId: cn-hangzhou
logConfig:
project: demo-project
logstore: demo-logstore
# VPC must match the NAS file system network.
vpcConfig:
securityGroupId: sg-xxxx
vSwitchIds:
- vsw-xxx
vpcId: vpc-xxxx
# NAS file system mount configuration.
nasConfig:
groupId: 0
userId: 0
mountPoints:
- enableTLS: false
# Local cache directory.
mountDir: /mnt/image-cache
# Remote NAS mount address.
serverAddr: xxxx.cn-hangzhou.nas.aliyuncs.com:/image-cache
# Recommended: 8 vCPUs, 32 GB memory, 10 GB disk.
cpu: 8
memory: 32768
diskSize: 10240
# Build timeout in seconds.
timeout: 1800
tasks:
- name: build-push
context:
data:
displayName: image build
enable: true
# Prefetch base images into the cache directory.
warm:
# Multiple base images can be prefetched.
images:
- registry-vpc.cn-hangzhou.aliyuncs.com/pipeline-demo/base-image-1:debug
- registry-vpc.cn-hangzhou.aliyuncs.com/pipeline-demo/base-image-2:debug
# Cache directory path.
cacheDir: "/mnt/image-cache"
build:
dockerfile: code/Dockerfile
image: registry-vpc.cn-hangzhou.aliyuncs.com/pipeline***/demo***:latest
# Use the same cache directory for the build.
cacheDir: "/mnt/image-cache"
taskTemplate: build-image-task
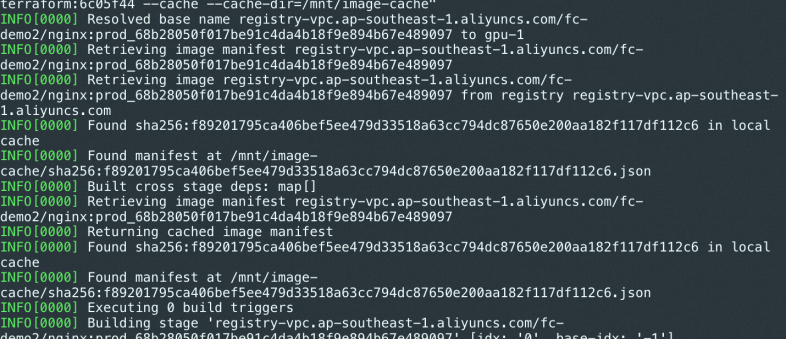
runAfters: []When a cache hit occurs, the build log prints Found manifest at ....
Separate prefetch and build tasks
Run image prefetching and image building as independent tasks with a dependency chain:
- name: only-warm
  context:
    data:
      enable: true
      # Prefetch base images into the cache.
      warm:
        images:
        - registry-vpc.cn-hangzhou.aliyuncs.com/pipeline-demo/base-image-1:debug
        - registry-vpc.cn-hangzhou.aliyuncs.com/pipeline-demo/base-image-2:debug
        cacheDir: "/mnt/image-cache"
        # Specify a Container Registry Enterprise Edition instance.
        instanceID: cri-xxxx
  taskTemplate: build-image-task
  runAfters: []
- name: only-build
  context:
    data:
      enable: true
      build:
        dockerfile: code/Dockerfile
        image: registry-vpc.cn-hangzhou.aliyuncs.com/pipeline-demo/demo-repo:latest
        # Reference the cache from the prefetch task.
        cacheDir: "/mnt/image-cache"
  taskTemplate: build-image-task
  runAfters: [only-warm]
Build a Container Registry Enterprise Edition image
The default pipeline execution environment does not support fixed public IP addresses or internal CIDR blocks, so it cannot access Container Registry Enterprise Edition instances. Use a custom execution environment with VPC connectivity instead.
Configure network access
Before building images with an Enterprise Edition instance, configure network access:
Internet access: Not enabled by default. To allow Internet-based access, configure a public IP address whitelist. See Configure access over the Internet.
VPC access: Configure an access control list (ACL) to connect an Elastic Compute Service (ECS) instance and a Container Registry Enterprise Edition instance in the same VPC. See Configure a VPC ACL.
Steps
Configure a custom execution environment for the pipeline and bind a VPC connected to your Container Registry Enterprise Edition instance. Use the same VPC and vSwitch as the Enterprise Edition instance, or configure a VPC ACL for a different VPC. See Configure a VPC ACL.
Specify the Enterprise Edition instance ID in the
build.instanceIDfield.(Recommended) Enable image acceleration for the image repository and append
_acceleratedto image tags. Pipeline image build tasks automatically push original images and wait for accelerated image conversion. See Load resources of a container image on demand.
Sample YAML
kind: Pipeline
name: "image-build-use-cache-pipeline"
description: 'demo pipeline'
labels:
  myLabel: image-build-use-cache
spec:
  templateSpec:
    context:
      data:
        runnerConfig:
          regionId: cn-hangzhou
          logConfig:
            project: demo-project
            logstore: demo-logstore
          # VPC must be connected to the Enterprise Edition instance.
          vpcConfig:
            securityGroupId: sg-xxxx
            vSwitchIds:
              - vsw-xxx
            vpcId: vpc-xxxx
          # Instance specifications.
          cpu: 8
          memory: 32768
          diskSize: 10240
          # Build timeout in seconds.
          timeout: 1800
    tasks:
      - name: build-push
        context:
          data:
            displayName: image build
            enable: true
            build:
              dockerfile: code/Dockerfile
              # Enable image acceleration by appending _accelerated to the tag.
              image: demo-registry-vpc.cn-hangzhou.aliyuncs.com/pipeline***/demo***:debug_accelerated
              # Container Registry Enterprise Edition instance ID.
              instanceID: cri-xxxx
        taskTemplate: build-image-task
        runAfters: []
Set up a CI/CD pipeline with image build and deployment
Combine image build task templates and custom task templates to create an automated CI/CD pipeline. Tag each image with the current commit ID during the CI stage, and deploy with that tag during the CD stage.
Tag images with commit IDs
Build stage: Append the built-in variable
<% .git.shortCommitId %>(the first 7 characters of the HEAD commit ID) as the image tag.image: registry-vpc.cn-hangzhou.aliyuncs.com/demo/demo-image:<% .git.shortCommitId %>Deployment stage: Inject an environment variable
GIT_COMMITwith the value<% .git.shortCommitId %>.s.yaml: Reference the environment variable with
${env(GIT_COMMIT)}to dynamically set the image tag.
For more information about built-in YAML variables, see Use a .yaml file to describe a pipeline.
Pipeline YAML
# Commit a pipeline for execution.
kind: Pipeline
# Include the commit ID and timestamp for unique naming.
name: "p-<% .git.shortCommitId %>-<% .currentTimestampMs %>"
description: 'demo pipeline'
# Labels serve as filter conditions for pipeline queries.
# Serverless Application Center also adds other labels when you commit pipeline execution.
labels:
  myLabel: my-cicd-example
spec:
  context:
    data:
      appName: <% .appName %>
  templateSpec:
    context:
      data:
        envName: <% .envName %>
        deployFile: s.yaml
    tasks:
      # Image build task.
      - name: build-image
        context:
          data:
            displayName: image build
            enable: true
            build:
              dockerfile: code/Dockerfile
              # Tag the image with the current commit SHA.
              image: registry-vpc.cn-hangzhou.aliyuncs.com/demo/demo-image:<% .git.shortCommitId %>
        taskTemplate: build-image-task
        runAfters: []
      # Deployment task.
      - name: build-and-deploy
        context:
          data:
            displayName: deployment
            enable: true
            # Inject the commit SHA as an environment variable.
            envVars:
              GIT_COMMIT: <% .git.shortCommitId %>
            steps:
              - plugin: "@serverless-cd/checkout"
              - plugin: "@serverless-cd/s-setup"
              - plugin: "@serverless-cd/s-deploy"
        taskTemplate: serverless-runner-task
        runAfters:
          - name: build-push
Reference the commit tag in s.yaml
Use the GIT_COMMIT environment variable in your s.yaml to dynamically set the container image tag:
edition: 3.0.0
name: demo
access: 'default'  # Key alias.

resources:
  function:
    component: fc3
    props:
      region: 'cn-hangzhou'
      functionName: demo
      runtime: custom-container
      customContainerConfig:
        # Dynamically reference the commit-based image tag.
        image: registry-vpc.cn-hangzhou.aliyuncs.com/demo***/demo-ima***:${env(GIT_COMMIT)}
        port: 9000
      memorySize: 4096
      timeout: 3600