Use the Realtime Compute for Apache Flink VS Code extension to develop, deploy, and publish SQL, JAR, and Python jobs locally and sync configurations from your online environment.
Prerequisites
-
You have created a workspace.
-
You have obtained an AccessKey pair with permissions for the target namespace.
-
You have installed VS Code v1.74.0+.
Limitations
-
Log configuration is not supported.
-
Pulling existing jobs is not supported.
Install and configure the extension
-
Download and install the extension.
-
Method 1: Go to the Visual Studio Marketplace and install Flink Realtime Compute Studio.
-
Method 2:
-
Open VS Code and click EXTENSIONS in the left navigation menu.
-
In the search bar, enter
Flink Realtime Compute Studio. -
Click Install.
-
-
-
In the menu bar, click and select a local folder.
-
Configure AccessKey credentials.
Workspace-wide
-
Click
 in the left menu bar. In the Configure AK&SK section, click Configure in a .vvprc file. The extension automatically creates a file with the
 .vvprcextension.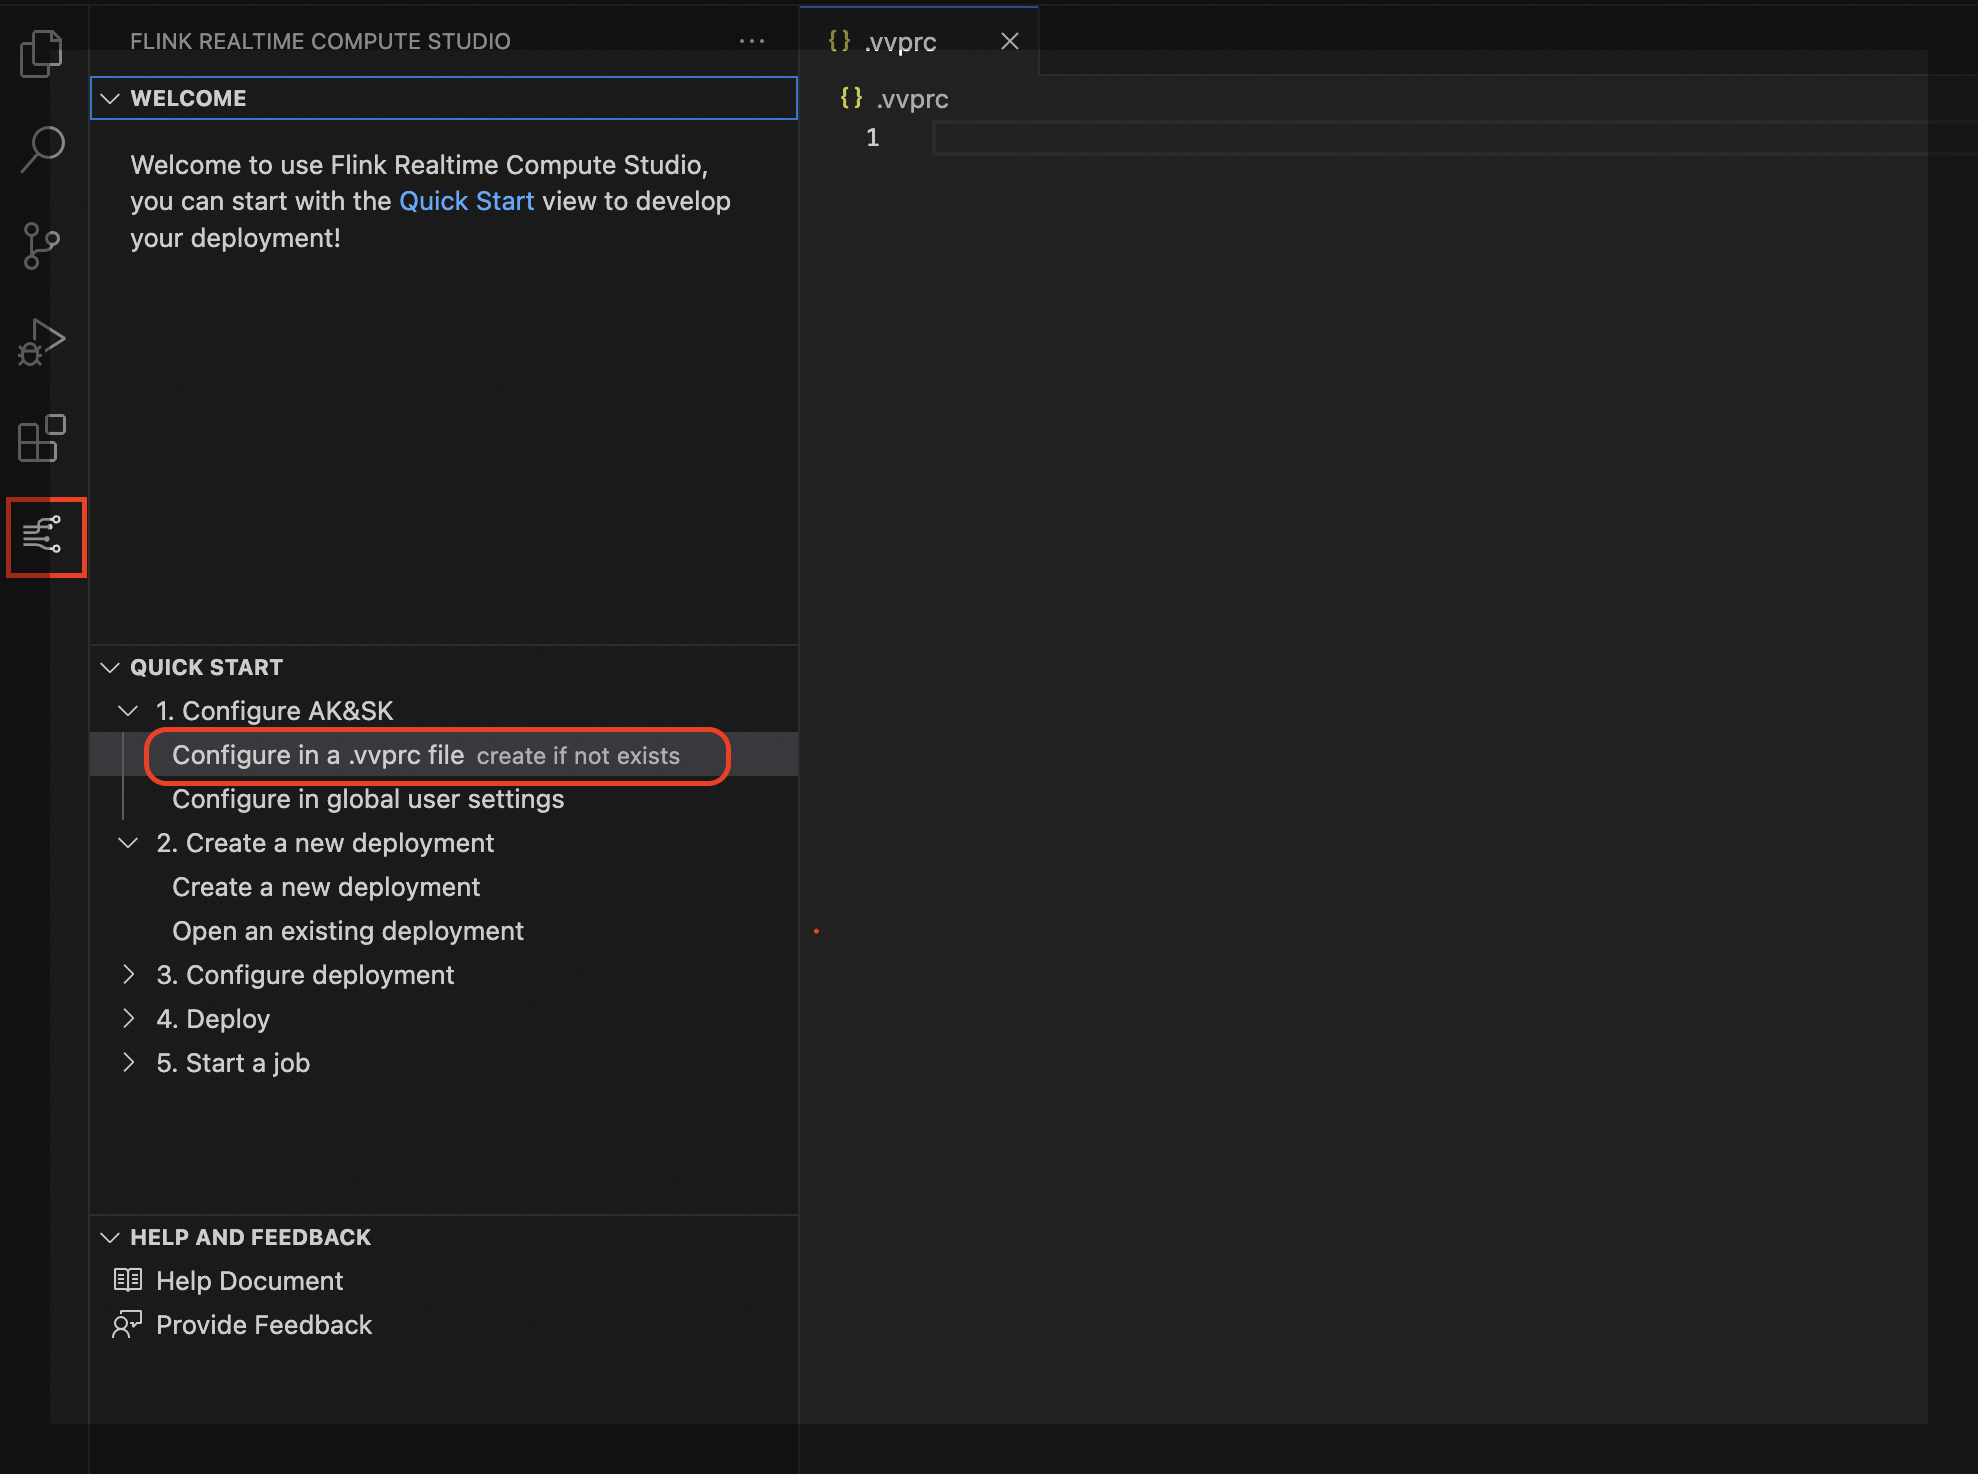
-
Enter the following configuration information.
{
  "accessKey": "xxx",
  "secretKey": "xxx",
  "namespace": "xxx",
  "workspace": "xxx",
  "regionId" : "xxx"
}
Parameter
Description
Notes
accessKey
Your AccessKey ID.
secretKey
Your AccessKey secret.
namespace
The name of the Flink namespace.
workspace
The ID of the Flink workspace.
regionId
The region ID.
See the region ID in Endpoints.
Globally
-
Click
in the left menu bar. -
Click . VS Code opens the global settings.
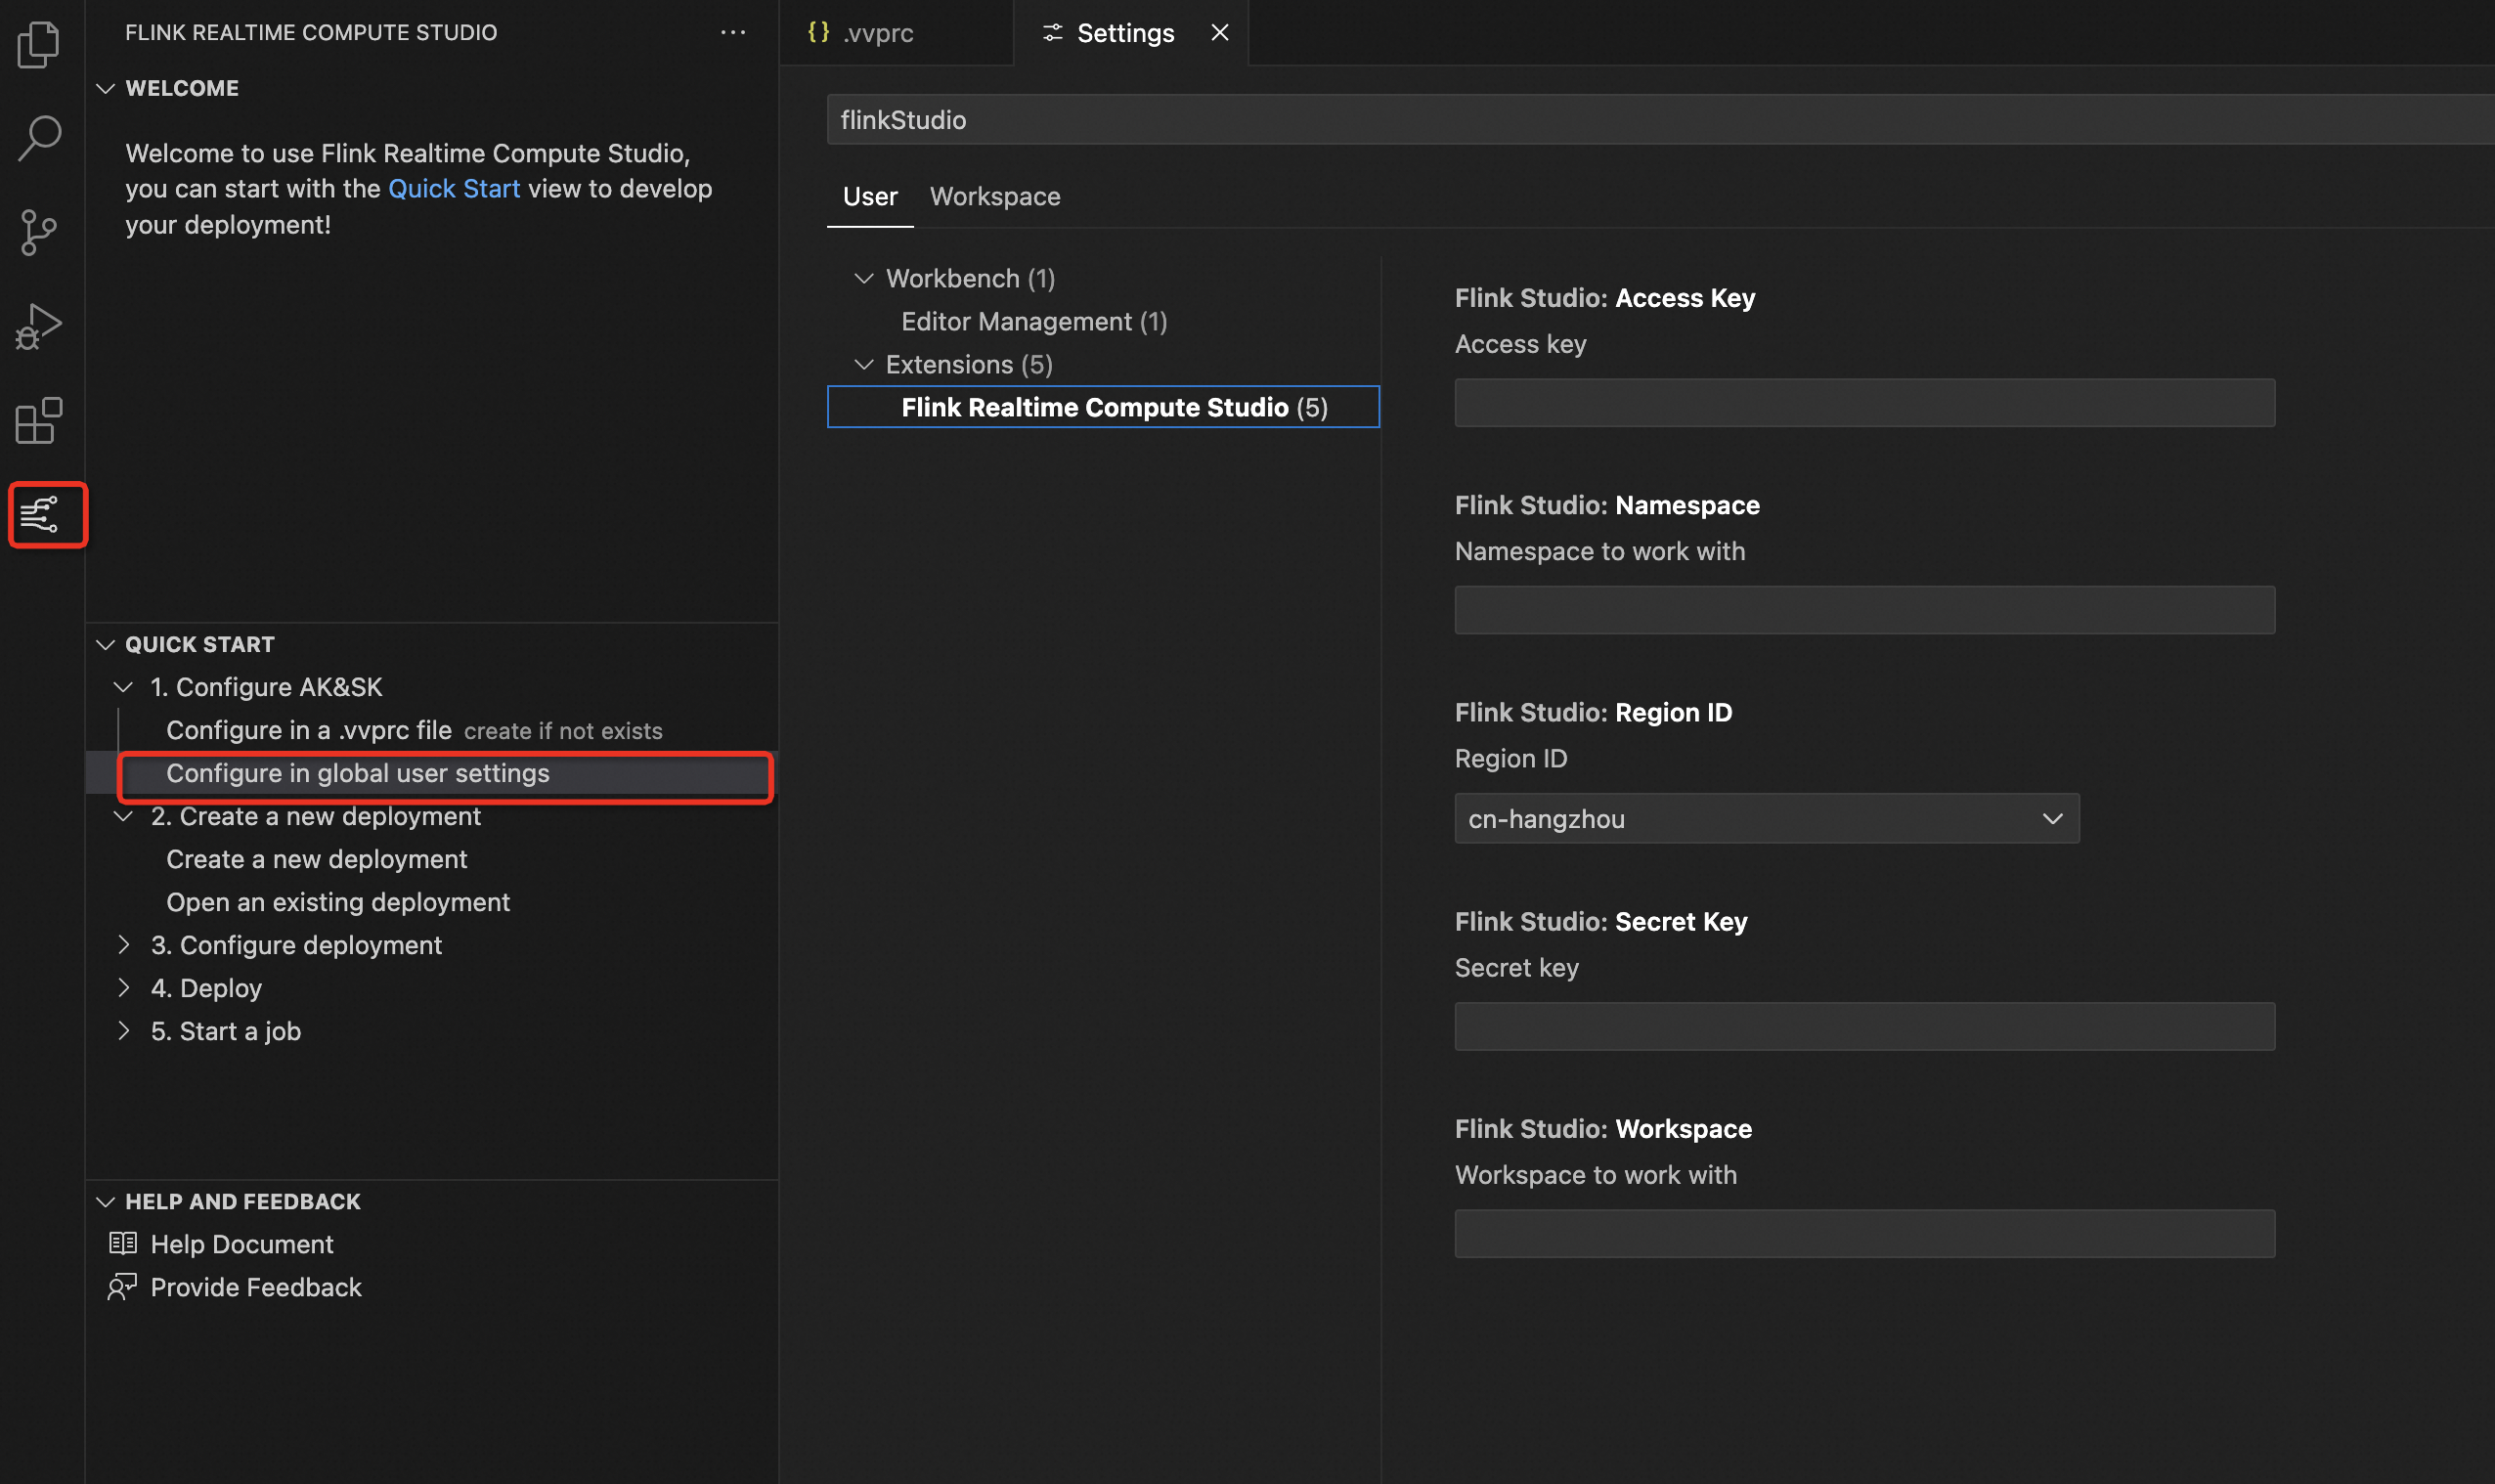
-
Select User or Workspace to configure the settings as needed.
NoteUser applies globally to all VS Code projects and is stored in the global configuration file. Workspace applies only to the current workspace.
Parameter
Description
Notes
Access Key
Your AccessKey ID.
Secret Key
Your AccessKey secret.
Namespace
The name of the Flink namespace.
Workspace
The ID of the Flink workspace.
Region ID
The region ID.
See the region ID in Endpoints.
NoteConfiguration priority: Current folder > Parent folder > Global.
After configuration, the namespace name appears in the status bar.
-
-
(Optional) Install helper extensions.
-
Flink SQL: Install Flink SQL Language Features for SQL syntax support.
-
Flink configuration: Install YAML for YAML file auto-completion.
-
Procedure
Step 1: Create a job
-
Method 1: Click
in the left menu bar. Under QUICK START, click Create a new deployment. Enter a name and press Enterto create a.vvpfile with default settings.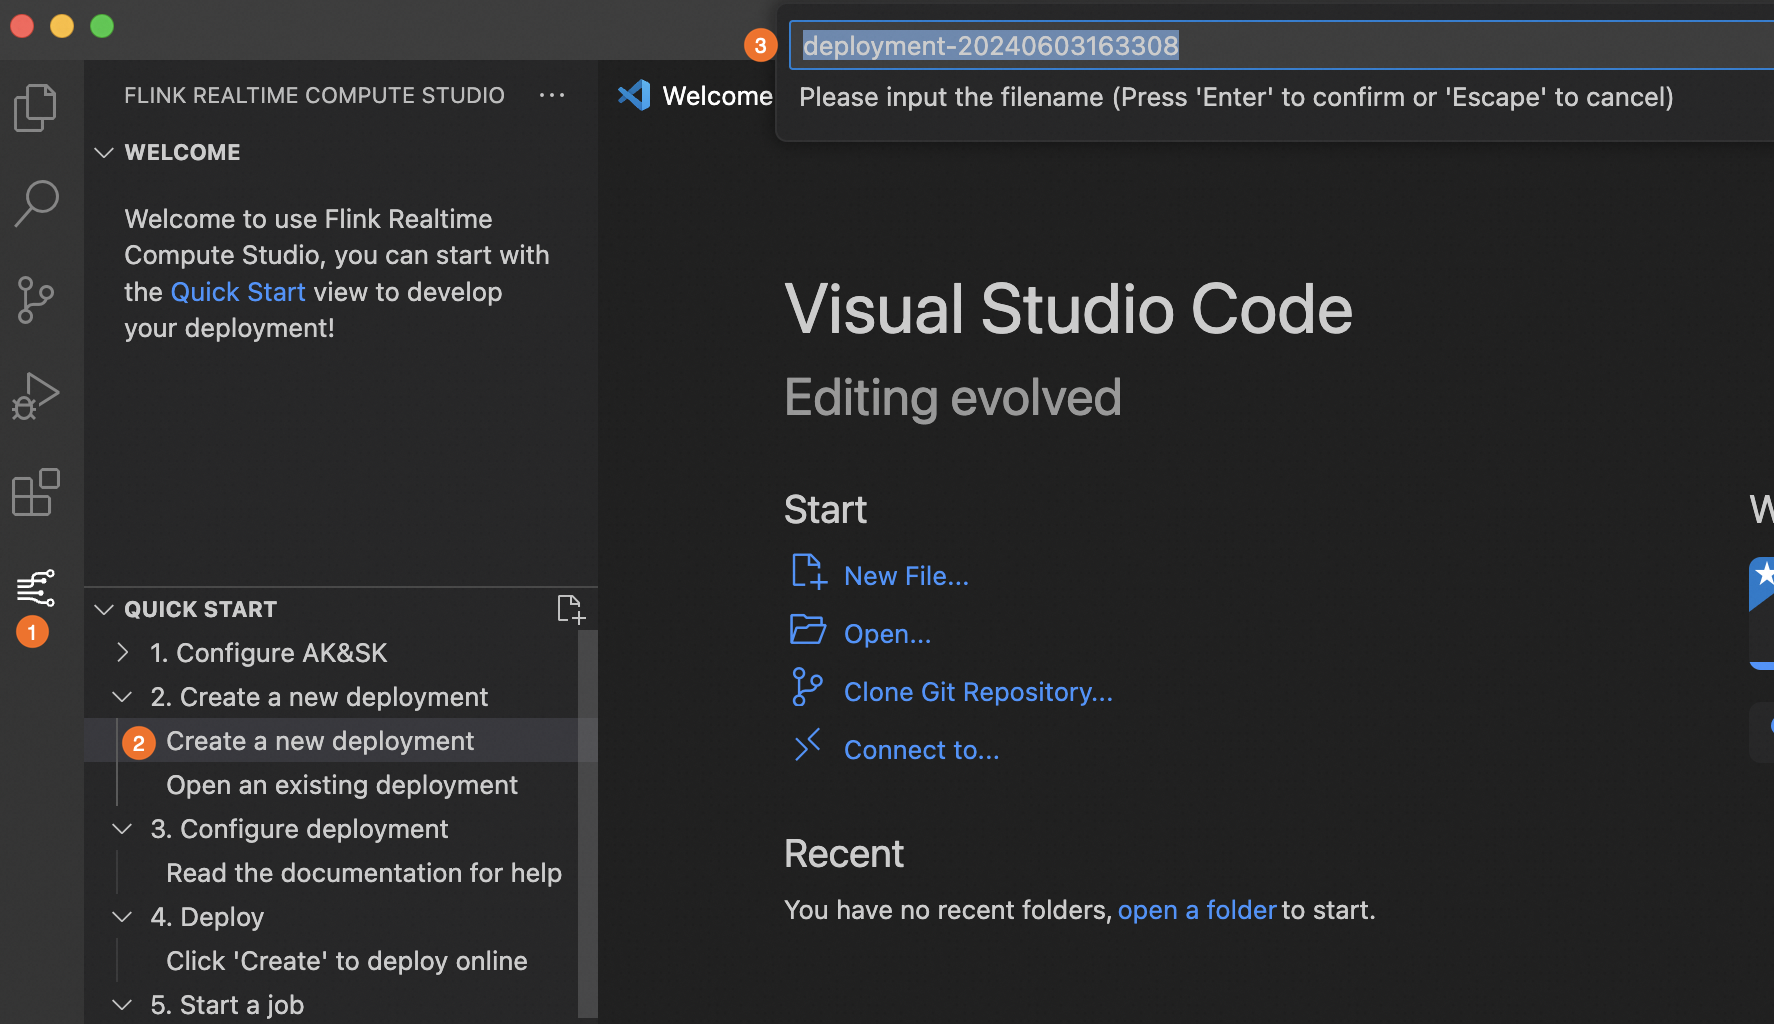
-
Method 2: In the file tree, create a
.vvpfile.
Step 2: Configure the job
Configure the job:
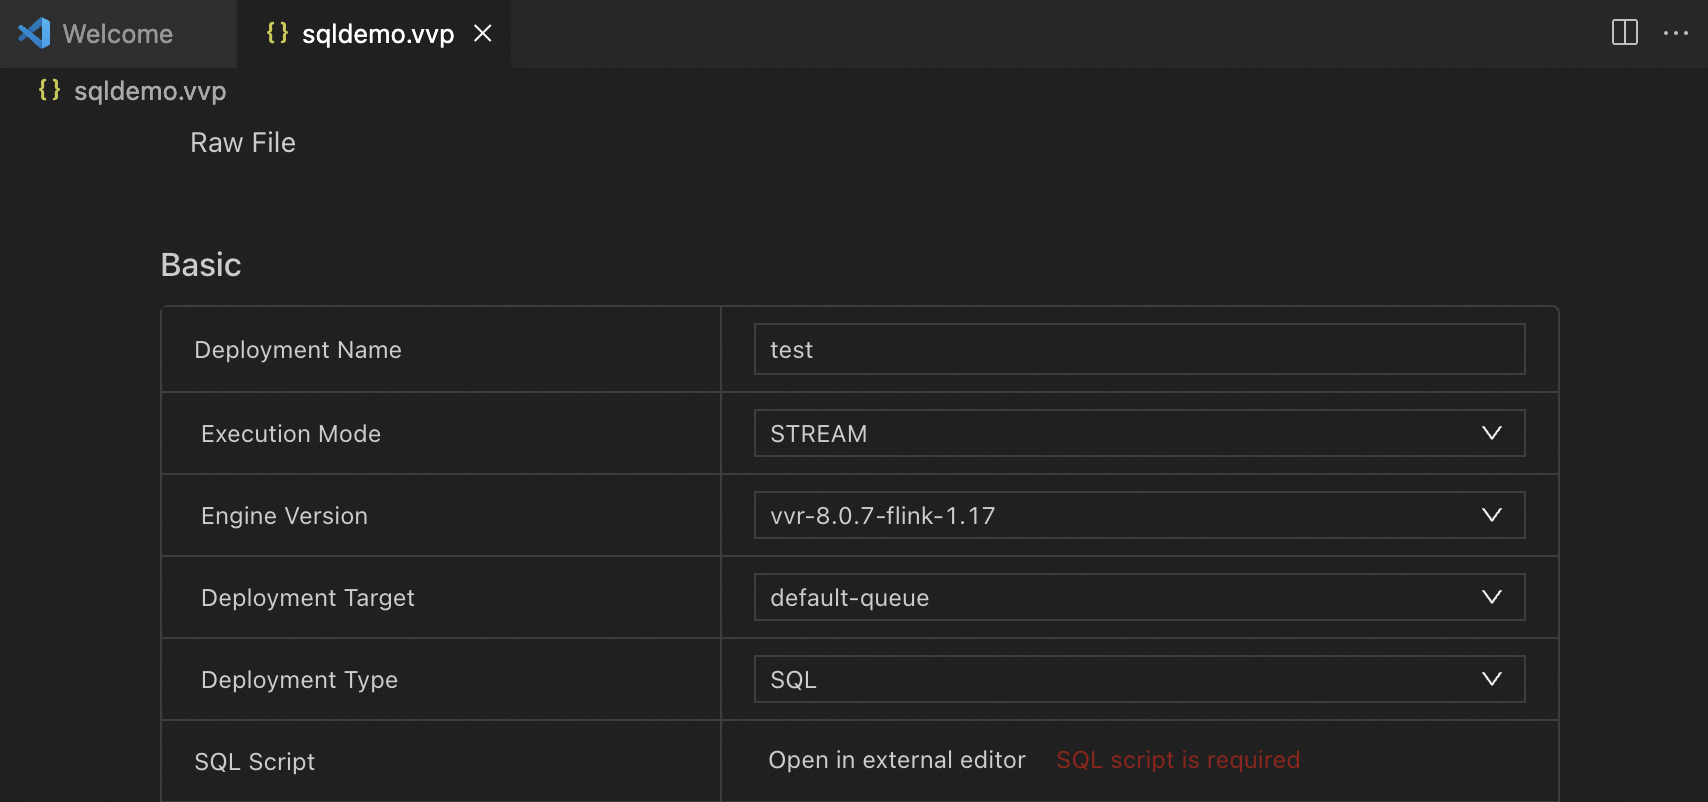
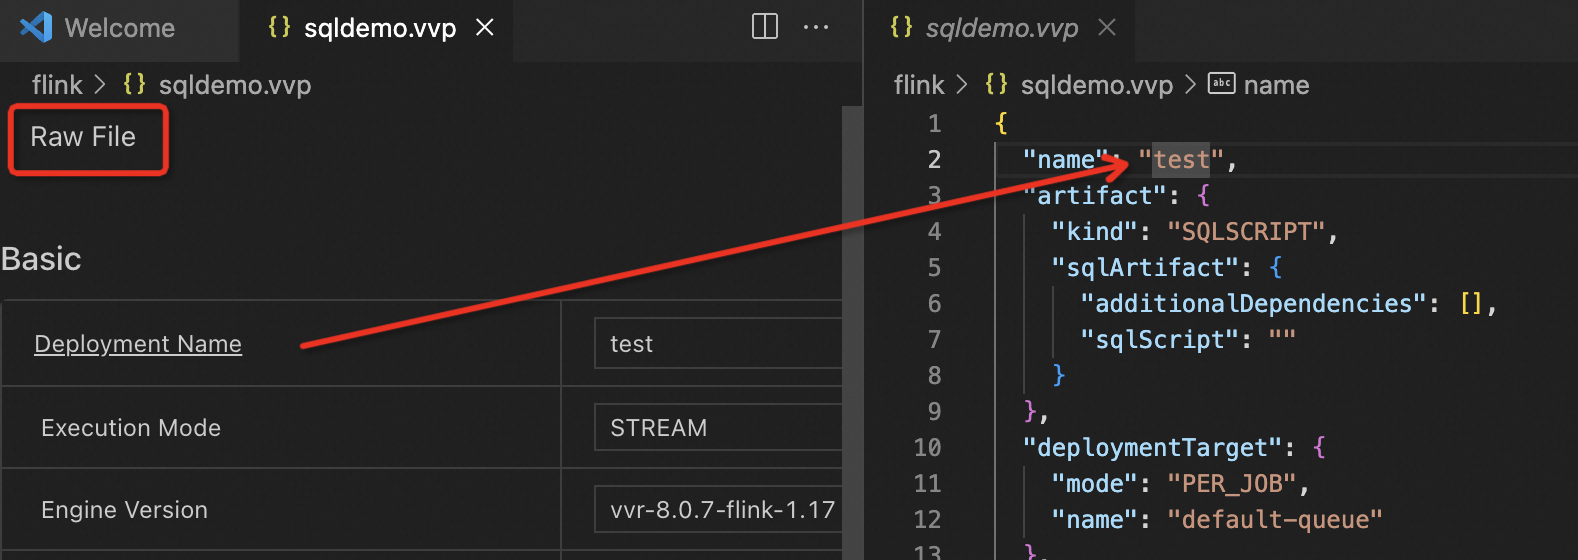
To edit the source file directly, click Raw File. Click any parameter name to jump to its location in the source.
-
Basic settings:
-
Resources: See Configure job resources.
-
Parameters: See Parameters.
Step 3: Deploy the job
Click Create to deploy the job, or click Update for existing jobs.
For SQL jobs, the extension validates the SQL script, resource plan, and configurations, and displays the results.
Step 4: Start the job
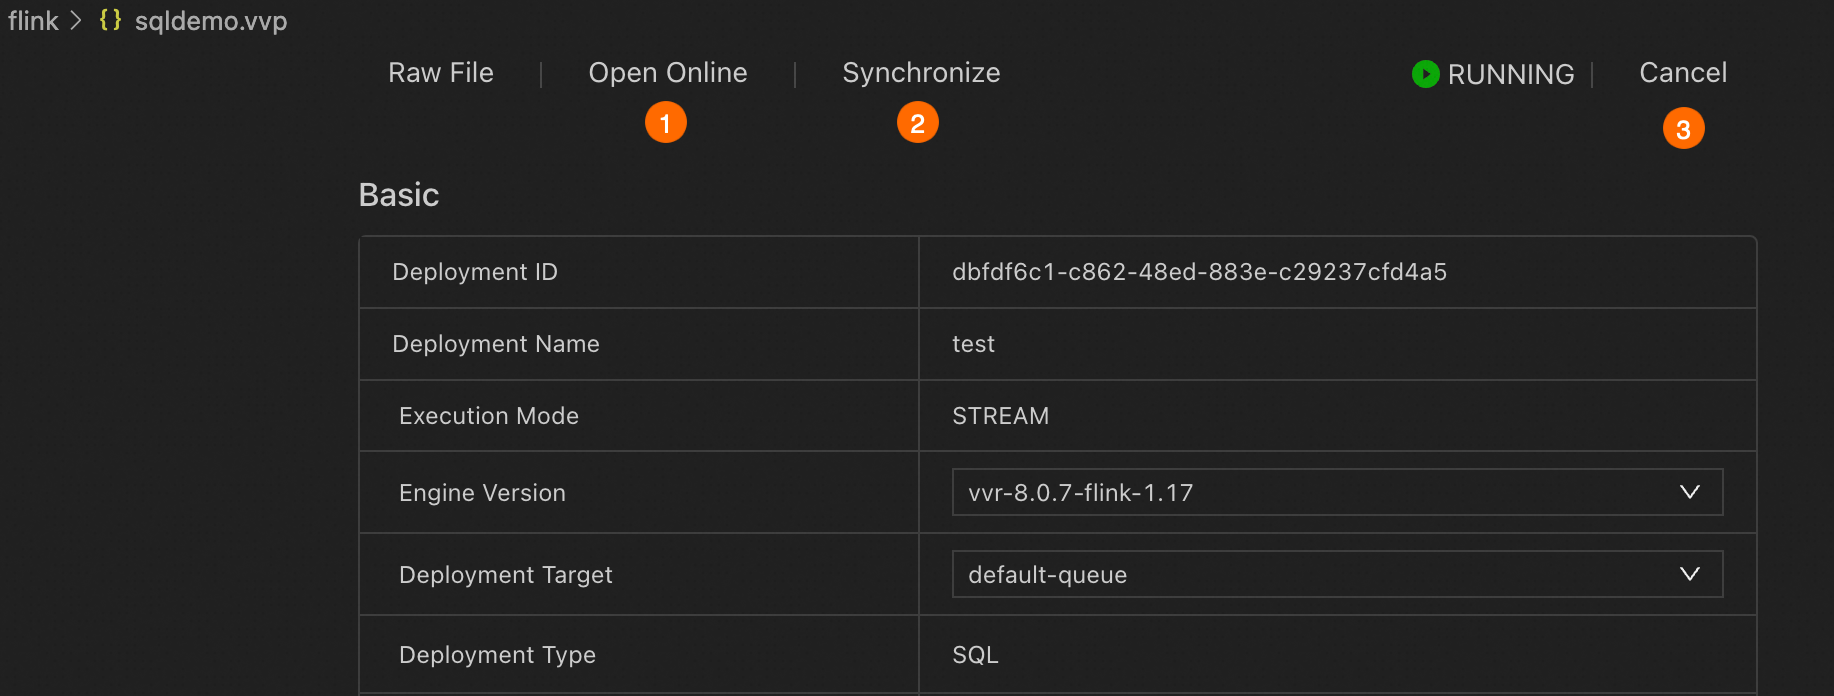
For a deployed job, the status appears in the upper-right corner. Click Start and select a startup mode. Start a job.

Step 5: Perform job O&M
-
Open Online: View job status or perform O&M operations in the Development Console.
-
Synchronize: Pull configurations from the console. Click Synchronize to preview the cloud version, then click Accept to overwrite the local file. SQL draft updates are not included.
-
Cancel: Stop the job.