If you no longer require one or more snapshots or the maximum number of snapshots is reached, you can delete snapshots to free up storage space and prevent unnecessary charges. You can manually delete snapshots, configure snapshots to be automatically deleted when the snapshots expire, and configure automatic snapshots to be automatically deleted when the source disks are released. Source disks are the cloud disks for which automatic snapshots are created.
Considerations
-
Deleted snapshots cannot be restored and the snapshot data cannot be recovered. Proceed with caution.
-
Deleted snapshots do not affect the cloud disks that are created from the snapshots.
-
If you created data disks from a snapshot, you can use the data disks as expected, but you can no longer re-initialize the disks after you delete the snapshot. For information about how to re-initialize a data disk, see Re-initialize a data disk.
-
If you created custom images from a snapshot, you must delete the images before you can delete the snapshot. After you delete the custom images, you can no longer use the images to create Elastic Compute Service (ECS) instances or re-initialize the system disks of ECS instances that are created from the images. For information about how to re-initialize the system disk of an ECS instance, see Re-initialize a system disk (reset the operating system).
-
You are charged for snapshots by region, and you can delete snapshots in only one region at a time. After you delete snapshots in a region, you are charged lower snapshot fees in the region. To delete all snapshots in all regions in your account, switch between regions and delete snapshots region by region. You can view the regions in which snapshots are available on the Overview page in the ECS console. For more information, see the View snapshot sizes in all or a single region section of the "View the snapshot size" topic.
Limits
The following snapshots cannot be manually deleted or automatically deleted on expiration or when the source disks are released:
-
Shared snapshots. You must unshare a shared snapshot before you can delete the snapshot. For information about how to unshare a snapshot, see the Share a snapshot section of the "Share a snapshot" topic.
-
Snapshots from which custom images are created. If you no longer require the custom images, you must delete the images before you can delete the snapshots. For information about how to delete a custom image, see Delete a custom image.
-
Snapshots created by Cloud Backup. To delete snapshots created by Cloud Backup, go to the ECS Instance Backup page in the Cloud Backup console. For more information, see Back up an ECS instance.
Procedure
You can manually delete a snapshot, configure a snapshot to be automatically deleted when the snapshot expires, and configure automatic snapshots to be automatically deleted when the source disks are released.
Manually delete a snapshot
-
Go to ECS console - Snapshots.
-
In the top navigation bar, select the region and resource group of the resource that you want to manage.

-
On the Disk Snapshots tab, find the snapshot that you want to delete and click Delete Snapshot in the Actions column.
-
In the Delete Snapshot dialog box, follow the on-screen instructions to delete the snapshot.
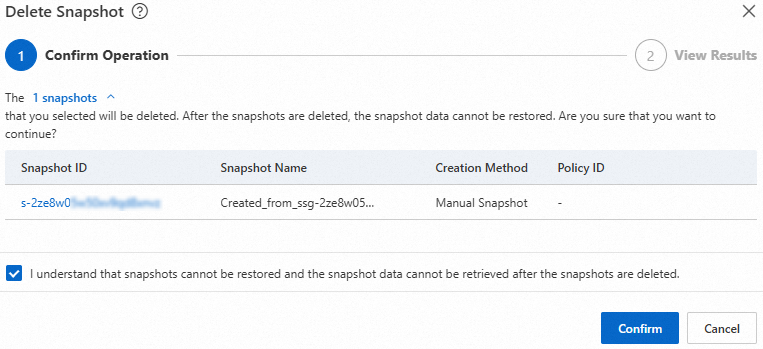
Snapshot not associated with resources
If the snapshot is not associated with resources, such as cloud disks or custom images, perform the following steps to delete the snapshot.
-
Select I understand that snapshots cannot be restored and the snapshot data cannot be retrieved after the snapshots are deleted.
-
Click Confirm.
Snapshot from which cloud disks are created
If you created cloud disks from a snapshot, you can forcefully delete the snapshot.
ImportantAfter you forcefully delete the snapshot, you can use the data disks that are created from the snapshot as expected, but you can no longer re-initialize the data disks. For information about how to re-initialize a data disk, see Re-initialize a data disk.
-
Read the notes. If you accept the risks, select I am aware of the risks and want to delete the snapshots. Then, click Next.
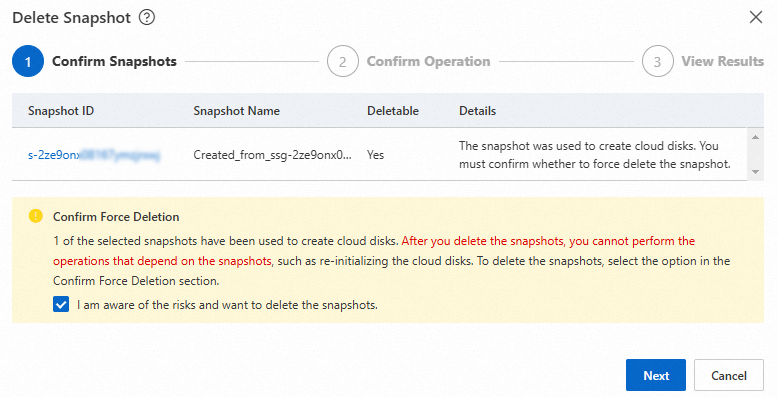
-
Follow the on-screen instructions to delete the snapshot.
NoteIf you no longer require the cloud disks, you can release the disks on the Block Storage page, and then delete the snapshot on the Disk Snapshots tab. For information about how to release a cloud disk, see Release a disk.
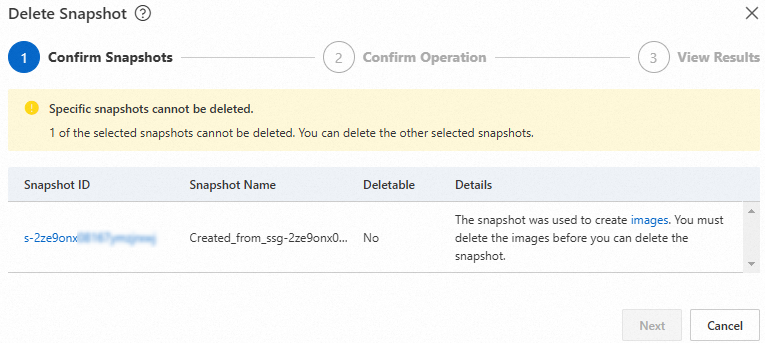
Snapshot from which custom images are created
If you created custom images from a snapshot, you must delete the images before you can delete the snapshot.
ImportantAfter you delete the custom images, you can use the ECS instances that are created from the images, but you can no longer re-initialize the system disks of the instances. For information about how to re-initialize the system disk of an ECS instance, see Re-initialize a system disk (reset the operating system). For information about how to delete a custom image, see Delete a custom image.
Click Images to go to the Custom Images tab of the Images page. Delete the custom images. Then, go back to the Disk Snapshots tab to delete the snapshot.
-
Configure a snapshot to be automatically deleted when the snapshot expires
When you create a snapshot or an automatic snapshot policy, you must configure the Retention Period parameter to specify a retention period for the created snapshot. After the retention period of a snapshot ends, the snapshot expires and is automatically deleted. For information about how to create a snapshot and an automatic snapshot policy, see Create a snapshot manually and Create an automatic snapshot policy.
If the Delete Automatic Snapshots While Releasing Disk attribute is enabled for a cloud disk that has automatic snapshots, and the disk is released before the automatic snapshots expire, the automatic snapshots are automatically deleted when the disk is released. If the cloud disk is a system disk, the automatic snapshots of the disk are also automatically deleted when the system disk is replaced.
-
If the snapshot is about to be released in three days, Released After {days} Days is displayed in the Retention Period column corresponding to the snapshot on the Disk Snapshots tab.

-
If you configured a retention period in days for a snapshot, you can extend the retention period before the snapshot expires to retain the snapshot for a longer period of time. For more information, see Extend the retention period of a snapshot.
Configure automatic snapshots to be automatically deleted when the source disks are released
If the Delete Automatic Snapshots While Releasing Disk attribute is enabled for a cloud disk, the automatic snapshots of the disk are automatically deleted when the disk is manually released or when the disk is automatically released together with the ECS instance to which the disk is attached. If the cloud disk is a system disk, the automatic snapshots of the disk are also automatically deleted when the system disk is replaced. For more information, see the Enable automatic snapshots to be released with the disk section of the "Configure an automatic snapshot policy for a cloud disk" topic.
If the retention period of an automatic snapshot of a cloud disk ends before the disk is released, the snapshot expires and is automatically deleted when the retention period ends.