Re-initialize a system disk to restore it to its initial state and erase all data on it.
Limitations
If a custom image is deleted, instances created from it remain usable, but their system disks cannot be re-initialized.
Effects of re-initialization
Understand the following effects before re-initializing the disk.
Re-initializing a system disk erases all data on it. To prevent data loss, create a snapshot to back up the disk beforehand.
|
Item |
Description |
|
System disk effects |
|
|
Data disk effects |
|
Procedure
Prepare for re-initialization
-
Re-initialization erases all written data. To prevent data loss, back up the target disk. See Manually create a single snapshot.
NoteSnapshots are a paid service. See Snapshot billing.
-
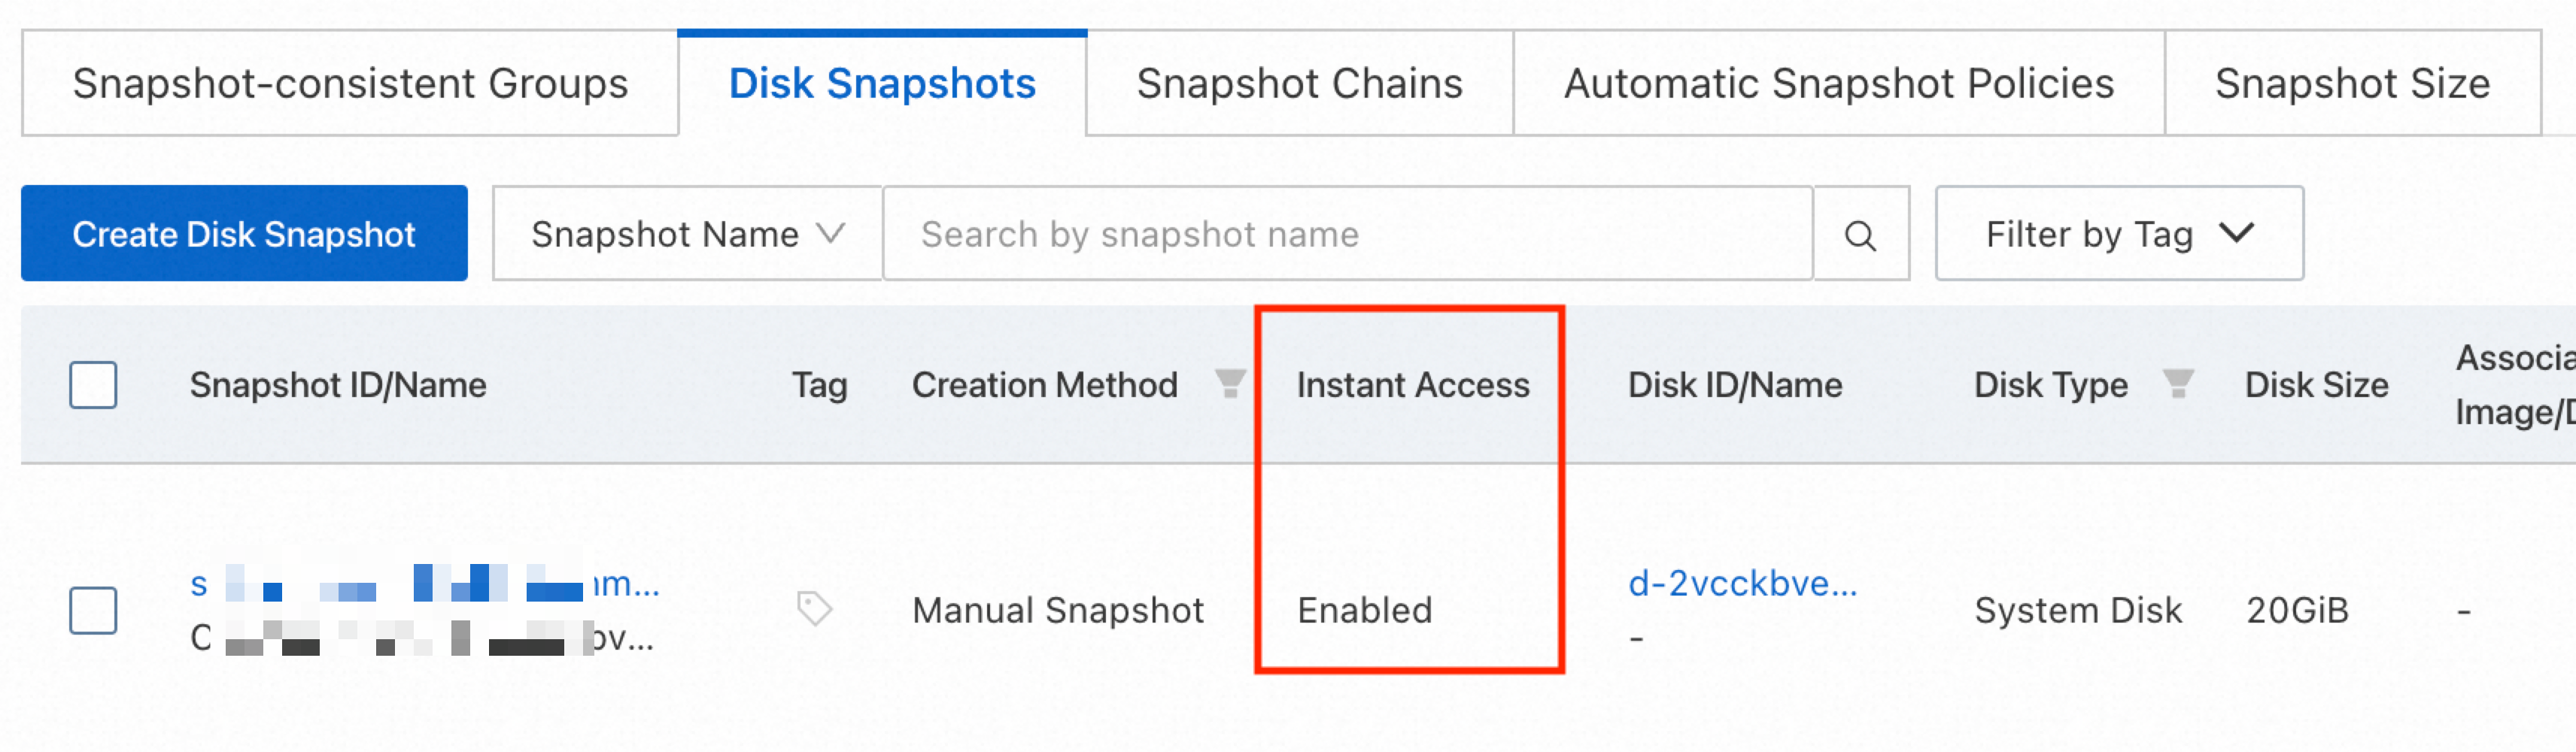
The legacy instant access feature must not be enabled for snapshots of ESSD disks. You cannot re-initialize a disk if its snapshots have legacy instant access enabled. The new version of instant access is enabled by default and does not affect re-initialization.
-
New version: Instant access status shows Enabled.
-
Legacy version: Instant access status shows an expiration date, such as: Oct 20, 2023, 11:07:07 Remaining Before Expiration.

NoteIf you are using the legacy version, call ModifySnapshotAttribute and set
DisableInstantAccesstotrueto disable it. -
-
(Linux only) To use an SSH key pair for authentication after re-initialization, create or import an SSH key pair first.
-
(Linux only) To reuse the same mount points after re-initialization, record the current mount information for your data disks:
sudo mount |grep "<Data disk name>"For example, the output for data disk
/dev/vdbshows two partitions:/dev/vdbhas partitions/dev/vdb1mounted to/tmpand/dev/vdb2mounted to/mnt.[ecs-user@ecs ~]$ sudo mount |grep "/dev/vdb" /dev/vdb1 on /tmp type ext4 (rw,relatime) /dev/vdb2 on /mnt type ext4 (rw,relatime) -
Stop the instance. See Stop an instance.
ImportantIf an ECS instance uses the pay-as-you-go billing method and resides in a VPC, you must enable the standard mode when you stop the instance. If you enable the economical mode, you may be unable to start the instance after you re-initialize the disks attached to the instance.
Re-initialize the disk
Re-initialization erases all data on the system disk. To prevent data loss, create a snapshot to back up the disk beforehand.
Go to ECS console - Instances.
In the upper-left corner of the page, select a region and resource group.

-
Find the target instance and click its ID to go to the Instance Details page.
-
Click the Block Storage tab, find the system disk, and click Re-initialize Disk in the Actions column.

-
In the Re-initialize Disk dialog box, configure the parameters.
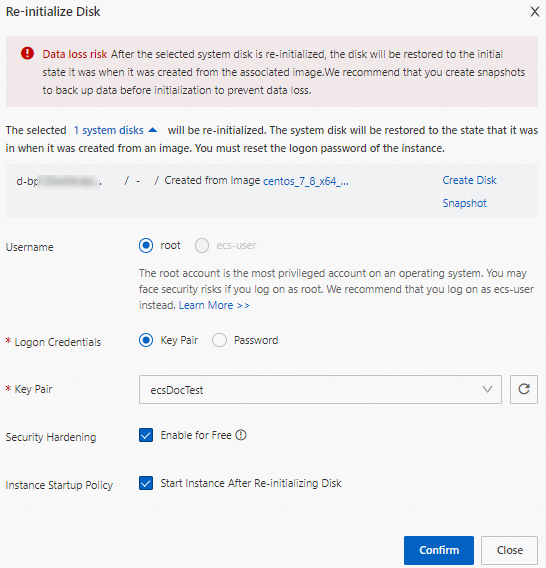
Parameter
Description
Logon Username
The username for OS logon.
Logon Credential
For Windows instances, reset the logon password. You can reuse the old password or specify a new one.
For Linux instances, select Key Pair or Password.
-
Key Pair: Bind an SSH key pair for logon.
-
Password: Reset the logon password. You can reuse the old password or specify a new one.
Security Hardening
Activate is selected by default. This installs the free Security Agent, which provides backdoor detection, unusual logon alerts, and brute-force attack prevention.
Instance Startup Policy
Start Instance After Re-initializing Disk is selected by default. The instance starts automatically after re-initialization. Clear this option to start the instance manually.
-
-
Click OK. The disk status changes to Initializing.
Re-initialization is complete when the disk status returns to In Use.
-
(Linux only) If the instance has data disks attached, re-mount them. Re-initialization does not change or erase data disk content, but mount information is lost. See How do I re-attach data disks after I re-initialize the system disk of a Linux instance?
For Windows instances, data disks come online automatically after re-initialization.
-
Redeploy your applications and configurations to restore your services.