The ID Verification plugin adds remote KYC verification to your React Native app, covering dependency setup, SDK initialization, and authentication with sample code.
Configure Dependencies
Integrate the plugin by following the official React Native documentation or the steps below.
Download the SDK
Go to Client SDK release notes to download the ID Verification React Native SDK. Extract the ZIP to get the react-native-idv-library folder.
Add the Local Module
Add the react-native-idv-library folder as a local module to your React Native project.
Place it alongside your app project:
Development/
├── App/                      # Your React Native app root directory
└── react-native-idv-library/ # Extracted SDK local module
In your app root directory (App/), run:
yarn add ../react-native-idv-library Install Native Dependencies
The SDK includes native code. Configure each platform:
-
Android:
React Native 0.60+ autolinks native modules. No extra steps needed. -
iOS:
In your app'siosdirectory, run CocoaPods to install native dependencies:cd ios bundle exec pod install
Start Integration
Initialize the SDK
Call install(): Promise<void> or installWithOptions(options: Object): Promise<void> to initialize the SDK. Run this as early as possible after app startup.
options: Optional parameters for data collection. Defaults to null. It accepts the following parameters:
The ID Verification client includes a built-in device helper security module. To comply with data collection requirements across different regions, the client supports multiple data reporting sites. You can use the
CustomUrlandCustomHostparameters to specify a reporting site based on user attributes.You can specify only one data reporting region per application session lifecycle. This region must match the one used for your server-side queries. Server-side region support varies by product. For details, see Supported regions.
Regional
CustomUrlvalues:China (Hong Kong):
https://cloudauth-device.cn-hongkong.aliyuncs.comSingapore:
https://cloudauth-device.ap-southeast-1.aliyuncs.comIndonesia (Jakarta):
https://cloudauth-device.ap-southeast-5.aliyuncs.comUS (Silicon Valley):
https://cloudauth-device.us-west-1.aliyuncs.comGermany (Frankfurt):
https://cloudauth-device.eu-central-1.aliyuncs.comMalaysia (Kuala Lumpur):
https://cloudauth-device.ap-southeast-3.aliyuncs.com
Parameter | Description | Example |
IPv6 | Specifies whether to use an IPv6 domain name to report device information:
| "1" |
DataSwitch | Specifies when to report device information.
Note We recommend using the default setting. | "1" |
CustomUrl | The domain name of the data reporting server. | For details, see Regional CustomUrl values. |
CustomHost | The host of the data reporting server. | "cloudauth-device.ap-southeast-1.aliyuncs.com" Note This example is for the Singapore region. Hosts for other regions can be derived from the URLs listed in Regional CustomUrl values. |
Example:
import IdvLibrary from 'react-native-idv-library';

IdvLibrary.installWithOptions({
  CustomUrl:"https://cloudauth-device.ap-southeast-5.aliyuncs.com",
  CustomHost:"cloudauth-device.ap-southeast-5.aliyuncs.com"});
Get MetaInfo
getMetaInfo(): Promise<string> returns the client environment context. Pass the result to your server to obtain a transactionId and Protocol from Alibaba Cloud.
Example:
import IdvLibrary from 'react-native-idv-library';

async function handleGetMetaInfo() {
  // Get metadata
  const _metaInfo = await IdvLibrary.getMetaInfo();
  console.log('Meta info:', _metaInfo);
}
Start Authentication
Call verify(transactionId: string, extParams?: Object): Promise<VerifyResult> to start verification.
Parameters:
-
transactionId: Required.
-
Extension parameters:
NoteEach transactionId is single-use. Reusing one returns a fault.
-
Return value:
Promise<VerifyResult>.VerifyResultcontains these fields:-
code: The status code.
-
subCode: The subcode.
-
message: The error description.
Status codes and subcodes are listed in the Android IdentityResponse.code table and iOS error codes.
-
-
Example:
import { Platform} from 'react-native';
import IdvLibrary from 'react-native-idv-library';

async function handleVerify() {
  const extParams = Platform.select({
    ios: {
      kIdentityParamKeyLanguage: 'en',
      kIdentutyParamKeyProtocol:'xxxxxxx'
    },
    android: {
      SdkLanguage: 'en',
      Protocol:'xxxxxxxxx'
    },
  });
  // Verification API
  const result = await IdvLibrary.verify('transactionId', extParams); // Replace transactionId with the actual verification ID obtained from the server.
  console.log('Verify result:', result);
}
Customize the UI
Call setCustomUIConfig(param: string): Promise<string> to customize UI colors.
-
params: JSON string. Platform-specific UI options:
-
Example:
async function handleSetCustonUiConfig() {
  const config= "{\"faceConfig\":{ \"faceBGColor\": \"#FF33FF\"}}";
  const result=await IdvLibrary.setCustomUIConfig(config);
  console.log('handleUi:', result);
}
Platform-Specific Configuration
The SDK requires camera and network permissions. Configure each platform accordingly:
Android
Add AAR Files
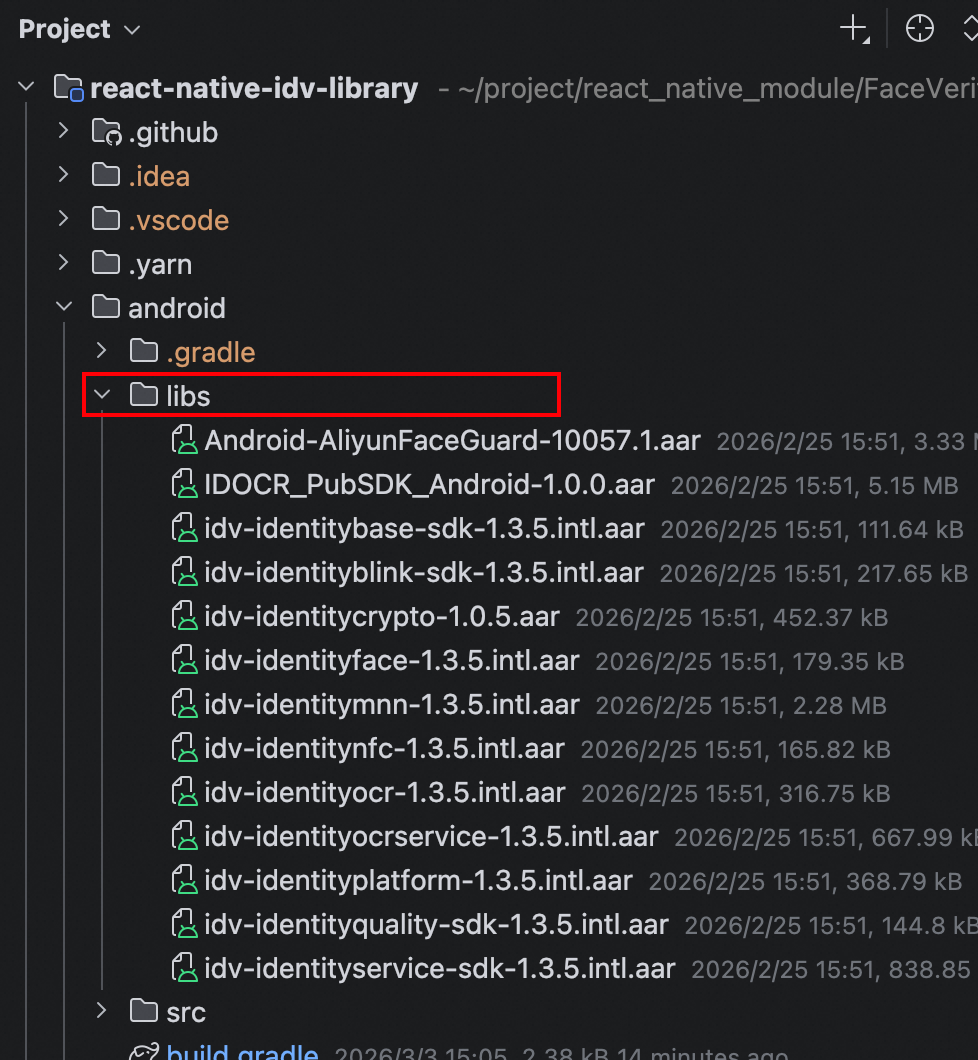
Copy the libs folder from react-native-idv-library/android to your project's android/app directory:
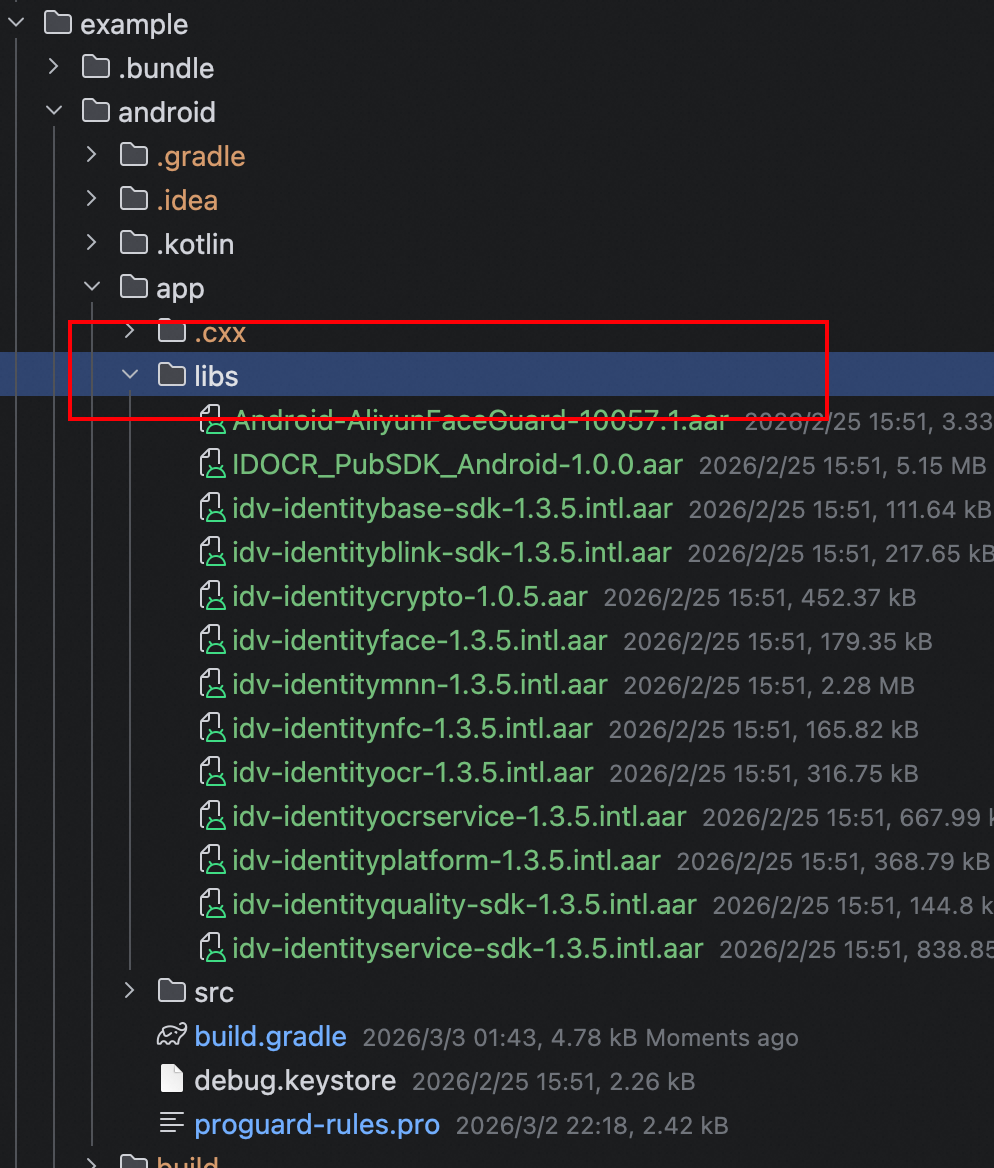
Add the following to your project's android/app/build.gradle:
// Add new
repositories {
    flatDir {
        dirs 'libs'
    }
}

dependencies {
    // Add new
    implementation fileTree(dir: 'libs', include the following: ['*.aar'])

}
Obfuscation Rules
-dontwarn com.idvlibrary.**
-keep class com.idvlibrary.** {
*;
}
-verbose
-keep class com.idv.identity.platform.api.** {*;}
-keep class com.idv.identity.platform.log.** {*;}
-keep class com.idv.identity.util.IdentityUtils {*;}
-keep class com.idv.identity.ocr.IdentityOcrApi {*;}
-keep class com.idv.identity.platform.model.** {*;}
-keep class com.idv.identity.platform.config.** {*;}
-keep class com.idv.identity.face.IdentityFaceApi {*;}


-keep class com.face.verify.intl.** {*;}
-keep class com.alibaba.fastjson.** {*;}
-keep class face.security.device.api.** {*;}
-keep class net.security.device.api.** {*;}
-keep class com.dtf.toyger.** { *; }
-dontwarn net.security.device.api.**
-dontwarn face.security.device.api.**


-keep class com.idv.identity.service.algorithm.** {*;}
-keep class com.idv.identity.base.algorithm.** {*;}
-keep class com.idv.identity.quality.QualityRouter {*;}
-keep class com.idv.identity.blink.BlinkRouter {*;}
-keep class com.idv.identity.service.IdentityFaceService {*;}
-keep class com.idv.identity.service.ocr.IdentityDocService {*;}

-keep class com.alibaba.sdk.android.oss.** { *; }
-dontwarn okio.**
-dontwarn org.apache.commons.codec.binary.**


# NFC
-keep class com.idv.identity.nfc.IdentityNfcApi { *; }
-keep class org.jmrtd.** {*;}
-keep class net.sf.**{*;}
-keep class org.**{*;}
-keep class cn.**{*;}


# Please add these rules to your existing keep rules to suppress warnings.
# This is generated automatically by the Android Gradle plugin.
-dontwarn com.fasterxml.**
-dontwarn com.google.**
-dontwarn java.applet.Applet
-dontwarn java.awt.**
-dontwarn javax.**
-dontwarn org.**
-dontwarn retrofit2.**
-dontwarn springfox.documentation.spring.web.json.Json

# Log obfuscation (optional)
-assumenosideeffects class android.util.Log {
    public static *** d(...);
}

# If using versions earlier than 1.3.2, add these rules
-keepattributes Signature
-keepattributes *Annotation*
-keep class com.alibaba.fastjson.** { *; }
-keep class * extends com.alibaba.fastjson.TypeReference { *; }
iOS
Add Required Permissions
Add these permissions to Info.plist (descriptions are for reference only):

Complete Example Code
import React from 'react';
import { Platform,Text, View, StyleSheet, Button } from 'react-native';

import IdvLibrary from 'react-native-idv-library';

IdvLibrary.installWithOptions({
  CustomHost:"cloudauth-device.cn-hongkong.aliyuncs.com",
  CustomUrl:"https://cloudauth-device.cn-hongkong.aliyuncs.com"
})
export default function App() {
  const [resultInfo, setValue] = React.useState<string | null>(null);

  async function handleVerify() {

    const extParams = Platform.select({
      ios: {
        kIdentityParamKeyLanguage: 'en',
        kIdentutyParamKeyProtocol:'xxxxxxx'
      },
      android: {
        SdkLanguage: 'en',
        Protocol:'xxxxxxxxx'
      },
    });
    // Verify identity
    const result = await IdvLibrary.verify('transactionId', extParams);// Replace transactionId with the real ID from your server.
    console.log('Verify result:', result);

    setValue(JSON.stringify(result));
  }

  async function handleGetMetaInfo() {
    // Get metadata
    const _metaInfo = await IdvLibrary.getMetaInfo();
    console.log('Meta info:', _metaInfo);
    setValue(_metaInfo);
  }

  async function handleSetCustonUiConfig() {
    const config= "{\"faceConfig\":{ \"faceBGColor\": \"#FF33FF\"}}";

    const result=await IdvLibrary.setCustomUIConfig(config);

    console.log('handleUi:', result);
  }

  return (
    <View style={styles.container}>
      <Text>Result : {resultInfo}</Text>
      <Button title="Get Verification Info" onPress={handleGetMetaInfo} />
      <Button title="Set UI" onPress={handleSetCustonUiConfig} />
      <Button title="Verify" onPress={handleVerify} />
    </View>
  );
}

const styles = StyleSheet.create({
  container: {
    flex: 1,
    alignItems: 'center',
    justifyContent: 'center',
  },
});
Go to Client SDK release notes to download the React Native Demo.
For reference only. Use the latest SDK version in production.