Cloud Firewall integrates with ESA through a dynamic address book to automate origin server protection, eliminating manual IP whitelist maintenance.
Prerequisites
-
You have an Internet Border policy configured in Cloud Firewall for your origin server.
-
Your origin server runs on an Alibaba Cloud service.
-
Origin Server Protection and the Auto-enable latest back-to-origin IP list option are enabled.
Cloud Firewall's use of the ESA address book: Mechanism
With Cloud Firewall enabled for your origin server, you can reference the ESA address book (ESA Back-to-origin Address) in Cloud Firewall. The ESA address book contains ESA node IPs. After you add it to an Internet Border policy, Cloud Firewall filters traffic that does not originate from ESA nodes. When ESA back-to-origin IPs change, the address book updates automatically, eliminating the need to manually maintain an IP whitelist for ESA node IPs.

Reference the ESA address book
-
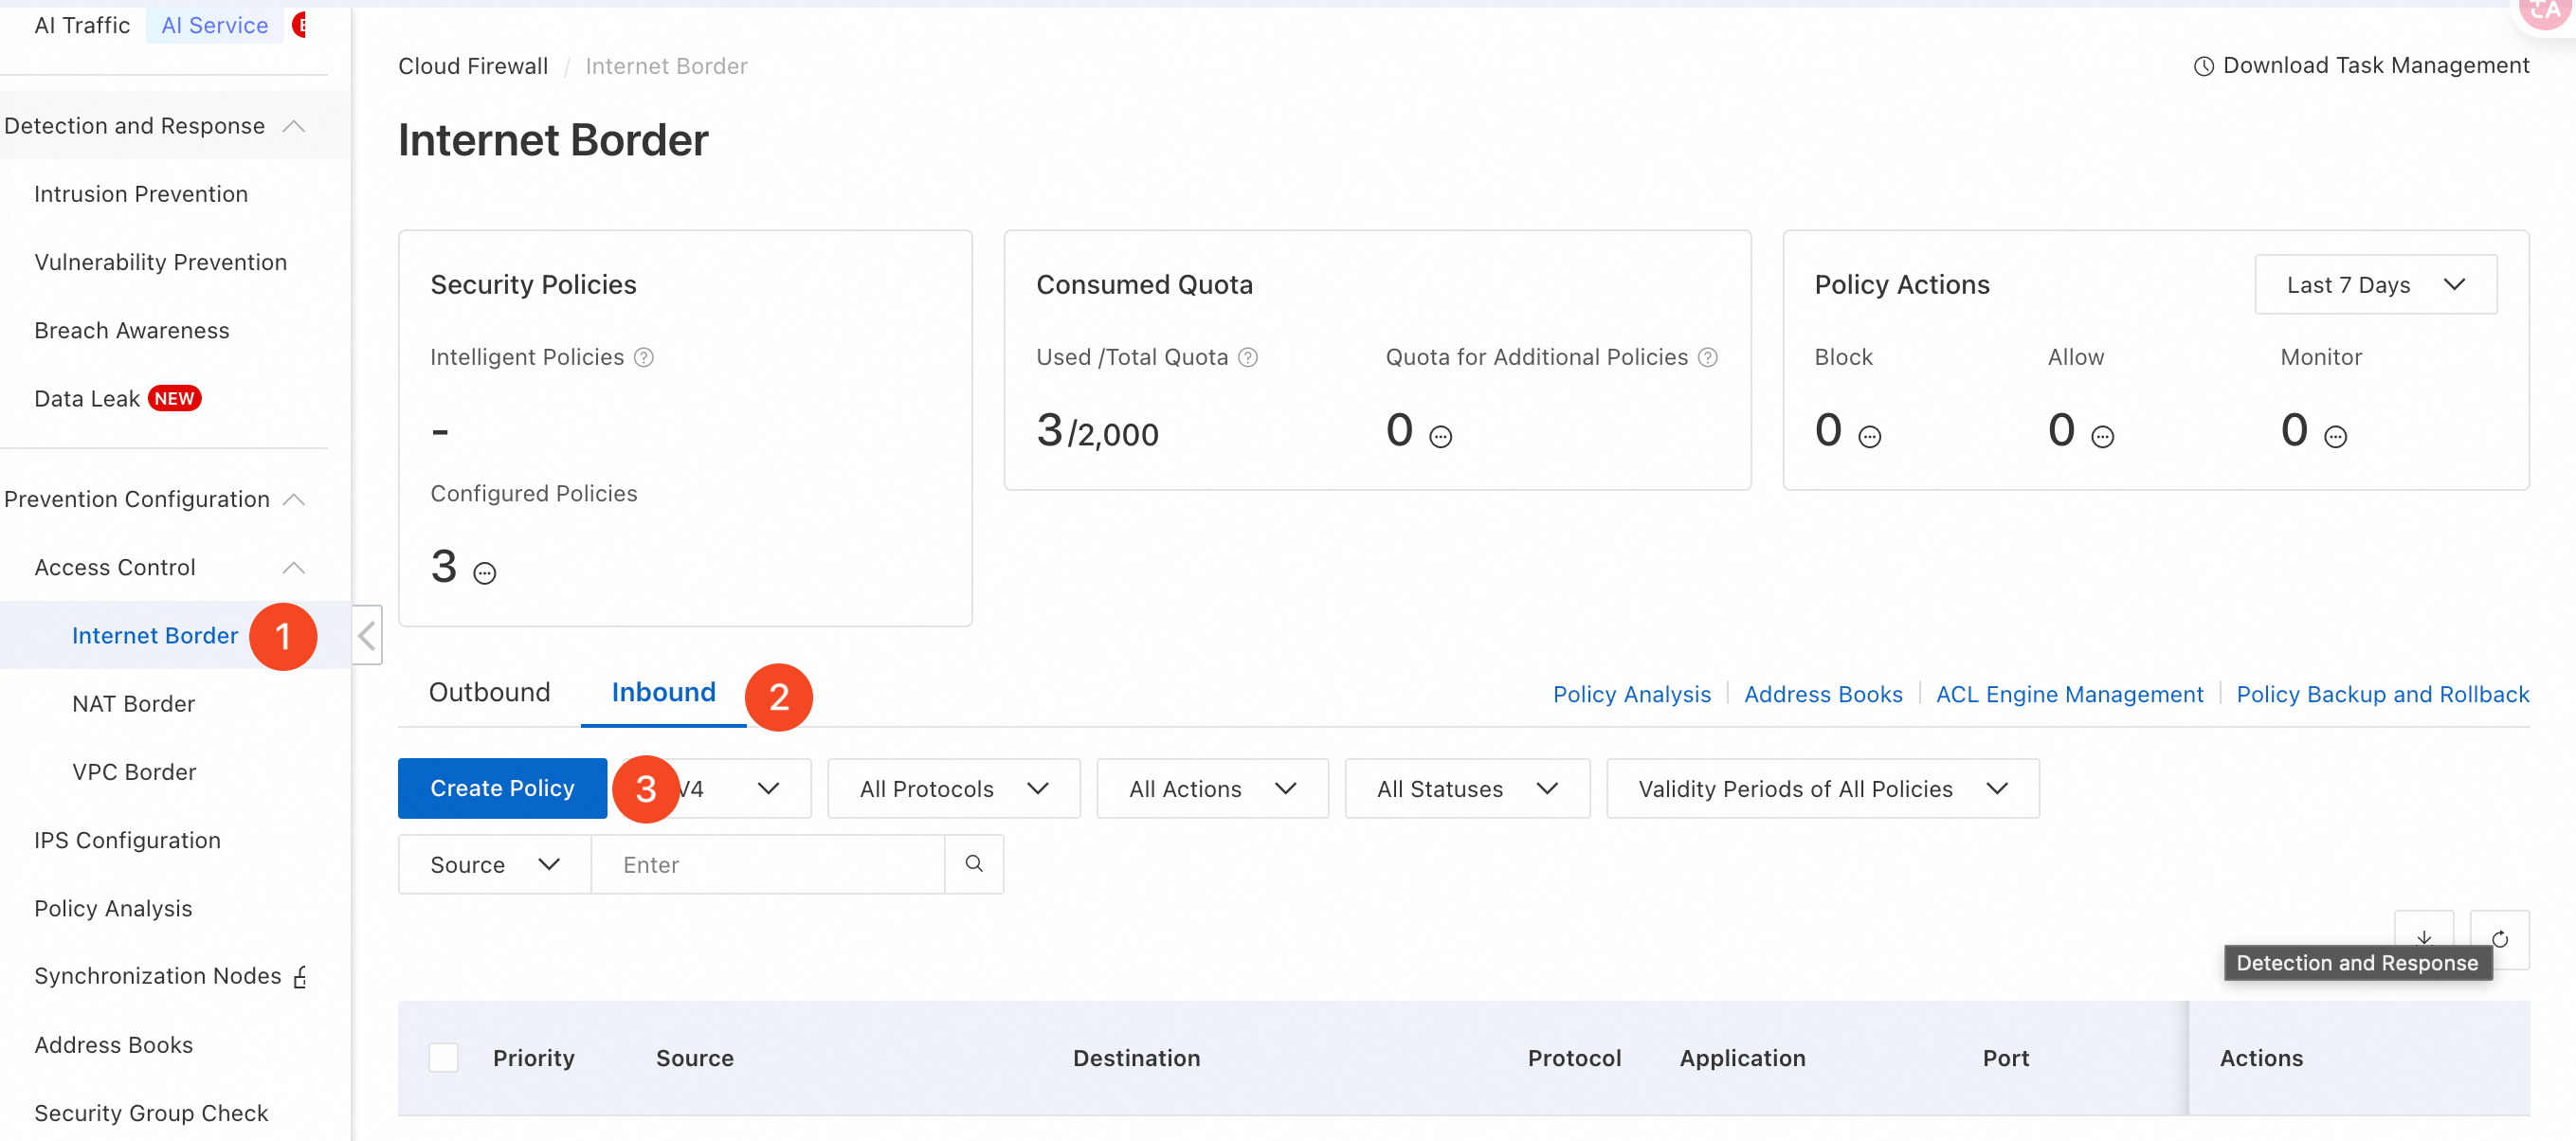
Go to the Internet Border inbound policy configuration page in the Cloud Firewall console. On the Inbound tab, select the IP version (IPv4 by default), and then click Create Policy.
-
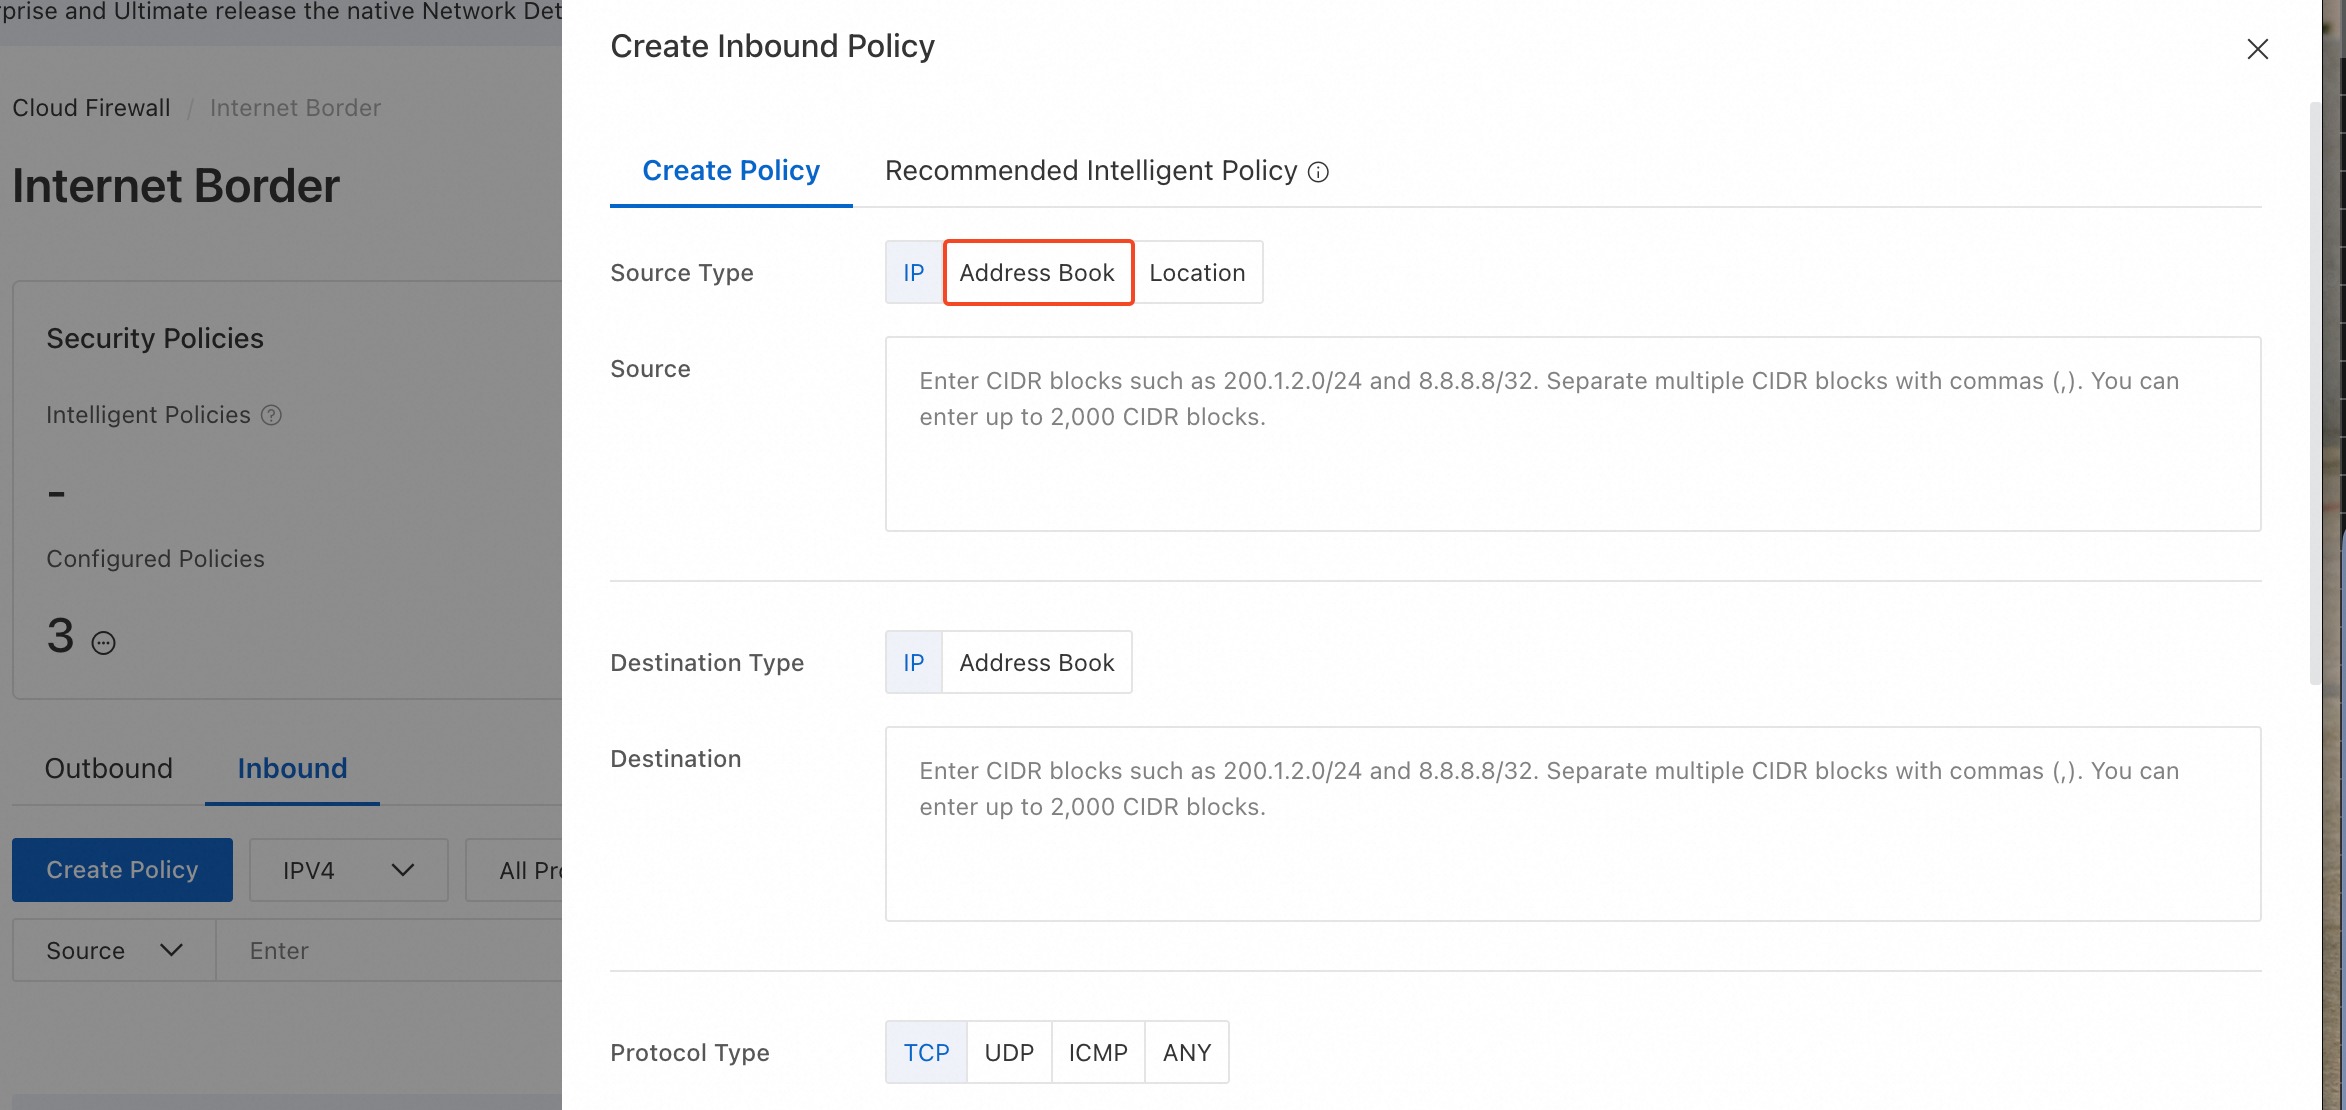
In the Create Inbound Policy panel, select the Create Policy tab. For Source Type, click Address Book.
-
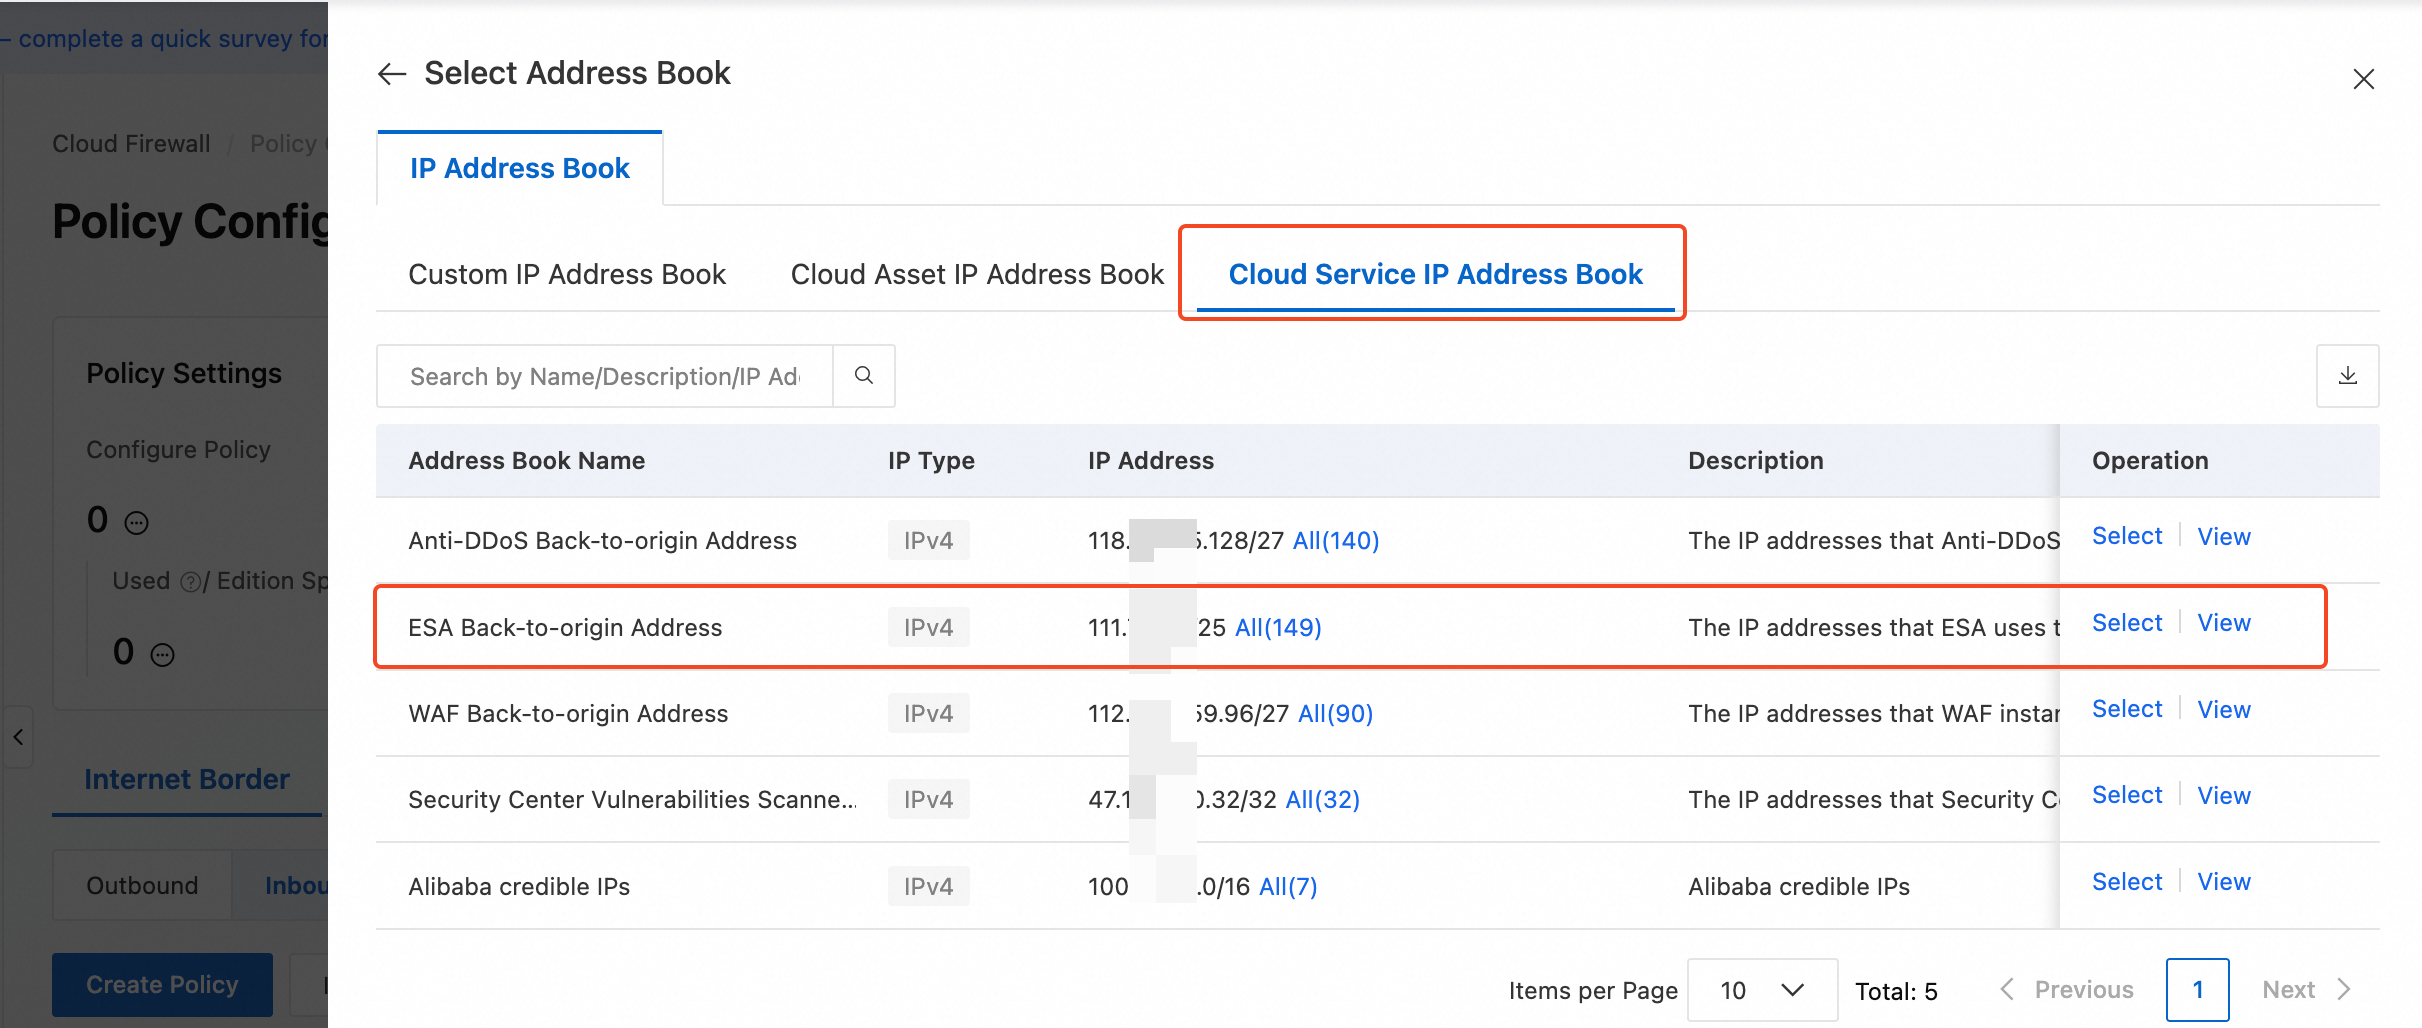
Select Cloud Service IP Address Book, select ESA Back-to-origin Address from the results, and then click Select in the Actions column.
-
In Destination, enter your origin server IP/CIDR address, such as
1.2.3.4/32.
-
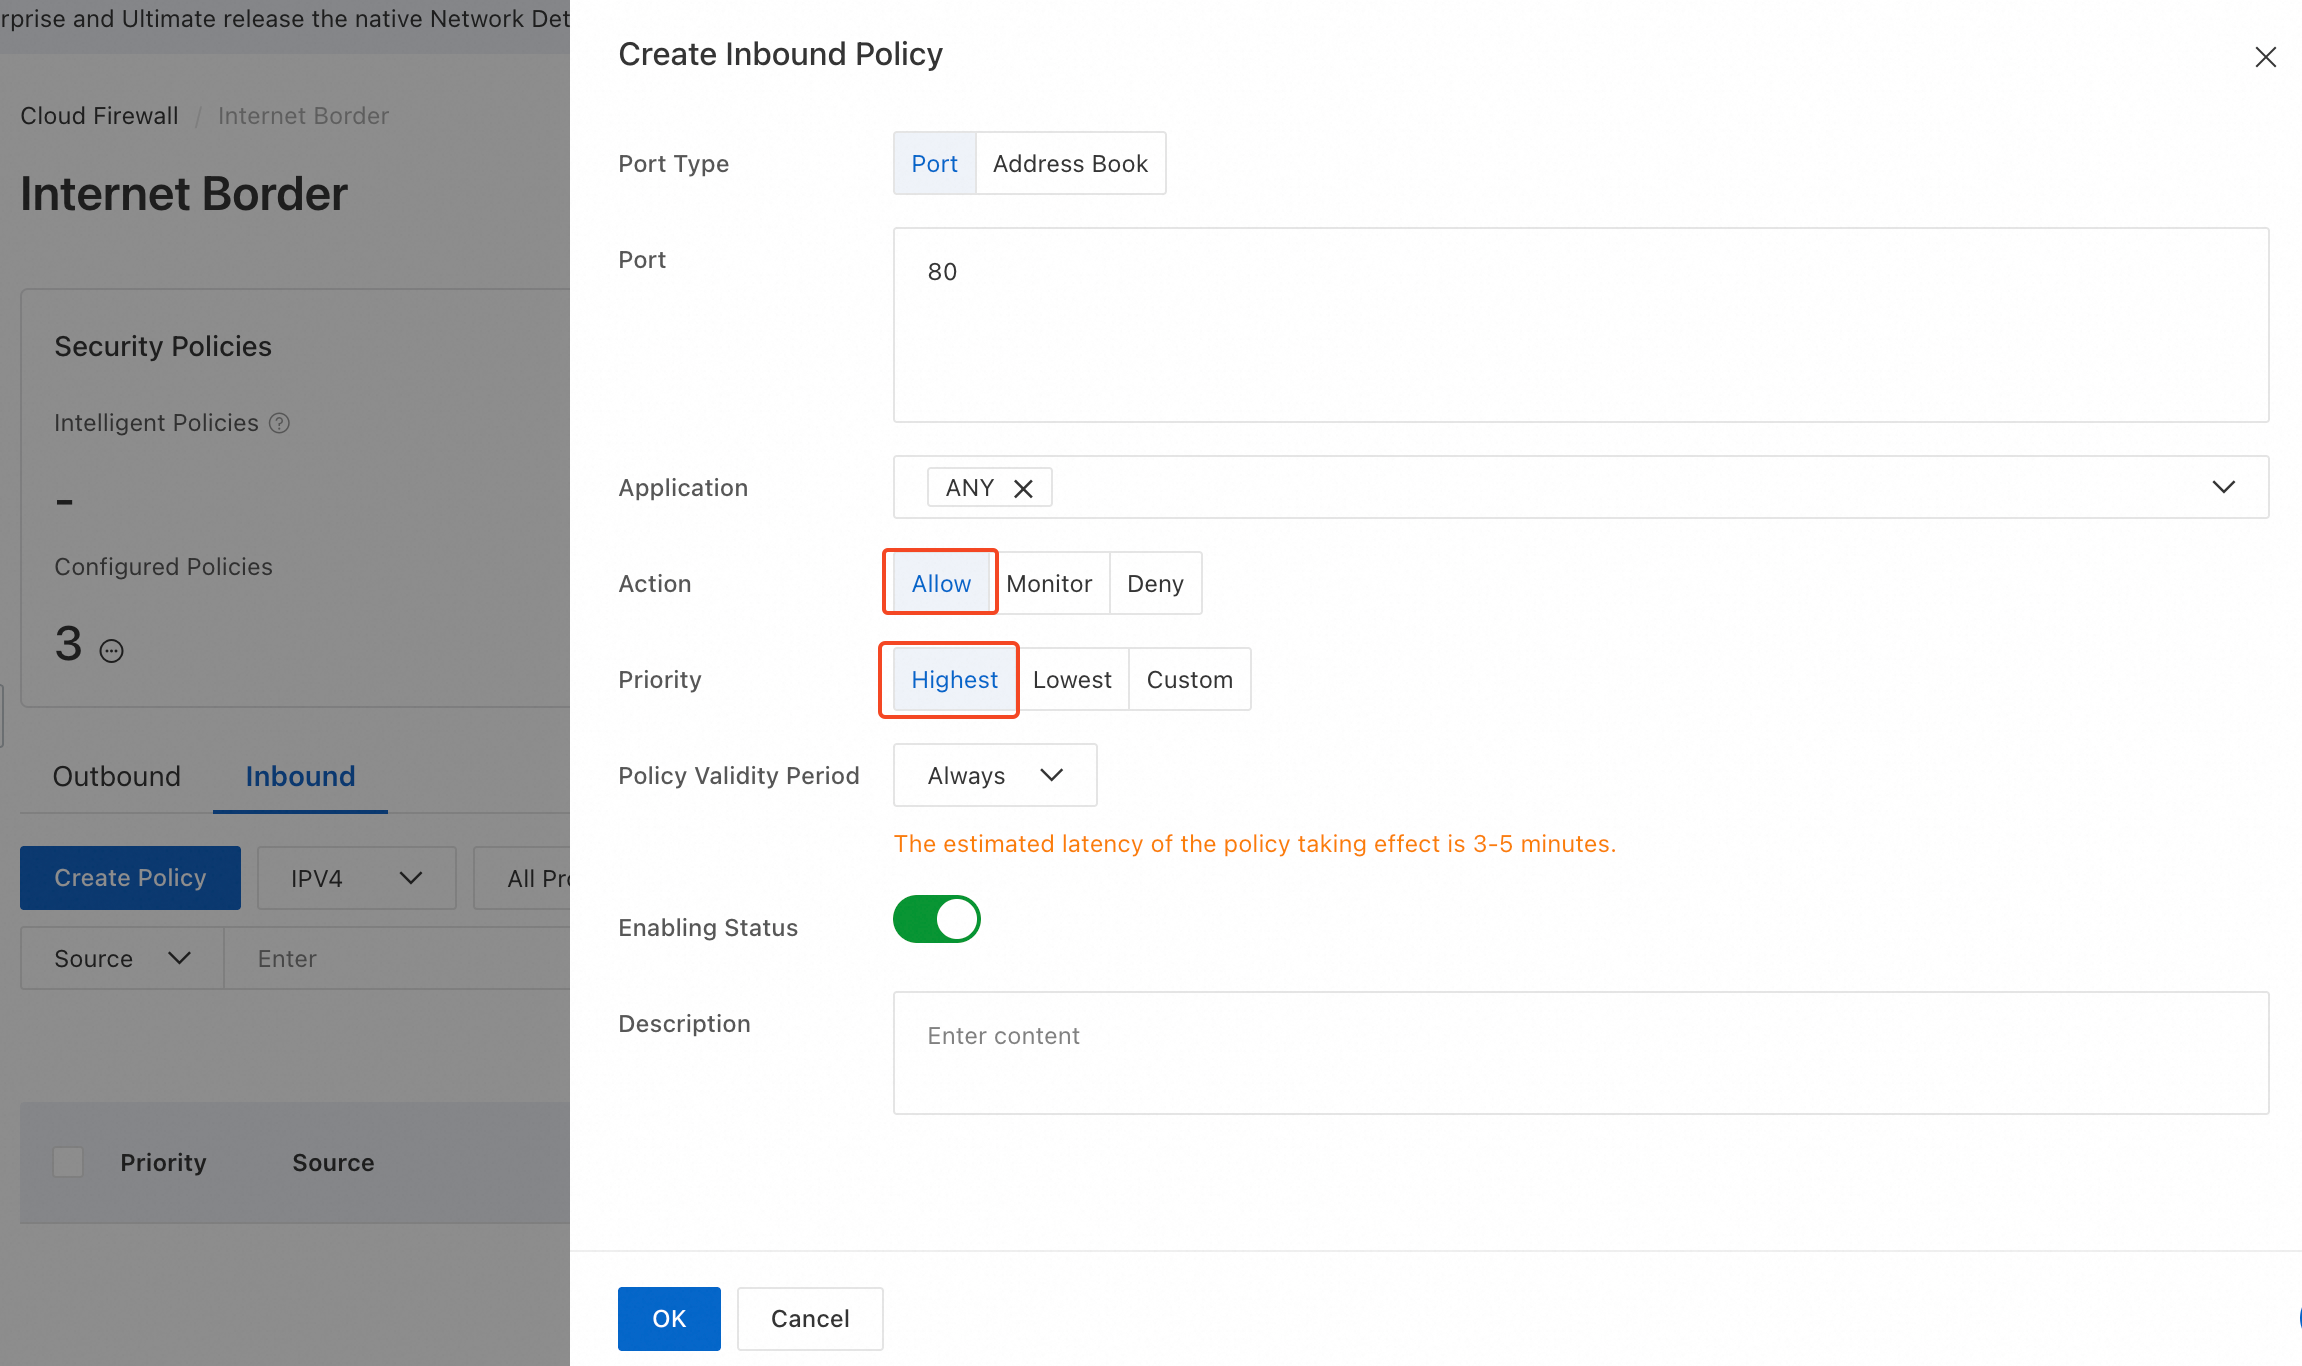
You need to select a protocol type based on your business scenario. If you are unsure, select ANY, enter your service ports in the Port field, and set Application to ANY.
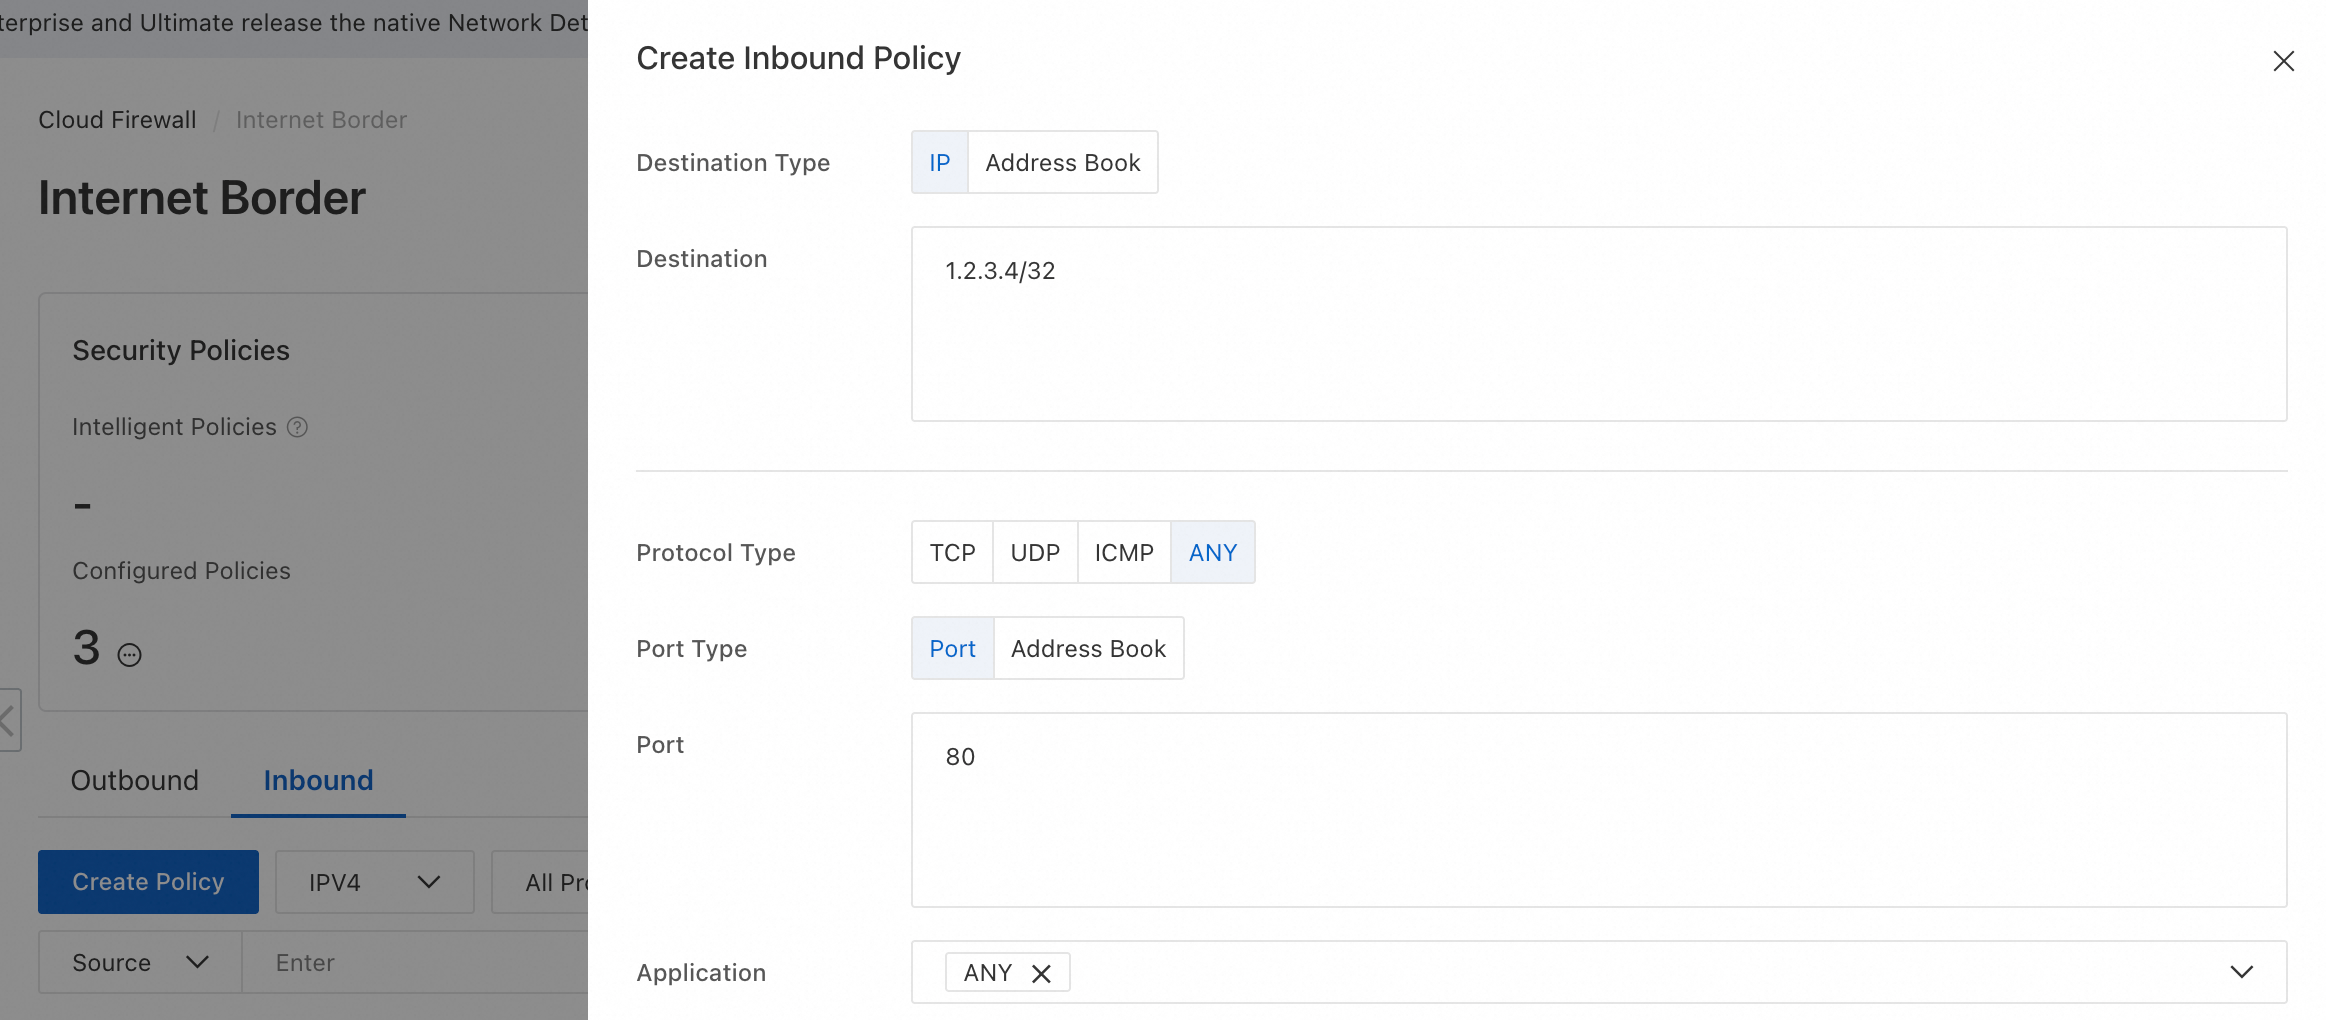
-
Set Action to Allow, Priority to Highest, Policy Validity Period to Always, and Status to
 . Then, click OK.