When your site faces high-concurrency traffic from flash sales, sales promotions, or popular events, your origin server can become overloaded. This can cause slow responses or even a breakdown. The Waiting Room feature protects your origin server by creating a virtual queue at the edge. It queues user requests that exceed your origin's capacity. This ensures stable server performance and improves the user experience by providing a clear waiting time. Follow these steps to quickly set up and enable a waiting room for your site.
Configure a basic waiting room for a flash sale in 5 minutes
Assume your origin server can handle a maximum of 300 concurrent users. You need to configure a waiting room for the upcoming flash sale page at promo.example.com/flash-sale to protect the server.
Procedure
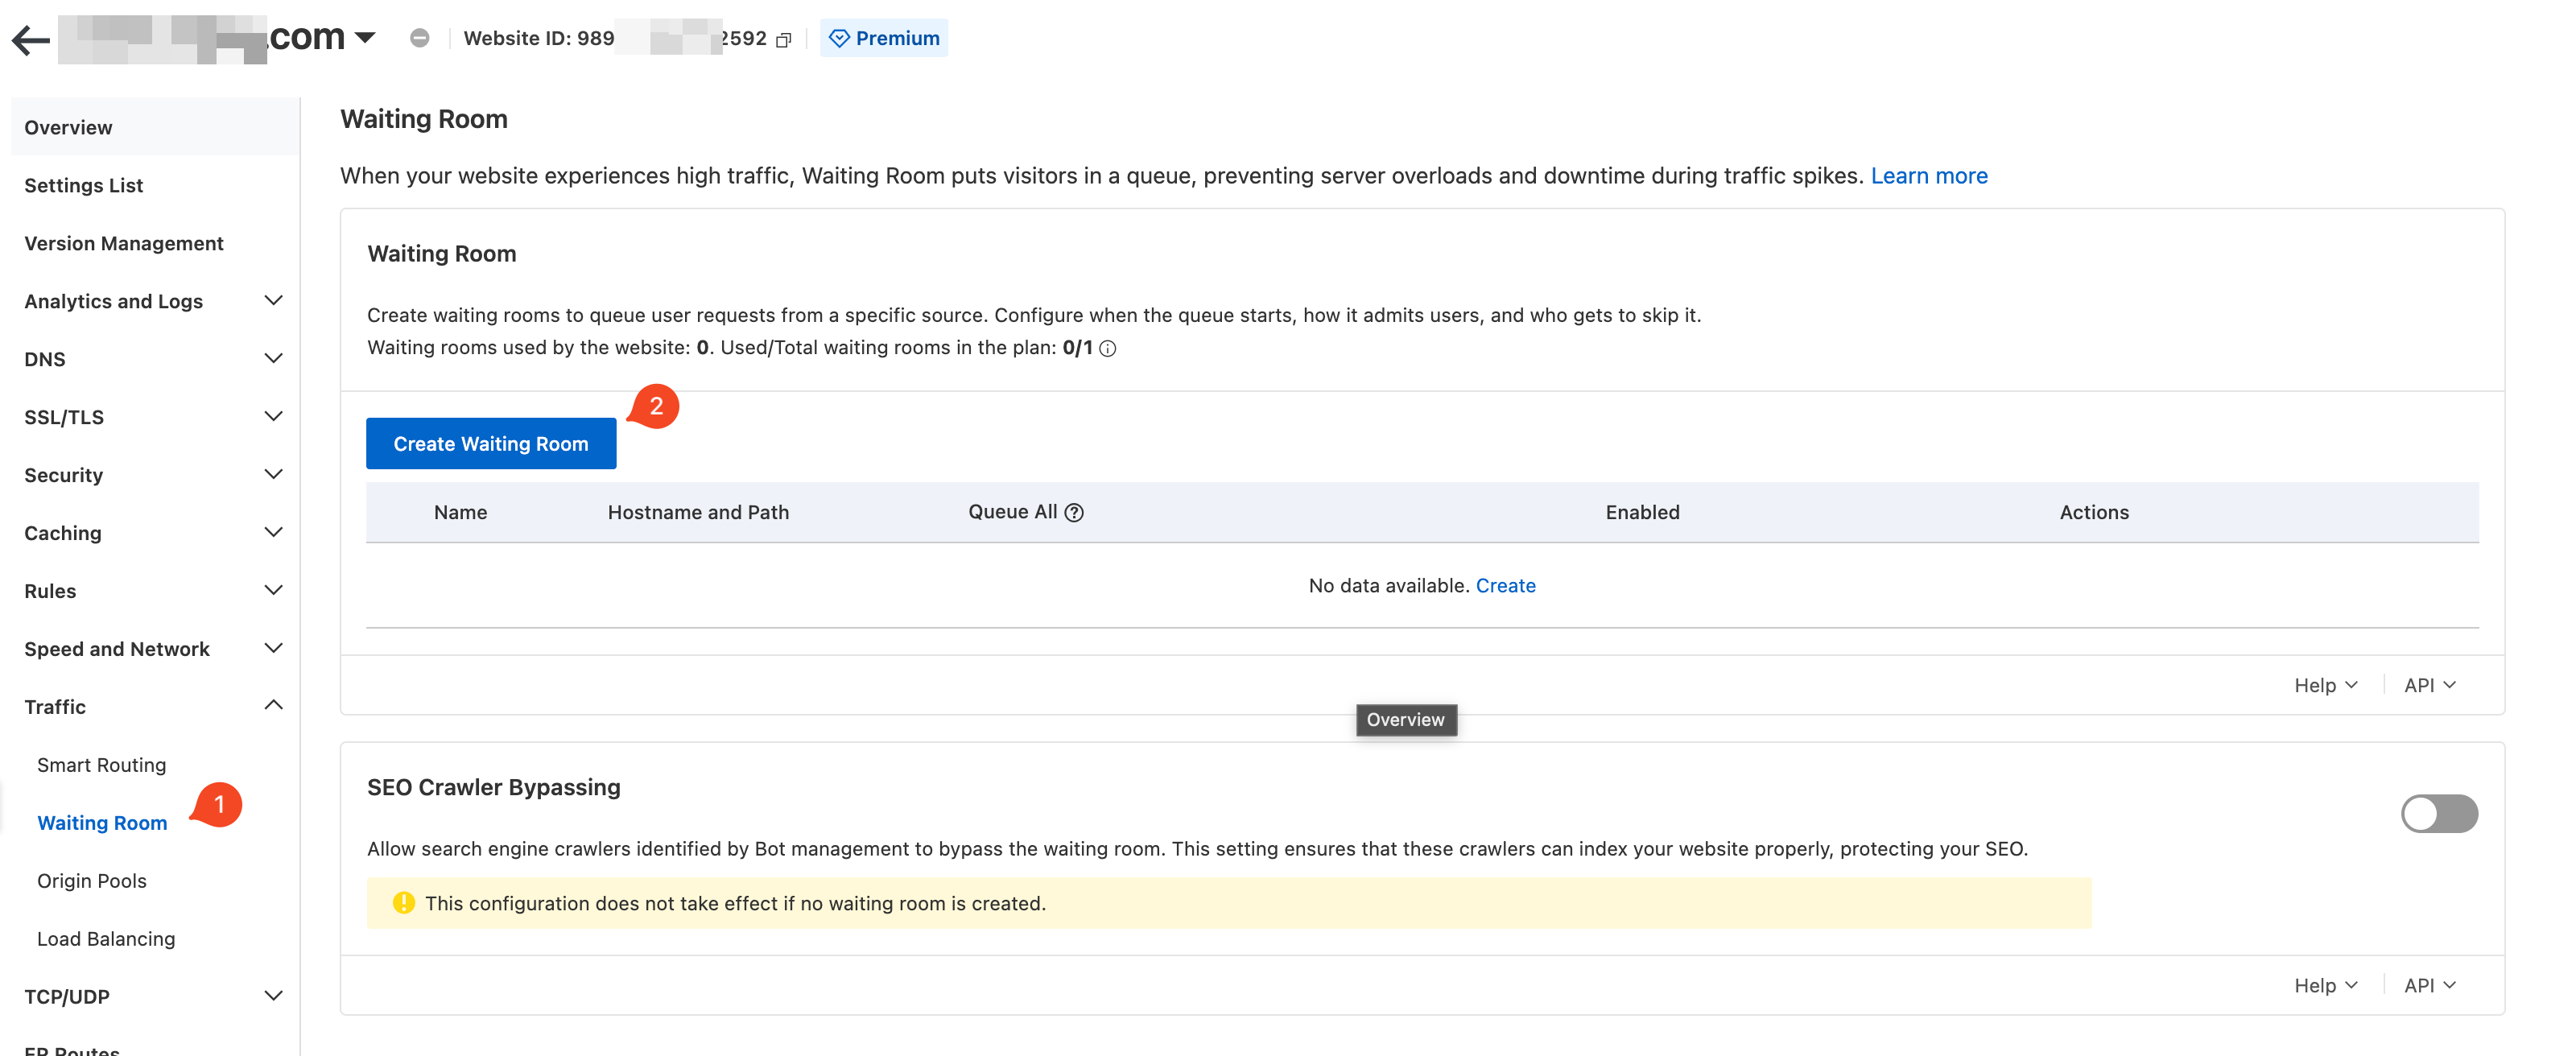
In the ESA console, select Websites, and then click the target site in the Website column.
In the left navigation pane, choose .
In the Waiting Room area, click Create Waiting Room. Fill in the following core parameters:
Waiting Room Name:
flash-sale-roomHostname and Path:
promo.example.com/flash-saleSubdomain:
promoPath:
flash-sale
Custom Cookie:
__aliwaitingroom_flash_sale(This acts as the queueing credential.)Total Active Users:
300(This value should match your origin's concurrent capacity.)New Users per Minute:
300(This setting ensures that users are admitted quickly at the start of the event.)Session Duration:
5
Result verification
The waiting room is enabled by default. When the number of concurrent users accessing promo.example.com/flash-sale exceeds the Total Active Users limit of 300, subsequent users are directed to a waiting page that displays the estimated wait time.

Create a waiting room
For more fine-grained control over your waiting room, follow these detailed steps.
Step 1: Go to the waiting room configuration page
In the ESA console, select Websites, and then click the target site in the Website column.
In the left navigation pane, choose .
In the Waiting Room area, click Create Waiting Room.
Step 2: Basic settings
In this step, you define the basic information for the waiting room, such as its name and path.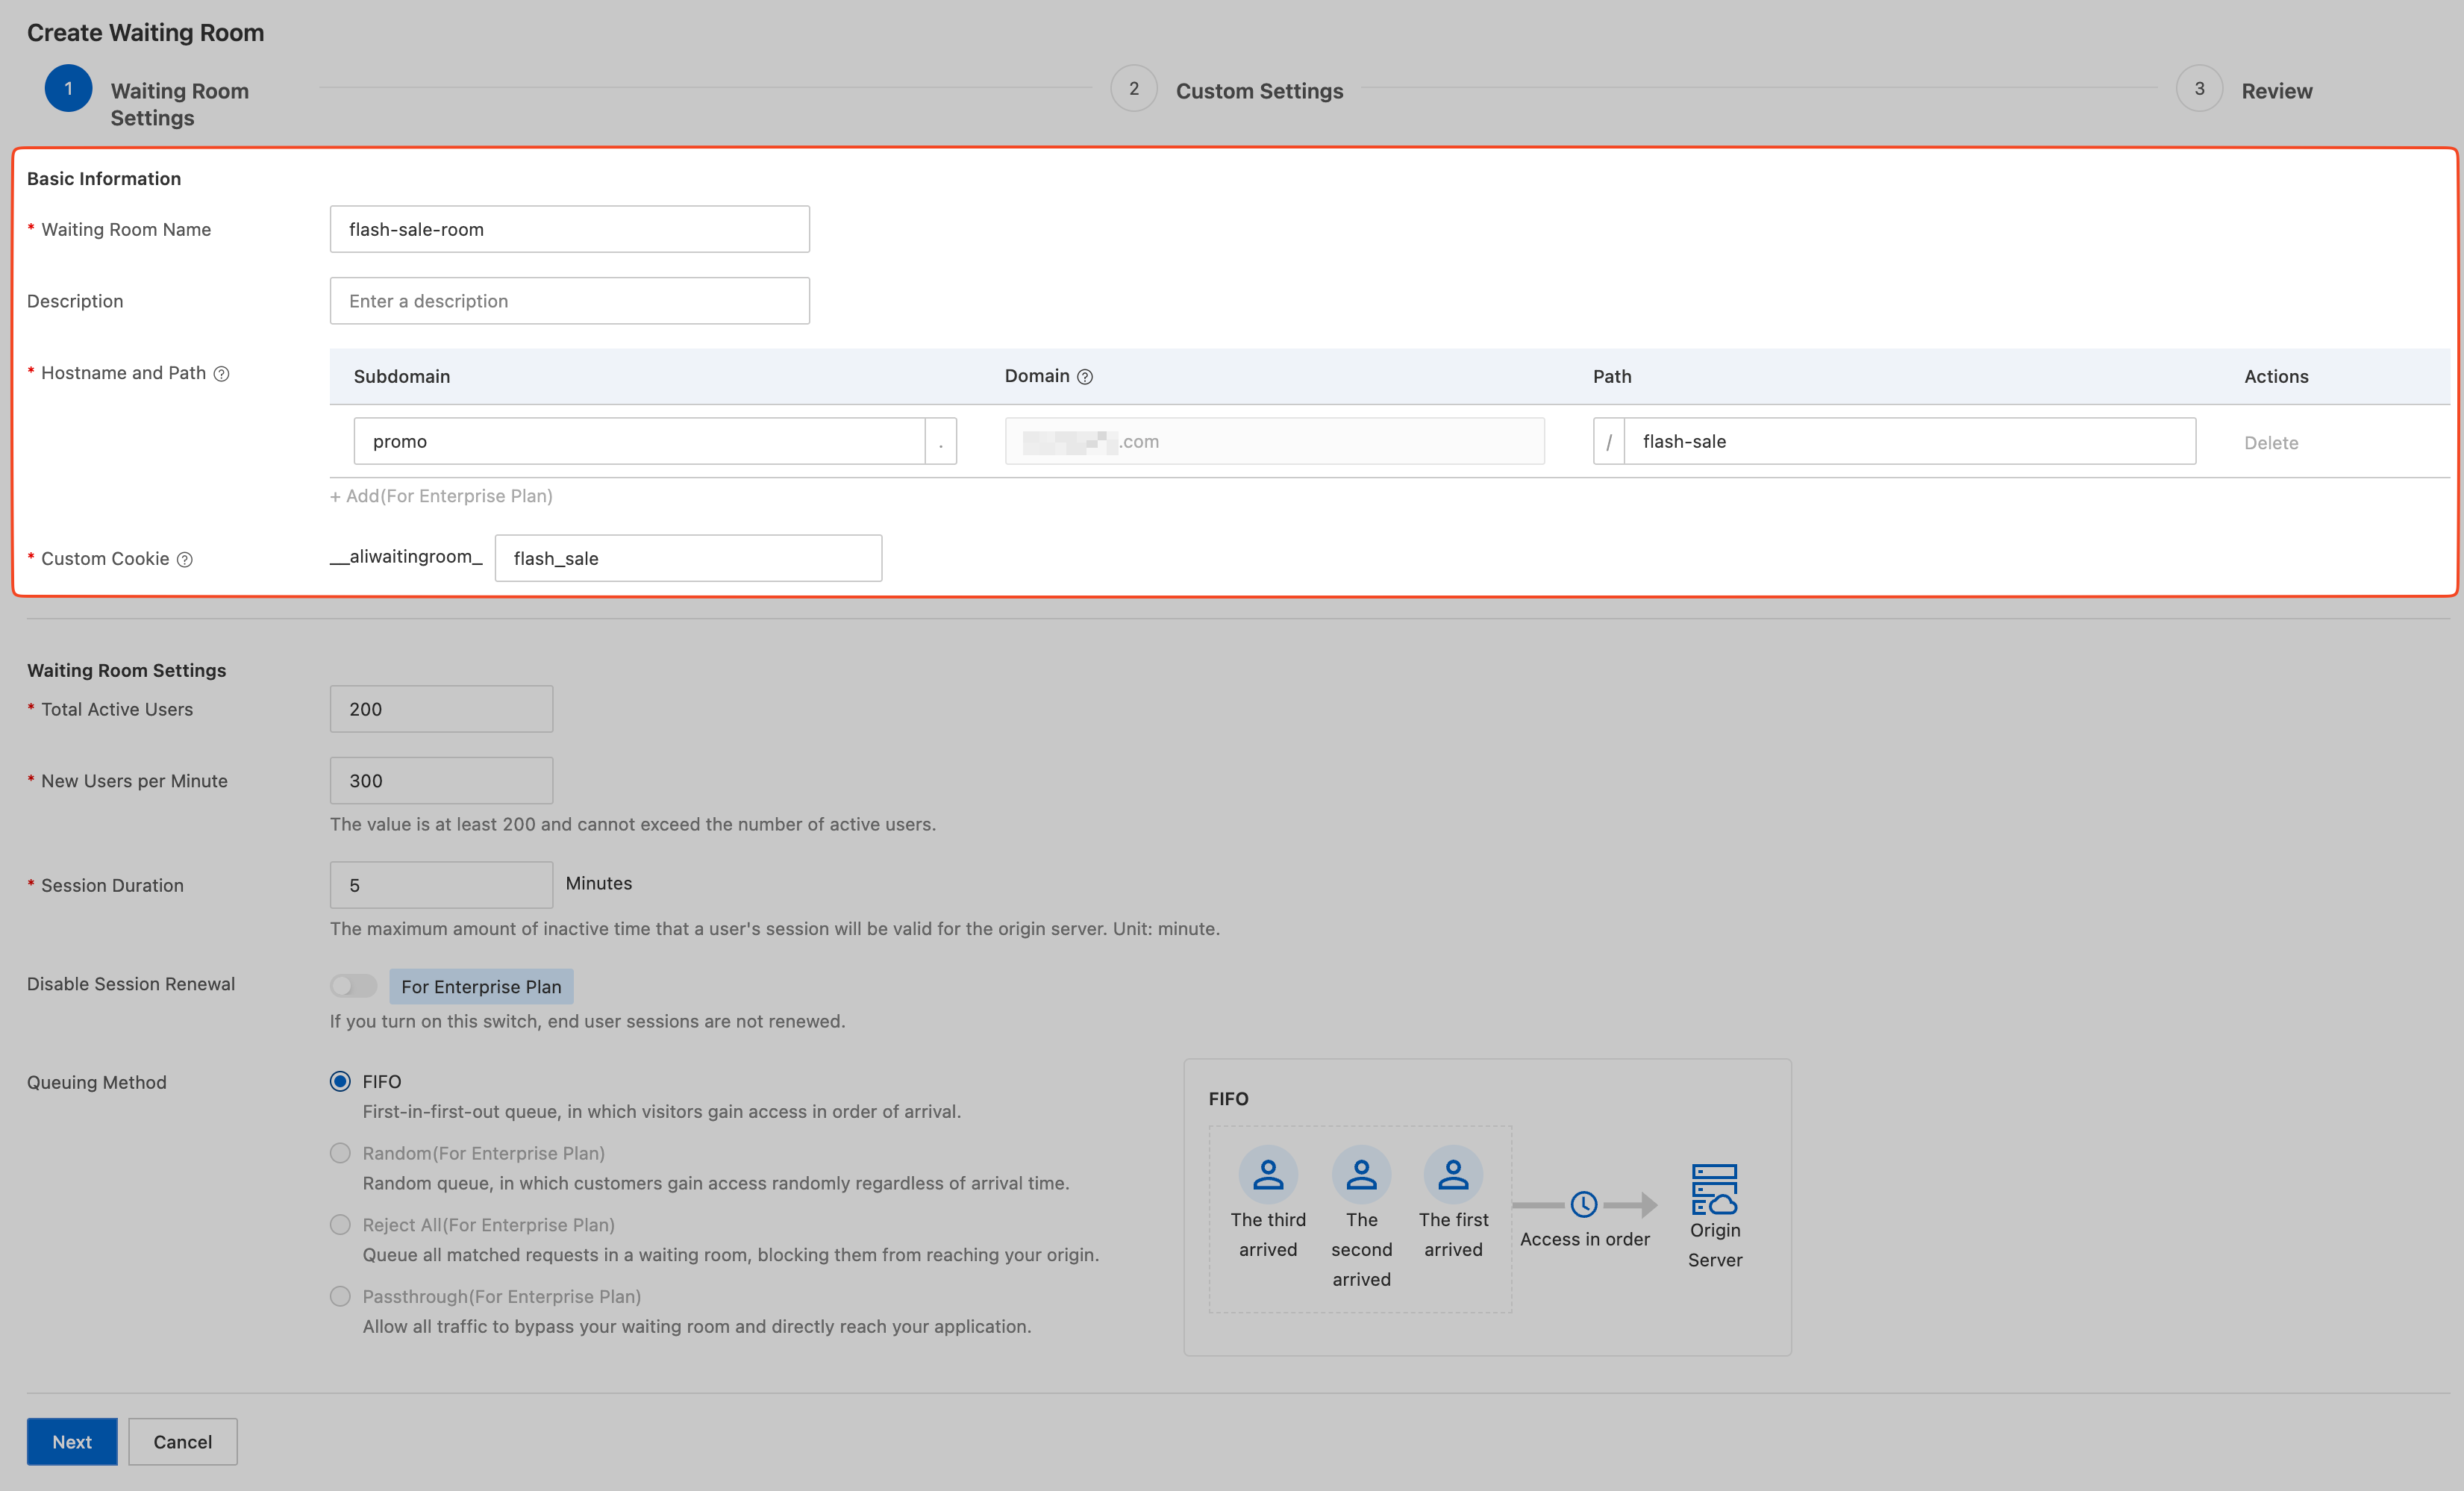
Parameter | Description |
Waiting Room Name | Set an easy-to-identify name for your waiting room, such as |
Hostname and Path | Defines the exact URL where the waiting room is active. A site can have multiple hostnames (domain names). This rule applies only to the Hostname and Path you specify. Example: If the hostname is |
Custom Cookie | The credential used to identify and track a user's queue status. The cookie name has a fixed prefix of Example: |
Step 3: Room capacity and rate configuration
In this step, you define the waiting room's capacity and the rate at which users are admitted. This is the core configuration for protecting your origin server.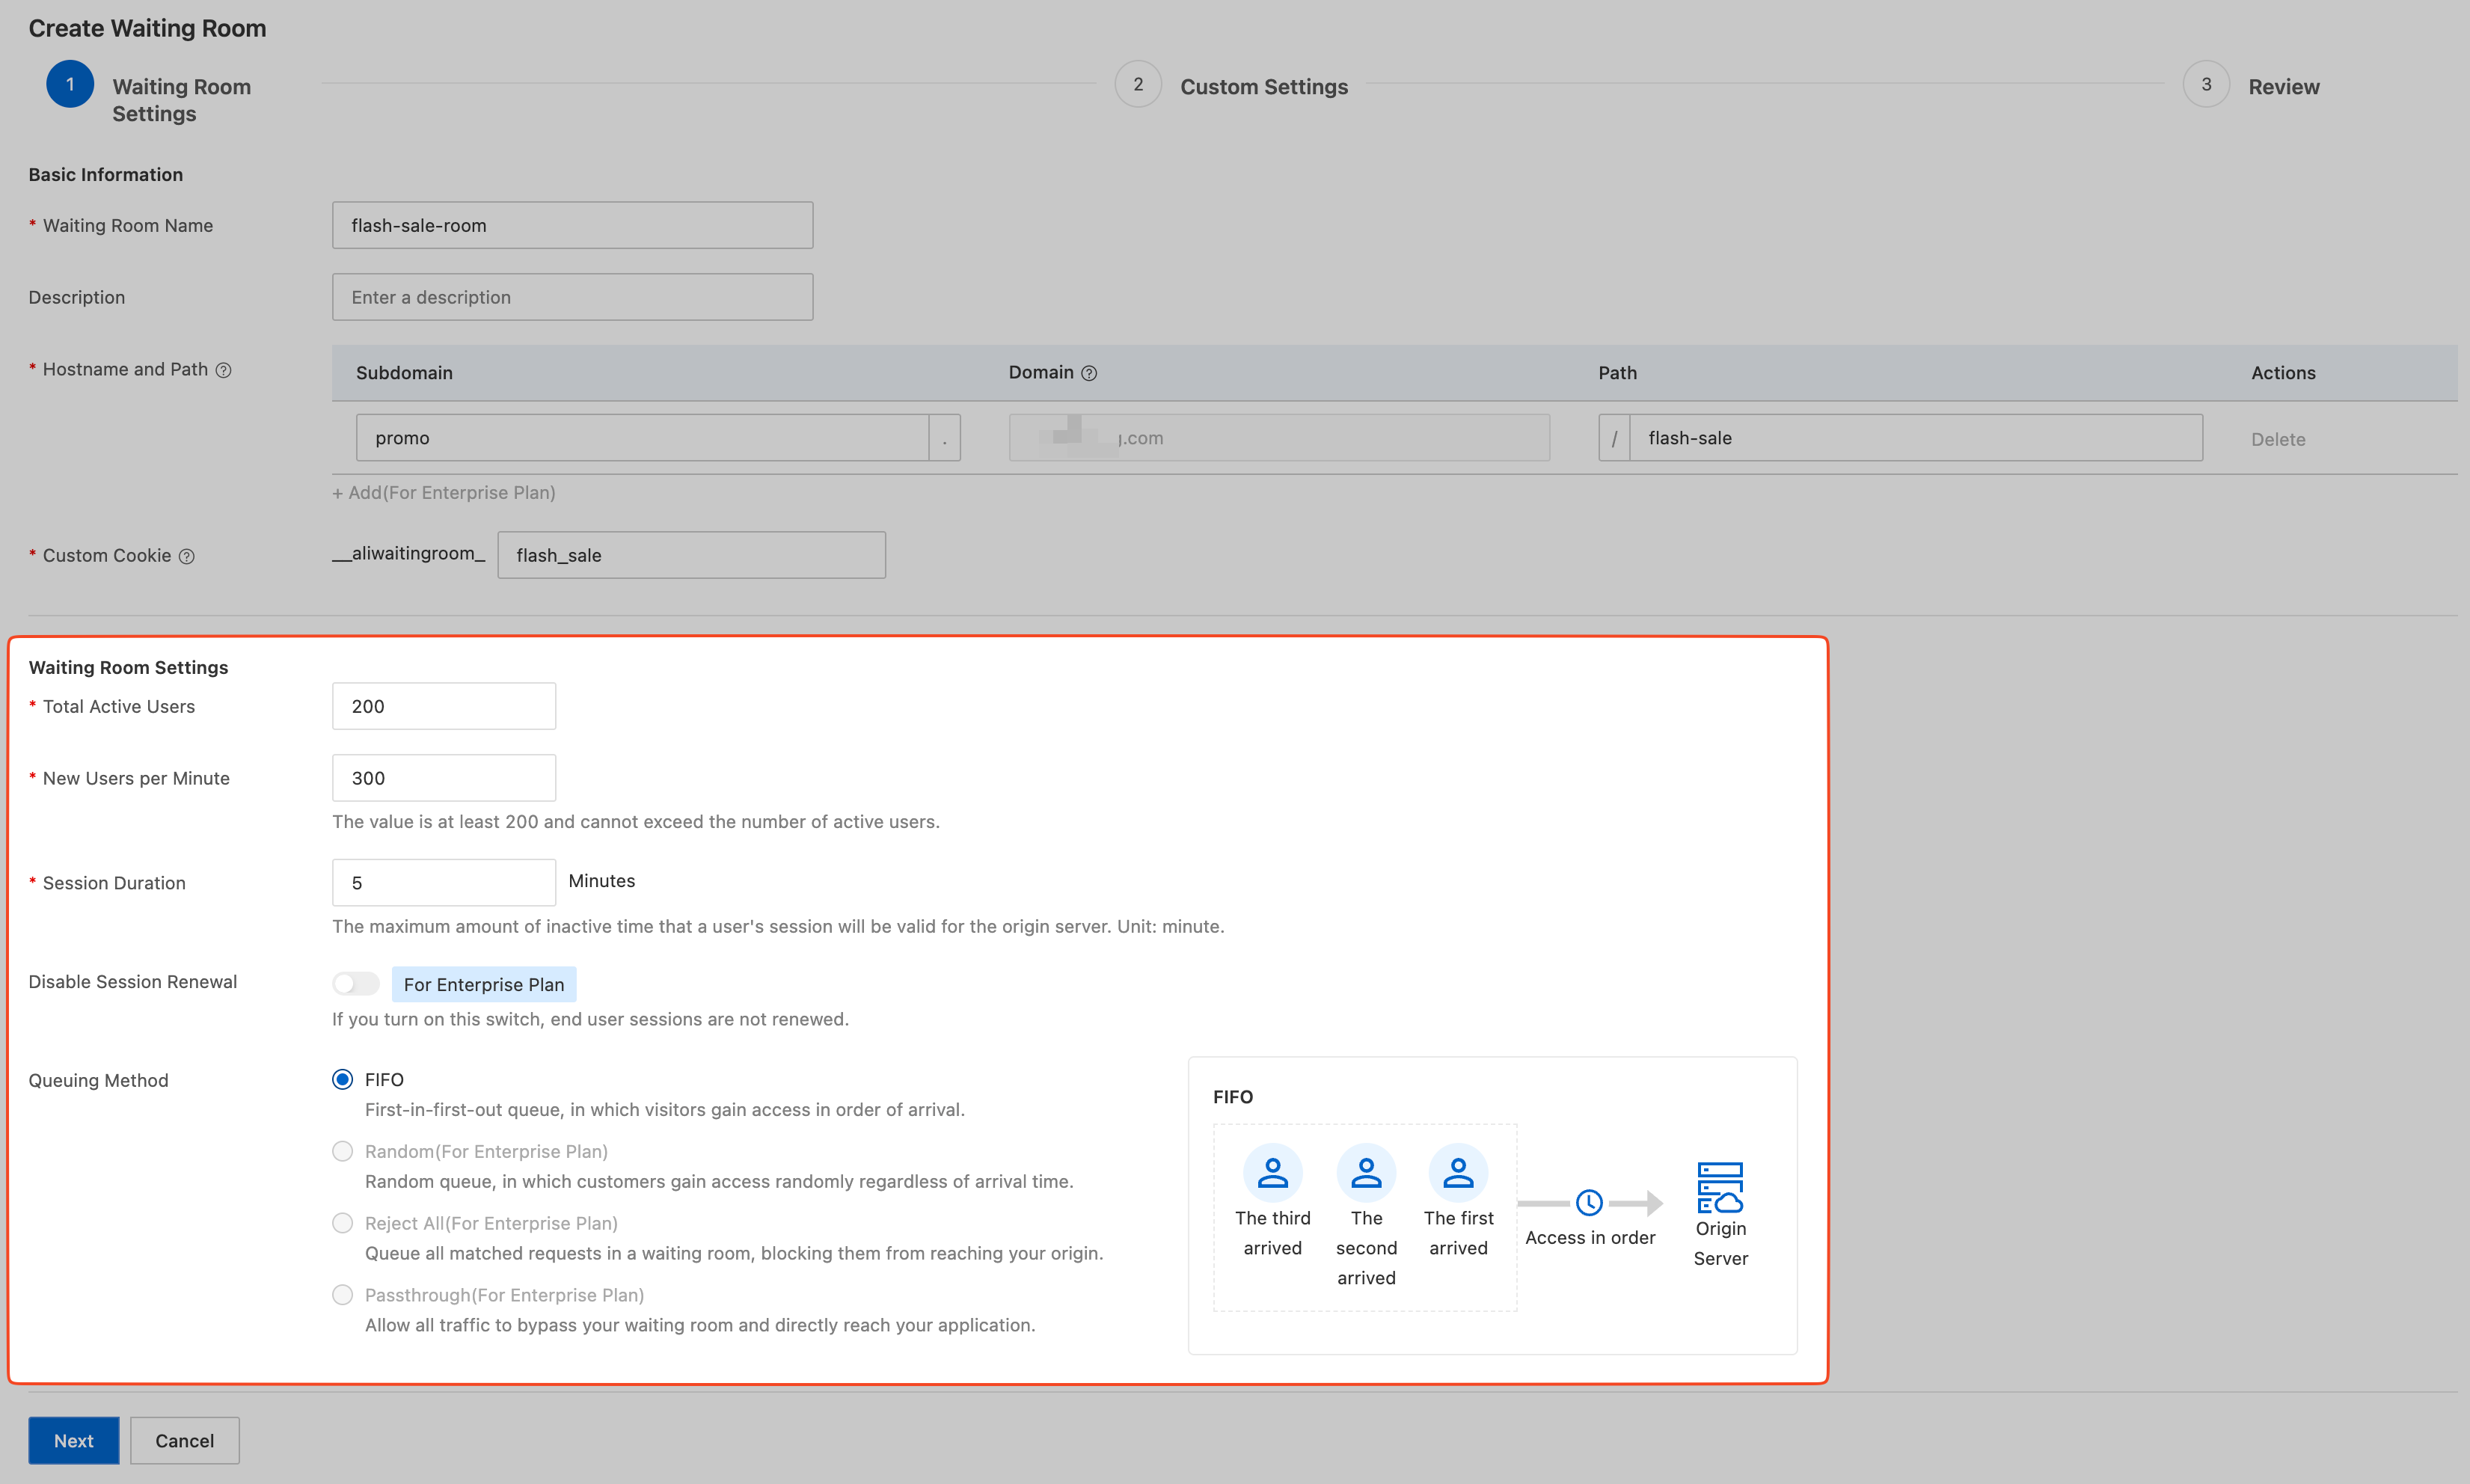
Parameter | Description |
Total Active Users | Purpose: Sets the maximum number of concurrent users that can access your origin server at the same time. Description: Set this value based on your origin server's actual concurrent processing capacity. When the number of active users accessing the origin reaches this threshold, new user requests are sent to the queue. Note: The minimum value is 200. If your origin's actual load is less than 200, set this value to 200 and use the New Users per Minute parameter to control the admission rate more precisely. |
New Users per Minute | Purpose: Sets the maximum number of new users admitted from the queue to the origin server each minute. This controls the growth rate of the load on your origin. Description: This parameter determines how quickly the queue is processed. For example, if you set it to 300, a maximum of 300 new users can move from the waiting page to the origin server each minute. Note: The minimum value is 200. It must be less than or equal to the Total Active Users. |
Session Duration | Purpose: Defines the validity period of a user's session after they leave the queue. Description: After a user successfully accesses the origin server, if they leave temporarily (for example, by closing the page) and return within the time set by this parameter, they do not need to queue again. The default value is 5 minutes. |
Disable Session Renewal | Purpose: Determines if a user's session validity period is automatically refreshed during interaction with the origin server. Note: The name of this toggle is the opposite of its behavior. Choose an option based on your desired outcome:
|
Queuing Method | Purpose: Selects the policy for admitting users from the waiting page.
|
Step 4: Customize the waiting page
In this step, you configure the page content or API response that users see while they are in the queue.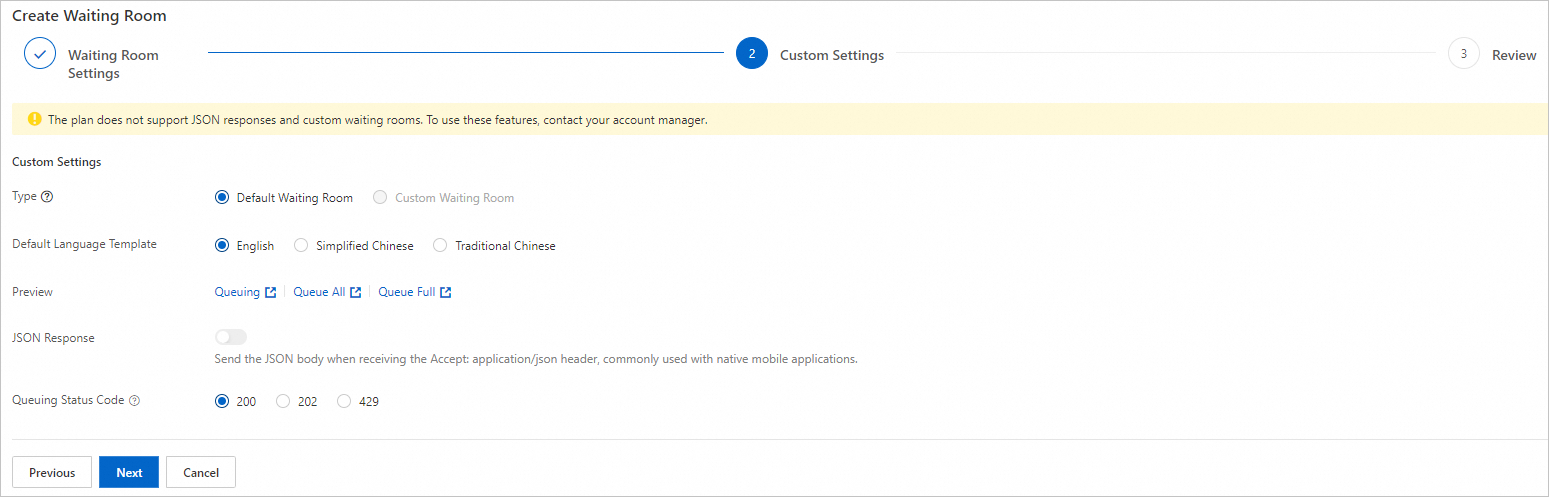
Parameter | Description |
Type | Default Waiting Room: A standard waiting page provided by the system. It automatically displays the estimated wait time. You can select a Default Language Template (English, Simplified Chinese, or Traditional Chinese). Custom Waiting Room: Lets you upload a custom HTML page. To use this feature, contact your sales representative.
|
Preview | Click the link to preview how the waiting page appears in different states, such as Queuing or Queue All. |
JSON Response | Purpose: Provides structured queue status information for non-browser clients, such as apps and miniapps. Enable this toggle. When a client's request header includes Interaction flow:
Response example: |
Queuing Status Code | Customize the HTTP response status code that users receive while in the queue. The default is |
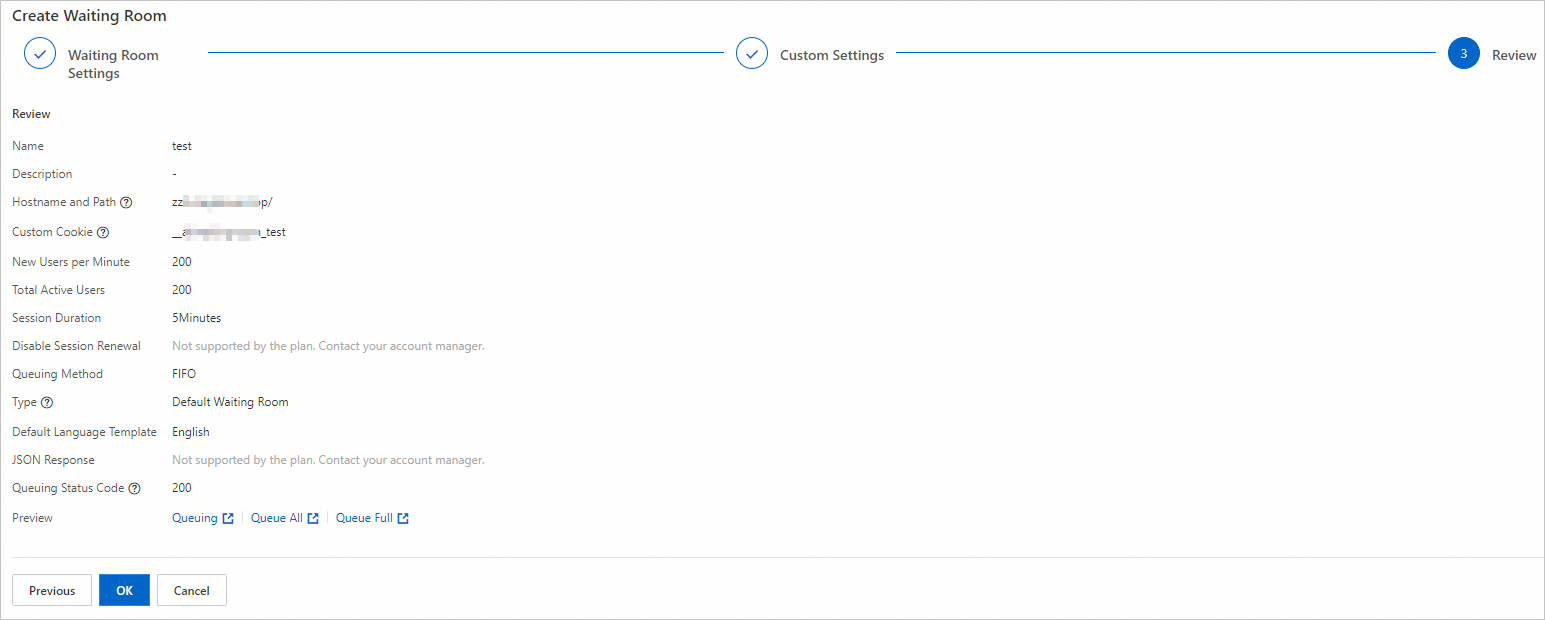
Step 5: Preview and enable the waiting room
A summary of the settings from the previous steps is displayed. This lets you confirm your configuration and choose whether to configure other features. After you confirm that the parameters are correct, click OK to create the waiting room.
After the waiting room is created, the feature is enabled by default.
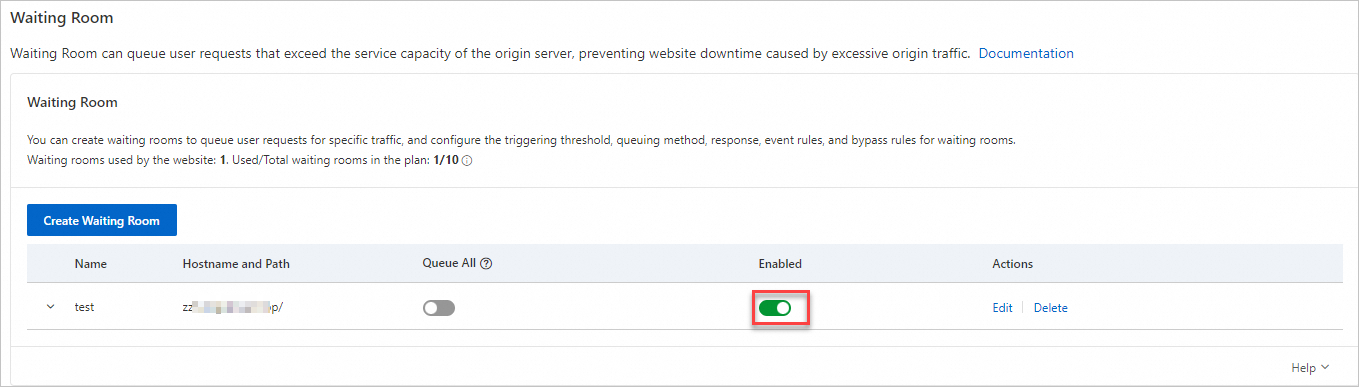
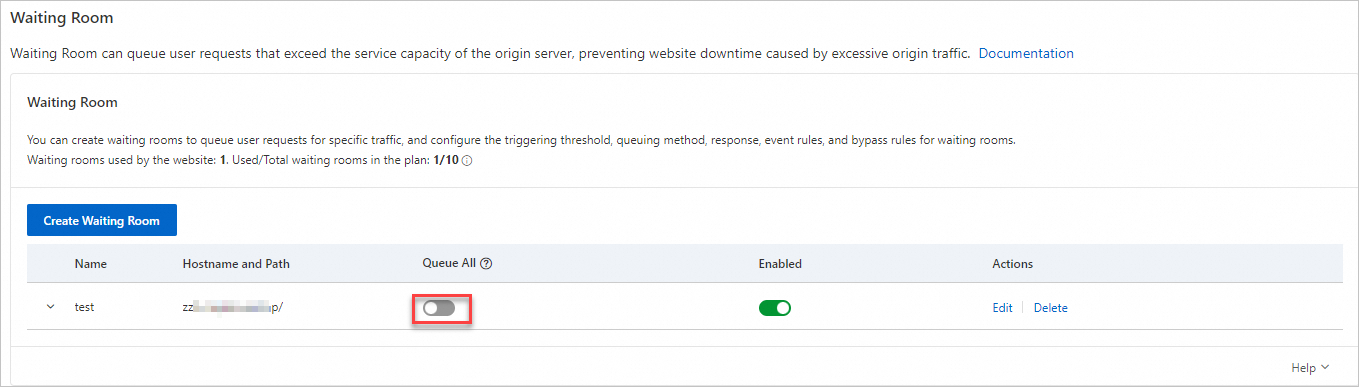
You can also toggle Queue All on or off for all requests as needed:
Off: This is the default state. When the number of requests reaches the thresholds defined for Total Active Users and New Users per Minute, excess requests are sent to the waiting room queue.
On: All new visitors are required to queue. This can be used to prepare for a product launch or other scheduled events.
NoteActive users who are already accessing your origin server can continue their sessions. They are not returned to the queue before their session expires.
Queue All overrides all other waiting room settings, including event settings.
What to do next
If you are an Enterprise user, you can also use the following advanced features for greater control over the waiting room:
Scheduled waiting room events: Automatically adjust the waiting room's capacity and rate parameters at preset times to handle predictable traffic peaks and troughs.
Waiting room bypass rules: Set specific rules based on IP, header, or cookie to allow matching requests to bypass the waiting room and access the origin server directly.