To centralize permission management for Alibaba Cloud products, such as Enterprise Distributed Application Service (EDAS), EDAS has migrated its built-in permission management to Resource Access Management (RAM). This topic describes how to switch from EDAS built-in permission management to RAM permission management and grant EDAS access policies to a RAM user in the RAM console.
Background information
For more information about the basic structure and syntax of the access policy language, see Policy structure and syntax.
Parameter | Description |
Effect | The effect can be Allow or Deny. |
Action | The operation that is performed on a specific resource. You can specify multiple operations. The value is the name of an operation that is defined for an Alibaba Cloud service. The format is
|
Resource | The specific object on which authorization is performed. The format follows the Alibaba Cloud Resource Name (ARN) specification: |
Condition (Optional) | The condition that must be met for the authorization to take effect. A condition consists of one or more condition clauses. A condition clause consists of a condition key, a condition operator, and a condition value. |
Step 1: Generate an EDAS access policy
You can use one of the following three methods to view or generate an EDAS access policy.
Method 1: View the access policy example library
Regardless of whether you use RAM permissions or EDAS built-in permissions, you can find the access policy that you want to grant in the access policy example library. For more information, see Access policy example library.
Method 2: Use the permission assistant to generate an access policy
This topic describes how to perform this task in a simple scenario. For more information, see Use the EDAS permission assistant to generate a RAM policy.
-
Log on to the EDAS console.
In the navigation pane on the left, choose .
On the Permission Assistant page, click Create Policy.
In the Create Policy wizard, set the access policy parameters.
On the Create Custom Policy tab, configure the access policy parameters, and then click Next.
Parameter
Description
Policy Name
The custom name of the policy.
Note
The note of the access policy.
Add Statement
Click Add Statement.
In the Add Authorization Statement panel, set Effect and Authorize Actions and Resources, and then click OK.
ImportantWhen you add an access policy, you can select only one effect: Allow or Deny.
On the Create Custom Policy tab, clone, edit, or delete permissions in the Actions column of the access policy list as needed.
On the Policy Preview tab, preview the access policy. Click Copy in the upper-right corner of the policy document text box, and then click Finish at the bottom of the panel.
The message The policy is successfully granted appears in the console. Click Return to List to view and manage the new access policy.
In the Authorization Policy section, copy the generated authorization policy.
Method 3: Directly convert EDAS built-in permissions into a RAM access policy
If you have already configured account authorization using EDAS built-in permission management, you can directly convert the configured permissions into a RAM access policy in the EDAS console.
-
Log on to the EDAS console.
In the navigation pane on the left, choose .
On the RAM User page, select a RAM user that has EDAS built-in permissions, and click Generate RAM Policy in the RAM Authentication column.
In the RAM Policy dialog box that appears, copy the access policy and click OK.
Step 2: Create an access policy
Log on to the RAM console as a RAM user who has administrative rights.
In the left-side navigation pane, choose .
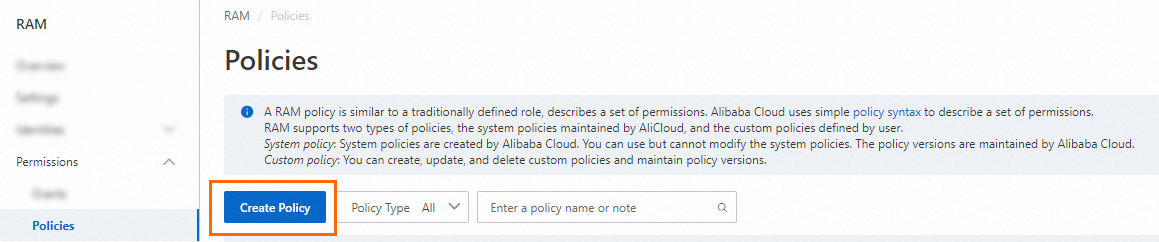
On the Policies page, click Create Policy.
On the Create Policy page, click the JSON tab.

Enter the policy document.
NoteIn the Policy Document text box, enter the access policy that you generated in Step 1: Generate an EDAS access policy.
In the Create Policy dialog box, configure the Policy Name and Description parameters and click OK.
Step 3: Create a RAM user and grant permissions
Log on to the RAM console by using an Alibaba Cloud account or as a RAM administrator.
In the left-side navigation pane, choose .
On the Users page, click Create User.

In the User Account Information section of the Create User page, configure the following parameters:
Logon Name: The logon name can be up to 64 characters in length, and can contain letters, digits, periods (.), hyphens (-), and underscores (_).
Display Name: The display name can be up to 128 characters in length.
Tag: Click the
 icon and enter a tag key and a tag value. Adding tags helps you categorize and manage RAM users.
NoteYou can click Add User to create multiple RAM users at a time.
In the Access Mode section, select an access mode and configure the required parameters.
For enhanced security, we recommend creating separate users for individuals and for applications. Choose only one access mode accordingly to maintain this separation.
Console access
For users who are individuals, we recommend enabling Console Access. This allows them to sign in to the Alibaba Cloud Management Console with a username and password. If you select Console Access, you must configure the following parameters:
Set Logon Password: Select Automatically Regenerate Default Password or Reset Custom Password. If you select Reset Custom Password, you must specify a password. The password must meet complexity requirements. For more information, see Configure a password policy for a RAM user.
Password Reset: Specify whether the RAM user is required to reset the password at the next sign-in.
Enable MFA: Specify whether to enable multi-factor authentication (MFA) for the RAM user. After you enable MFA, you must bind an MFA device to the RAM user. For more information, see Bind an MFA device to a RAM user.
Programmatic access
For users that represent applications, enable Using permanent AccessKey to access for the RAM user. The system will generate a permanent AccessKey ID and AccessKey Secret for API calls. For more information, see Obtain an AccessKey pair.
ImportantThe AccessKey Secret is displayed only once when it is created and cannot be retrieved later. Therefore, you must save it in a secure location.
An AccessKey pair is a permanent credential for application access. If the AccessKey pair of an Alibaba Cloud account is leaked, the resources that belong to the account are exposed to potential risks. To prevent credential leak risks, we recommend that you use Security Token Service (STS) tokens. For more information, see Best practices for using an access credential to call API operations.
Click OK.
Return to the Users page. In the user list, find the target RAM user and click Add Permissions in the Actions column.
In the Add Permissions panel, set the permissions, and then click Confirm.
Parameter
Description
Authorized Scope
Valid values are Alibaba Cloud Account and Specific Resource Group. Select an authorized scope as needed.
Principal
The logon name of the current RAM user is automatically entered.
Select Permissions
Select Custom Policy. In the search box, search for the name of the access policy that you set. In the Policy Name section, click the name of the policy that appears in the search results to select the policy.
Use an Alibaba Cloud account or a RAM administrator to log on to the RAM console.
Step 4: Switch to RAM authorization in the EDAS console
-
Log on to the EDAS console.
In the navigation pane on the left, choose .
On the RAM User page, find the target RAM user and click Switch to RAM in the RAM Authentication column.
NoteFor a RAM user that already uses RAM authorization, the button in the Actions column is unavailable.
For a RAM user that still uses EDAS built-in authorization, you can switch to RAM authorization. After the switch, you cannot switch back to EDAS built-in authorization.
When you switch to RAM authorization, EDAS first checks whether the RAM user has been granted EDAS permissions in the RAM console.
If the RAM user has been granted the required permissions, click OK in the dialog box that appears to switch to RAM authentication.
If the RAM user has not been granted EDAS permissions in the RAM console, a message appears that prompts you to go to the RAM console to complete the authorization.