You can use Data Transmission Service (DTS) to track data changes in real time. This feature applies to the following scenarios: lightweight cache updates, business decoupling, asynchronous data processing, and synchronization of extract, transform, and load (ETL) operations. This topic describes how to track data changes from a PolarDB for MySQL cluster.
Prerequisites
The binary logging feature is enabled for the PolarDB for MySQL cluster. For more information, see Enable binary logging.
Precautions
DTS does not track DDL operations that are performed by using gh-ost or pt-online-schema-change. Therefore, the change tracking client may fail to write the consumed data to the destination tables due to schema conflicts.
If the source database is involved in another task such as a running data migration task, DTS may track data changes of other objects. In this case, you must manually filter the tracked data on the change tracking client.
Procedure
Create a change tracking instance. For more information, see Purchase a change tracking instance.
NoteOn the buy page, set Source Database to PolarDB and select the region where the source PolarDB cluster resides.
Log on to the DTS console.
In the left-side navigation pane, click Change Tracking.
In the upper part of the Change Tracking Tasks page, select the region where the change tracking instance resides.
Find the change tracking instance, and click Configure Channel in the Actions column.
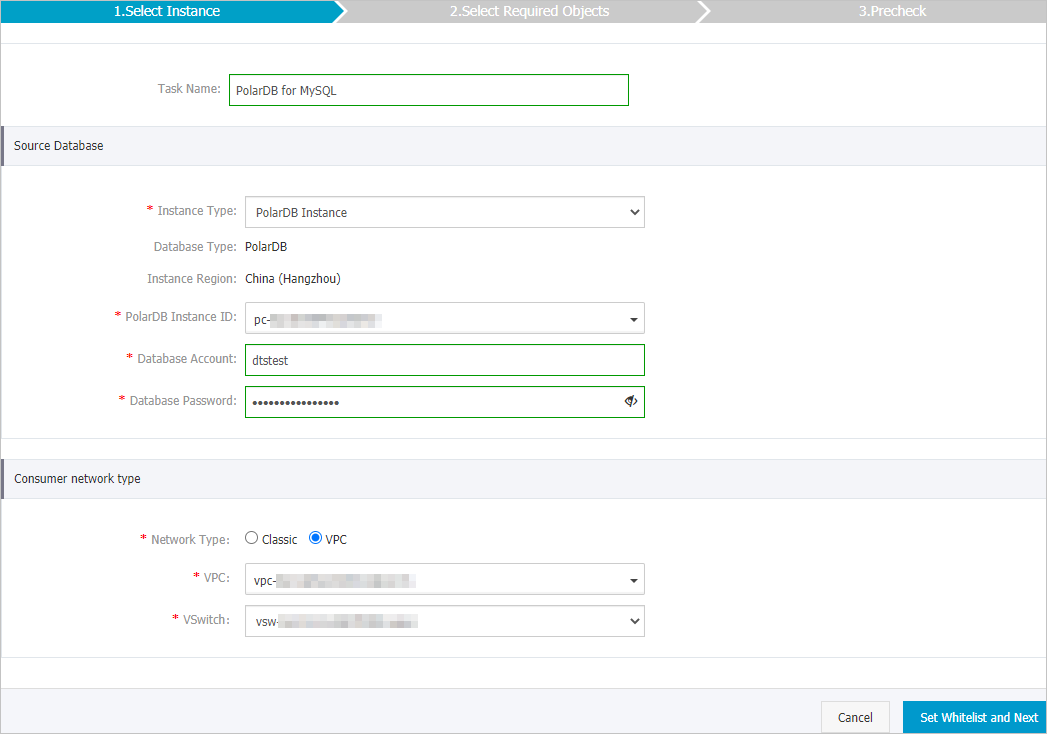
Configure the source database and network type for the change tracking task.
Section
Parameter
Description
N/A
Task Name
DTS automatically generates a task name. We recommend that you specify an informative name for easy identification. You do not need to use a unique task name.
Source Database
Instance Type
The value of this parameter is set to PolarDB Instance and cannot be changed.
Database Type
The value of this parameter is set to PolarDB and cannot be changed.
Instance Region
The source region that you selected on the buy page. You cannot change the value of this parameter.
PolarDB Instance ID
Select the ID of the source PolarDB cluster.
Database Account
Enter the database account of the source PolarDB cluster.
NoteThe account must have the SELECT permission on the required objects, the REPLICATION CLIENT permission, the REPLICATION SLAVE permission, and the SHOW VIEW permission.
Database Password
Enter the password of the database account.
Network Type
N/A
Select the network type of the change tracking instance.
Classic
If you select Classic, no other configurations are required. For more information, see Classic networks.
VPC
If you select VPC, you must specify the VPC and vSwitch parameters. For more information, see VPC.
NoteWe recommend that you select the same network type as the ECS instance on which the change tracking client is installed. For example, if the ECS instance is deployed in a virtual private cloud (VPC), select VPC as the network type and specify the VPC and vSwitch parameters.
If you track data changes over internal networks, the network latency is minimal.
In the lower-right corner of the page, click Set Whitelist and Next.
NoteDTS adds the CIDR blocks of DTS servers to the whitelist of the source PolarDB cluster. This ensures that DTS servers can connect to the source PolarDB cluster.
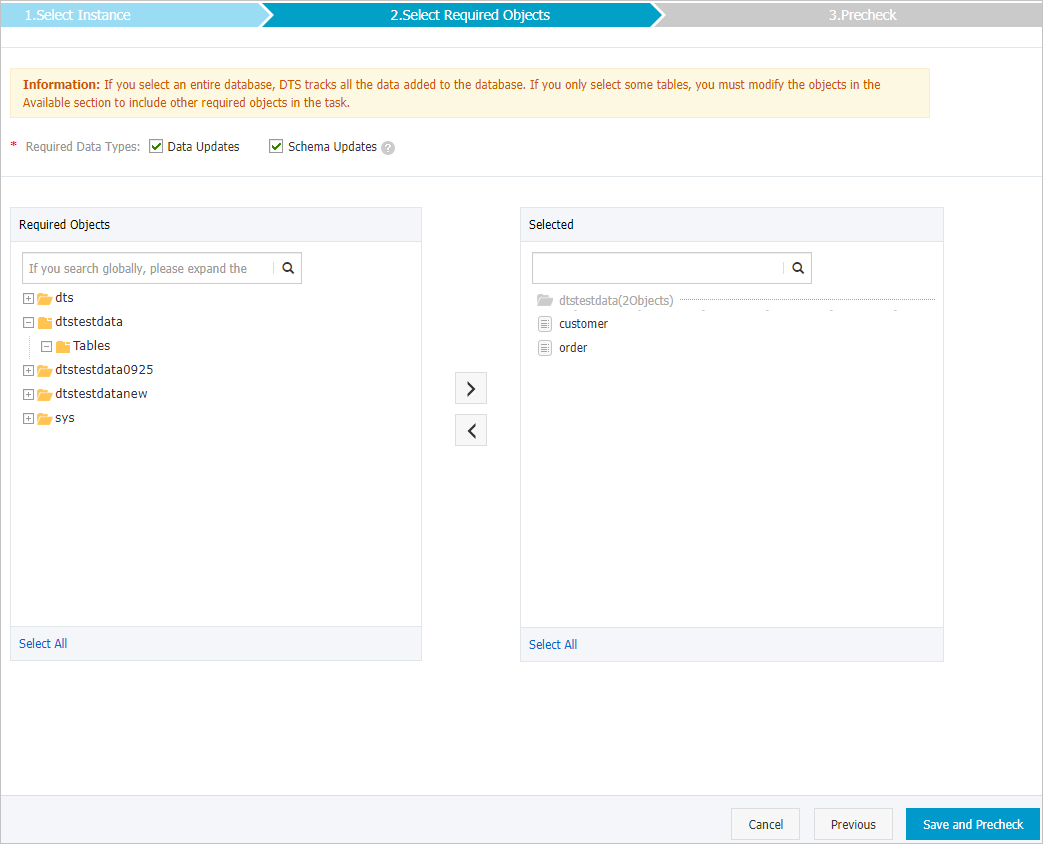
Select the data change types and objects.
Parameter
Description
Required Data Types
Data Updates
DTS tracks data updates of the selected objects, including the INSERT, DELETE, and UPDATE operations.
Schema Updates
DTS tracks the create, delete, and modify operations that are performed on all object schemas of the source instance. You must use the change tracking client to filter the required data.
NoteIf you select a database as the object, DTS tracks data changes of all objects, including new objects in the database.
If you select a table as the object, DTS tracks only data changes of this table. In this case, if you want to track data changes of another table, you must add the table to the selected objects. For more information, see Modify the objects for change tracking.
Required Objects
Select one or more objects from the Required Objects section and click the
 icon to add the objects to the Selected section. Note
You can select tables or databases as the objects for change tracking.
In the lower-right corner of the page, click Save and Precheck.
NoteBefore you can start the change tracking task, DTS performs a precheck. You can start the change tracking task only after the task passes the precheck.
If the task fails to pass the precheck, you can click the
 icon next to each failed item to view details. After you troubleshoot the issues based on the causes, you can run a precheck again.
Close the Precheck dialog box after the following message is displayed: The precheck is passed.
What to do next
After the change tracking task is configured, DTS performs initial change tracking, which takes about 1 minute. After initial change tracking is completed, you can perform the following operations: