Use Data Transmission Service (DTS) to migrate data from an Amazon RDS for Oracle instance to a PolarDB for PostgreSQL (Compatible with Oracle) cluster. DTS supports schema migration, full data migration, and incremental data migration, so you can complete the migration with minimal downtime.
Prerequisites
Before you begin, make sure that:
Public access is enabled on the Amazon RDS for Oracle instance so DTS can connect over the Internet
The Amazon RDS for Oracle instance runs Oracle 9i, 10g, 11g, or 12c or later (non-multitenant architecture)
The destination PolarDB for PostgreSQL (Compatible with Oracle) cluster has enough available storage to hold all data from the source instance
You are familiar with DTS capabilities and limits for Oracle migration. Use Advanced Database & Application Migration (ADAM) to evaluate your database before migration. For details, see Prepare an Oracle database and Overview
Billing
| Migration type | Instance configuration fee | Data transfer fee |
|---|---|---|
| Schema migration and full data migration | Free | Free |
| Incremental data migration | Charged. See Billing overview. | — |
Migration types
| Migration type | Description |
|---|---|
| Schema migration | Migrates schemas to the destination cluster. Supported object types: table, view, synonym, trigger, stored procedure, stored function, package, and user-defined type. Note DTS does not support schema migration for triggers in this scenario. Delete all triggers from the source database before migration to prevent data inconsistency. See Configure a data synchronization task for a source database that contains a trigger. |
| Full data migration | Migrates all existing data from the Amazon RDS for Oracle instance to the destination cluster. Do not perform DDL operations on migrated objects while schema migration or full data migration is running, or those objects may fail to migrate. |
| Incremental data migration | After full data migration completes, DTS continuously polls redo log files from the source and applies incremental changes to the destination. This keeps the destination in sync without interrupting your source application. |
SQL operations supported for incremental migration
| Type | Supported statements |
|---|---|
| DML | INSERT, UPDATE, DELETE |
| DDL | CREATE TABLE (excluding statements with partitioning clauses, subpartitioning clauses, or functions; CREATE TABLE AS SELECT is not supported), ALTER TABLE (ADD COLUMN, ADD INDEX, DROP COLUMN, DROP INDEX, MODIFY COLUMN, RENAME COLUMN), DROP TABLE, RENAME TABLE, TRUNCATE TABLE, CREATE INDEX |
Permissions required
| Database | Schema migration | Full data migration | Incremental data migration |
|---|---|---|---|
| Amazon RDS for Oracle instance | Schema owner | Schema owner | Master user |
| PolarDB for PostgreSQL (Compatible with Oracle) cluster | Schema owner | — | — |
For instructions on creating accounts and granting permissions, see:
Amazon RDS for Oracle: Prepare a database account, CREATE USER, and GRANT
PolarDB for PostgreSQL (Compatible with Oracle) cluster: Create a database account
Limitations
During schema migration, DTS migrates foreign keys from the source database to the destination cluster. During full data migration and incremental data migration, DTS temporarily disables constraint checks and cascade operations on foreign keys at the session level. If you perform cascade or delete operations on the source database during migration, data inconsistency may occur.
Source database limitations
The source database server must have sufficient outbound bandwidth. Insufficient bandwidth reduces migration speed.
For an Oracle Real Application Cluster (RAC) database connected over Express Connect: specify a virtual IP address (VIP) instead of a Single Client Access Name (SCAN) IP address. After you specify the VIP, node failover is not supported.
For an Oracle RAC database connected over Express Connect, VPN Gateway, Smart Access Gateway, Database Gateway, or Cloud Enterprise Network (CEN): you can use a single VIP instead of a SCAN IP address when configuring the source database. After you specify the VIP, node failover is not supported for the Oracle RAC database.
If a VARCHAR2 field in the source database contains an empty string (which Oracle evaluates as null) and the corresponding field in the destination has a NOT NULL constraint, the migration task fails.
Tables to be migrated must have a PRIMARY KEY or UNIQUE constraint, with all fields unique. Otherwise, the destination may contain duplicate records.
As an alternative, enable the Add a hidden primary key option during task configuration. DTS uses the ROWID column as a hidden primary key for tables without a primary key or UNIQUE constraint.
For Oracle 12c or later: table names cannot exceed 30 bytes.
If you rename tables or columns during migration (table-level migration): a single task supports up to 1,000 tables. For more than 1,000 tables, configure multiple tasks in batches, or migrate the entire database instead.
For incremental data migration:
Redo logging and archive logging must be enabled on the source.
For incremental-only migration: retain redo logs and archive logs for more than 24 hours.
For full + incremental migration: retain logs for at least 7 days. After full migration completes, you can reduce the retention period to more than 24 hours.
ImportantIf DTS cannot retrieve redo logs or archive logs, the task fails. In extreme cases, data loss or inconsistency may occur. Failure to meet the log retention requirements means the DTS Service Level Agreement (SLA) does not apply.
During schema migration and full data migration: do not perform DDL operations on the source database. The task fails if schemas change mid-migration.
During full-only migration (without incremental): do not write data to the source. For guaranteed consistency, run schema migration, full data migration, and incremental data migration together.
Do not update LONGTEXT fields during migration. The task fails if LONGTEXT fields are modified.
Other limitations
Run migrations during off-peak hours. DTS uses read and write resources on both the source and destination, which may increase database load.
After full migration, the destination cluster's tablespace is larger than the source database due to fragmentation from concurrent INSERT operations.
DTS automatically retries failed tasks for up to 7 days. Before switching workloads to the destination, stop or release any failed tasks. Otherwise, a resumed task may overwrite destination data with source data. Alternatively, execute the
REVOKEstatement to revoke write permissions from the DTS accounts on the destination.The destination cluster generates unique indexes (such as
pg_oid_1498503_index) to correspond to ROWID values. The destination will have more indexes than the source.The destination cluster does not support the string terminator
\0. DTS skips this character when writing, which causes inconsistency between source and destination.CHECK constraints from the source Oracle database are converted to NOT NULL constraints in the destination cluster.
The character sets of the source and destination databases must be compatible. Incompatible character sets cause inconsistency or task failure.
Use the schema migration feature of DTS. Skipping schema migration may cause task failure due to incompatible data types.
The time zones of the source and destination databases must be the same.
Custom type objects can be migrated. Built-in Oracle objects cannot be migrated, but PolarDB for PostgreSQL (Compatible with Oracle) already supports Oracle built-in objects natively — no manual migration needed.
DTS does not validate metadata such as sequences. Validate sequences manually after migration.
After switching workloads to the destination, newly written sequences do not automatically continue from the maximum sequence value in the source. Before switching, query the maximum sequence values in the source and set them as the starting values in the destination. Run the following PL/SQL block in the source database to generate the
setvalstatements:The output contains
setvalstatements for all sequences in the source database. Run only the statements that apply to your migration.DECLARE CURSOR cur_data IS SELECT SEQUENCE_NAME, LAST_NUMBER FROM user_sequences; v_column1_value varchar(1000); v_column2_value number(20); BEGIN OPEN cur_data; LOOP FETCH cur_data INTO v_column1_value, v_column2_value; EXIT WHEN cur_data%NOTFOUND; DBMS_OUTPUT.PUT_LINE('select setval(''' || lower(v_column1_value) || ''', ' || v_column2_value || ');'); END LOOP; CLOSE cur_data; END; /
Data type mappings
For data type mappings between Oracle and PolarDB for PostgreSQL (Compatible with Oracle), see Data type mappings between heterogeneous databases.
Configure the source database
Complete these steps before creating the DTS migration task.
Step 1: Add DTS server CIDR blocks to the security group
Log on to the Amazon RDS Management Console.
Go to the basic information page of the Amazon RDS for Oracle instance.
In the Security group rules section, click the name of the security group containing the existing inbound rule.
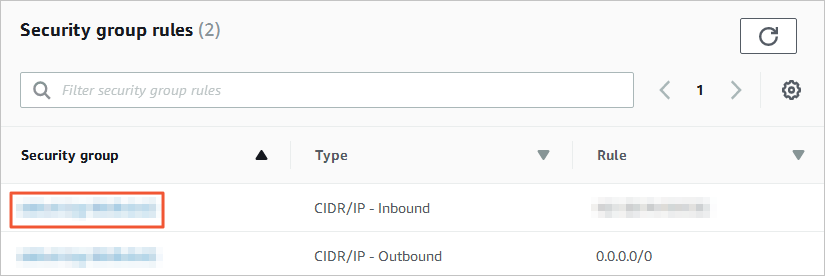
Add the CIDR blocks of DTS servers for the destination database region (port 1521) to the inbound rule. See Add the CIDR blocks of DTS servers.
Add only the CIDR blocks for the region where the destination database resides. For example, if the source is in Singapore and the destination is in China (Hangzhou), add only the China (Hangzhou) CIDR blocks. You can add all required CIDR blocks at once.
Step 2: Configure log settings (incremental migration only)
Skip this step if you are not performing incremental data migration.
Select the configuration that matches your Oracle version:
Oracle 12c or later (non-multitenant architecture)
Connect to the Amazon RDS for Oracle instance using the master user account and SQL*Plus.
Check whether archive logging is enabled:
SELECT LOG_MODE FROM v$database;If the result is
ARCHIVELOG, archive logging is already enabled. If not, enable it before continuing.Set the archive log retention period to at least 72 hours:
-- Check the current configuration
exec rdsadmin.rdsadmin_util.show_configuration;

-- Set retention to 72 hours
exec rdsadmin.rdsadmin_util.set_configuration('archivelog retention hours', 72);
Enable supplemental logging. Choose database-level or table-level supplemental logging:
Database-level (recommended for full-database migration):
-- Check current supplemental logging status SELECT supplemental_log_data_min, supplemental_log_data_pk, supplemental_log_data_ui FROM v$database; -- Enable primary key and unique key supplemental logging exec rdsadmin.rdsadmin_util.alter_supplemental_logging('ADD', 'PRIMARY KEY'); exec rdsadmin.rdsadmin_util.alter_supplemental_logging('ADD', 'UNIQUE');Table-level (use either option):
-- Option 1: Enable supplemental logging for all columns exec rdsadmin.rdsadmin_util.alter_supplemental_logging('ADD', 'ALL'); -- Option 2: Enable primary key supplemental logging only exec rdsadmin.rdsadmin_util.alter_supplemental_logging('ADD', 'PRIMARY KEY');
Create a database account and grant the required permissions. The following example creates an account named
RDSDT_DTSACCT:-- Create the DTS account create user RDSDT_DTSACCT IDENTIFIED BY RDSDT_DTSACCT; grant create session to RDSDT_DTSACCT; grant connect to RDSDT_DTSACCT; grant resource to RDSDT_DTSACCT; -- Permissions for reading log mining views exec rdsadmin.rdsadmin_util.grant_sys_object('V_$LOGMNR_LOGS','RDSDT_DTSACCT','SELECT'); exec rdsadmin.rdsadmin_util.grant_sys_object('V_$LOGMNR_CONTENTS','RDSDT_DTSACCT','SELECT'); exec rdsadmin.rdsadmin_util.grant_sys_object('DBMS_LOGMNR','RDSDT_DTSACCT','EXECUTE'); -- Permissions for reading object metadata exec rdsadmin.rdsadmin_util.grant_sys_object('ALL_OBJECTS','RDSDT_DTSACCT','SELECT'); exec rdsadmin.rdsadmin_util.grant_sys_object('ALL_TAB_COLS','RDSDT_DTSACCT','SELECT'); exec rdsadmin.rdsadmin_util.grant_sys_object('DBA_REGISTRY','RDSDT_DTSACCT','SELECT'); grant select any table to RDSDT_DTSACCT; grant select any transaction to RDSDT_DTSACCT; -- Permissions for reading log-related views exec rdsadmin.rdsadmin_util.grant_sys_object('V_$LOG','RDSDT_DTSACCT','SELECT'); exec rdsadmin.rdsadmin_util.grant_sys_object('V_$LOGFILE','RDSDT_DTSACCT','SELECT'); exec rdsadmin.rdsadmin_util.grant_sys_object('V_$ARCHIVED_LOG','RDSDT_DTSACCT','SELECT'); exec rdsadmin.rdsadmin_util.grant_sys_object('V_$PARAMETER','RDSDT_DTSACCT','SELECT'); exec rdsadmin.rdsadmin_util.grant_sys_object('V_$DATABASE','RDSDT_DTSACCT','SELECT'); exec rdsadmin.rdsadmin_util.grant_sys_object('V_$ACTIVE_INSTANCES','RDSDT_DTSACCT','SELECT'); exec rdsadmin.rdsadmin_util.grant_sys_object('V_$INSTANCE','RDSDT_DTSACCT','SELECT'); -- Permissions for reading internal dictionary tables exec rdsadmin.rdsadmin_util.grant_sys_object('USER$','RDSDT_DTSACCT','SELECT'); exec rdsadmin.rdsadmin_util.grant_sys_object('OBJ$','RDSDT_DTSACCT','SELECT'); exec rdsadmin.rdsadmin_util.grant_sys_object('COL$','RDSDT_DTSACCT','SELECT'); exec rdsadmin.rdsadmin_util.grant_sys_object('IND$','RDSDT_DTSACCT','SELECT'); exec rdsadmin.rdsadmin_util.grant_sys_object('ICOL$','RDSDT_DTSACCT','SELECT'); exec rdsadmin.rdsadmin_util.grant_sys_object('CDEF$','RDSDT_DTSACCT','SELECT'); exec rdsadmin.rdsadmin_util.grant_sys_object('CCOL$','RDSDT_DTSACCT','SELECT'); exec rdsadmin.rdsadmin_util.grant_sys_object('TABPART$','RDSDT_DTSACCT','SELECT'); exec rdsadmin.rdsadmin_util.grant_sys_object('TABSUBPART$','RDSDT_DTSACCT','SELECT'); exec rdsadmin.rdsadmin_util.grant_sys_object('TABCOMPART$','RDSDT_DTSACCT','SELECT'); -- Additional privileges grant LOGMINING TO RDSDT_DTSACCT; grant EXECUTE_CATALOG_ROLE to RDSDT_DTSACCT; grant select on v$database to rdsdt_dtsacct; grant select on dba_objects to rdsdt_dtsacct; grant select on DBA_TAB_COMMENTS to rdsdt_dtsacct; grant select on dba_tab_cols to rdsdt_dtsacct; grant select_catalog_role TO rdsdt_dtsacct;
Oracle 9i, 10g, or 11g
Connect to the Amazon RDS for Oracle instance using the master user account and SQL*Plus.
Check whether the instance is running in ARCHIVELOG mode:
archive log list;If the instance is in NOARCHIVELOG mode, switch to ARCHIVELOG mode before continuing. See Managing Archived Redo Logs.
Enable force logging:
exec rdsadmin.rdsadmin_util.force_logging(p_enable => true);Enable supplemental logging for primary keys and unique keys:
begin rdsadmin.rdsadmin_util.alter_supplemental_logging(p_action => 'ADD',p_type => 'PRIMARY KEY');end;/
begin rdsadmin.rdsadmin_util.alter_supplemental_logging(p_action => 'ADD',p_type => 'UNIQUE');end;/
Set the archive log retention period to at least 24 hours:
begin rdsadmin.rdsadmin_util.set_configuration(name => 'archivelog retention hours', value => '24');end;/Commit the changes:
commit;
Create the migration task
Go to the Data Migration Tasks page.
Log on to the Data Management (DMS) console.
In the top navigation bar, click DTS.
In the left-side navigation pane, choose DTS (DTS) > Data Migration.
You can also go directly to the Data Migration Tasks page of the new DTS console. For console navigation details, see Simple mode and Customize the layout and style of the DMS console.
From the drop-down list next to Data Migration Tasks, select the region where the data migration instance resides.
In the new DTS console, select the region in the upper-left corner.
Click Create Task. In the Create Data Migration Task wizard, configure the source and destination databases.
WarningAfter configuring the source and destination databases, review the Limits displayed at the top of the page before proceeding. Skipping this step may cause task failure or data inconsistency.
Source database parameters
Parameter Description Task Name A descriptive name for the task. DTS auto-generates a name. Uniqueness is not required. Select an existing DMS database instance Optional. Select an existing registered instance to auto-populate the connection parameters, or configure them manually. Database Type Select Oracle. Access Method Select Public IP Address. Instance Region The region where the Amazon RDS for Oracle instance resides. If the region is not listed, select the geographically closest region. Domain Name or IP The endpoint of the Amazon RDS for Oracle instance. Port Number The service port. Default: 1521. Oracle Type Select Non-RAC Instance to configure the SID parameter, or RAC or PDB Instance to configure the Service Name parameter. This example uses Non-RAC Instance. Database Account The database account for the source instance. See Permissions required. Database Password The password for the database account. Destination database parameters
Parameter Description Select an existing DMS database instance Optional. Select an existing registered instance to auto-populate the connection parameters, or configure them manually. Database Type Select PolarDB (Compatible with Oracle). Access Method Select Alibaba Cloud Instance. Instance Region The region where the destination PolarDB for PostgreSQL (Compatible with Oracle) cluster resides. Instance ID The ID of the destination cluster. Database Name The name of the destination database in the cluster. Database Account The database account for the destination cluster. See Permissions required. Database Password The password for the database account. Click Test Connectivity and Proceed. If your source database has an IP address whitelist configured, add the DTS server CIDR blocks to the whitelist, then click Test Connectivity and Proceed.
WarningAdding DTS server CIDR blocks to an IP address whitelist or security group rules introduces network exposure. Take preventive measures, including: strengthening account credentials, restricting exposed ports, authenticating API calls, regularly auditing whitelist rules, and removing unauthorized CIDR blocks. For private connectivity, consider using Express Connect, VPN Gateway, or Smart Access Gateway instead.
Configure the objects to be migrated and migration settings.
Parameter Description Migration Types Select the migration types to run. To migrate without downtime, select Schema Migration, Full Data Migration, and Incremental Data Migration together. For a one-time cutover migration, select Schema Migration and Full Data Migration only. NoteWithout incremental migration, do not write data to the source during migration.
Add a hidden primary key for a table without a primary key/a table without a unique key Set to Yes if any objects to be migrated contain tables without a primary key or unique key. DTS uses the ROWID column as a hidden primary key to prevent duplicate data. Only available when all three migration types are selected. Processing Mode of Conflicting Tables Precheck and Report Errors: checks for tables with identical names in the source and destination before starting. The task only starts if no conflicts are found. Ignore Errors and Proceed: skips the precheck. WarningSelecting this option may cause data inconsistency. Specifically: if the source and destination databases have the same schema, DTS does not migrate data records that have the same primary keys as records already in the destination database; if the source and destination databases have different schemas, only specific columns are migrated or the migration task fails. Proceed with caution.
Source Objects Select columns, tables, or databases and click the icon to move them to Selected Objects. Selected Objects To rename a single object, right-click it. See Map the name of a single object. To rename multiple objects at once, click Batch Edit. See Map multiple object names at a time. NoteRenaming an object may cause dependent objects to fail migration. To filter rows by condition, right-click a table and specify WHERE conditions. See Set filter conditions.
Click Next: Advanced Settings and configure the advanced options.
Parameter Description Data Verification Settings Configure data verification to check consistency between source and destination after migration. See Configure data verification. Select the dedicated cluster used to schedule the task By default, DTS schedules the task on a shared cluster. To use a dedicated cluster, purchase one in advance. See What is a DTS dedicated cluster? Retry Time for Failed Connections How long DTS retries when the source or destination is unreachable. Valid values: 10–1440 minutes. Default: 720. Set this to at least 30 minutes. If DTS reconnects within the retry window, the task resumes. Otherwise, the task fails. NoteWhen multiple tasks share the same source or destination, the most recently set value takes precedence. Retry time accrues DTS instance charges.
The wait time before a retry when other issues occur in the source and destination databases. How long DTS retries after DDL or DML failures. Valid values: 1–1440 minutes. Default: 10. Set this to at least 10 minutes, and less than the Retry Time for Failed Connections value. Enable Throttling for Full Data Migration Limits queries per second (QPS), requests per second (RPS), and migration speed (MB/s) to reduce load on the destination during full migration. Available only when Full Data Migration is selected. Enable Throttling for Incremental Data Migration Limits RPS and migration speed (MB/s) during incremental migration. Available only when Incremental Data Migration is selected. Environment Tag An optional label to identify the DTS instance by environment (for example, production or staging). Actual Write Code The encoding format used when writing data to the destination. Select based on your destination database character set. Configure ETL Select Yes to enable extract, transform, and load (ETL) and enter data processing statements. See Configure ETL in a data migration or data synchronization task and What is ETL? Monitoring and Alerting Select Yes to receive alerts when the task fails or migration latency exceeds a threshold. Configure the threshold and notification settings. See Configure monitoring and alerting when you create a DTS task. Click Next: Save Task Settings and Precheck.
DTS runs a precheck before the migration task can start. If the precheck fails, click View Details next to each failed item, resolve the issues, then click Precheck Again. If an item generates an alert that can be ignored, click Confirm Alert Details, then Ignore in the details dialog, then click Precheck Again. Be aware that ignoring an alert may cause data inconsistency. To preview the API parameters for this task configuration, hover over Next: Save Task Settings and Precheck and click Preview OpenAPI parameters.
Wait until the precheck success rate reaches 100%, then click Next: Purchase Instance.
On the Purchase Instance page, configure the instance class.
Parameter Description Resource Group Settings The resource group for the data migration instance. Default: default resource group. See What is Resource Management? Instance Class The instance class determines migration throughput. Select based on your workload. See Specifications of data migration instances. Select the Data Transmission Service (Pay-as-you-go) Service Terms check box.
Click Buy and Start. Monitor the task progress in the task list.
What's next
Remove the hidden primary key (if applicable)
If you enabled the Add a hidden primary key option and have switched your workloads to the destination cluster, delete the hidden primary key before terminating or releasing the DTS instance:
On the task detail page, go to the Basic Information tab of the Full Data Migration or Incremental Write module.
In the Actions column, click Delete Invisible Primary Key.
After deleting the hidden primary key, verify that the data in the source and destination databases is identical.
Synchronize sequence starting values
After switching workloads, newly written sequences in the destination do not automatically continue from the maximum values in the source. Run the PL/SQL block in the Limitations section to generate setval statements for the source sequences, then execute the applicable statements in the destination database.