Use Data Transmission Service (DTS) to migrate data from an ApsaraDB for MongoDB replica set or sharded cluster instance to a Lindorm wide table instance. DTS supports full data migration and incremental data migration, so you can migrate without stopping your application.
Choose a migration type
Select a migration type based on whether your application can tolerate downtime.
| Migration type | When to use | Downtime required |
|---|---|---|
| Full data migration only | Your application can tolerate a maintenance window. Stop writes to the source before migrating. | Yes — stop writes during migration |
| Full + incremental data migration | Your application must stay online during migration. DTS syncs ongoing changes until you cut over. | No — cut over at any time |
If you select full data migration only, stop writing to the source database before the task starts. Writing to the source during a full-only migration causes data inconsistency.
Prerequisites
Before you begin, make sure:
Only migration tasks within the Germany (Frankfurt) region are supported.
The ApsaraDB for MongoDB source instance uses a replica set or sharded cluster architecture.
A Lindorm instance with the wide table engine is created. See Create an instance.
A wide table is created in the Lindorm instance. See Use Lindorm-cli to connect to and use LindormTable or Use Lindorm Shell to connect to LindormTable.
The available storage space of the destination instance is at least 10% larger than the total data size in the source instance.
The objects you create in the destination comply with Quotas and limits.
For sharded cluster sources:
Shard node endpoints are configured and all shard nodes share the same account and password. See Apply for an endpoint for a shard.
The
_idfield in all collections to migrate is unique across shards.The number of Mongos nodes does not exceed 10.
For incremental data migration:
To migrate UPDATE and DELETE operations, add a non-primary key column named
_mongo_id_to the Lindorm wide table before starting the task:SQL-created table: The column data type must match the
_idcolumn type in the source MongoDB instance. Create a secondary index on this column.Apache HBase API-created table: The column must belong to column family
f. The data type must match the_idcolumn type. Create a secondary index on this column. If you want to add additional columns and use the ETL feature, make sure that the Lindorm instance does not contain duplicate data.
The oplog feature is enabled on the source database, and operation logs are retained for at least 7 days. Alternatively, change streams are enabled and DTS can subscribe to changes from the last 7 days.
If the wide table is created using the Apache HBase API, create column mappings before configuring the migration task. See Add column mappings for an Apache HBase API table.
Billing
| Migration type | Task configuration fee | Data transfer fee |
|---|---|---|
| Full data migration | Free | Free, unless Connection Type is set to Public IP Address (Internet traffic is charged). See Billable items. |
| Incremental data migration | Charged. See Billing overview. | — |
Migration types
| Migration type | Description |
|---|---|
| Full data migration | DTS migrates the existing data of the objects to be migrated from the source ApsaraDB for MongoDB instance to the destination Lindorm instance. Note DTS supports full data migration for databases and collections. |
| Incremental data migration | After full data migration is complete, DTS migrates incremental data from the source ApsaraDB for MongoDB instance to the destination Lindorm instance. Only INSERT, UPDATE, and DELETE operations on documents are migrated. For UPDATE operations, only updates from $set are migrated. |
Permissions required
| Database | Full data migration | Incremental data migration |
|---|---|---|
| Source ApsaraDB for MongoDB | Read on the source database | Read on the source database, the admin database, and the local database |
| Destination Lindorm instance | Read and write | Read and write |
See Manage the permissions of MongoDB database users and Manage users.
Migrate data from MongoDB to Lindorm
The following procedure uses a wide table created with Lindorm SQL statements as the example.
Step 1: Open the Data Migration page
Use one of the following methods:
DTS console
Log on to the DTS console.DTS console
In the left-side navigation pane, click Data Migration.
In the upper-left corner, select the region where the data migration instance resides.
DMS console
The actual steps may vary based on the mode and layout of the DMS console. See Simple mode and Customize the layout and style of the DMS console.
Log on to the DMS console.DMS console
In the top navigation bar, go to Data + AI > DTS (DTS) > Data Migration.
From the drop-down list next to Data Migration Tasks, select the region where the data migration instance resides.
Step 2: Configure source and destination databases
Click Create Task, then configure the parameters described in the following tables.
Source database parameters
| Parameter | Description |
|---|---|
| Task Name | A name for the DTS task. DTS generates a name automatically. Specify a descriptive name that makes it easy to identify the task. The name does not need to be unique. |
| Select Existing Connection | If the MongoDB instance is already registered with DTS, select it from the list. DTS fills in the connection parameters automatically. Otherwise, configure the parameters below. |
| Database Type | Select MongoDB. |
| Connection Type | Select Cloud Instance. |
| Instance Region | The region where the source ApsaraDB for MongoDB instance resides. |
| Replicate Data Across Alibaba Cloud Accounts | Select No. |
| Architecture | The architecture of the source instance. Select Replica Set for this example. If the source uses a sharded cluster architecture, also configure Shard Account and Shard Password. |
| Migration Method | How DTS obtains incremental changes from the source. Oplog (recommended) — available if the oplog feature is enabled. By default, the oplog feature is enabled for ApsaraDB for MongoDB instances. Use this method for low-latency incremental migration. ChangeStreamChange Streams — available if change streams are enabled. Required for inelastic Amazon DocumentDB clusters. Requires MongoDB V4.0 or later. If Sharded Cluster is selected for Architecture, you do not need to configure Shard account and Shard password when using this method. |
| Instance ID | The ID of the source ApsaraDB for MongoDB instance. |
| Authentication Database | The database that stores the account and password. Default value: admin. |
| Database Account | The database account for the source instance. |
| Database Password | The password for the database account. |
| Encryption | Select Non-encrypted, SSL-encrypted, or Mongo Atlas SSL based on your requirements. Available options depend on the Connection Type and Architecture selections. The options shown in the DTS console apply. Restriction: If Architecture is Sharded Cluster and Migration Method is Oplog, SSL-encrypted is unavailable. |
Destination database parameters
| Parameter | Description |
|---|---|
| Select Existing Connection | If the Lindorm instance is already registered with DTS, select it from the list. Otherwise, configure the parameters below. |
| Database Type | Select Lindorm. |
| Connection Type | Select Alibaba Cloud Instance. |
| Instance Region | The region where the destination Lindorm instance resides. |
| Instance ID | The ID of the destination Lindorm instance. |
| Database Account | The database account for the destination Lindorm instance. |
| Database Password | The password for the database account. |
Step 3: Test connectivity and proceed
Click Test Connectivity and Proceed at the bottom of the page.
DTS must be able to access both the source and destination databases. Make sure DTS server CIDR blocks are added to the security settings of both databases. See Add the CIDR blocks of DTS servers. If the source or destination is a self-managed database not accessed via Alibaba Cloud Instance, click Test Connectivity in the CIDR Blocks of DTS Servers dialog box.
Step 4: Configure objects to migrate
On the Configure Objects page, set the following parameters.
Migration types and objects
| Parameter | Description |
|---|---|
| Migration Types | Select Full Data Migration for a one-time migration. Select both Full Data Migration and Incremental Data Migration to keep the source and destination in sync during migration and minimize downtime. |
| Processing Mode of Conflicting Tables | No configuration required. |
| Capitalization of Object Names in Destination Instance | The capitalization policy for database and collection names in the destination. Default: DTS default policy. See Specify the capitalization of object names in the destination instance. |
| Source Objects | Select the collections to migrate and click |
Configure selected objects
For each collection in Selected Objects, configure the schema name, table name, and column mappings.
The following example shows how a source MongoDB document maps to a Lindorm wide table row:
Source document (ApsaraDB for MongoDB)
{
  "_id": "62cd344c85c1ea6a2a9f****",
  "person": {
    "name": "neo",
    "age": "26",
    "sex": "male"
  }
}
Destination table row (Lindorm)
| Column name | Type | Value expression |
|---|---|---|
id | STRING | bson_value("_id") |
person_name | STRING | bson_value("person","name") |
person_age | BIGINT | bson_value("person","age") |
To configure the schema, table name, and column mappings:
Edit the schema name:
In Selected Objects, right-click the database that contains the collections.
In the Edit Schema dialog box, enter the database name to use in the Lindorm instance in the Schema Name field.
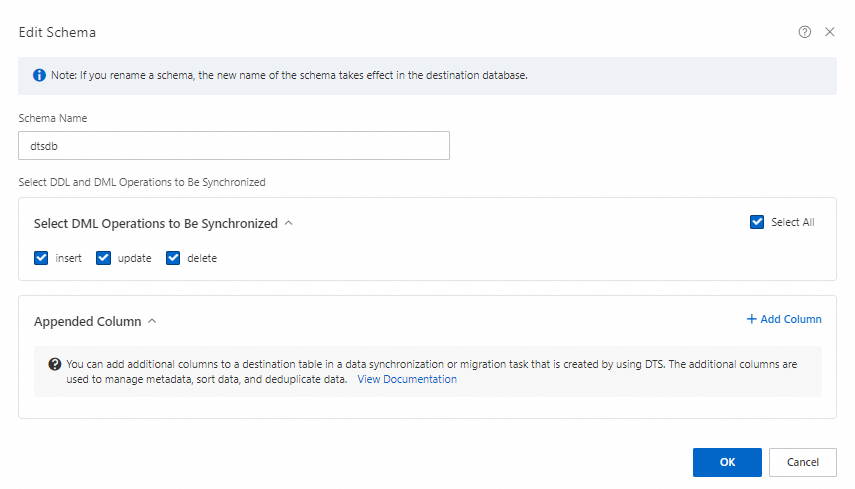
(Optional) In Select DDL and DML Operations to Be Synchronized, select the operations to migrate during incremental data migration.
Click OK.
Edit table names:
In Selected Objects, right-click a collection.
In the Edit Table Name dialog box, enter the table name to use in the Lindorm instance in the Table Name field.
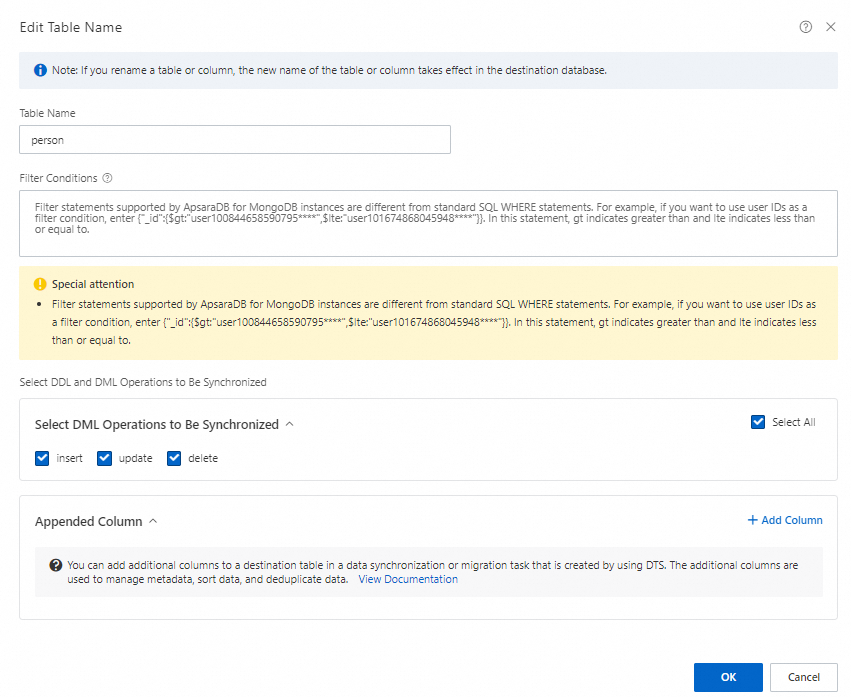
(Optional) Specify filter conditions. See Specify filter conditions.
(Optional) In Select DDL and DML Operations to Be Synchronized, select the operations to migrate during incremental data migration.
Map source fields to destination columns: DTS automatically maps each field in the source collection using a
bson_value()expression and assigns it to a column. In thebson_value()expression, the field name inside""is the field name in the source MongoDB instance. For example,bson_value("age")maps theagefield. (Optional) Click the icon next to a column to remove fields that do not need to be migrated. Check that the
 bson_value()expression matches the required destination columns:In the
bson_value()expression in the Assign Value column, check the field name from MongoDB.The field within
""is the field name in MongoDB. For example, if the expression isbson_value("age"), this expression maps theagefield in MongoDB.(Optional) Click the
icon next to a column to remove fields that do not need to be migrated.NoteTo delete a field that you do not need to migrate, click
in the row of the field.Configure the fields to be migrated.
Perform the next steps based on whether the
bson_value()expression meets your requirements.Fields for which the expression meets requirements
Enter the Column Name for the destination table.
NoteFor SQL-created tables: use the column names defined in the table.
For Apache HBase API-created tables: use ROW for the primary key column, and Column family:Column name format (for example, person:name) for other columns. Create column mappings first. See Add column mappings for an Apache HBase API table.
Select the Type for the column data.
ImportantThe data type of the destination column must be compatible with the source field type.
(Optional) Set Length and Precision.
Repeat these steps to map all required fields.
Fields for which the expression does not meet requirements
NoteFor example, fields that have a hierarchical structure (parent-child structure).
Click the
icon next to the column.Click + Add Column.

Set Column Name, Type, Length, and Precision.
In the text box under Assign Value, enter a
bson_value()expression. For more information, see Value assignment example.ImportantAlways assign the primary key column as
bson_value("_id").For nested fields, specify both the field and subfield in the expression — for example,
bson_value("person","name"). Using onlybson_value("person")causes data loss for subfields.
Repeat for each field.
Click OK.
Step 5: Configure advanced settings
Click Next: Advanced Settings and configure the following parameters.
| Parameter | Description |
|---|---|
| Dedicated Cluster for Task Scheduling | By default, DTS schedules tasks to the shared cluster. For higher stability, purchase a dedicated cluster. See What is a DTS dedicated cluster. |
| Retry Time for Failed Connections | The retry window when the source or destination database is unreachable. Valid values: 10–1,440 minutes. Default: 720 minutes. Set this to at least 30 minutes. If DTS reconnects within this window, migration resumes automatically. If not, the task fails. |
| Retry Time for Other Issues | The retry window for DDL or DML operation failures. Valid values: 1–1,440 minutes. Default: 10 minutes. We recommend that you set the parameter to a value greater than 10. This value must be smaller than Retry Time for Failed Connections. |
| Enable Throttling for Full Data Migration | Throttle the read/write rate during full migration to reduce load on the source and destination. Configure QPS (queries per second to source), RPS of Full Data Migration, and Data migration speed for full migration (MB/s). Available only when Full Data Migration is selected. |
| Only one data type for primary key _id in a table of the data to be synchronized | Specifies whether the _id field has a single consistent data type across all documents in the collection. Yesalert notification settings — DTS skips data type scanning during full migration. No — DTS scans the _id data type during full migration. Available only when Full Data Migration is selected. Enable based on your data. Incorrect settings may cause data loss. |
| Enable Throttling for Incremental Data Migration | Throttle the incremental migration rate. Configure RPS of Incremental Data Migration and Data migration speed for incremental migration (MB/s). Available only when Incremental Data Migration is selected. |
| Environment Tag | An optional tag to identify the DTS instance. |
| Configure ETL | Enable the extract, transform, and load (ETL) feature to transform data during migration. Yes — enter data processing statements in the code editor. See Configure ETL in a data migration or data synchronization task. No — disable ETL. For Apache HBase API-created tables, use the ETL script to specify which columns to migrate. By default, all top-level fields go to column family f. Example: script:e_expand_bson_value("*", "_id,name") writes all fields except _id and name as dynamic columns. DTS does not migrate additional columns or columns not included in the ETL task. If you add extra columns and use ETL, make sure the Lindorm instance does not contain duplicate data. |
| Monitoring and Alerting | Configure alerts for task failures or high migration latency. Yes — set an alert threshold and notification contacts. See Configure monitoring and alerting when you create a DTS task. No — no alerting. |
Step 6: Run precheck and save settings
Click Next: Save Task Settings and Precheck.
To view the API parameters for this task configuration before saving, move the pointer over Next: Save Task Settings and Precheck and click Preview OpenAPI parameters.
DTS runs a precheck before starting the migration. Address any precheck failures:
For failed items: click View Details, fix the issue, then click Precheck Again.
For alert items:
If the alert cannot be ignored, fix the issue and run the precheck again.
If the alert can be ignored, click Confirm Alert Details > Ignore > OK, then click Precheck Again. Ignoring alerts may result in data inconsistency.
Step 7: Purchase and start the instance
Wait until the Success Rate reaches 100%, then click Next: Purchase Instance.
On the Purchase Instance page, configure the following parameters:
Parameter Description Resource Group The resource group for the data migration instance. Default: default resource group. See What is Resource Management? Instance Class The migration throughput tier. Higher classes provide faster migration. See Instance classes of data migration instances. Read the Data Transmission Service (Pay-as-you-go) Service Terms and select the check box.
Click Buy and Start, then click OK in the confirmation dialog.
Verify migration status
On the Data Migration page, check the task status:
Full data migration only: The task stops automatically when complete. The status changes to Completed.
Full + incremental data migration: The incremental migration runs continuously without stopping. The status shows Running. Stop or release the task manually when you are ready to cut over to the destination database.
Before switching workloads to the destination database, stop or release any failed tasks. Alternatively, run REVOKE to revoke write permissions from the DTS accounts on the destination database. If you skip this step and DTS auto-resumes a failed task within 7 days, data from the source may overwrite data in the destination.
Limitations
Source database limitations
The source server must have sufficient outbound bandwidth. Insufficient bandwidth reduces migration speed.
Collections must have PRIMARY KEY or UNIQUE constraints, and all fields must be unique. Otherwise, duplicate records may appear in the destination.
DTS cannot migrate data from the
admin,config, orlocaldatabases.DTS cannot connect to MongoDB over an SRV endpoint.
If you select collections as migration objects and rename them, a single task can migrate up to 1,000 collections. Exceeding this limit causes a request error. Split the migration into multiple tasks.
Full data migration limitations
Do not perform schema changes on databases or collections during full data migration, including updates to array types. Schema changes cause task failures or data inconsistency.
Do not write data to the source database if you are running full data migration only. Writing to the source causes data inconsistency.
Concurrent INSERT operations during full migration cause fragmentation in destination collections. The storage used by destination collections will be larger than in the source.
Incremental data migration limitations
Only INSERT, UPDATE, and DELETE operations on documents are migrated. For UPDATE operations, only updates from
$setare migrated.The oplog feature must be enabled and operation logs retained for at least 7 days, OR change streams must be enabled and DTS must be able to subscribe to changes from the last 7 days. If these requirements are not met, DTS may fail to obtain operation logs and the task may fail. In exceptional cases, data inconsistency or loss may occur.
Use the oplog feature to obtain data changes when possible. Use change streams only if the source runs MongoDB V4.0 or later.
Transaction information is not retained. Transactions are converted into a single record.
DTS calculates migration latency based on the timestamp of the latest migrated record in the destination and the current timestamp in the source. If no updates occur on the source for an extended period, the latency value may be inaccurate. To refresh the latency, write an update to the source.
Sharded cluster limitations
The
_idfield must be unique across all shards. Duplicate_idvalues cause data inconsistency.The number of Mongos nodes cannot exceed 10.
Do not run the following commands on objects being migrated while the task is running:
shardCollection,reshardCollection,unshardCollection,moveCollection,movePrimary. These commands change data distribution and cause data inconsistency.If the Balancer is active in the source sharded cluster, it may cause migration latency.
Lindorm destination limitations
The destination Lindorm instance cannot contain collections with a column named
_idor_value. If such columns exist, the task fails.Migrated data must comply with Limits on data requests.
FLOAT precision defaults to 38 digits; DOUBLE precision defaults to 308 digits. DTS uses
ROUND(COLUMN,PRECISION)to retrieve these values. Verify that precision settings meet your business requirements before starting the migration.If the source contains TTL indexes, data inconsistency may occur after migration.
Azure Cosmos DB and Amazon DocumentDB limitations
For Azure Cosmos DB for MongoDB clusters and Amazon DocumentDB elastic clusters: only full data migration is supported.
For inelastic Amazon DocumentDB clusters: enable change streams and set Migration Method to ChangeStream and Architecture to Sharded Cluster.
Other operational notes
Evaluate the impact of migration on source and destination database performance before starting. Run the migration during off-peak hours when possible. Full data migration uses read and write resources on both databases and may increase server load.
If a DTS task fails, DTS technical support attempts to restore it within 8 hours. During restoration, the task may restart and parameters may be modified. Only DTS task parameters are modified — database parameters are not changed. Parameters that may be modified include those described in Modify the parameters of a DTS instance.
Example of adding column mappings for a table created by calling the Apache HBase API
The Lindorm instance engine version must be 2.4.0 or later.
In this example, SQL Shell is used.
Create a column mapping for the table:
ALTER TABLE test MAP DYNAMIC COLUMN f:_mongo_id_ HSTRING/HINT/..., person:name HSTRING, person:age HINT;Create a secondary index on the
_mongo_id_column:CREATE INDEX idx ON test(f:_mongo_id_);
Example of configuring an ETL task for a table created by calling the Apache HBase API
Source document in ApsaraDB for MongoDB
{
  "_id": 0,
  "person": {
    "name": "cindy0",
    "age": 0,
    "student": true
  }
}
ETL script
script:e_expand_bson_value("*", "_id")Migration result

Example of value assignment
Source document structure
{
  "_id": "62cd344c85c1ea6a2a9f****",
  "person": {
    "name": "neo",
    "age": "26",
    "sex": "male"
  }
}
Destination table schema
| Column name | Type |
|---|---|
id | STRING |
person_name | STRING |
person_age | INT |
Column assignment configuration
Specify both the field and subfield in the bson_value() expression for nested fields. For example, using bson_value("person") alone does not migrate subfields such as name, age, and sex — it only references the parent field. This causes data loss or task failure.
| Column name | Type | Value expression |
|---|---|---|
id | STRING | bson_value("_id") |
person_name | STRING | bson_value("person","name") |
person_age | BIGINT | bson_value("person","age") |