This topic describes how to adjust the sensitivity levels of sensitive fields and change the masking rules for sensitive fields. This topic also describes how to grant and revoke permissions of a user on querying, exporting, and changing data in sensitive fields.
Prerequisites
You are a Data Management (DMS) administrator, a database administrator (DBA), or a security administrator.
NoteTo view the role of your account, move the pointer over the
 icon in the upper-right corner of the DMS console.
Supported databases:
Relational databases: MySQL, SQL Server, PostgreSQL, MariaDB, Oracle, Dameng (DM), PolarDB for PostgreSQL (Compatible with Oracle), PolarDB for Xscale, ApsaraDB for OceanBase, DB2, Lindorm_CQL, Lindorm_SQL, OpenGauss.
Data warehouses: AnalyticDB for MySQL, AnalyticDB for PostgreSQL, Data Lake Analytics (DLA), ClickHouse, MaxCompute, Hologres, Hive.
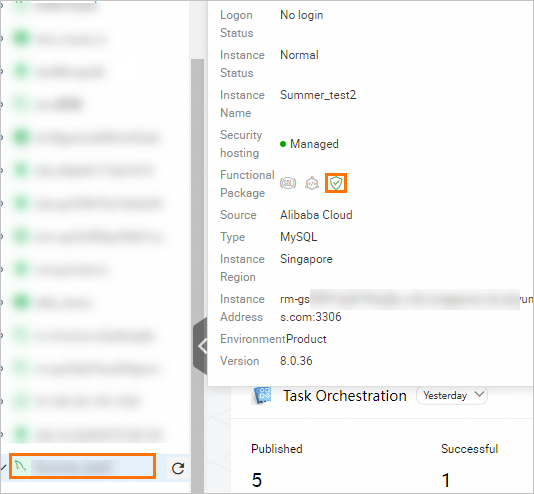
The sensitive data protection feature must be enabled for the instance. For more information, see Enable the sensitive data protection feature.
Adjust the security level of fields
Log on to the DMS console V5.0.
Move the pointer over the
 icon in the upper-left corner and choose . Note
If you use the DMS console in normal mode, choose in the top navigation bar.
In the upper-right corner of the Sensitive Data Assets page, click Global Sensitive Data to go to the Sensitive Data List page.
On the Field Control tab, modify the security level of a field.
Find the field for which you want to adjust the sensitivity level and click Change Security Level in the Operation column.
NoteTo adjust the sensitivity levels of multiple fields to the same level, select the fields and click Change Security Level in the upper-left corner of the Field Control tab.
In the Security Level Adjustment dialog box, select a sensitivity level and click Confirm.
Grant permissions on sensitive fields
If a user needs to query or export plaintext information in fully masked or partially masked fields, the user must be granted the permissions to query or export sensitive fields.
You can grant permissions on sensitive fields only for a database instance for which security hosting is enabled. For more information about how to enable secure hosting, see the "Enable security hosting" section of the Security hosting topic.
On the Field Control tab of the Sensitive Data List page, select the fields on which you want to grant permissions to a user.
Click Authorize User in the upper-left corner of the Field Control tab.
In the Authorize User dialog box, select one or more users to whom you want to grant permissions from the drop-down list in the Add User section.
Configure the parameters in the Permission Configuration section. The following table describes the parameters that you can configure. If you do not grant a user the permissions on fields, the values of the fields are encrypted to the user.
Parameter
Description
Permission
The type of the permission. You can select one or more permission types. Valid values:
Query: allows the selected users to query data by executing SQL statements on the SQL Console tab.
Export: allows the selected users to submit tickets to export data.
Change: allows the selected users to submit tickets to change or import data.
Data Masking Policy
The masking policy that is used to mask the fields. Valid values:
Semi-sensitization:
If a data masking algorithm is configured for a field, the values of the field are displayed after they are processed by the data masking algorithm.
If no data masking algorithm is configured for a field, the values of the field are encrypted.
Plain Text: The values of the fields are displayed in plaintext.
Expire Date
The validity period of the permissions. You can set the validity period to one month, three months, six months, one year, two years, three years, or a custom time range.
NoteIf you want to grant permissions on the fields by day or hour, select Others from the drop-down list and specify the validity period.
Click OK.
Revoke permissions of a user on sensitive fields
On the Field Control tab, find the sensitive field on which you want to revoke permissions and click Manage Permissions in the Operation column.
On the Manage Permissions page, click Column Permissions.
Find the permission that you want to revoke and click Recycle Permission in the Actions column.
To view the authorization details of the sensitive field, click View Details in the Actions column.
You can also grant or revoke other permissions on the database on the Manage Permissions page.
What to do next
After you modify the data masking algorithm for a sensitive field, you may need to query data of a table on the SQL Console tab. For more information, see Manage a database on the SQLConsole tab.
You can also call an API operation to adjust the sensitivity level of fields.
For more information, see ChangeColumnSecLevel.
FAQ
Q: What do I do if I fail to configure sensitive fields?
A: To troubleshoot the issue, perform the following operations:
Check whether the sensitive data protection feature is enabled for the instance. For more information, see Enable the sensitive data protection feature.

Check whether you are authorized to access the instance. For more information, see the Grant permissions on sensitive fields section of this topic.

Check whether you have submitted a ticket to configure sensitive fields.
If the ticket is in progress, complete or close the ticket before re-configuring sensitive fields.