This topic outlines how to add an OpenAPI data source in DataV and provides guidance on related parameter configurations. OpenAPI is Alibaba Cloud's method for invoking open interfaces of cloud products. With OpenAPI, users can easily invoke API interfaces from various cloud products for control and query purposes. In DataV, a common use case is leveraging OpenAPI to retrieve and display data by calling APIs from other cloud products.
Prerequisites
The OpenAPI data source to be added must be prepared.
Limits
Supports only Enterprise Edition or higher.
Add an OpenAPI data source
Access the DataV console.
On the Workbench page, click Data Preparation > Data Source to access the Data Source page, and then click Create Data Source.
-
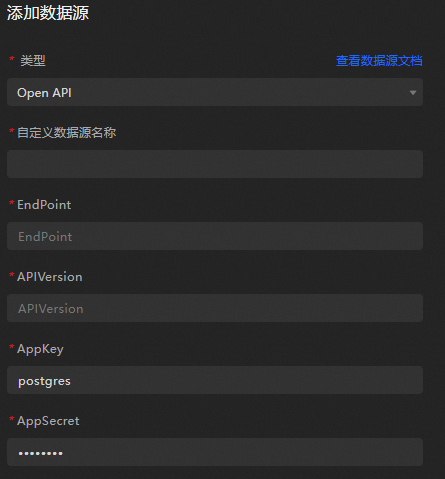
From the Type list, select OpenAPI.
-
Enter the relevant OpenAPI details.
Parameter
Description
Custom Data Source Name
The display name of the data source, which you can name freely.
EndPoint
The endpoint of the OpenAPI, which you need to obtain from the API document of the cloud product. For example, the OpenAPI endpoint for ECS is
ecs.aliyuncs.com, and the OpenAPI endpoint for Cloud Monitor in the Hangzhou region ismetrics.cn-hangzhou.aliyuncs.com.APIVersion
The API version of the cloud product, which you can obtain from the API document of the cloud product. For example, the API version for Cloud Monitor is
2017-03-01.AppKey
The AccessKey ID of the account that can invoke the OpenAPI.
AppSecret
The AccessKey Secret of the account that can invoke the OpenAPI.
-
Once the information is entered, click OK to finalize the addition of the data source.
The new data source will be automatically listed in the data source list.
Use an OpenAPI data source
Access the DataV console.
In the console pane, move the pointer over the dashboard that you want to edit and click Edit.
ImportantIf you have not created a dashboard on the console page, create a dashboard by referring to Using a template to create a PC dashboard.
On the canvas editing page, click a widget on the canvas.
If no widget exists on the canvas, add a widget first. For more information, see Canvas operations.
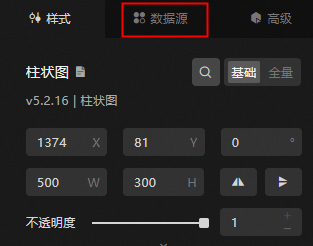
On the right side of the canvas, click the Data Source tab.
-
In the Set Data Source module, choose the Data Source Type as OpenAPI.
-
From the Select Existing Data Source list, pick the configured OpenAPI data source.
-
Select a request method from the Request Method drop-down list. Choose either GET or POST.
-
Input the Interface Name.
Type the name of the interface to be called in the edit box, which corresponds to the Action parameter in the API call. The value is sourced from the API list provided by the cloud product, such as
DescribeMetricListfor CloudMonitor. -
(Optional)
Enter the Return Result Path.
Specify a portion of the OpenAPI return result as the return result path.
For instance, if OpenAPI returns:
{
    "data": [
        {
            "x": 1,
            "y": 2
        },
        {
            "x": 2,
            "y": 4
        }
    ]
}
If the Return Result Path is set to data, the data response result will be:
[ { "x": 1, "y": 2 }, { "x": 2, "y": 4 } ]NoteThis transformation can be performed in the filter. It can be left empty here.
-
Input the query parameters in the edit box below.
-
Query parameters are the interface parameters for the OpenAPI, entered as a JSON object.
-
Consult the cloud product API's input parameter description for parameter names.
-
Include the callback ID in the value of the JSON object.
For example, the query parameters for the CloudMonitor's DescribeMetricList API are as follows.
{ "MetricName": "cpu_idle", "Namespace": "acs_ecs_dashboard", "Dimensions": [ { "instanceId": "i-j6c0kyh2qh7fi0r4k351" } ], "StartTime": "2021-01-27 14:00:00", "EndTime": "2021-01-27 15:00:00", "Period": "60" } -
-
Click to select Object To Array to convert the returned object into an array automatically.
For instance:
// Original data { "name": "..." } => // Transformed data [{ "name": "..." }]NoteThis configuration item is rarely needed. Data format transformation is best handled using filters.
-
Click View Data Return Result to inspect the data return result.
What to do next
Once you have the raw data, you can consult datasource config for widget data adaptation.
FAQ
For additional questions, consult the FAQ about datasource config.