Effective mapping relationships link data standards to asset objects. They are auto-generated from landing-mapping rules or manually added, and are required before you can run landing compliance monitoring.
Permissions
-
A super administrator, a data standard administrator, or the owner of a standard in a mapping relationship can mark a confirmed mapping as invalid, remove the mapping, configure quality monitoring rules, or add new mappings.
-
A super administrator or a data standard administrator can configure landing compliance assessment tasks for all manually added mapping relationships. They can also view the operational logs for those tasks.
Access Effective Mapping Relationships
-
On the Dataphin homepage, in the top menu bar, choose Administration > Standard.
-
In the navigation pane on the left, choose Landing Assessment > Mapping. On the Mapping page, click the Effective Mapping tab.
View Effective Mapping Relationships
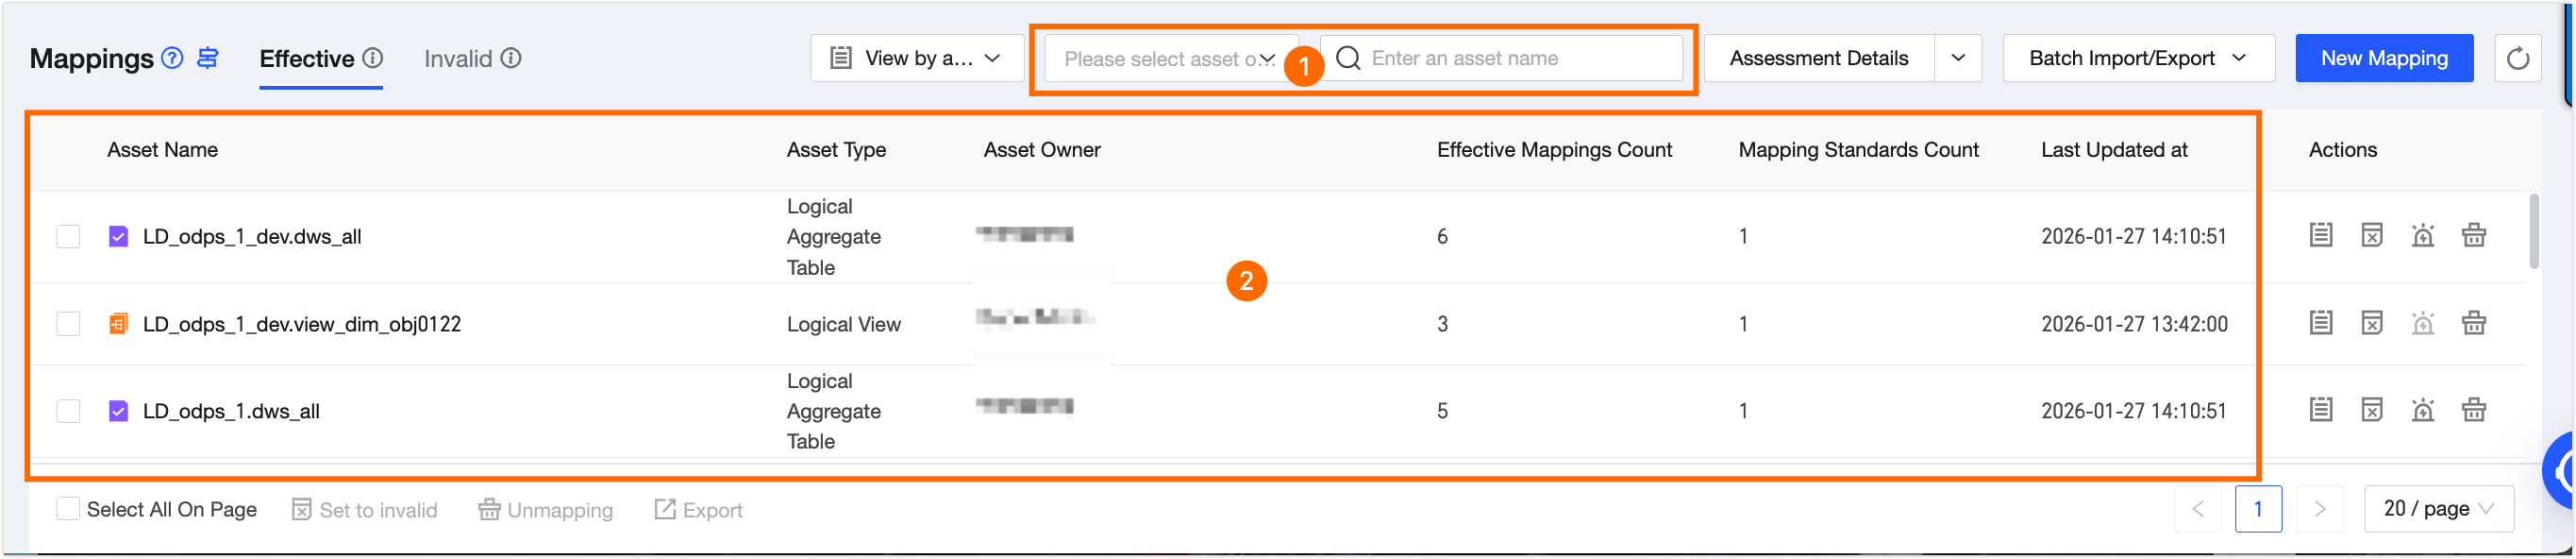
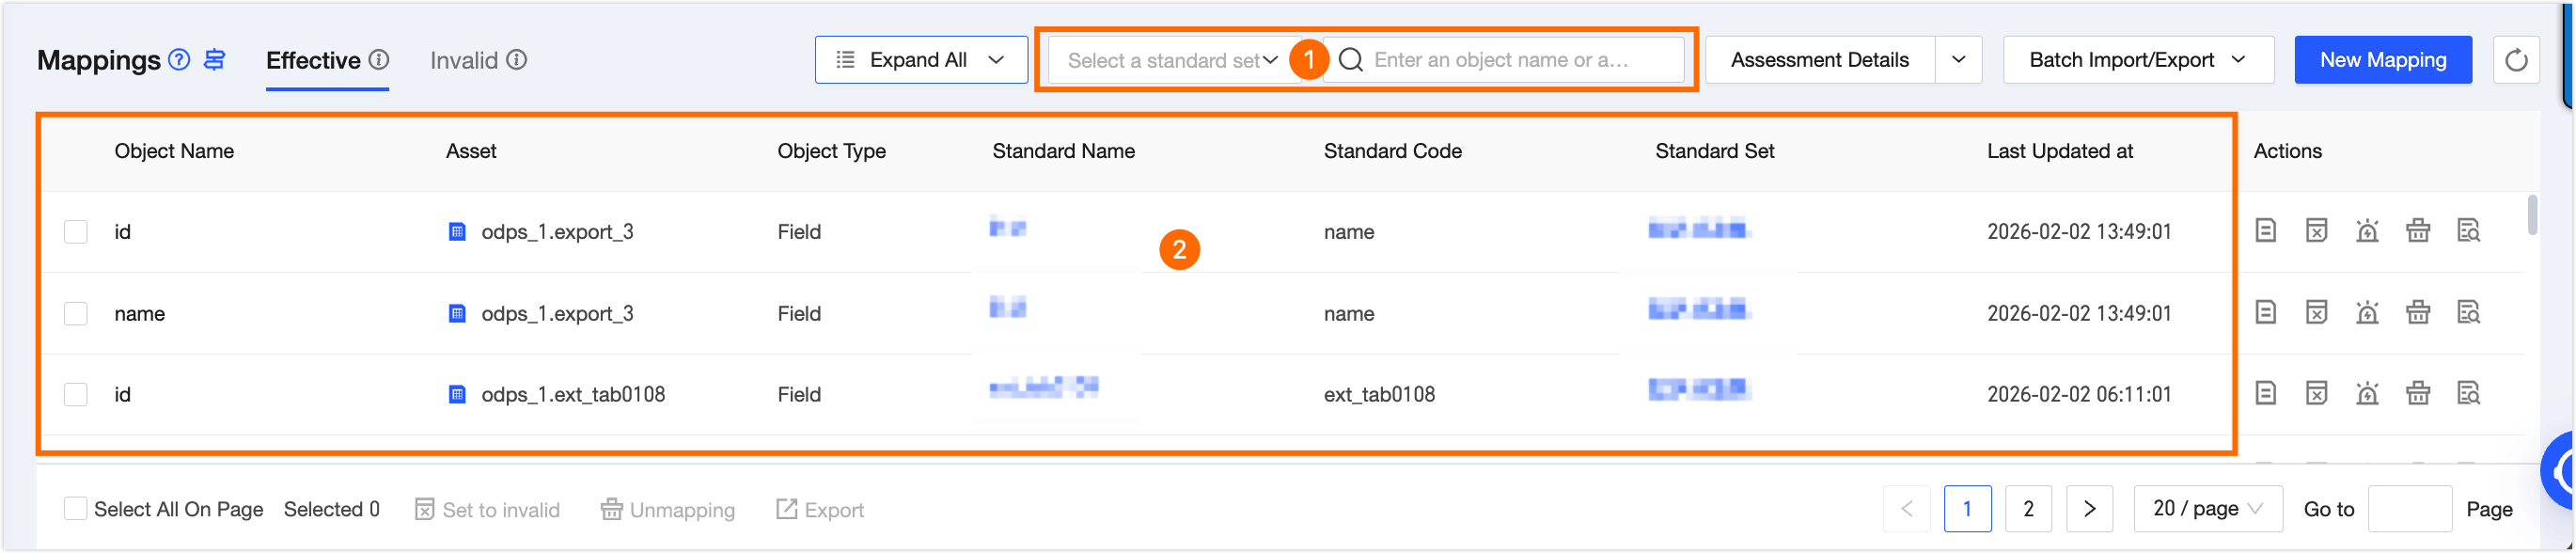
You can view effective mapping relationships from two perspectives: Group by Asset and Expand All.
View effective mapping relationships grouped by asset
|
Region |
Description |
|
① Filter and search area |
Filter by asset owner. Or search by asset name using fuzzy search. |
|
② List information area |
This area shows the following columns: Asset Name, Asset Type, Asset Owner, Number of Mapped Objects, Number of Standards Mapped, and Last Updated.
|
View effective mapping relationships expanded fully
|
Section |
Description |
|
① Filter and search area |
Filter by standard set. Or search by object name or standard name using fuzzy search. |
|
② List information area |
This area shows the following columns: Object Name, Associated Asset, File Format, Standard Name, Standard Code, Standard Set, and Last Updated.
|
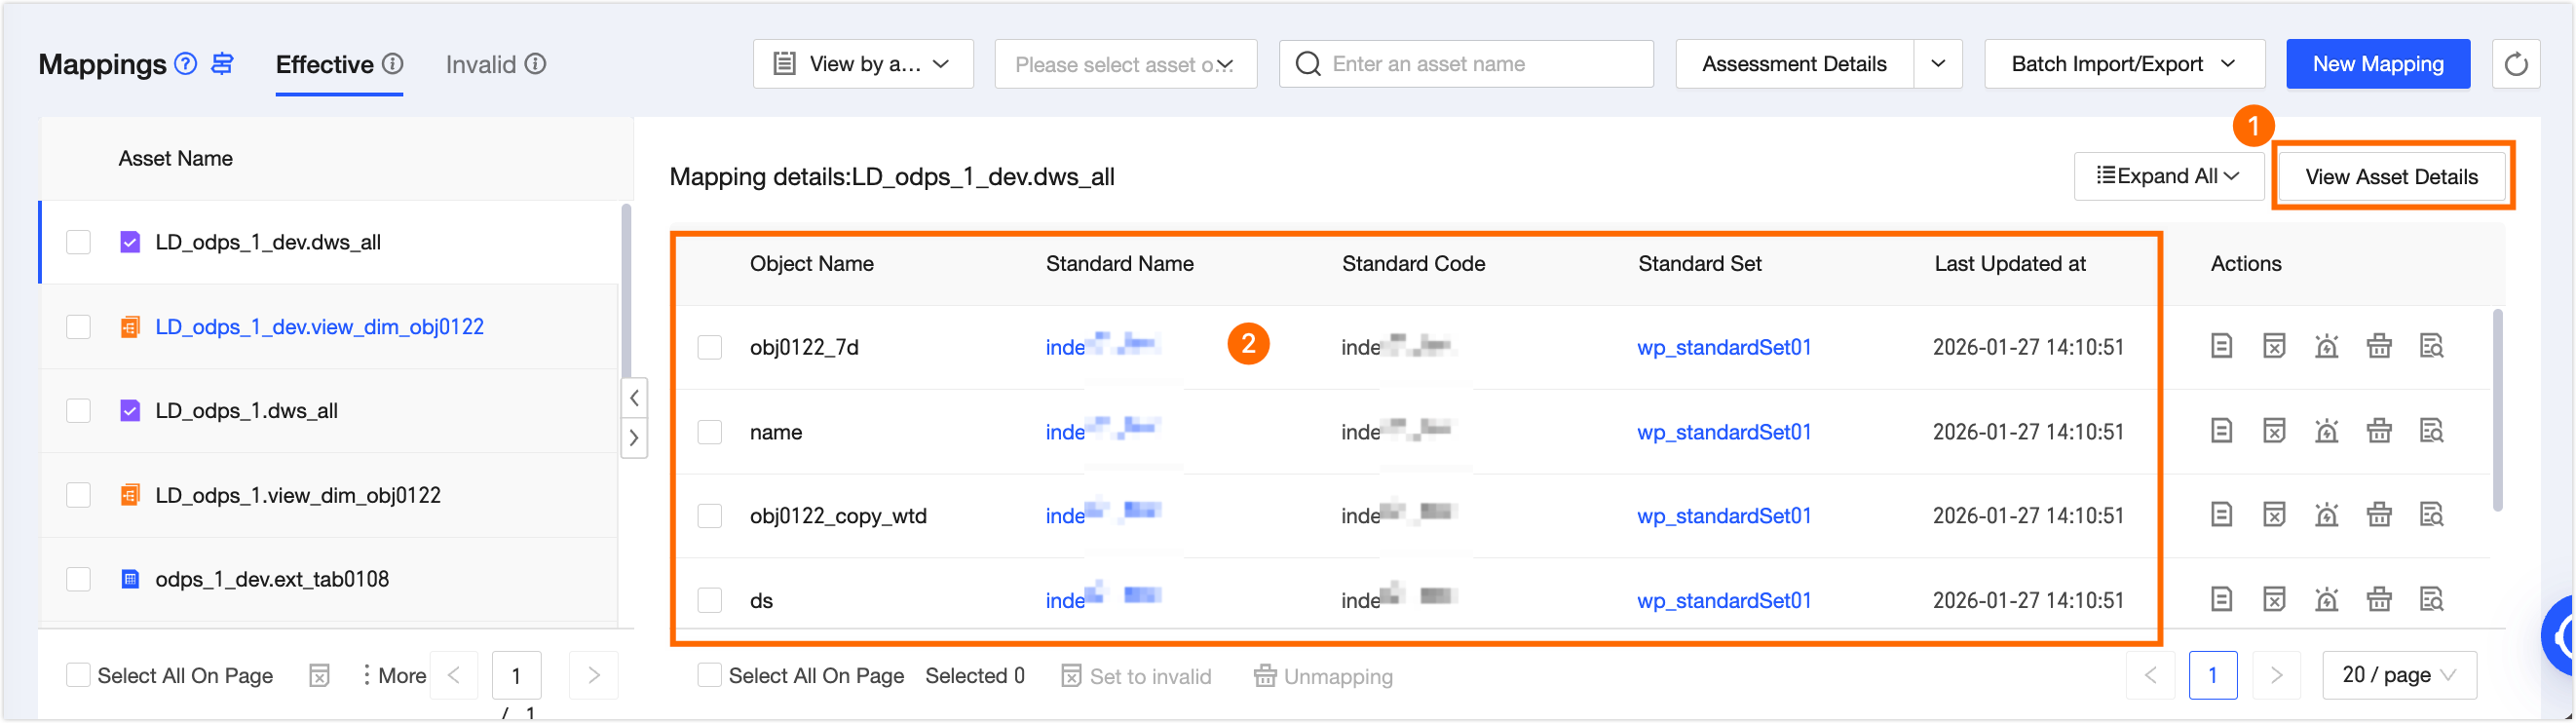
Effective Mapping Details List
In the Group by Asset view, click an asset to see its detailed mapping information.
|
Section |
Description |
|
① View asset details |
Click the View Asset Details button to go to the asset’s details page in the asset catalog. Note
You cannot view details for external assets. |
|
② Mapping details list area |
This area shows the following columns: Object Name, Standard Name, Standard Code, Standard Set, and Last Updated.
|
Add a Mapping Relationship
-
On the Effective Mapping tab, click the Add Mapping button in the upper-right corner.
-
In the Add Mapping dialog box, configure the parameters.
Parameter
Description
Data Standard
Select the data standard that the asset object must map to. You can only select standards that are active and that you have permission to manage.
Object Type
Select Column or Metric.
-
Column: Includes all fields in Dataphin data tables.
-
Metric: Includes derived metrics, derivative metrics, and registered metrics from logical aggregate tables.
Data Table
Select a data table based on the object type. Click the Filter icon to filter tables by business unit or project and table type.
-
If the object type is Column, the table owner can select all tables they have access to. A project administrator can select physical tables, logical dimension tables, logical fact tables, physical views, materialized views, and logical views in their project.
-
If the object type is Metric, select only logical aggregate tables.
Super administrators and standard administrators can select all assets.
Column/Metric
Select the asset object based on the object type.
-
Column: Select the column from the data table to map to the data standard.
-
Metric: Select the metric from the data table to map to the data standard. Only metric owners can select metrics they have access to.
-
-
Click OK to validate the asset permissions for this mapping and check whether it already exists in the invalid mapping list.
-
If validation passes, the mapping is added.
-
If validation fails, view the error reason in the Mapping Addition Result dialog box.
If the mapping already exists in the invalid mapping list, choose Skip or Mark as Valid.
-
Manage Effective Mapping Relationships
The available actions depend on the view—Group by Asset or Expand All. See the table below.
|
View |
Single-item action |
Batch action |
Standard mapping details action |
|
Group by Asset view |
Perform actions on the asset in the current mapping. All mapped objects under that asset inherit the same action. You can View Mapping Details, Mark as Invalid, Configure Quality Monitoring, or Remove Mapping. |
Perform batch actions on selected assets in this view: Mark as Invalid, Remove Mapping, or Export. |
Perform actions on all mapped objects under the current asset.
|
|
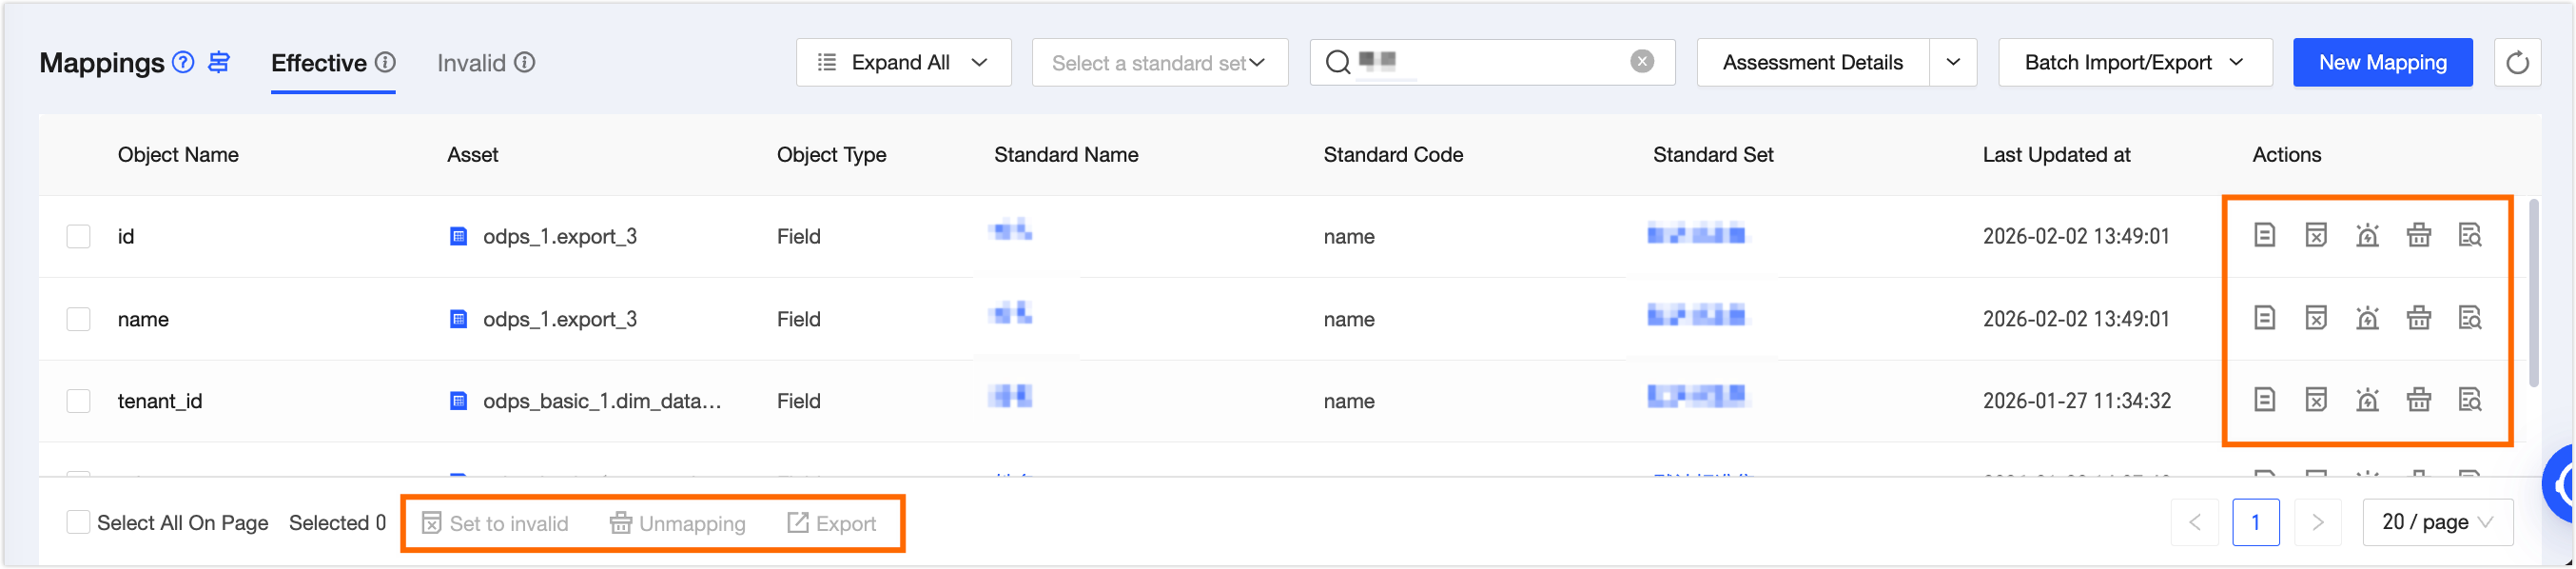
Expand All view |
Perform actions on a specific object (Dataphin column or Dataphin metric) in the current mapping: View Landing Compliance Results, Mark as Invalid, Configure Quality Monitoring, Remove Mapping, or View Mapping Details. |
Perform batch actions on selected objects (Dataphin columns or Dataphin metrics) in this view: Mark as Invalid, Remove Mapping, or Export. |
None |
|
Action |
Description |
|
View Bid Evaluation Results |
You can click the View Bid Failure Assessment Results |
|
View Mapping Details |
Click View Mapping Details in the Actions column to view mapping details. For more information, see Effective Mapping Details List. |
|
Mark as Invalid |
Assets marked as invalid do not take part in landing compliance assessments. They also do not generate landing compliance details. In the Mark All Selected Relationships as Invalid dialog box, click OK to move the mappings to the invalid mapping list. |
|
Configure Quality Monitoring |
Quality monitoring rules can reference Data Standard Monitoring. The system also shows any quality monitoring rules already configured for this asset in other modules. This helps avoid duplicate rules that waste resources or cause conflicts. For more information, see Configure Quality Monitoring. |
|
Remove Mapping |
Remove an effective mapping. Choose Remove and Add to Invalid Mapping or Remove Only – Reconfirm on Remapping.
|
|
View Mapping Details |
View detailed info about the asset’s effective mappings, including basic info and mapping records. |
|
Export |
Select assets (in Group by Asset view) or objects (in Expand All view), then click the Export button at the bottom of the page to export your selection. You can view the export record and download the file in Batch Operation Records. |
Configure Quality Monitoring
In the Group by Asset view, you can configure quality monitoring rules for all mapped objects (such as columns) in an asset (such as a data table) at once.
In the Expand All view, you can apply quality monitoring rules from all data standards linked to a single asset object.
The configuration steps are nearly identical in both views. The only difference is the scope of available monitoring rules. The following example uses the asset-level approach.
-
You must enable the Asset Quality module.
-
You can configure up to 200 quality monitoring rules per asset in the Data Standard module. External registered assets do not support quality monitoring rules.
-
Monitoring results from rules configured on this page affect the pass rate shown on the Landing Compliance Details page. Rules generated by referencing Data Standard Monitoring in the Quality module are excluded from landing compliance statistics. All quality monitoring rules—no matter where they are configured—appear in the Quality module’s rule list and quality reports.
-
Rules configured here appear in the Quality module’s rule list. But you can edit or delete them only from this page.
-
Click the Configuration Quality Monitoring
 icon in the Actions column to open the Configuration Quality Monitoring panel.
 -
In the Configure Quality Monitoring dialog box, you can reference Data Standard Monitoring. The system also shows any quality monitoring rules already configured for this asset in other modules.
-
Data Standard Monitoring
-
On the Data Standard Monitoring tab, click Create Data Standard Monitoring.
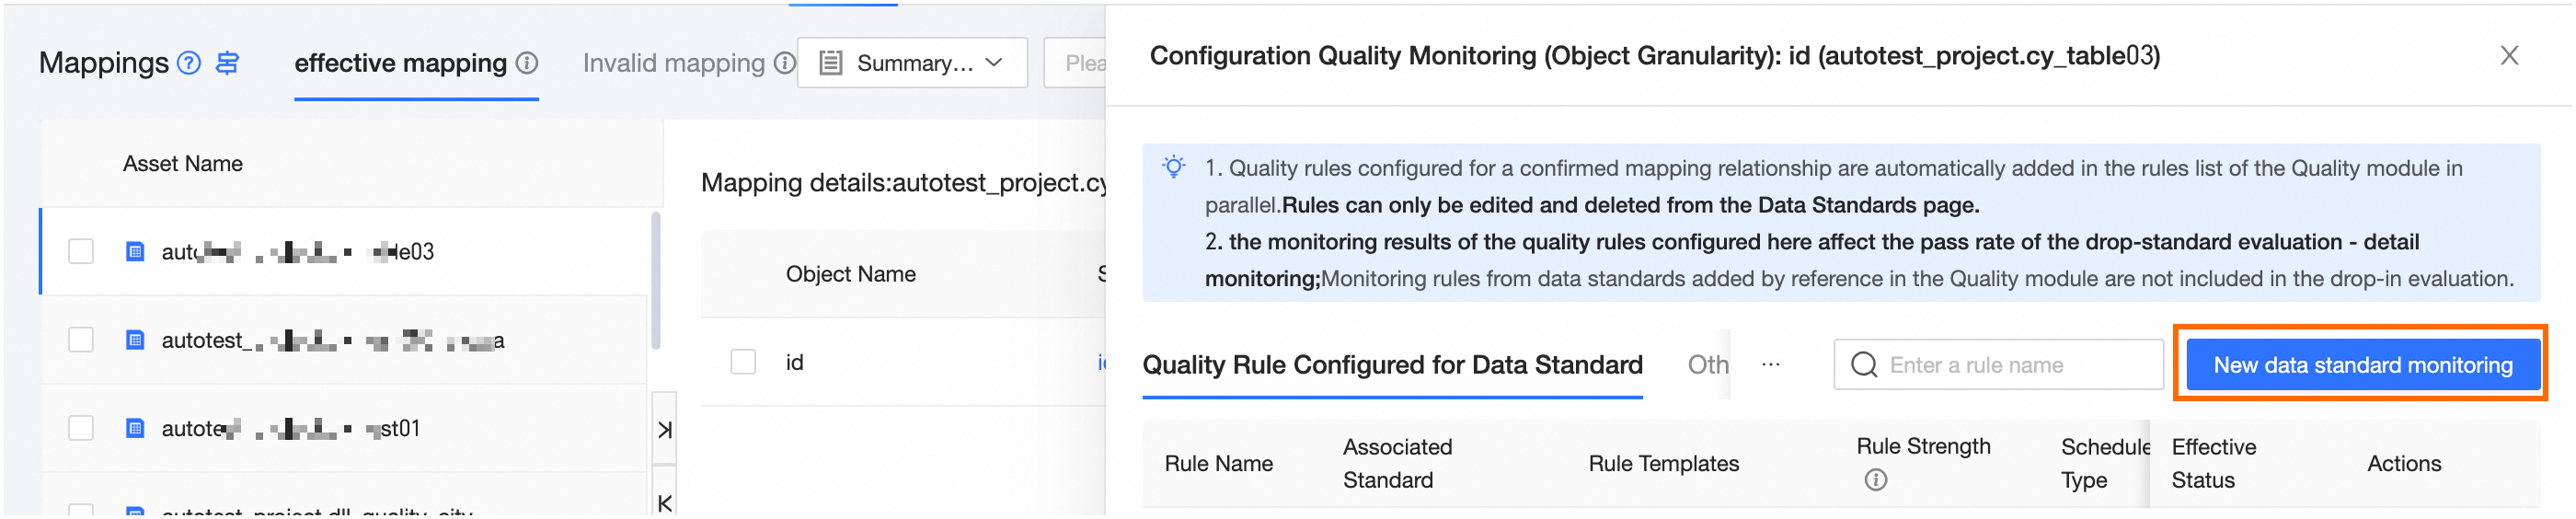
-
In the Create Data Standard Monitoring dialog box, select the data standard monitoring rule to reference.
-
Click Confirm Add to finalize the reference data standard monitoring rules.
In the Data Standard Monitoring list, you can schedule, enable or disable, view, edit (name, strength, description), or delete monitoring rules.
Note-
After referencing, you cannot change the rule’s core settings. You can still configure scheduling or adjust rule strength.
-
You can filter standard rules by Validity, Uniqueness, Completeness, or Stability. Or search by rule name.
-
In the reference dialog box, you can set the schedule, rename the rule, adjust strength, enable or disable it, or click the standard code to view standard details.
-
Click the
 icon in the Actions column to view the quality rule.
 -
Editable fields vary by where the quality rule was created. For details, see Edit Quality Rules.
-
-
-
Other Quality Rules
Quality rules configured elsewhere for the current asset are listed here to help avoid duplicates.
-
In the Configure Quality Monitoring dialog box, select Other Quality Rules.
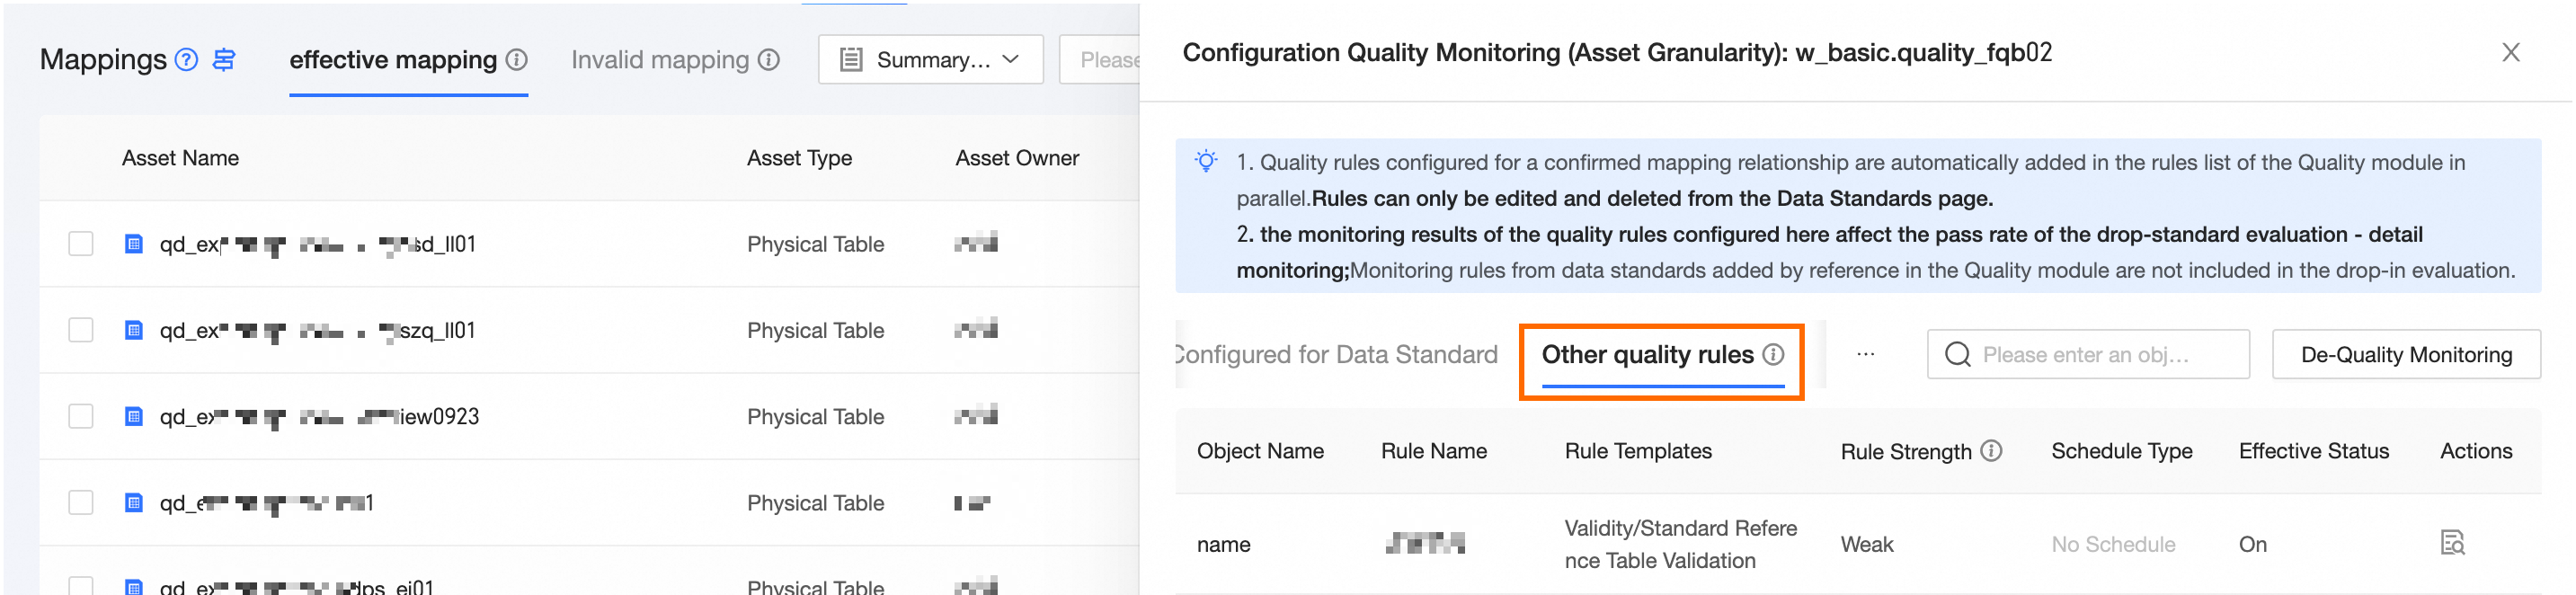
-
On the Other Quality Rules tab, click Go to Quality Monitoring.
This opens the asset’s rule details page in the Asset Quality module. To create a new rule, see Create Data Table Quality Rules.
In the Other Quality Rules list, you can schedule or view monitoring rules.
-
-
Unsuccessful Bid Evaluation Configuration
Landing compliance assessment lets you schedule automatic checks for manually added effective mapping relationships. It generates assessment details and updates the execution results for quality monitoring rules configured in the Data Standard module.
-
On the mapping relationships list page, click Non-compliance Evaluation Configuration in the upper-right corner to open the Edit Non-compliance Evaluation Configuration dialog box.
-
In the Edit Landing Compliance Assessment Configuration dialog box, configure the parameters.
Parameter
Description
Schedule Assessment
When enabled, manually added effective mapping relationships are assessed at the scheduled time. When disabled, no assessment runs.
Assessment Time
Based on the configured assessment time, the system performs non-compliance assessments on a scheduled basis. You can select Daily, Weekly, or Monthly.
-
Click OK to save the landing compliance assessment configuration.
View Lost Bid Evaluation run records
Only the last 30 days of manual mapping assessment run records are kept. At most, 1,000 records are stored.
-
On the effective mapping relationships list page, click the dropdown arrow next to Landing Compliance Assessment Configuration, then click Landing Compliance Assessment Run Records to open the Landing Compliance Records – Manual Mapping dialog box.
-
In the Landing Compliance Records – Manual Mapping dialog box, view run records for manual mappings. Columns include ordinal number, start time, end time, and task status. Click the View icon in the Actions column to view the operational log for a manual mapping.