After you configure access control policies, Cloud Firewall matches traffic packets against the 4-tuple, application type, and domain name in sequence. A 4-tuple refers to the source address, destination address, destination port, and transport layer protocol. If Cloud Firewall cannot identify the application type or domain name of traffic, Cloud Firewall automatically allows the traffic to ensure normal business operations. If you do not want to allow the unidentified traffic, you can enable the strict mode.
Traffic matching rules of Cloud Firewall
After you configure access control policies, Cloud Firewall matches traffic packets against the 4-tuple, application type, and domain name in sequence when traffic passes through Cloud Firewall.
Loose mode: When traffic packets do not contain standard application information or domain names, Cloud Firewall may not be able to identify the application type or domain name of the traffic. In this case, Cloud Firewall automatically allows the traffic.
The application type in the policy is other than ANY.
A domain name is specified, and Domain Name Identification Mode is set to FQDN-based Dynamic Resolution (Extract Host and SNI Fields) or FQDN and DNS-based Dynamic Resolution.
Strict mode: Cloud Firewall does not directly allow traffic whose application type or domain name is unidentified. Cloud Firewall continues to match the traffic against the access control policy that has a lower priority until an access control policy is hit. Then, Cloud Firewall performs the action specified in the access control policy. If no access control policy is hit after Cloud Firewall matches traffic against all access control policies, Cloud Firewall automatically allows the traffic.

If normal traffic is blocked after the strict mode is enabled, we recommend that you add the required application information to the request packets or disable the strict mode.
By default, the strict mode is enabled for new VPC firewalls.
Enable or disable the strict mode of the access control engine
You can configure the mode of the access control engine for the Internet firewall and NAT firewalls. By default, the access control engine is in Loose Mode. In this mode, the traffic whose application type or domain name is identified as Unknown is automatically allowed to prevent negative impacts on your workloads. You can change the mode to Strict Mode if required.
For more information about how to change the mode of the access control engine for the Internet firewall, see Create access control policies for the Internet firewall.
For more information about how to change the mode of the access control engine for a NAT firewall, see Configure the access control engine mode.
FAQ
How do I view the logs of unidentified traffic?
Log on to the Cloud Firewall console.
In the left-side navigation pane, choose .
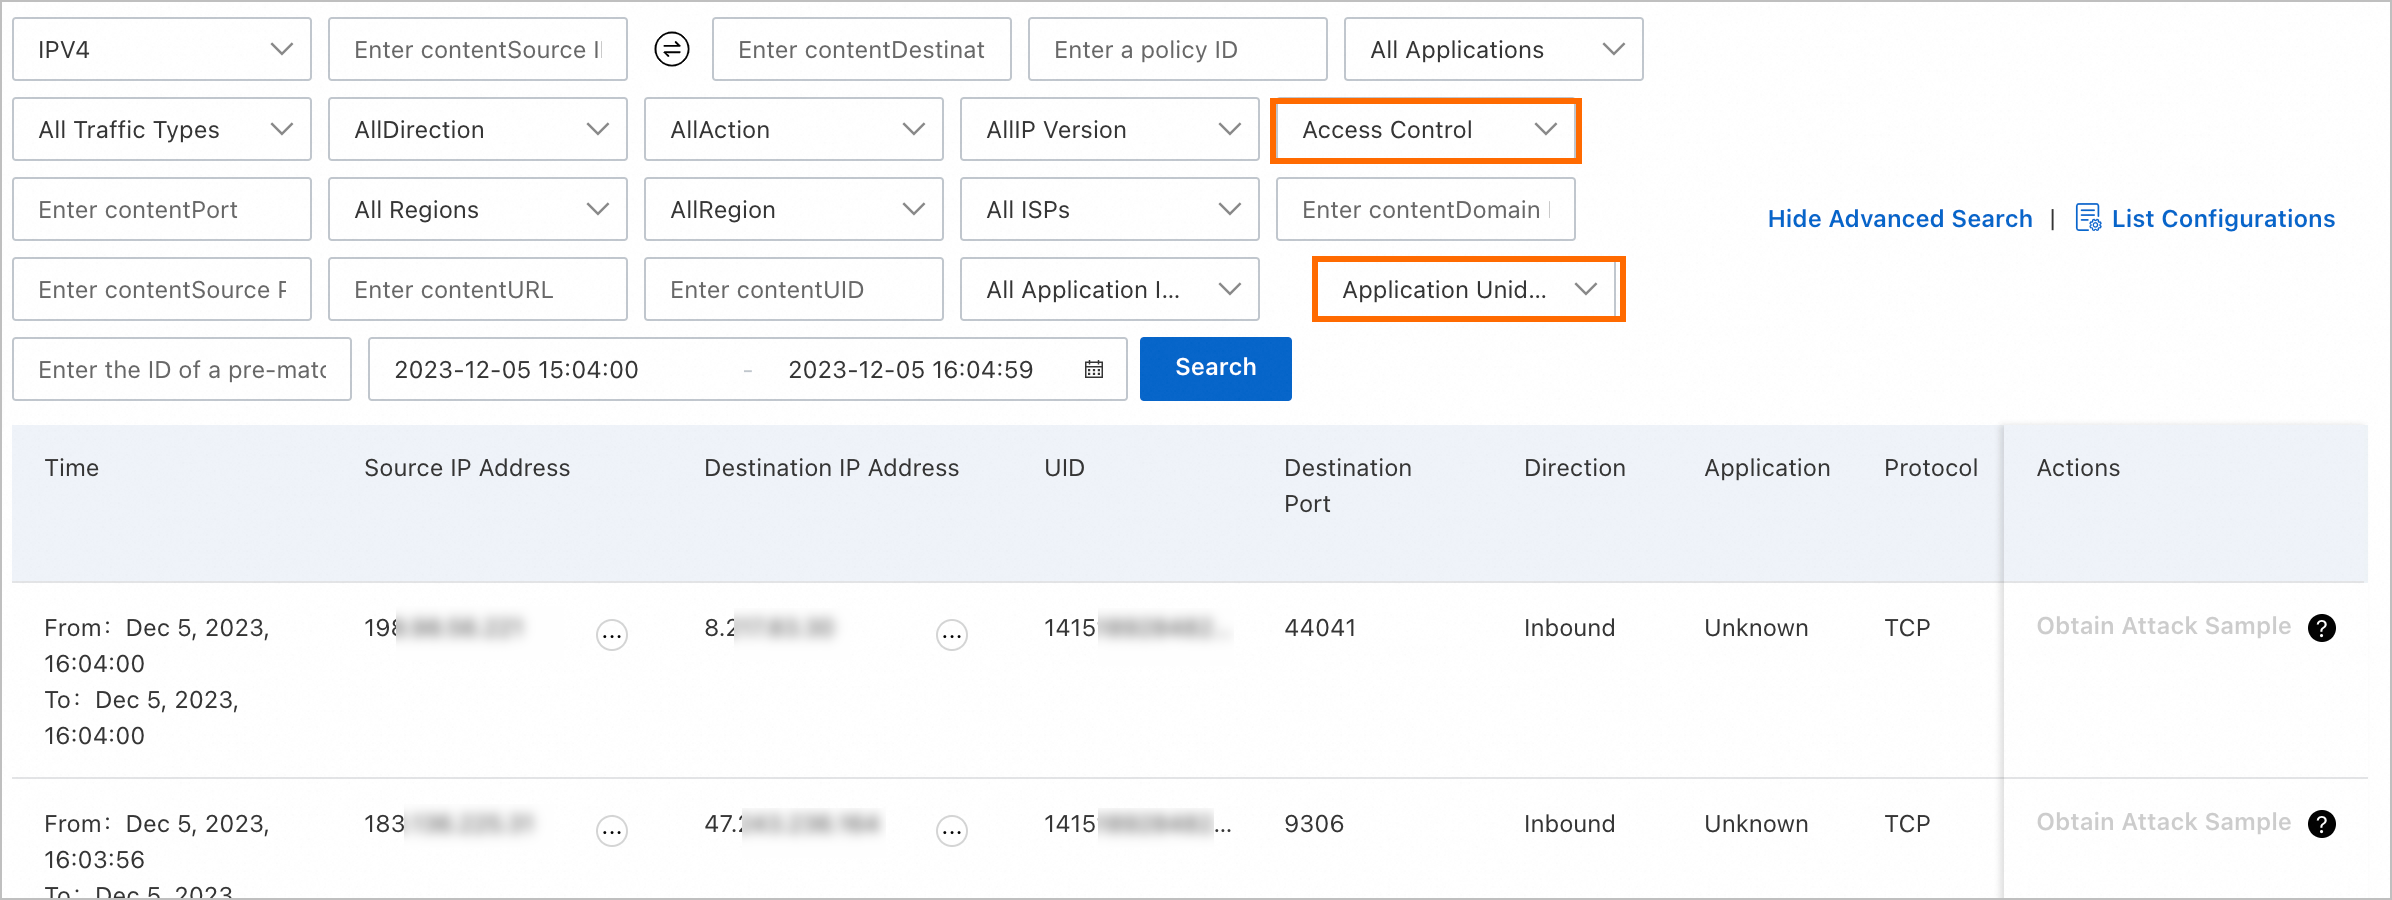
On the tab, select Access Control for Rule Source, select Application Unidentified or Domain Name Unidentified for All Pre-match Access Control Policy Statuses, and then click Search.

View the logs of traffic in strict mode. The logs include the following information: time, source IP addresses, destination IP addresses, and destination ports.
References
For more information about how access control policies work, see Overview of access control policies.
For more information, see Create inbound and outbound access control policies for the Internet firewall.
For more information about the fields in traffic logs and how to query traffic logs, see Log audit.