To prevent data loss or corruption in your Extreme NAS file system and to ensure that you can recover files promptly, use Cloud Backup to back up all directories and files in your Alibaba Cloud Extreme NAS file system. Cloud Backup lets you configure flexible backup policies to back up data to the cloud. You can view and restore your data at any time. This topic describes how to back up an Extreme NAS file system using the local NAS method.
Prerequisites
You have activated the Alibaba Cloud Cloud Backup service. Although activating Cloud Backup is free of charge, using the Alibaba Cloud NAS backup feature of Cloud Backup incurs costs, such as storage capacity fees. For more information, see Alibaba Cloud NAS backup costs.
An Extreme NAS file system is created. For more information, see Create an Extreme NAS file system in the console (NFS only).
An ECS instance is created. For more information, see Create an ECS instance from the console (Quick Launch).
The ECS instance must be in the same virtual private cloud (VPC) as the mount target of the Extreme NAS file system.
Background information
Extreme NAS is a high-performance shared file storage product built on Alibaba Cloud's latest generation of network architecture and all-flash storage.
Cloud Backup does not support backing up an Alibaba Cloud Extreme NAS file system using the Alibaba Cloud NAS backup method. You can back up an Extreme NAS file system using the local NAS method.
Backup jobs consume resources, such as CPU and memory, which can affect the performance of your production ECS instances. We recommend that you create a new ECS instance that is dedicated to backup jobs. The new ECS instance is a billable item. For more information, see ECS instance type billing.
Step 1: Install a backup client
Before you back up data, install a backup client on your ECS instance. For more information, see Download and activate a Linux client.
(Optional) Step 2: Configure the backup client
Configure the backup client parameters to increase the speed of backup jobs.
Log on to the ECS instance.
Set the number of concurrent tasks for the local client to 2. The recommended value is 8 or less because a larger value consumes more resources.
A backup job can be split into multiple tasks. Use the configclustertaskfetchernum parameter to configure the number of tasks that can run concurrently on the client.
The default value of the configclustertaskfetchernum parameter is 1.
In the hbrclient.yaml file, set the configclustertaskfetchernum parameter to 2. The recommended maximum value is 8. A larger value consumes more resources.
configclustertaskfetchernum: 2NoteIn Linux, the path to the hbrclient.yaml file is /opt/alibabacloud/hbrclient/conf.
Restart the Cloud Backup service. Restarting the service interrupts running tasks.
Run the
systemctl restart hbrclientcommand to restart the Cloud Backup service.
Step 3: Create a backup plan to periodically back up the Extreme NAS file system
After you create a backup plan, the first backup job is a full backup. Subsequent backup jobs are incremental backups by default.
Log on to the Cloud Backup console.
In the navigation pane, choose .
On the NAS Backup page, click Local NAS.
In the upper-left corner of the top menu bar, select a region.
On the Local NAS tab, click NAS Backup Wizard.
In the Create Backup Plan panel, configure the following parameters.
Configure the backup source. Set the key parameters as described in the following table, use the default values for the other parameters, and then click Next.
Parameter
Description
Backup NAS Instance
Select Add NAS Instance.
NAS Instance Name
The name of the NAS instance to back up.
NAS Network Address
The network address of the NAS instance to back up. You can get this address from the mount target of the Extreme NAS file system. For example,
00005*****y.cn-hangzhou.extreme.nas.aliyuncs.com.NAS Share Path
The shared directory of the NAS instance to back up is /share. For more information, see How to query the NAS shared directory.
Protocol Type
Select NFS.
Advanced Settings
Click Set Mount Parameters. Set the vers parameter to 3 to mount the file system using the NFS v3 protocol, and enable nolock to disable the file locking mechanism.
Configure the backup client group and click Next.
For Backup Client Group, select Create Backup Client Group. Enter a custom Client Group Name and select the ECS instance on which you installed the backup client in Step 1: Install a backup client.
Set the data network for the client group to VPC.
Click Settings for the target client.
In the Client Settings dialog box, set Data Network to VPC and click OK.
Configure the backup plan, and then click Next.
In the Basic Settings section, set the following parameters. Use the default values for all other parameters.
Parameter
Description
Source Paths
Enter the path of the folder that you want to back up. Only one folder path is supported. Wildcard characters are not supported.
Backup Rule
A backup file rule has the following options:
Include All Files: Backs up all files in the specified source path.
Include Files or Exclude Files: Select an option and enter a file list in the Enter Paths field. Cloud Backup backs up or excludes files in the source path based on the list.
The file list specifies a path relative to the source path. The matching rules are as follows:
If the path starts with a forward slash (/), the filter matches the absolute path within the source path.
For example, if the source path is /ifs/dataset and the file list is /subdir/data, files and folders in the /ifs/dataset/subdir/data path are backed up or excluded.
For example, if the source path is /ifs/dataset and the file list is /abc*, files or folders under /ifs/dataset whose names start with `abc` are backed up or excluded.
If the path does not start with a forward slash (/), the filter matches relative paths. Any path that matches the rule is included, regardless of its location within the source path.
For example, if the source path is /ifs/dataset and the file list is abc*, files or folders under the /ifs/dataset path whose names start with `abc` are backed up or excluded.
For example, if the source path is /ifs/dataset and the file list is abc, all files or folders named `abc` under the /ifs/dataset path are backed up or excluded.
Backup Policy
Select a backup policy from the drop-down list.
Cloud Backup automatically backs up the data source according to the selected backup policy. A backup policy defines settings such as backup vault encryption, backup interval, retention period, a replication policy, and automatic backup archiving.
If the default backup policies do not meet your requirements, click Create Backup Policy or Edit Policy to manage your policies. For more information about the parameters in a backup policy, see Policy Center.
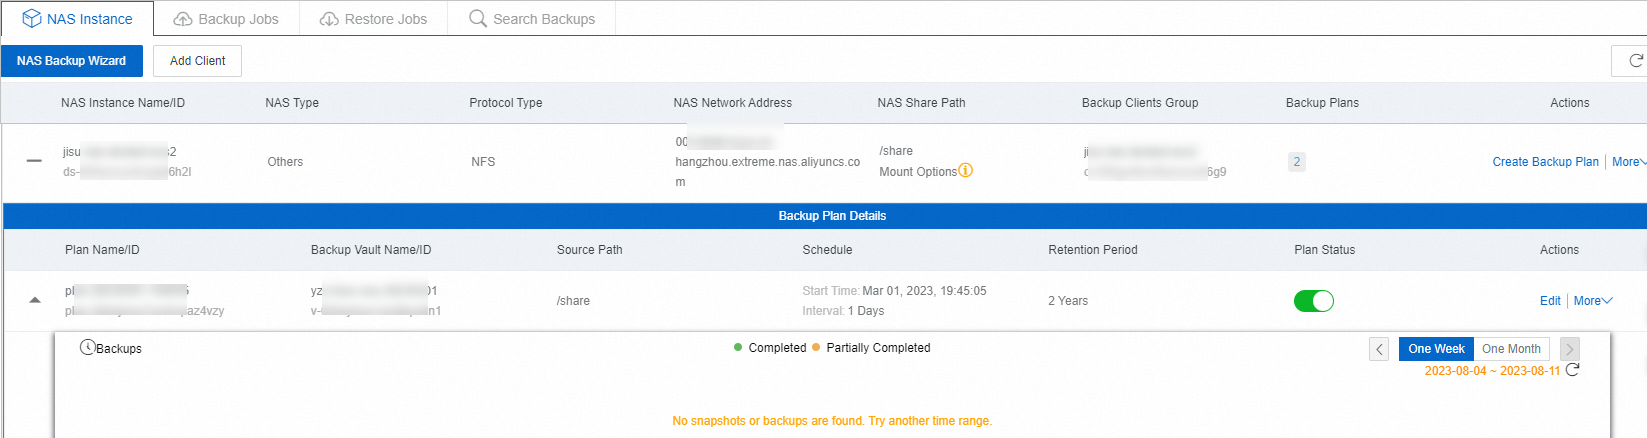
After the setup is complete, the NAS instance and its backup plan appear on the NAS Instances tab. Cloud Backup then starts to back up the Extreme NAS file system according to the backup plan.
Backup successful
When the scheduled backup time is reached, Cloud Backup starts the backup job.
NoteThe backup progress is an estimate and may not be exact. The system calculates it based on the data scanned so far, and the total data size may increase as the scan continues. Always refer to the final job status for confirmation of completion.
When the backup job Status changes to Completed, the backup for the day is complete.
NoteThe task list displays backup job history from the past six months only. To access older records, export them using the audit report feature.

View each backup record in Backup History. Use these history records to recover files. For more information, see Create a restore job for a single NAS file system in the same region.

Next: Create a restore job
The procedure for creating a restore job is the same as that for restoring an on-premises NAS. For more information, see Restore an on-premises NAS.